Trying to get the router on/off the MPCNC has not proved to be fun for me. I’ve been wanting to try out a laser, but kept shying away from ordering one mostly because of that.
Banggood has one of their laser engravers on sale for a price point I finally felt the need to jump on.
Just sitting here twiddling my thumbs waiting for it to show up now. I’m not sure I like their software, so there’s a good chance I’ll be replacing their board with a better one so I can cut using a SD card or possibly an octoprint setup (if possible).
This thing has turned into a bit of a rabbit hole.
The new device is up and running. It’s working quite well, surprisingly.
The one thing I’ve done is flashed the stock firmware with the latest GRBL. I’ve since played with both LightBurn and LaserGRBL software. LaserGRBL is nice, but I find it’s support for svg isn’t all that good.
LightBurn can import SVG files much better.
Right now, I’m working on using the laser to etch some PCB boards for another project I’m working on. I’m using Eagle to design the board. Once designed, I’m exporting the gerber file. Then I use gerbv to open the gerber and convert it to a SVG.
LightBurn does a great job of importing the SVG, but all you get are the base line paths. I use the built-in ‘offset’ function to expand the paths to outlines and have it remove the original. So far this has been working really well for creating the paths. My next step is to spray paint some pcb boards and try to burn the paint off.
I never did get the PCB boards burned but I think it was from lack of knowledge.
I spent a lot of time the last 2 days working on this machine. I finally started playing with the acceleration values in GRBL and have it ramping up and down much quicker.
I then spent a lot of time in LightBurn learning about Fill settings. When in doubt, RTFM. I am finally getting some good consistent results with regards to fills on text.
The below photo shows a lot of what I went through while trying to get good crisp text. Note, I rotated the board part way through testing to get a clean spot. The biggest problem I was having was with light burns in the middle of a pass. Finally solved this by just limiting the burns to individual letters instead of having it traverse large distances. I could probably tune the speed and burn percentage more to allow the full traverses to work, but the total burn time is actually lower by burning individual letters. Probably has something to do with the limited power of my laser.
My daughter asked for a cross with the lord’s prayer on it. This is testing the text. Once I have this working, I’ll use the MPCNC to cut the cross after burning on a nicer piece of wood. I plan on using the laser to burn a spot at X0Y0 for referencing the MPCNC on. I’ll also burn a small line 10mm long on X and 10mm long on Y that I can jog the MPCNC across to verify the board is straight on the machine.
No kidding. The longer it ran, the more worried I got.
One thing I also learned is I need to get an enclosure around the laser with an exhaust fan out the shop. I had the window open and the door for a slight breeze through the shop, but you could still smell it when you walked in.
I was working on a wedding gift for my sons best friend.
6 hour photo burn on top of a nice box, i had to leave and lock my shop so i wouldn’t babysit it the entire time.
turned out very nice.
Another thread on this forum had me messing with my laser some more trying to cut 3mm plywood. The poor little 3.3w laser was just not up to snuff for the thicker material. I did some research and ordered a more powerful laser this morning. Oddly enough, the laser cost almost as much as this entire machine did when I got it on sale.
More details to come as the parts get in and I wire them up.
Well… today was an utter failure. I ordered the NEJE 30w laser with the PWM controller… and I received a NEJE 30w laser with the IAB controller.
My laser engraver is a cheap chinese one and the controller isn’t quite a full-fledged eleksmaker Mana SE board… meaning it only has the 2 pin connector on it and not the 3pin connector.
So I returned the part to Amazon and ordered the NEJE 30w that comes with ‘everything’ including power supply and both boards. Cost more, but there should be no excuses for me to not have what I need to make it work when it comes in now.
It took forever but the new kit finally arrived. Within a few minutes I had a test setup up and running to validate my controller can power it off of the PWM. It worked great! A few more minutes and I had it mounted to the gantry.
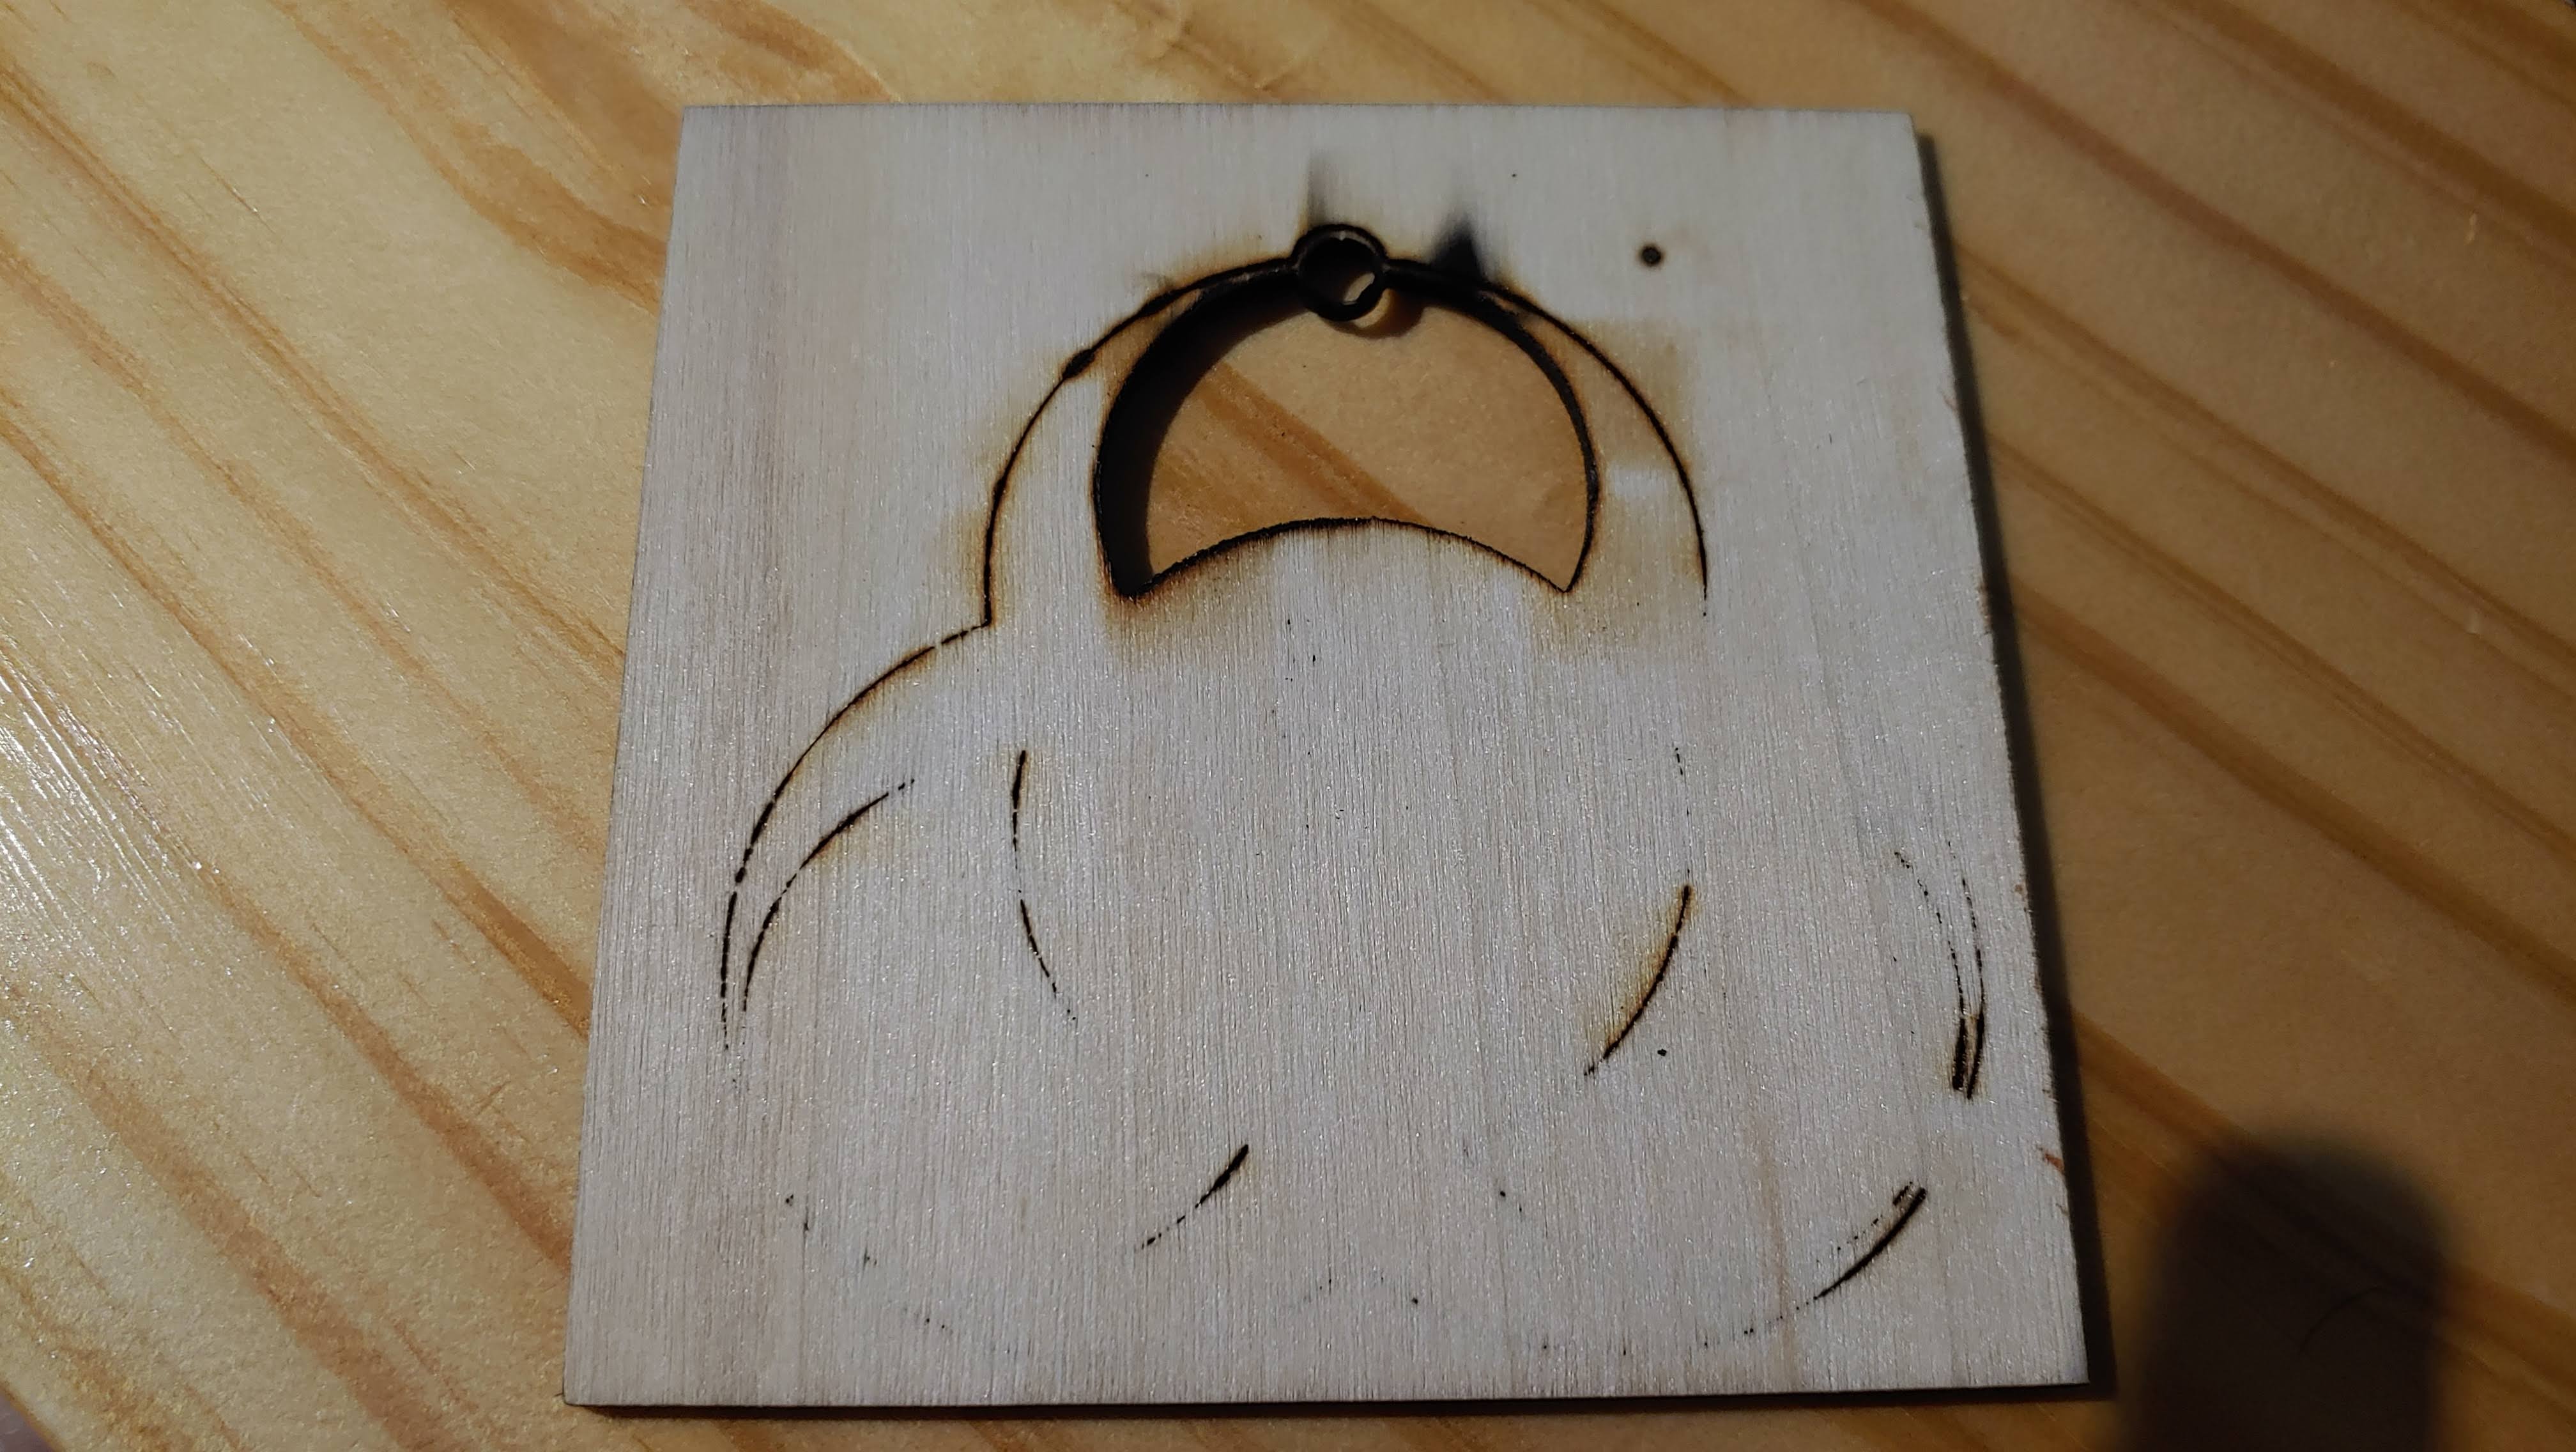
Did a few test fires through CNC.js and threw a quick design at it. I still have some playing to do with the feeds and speeds. The part that cut off cleanly was because I ran that part of the program twice. The first time through I did 2 passes at 100 mm/min and 100% power. I thought that was a bit too slow, so I bumped it up to 2 passes at 200 mm/min and 100%. That looks to be too fast. It looks like I need to shoot somewhere in the middle.
I will need to spend some time to make a final cable for it. The pinouts on the controller are opposite what the cable for the laser is, so I need to cut it and reconnect with the pins swapped. I don’t have the tool to push the pins out and I don’t want to ruin the connector. I also need to finish plumbing in the air assist. I have all the parts, I just need to bend an aluminum tube for the jet to come out of.
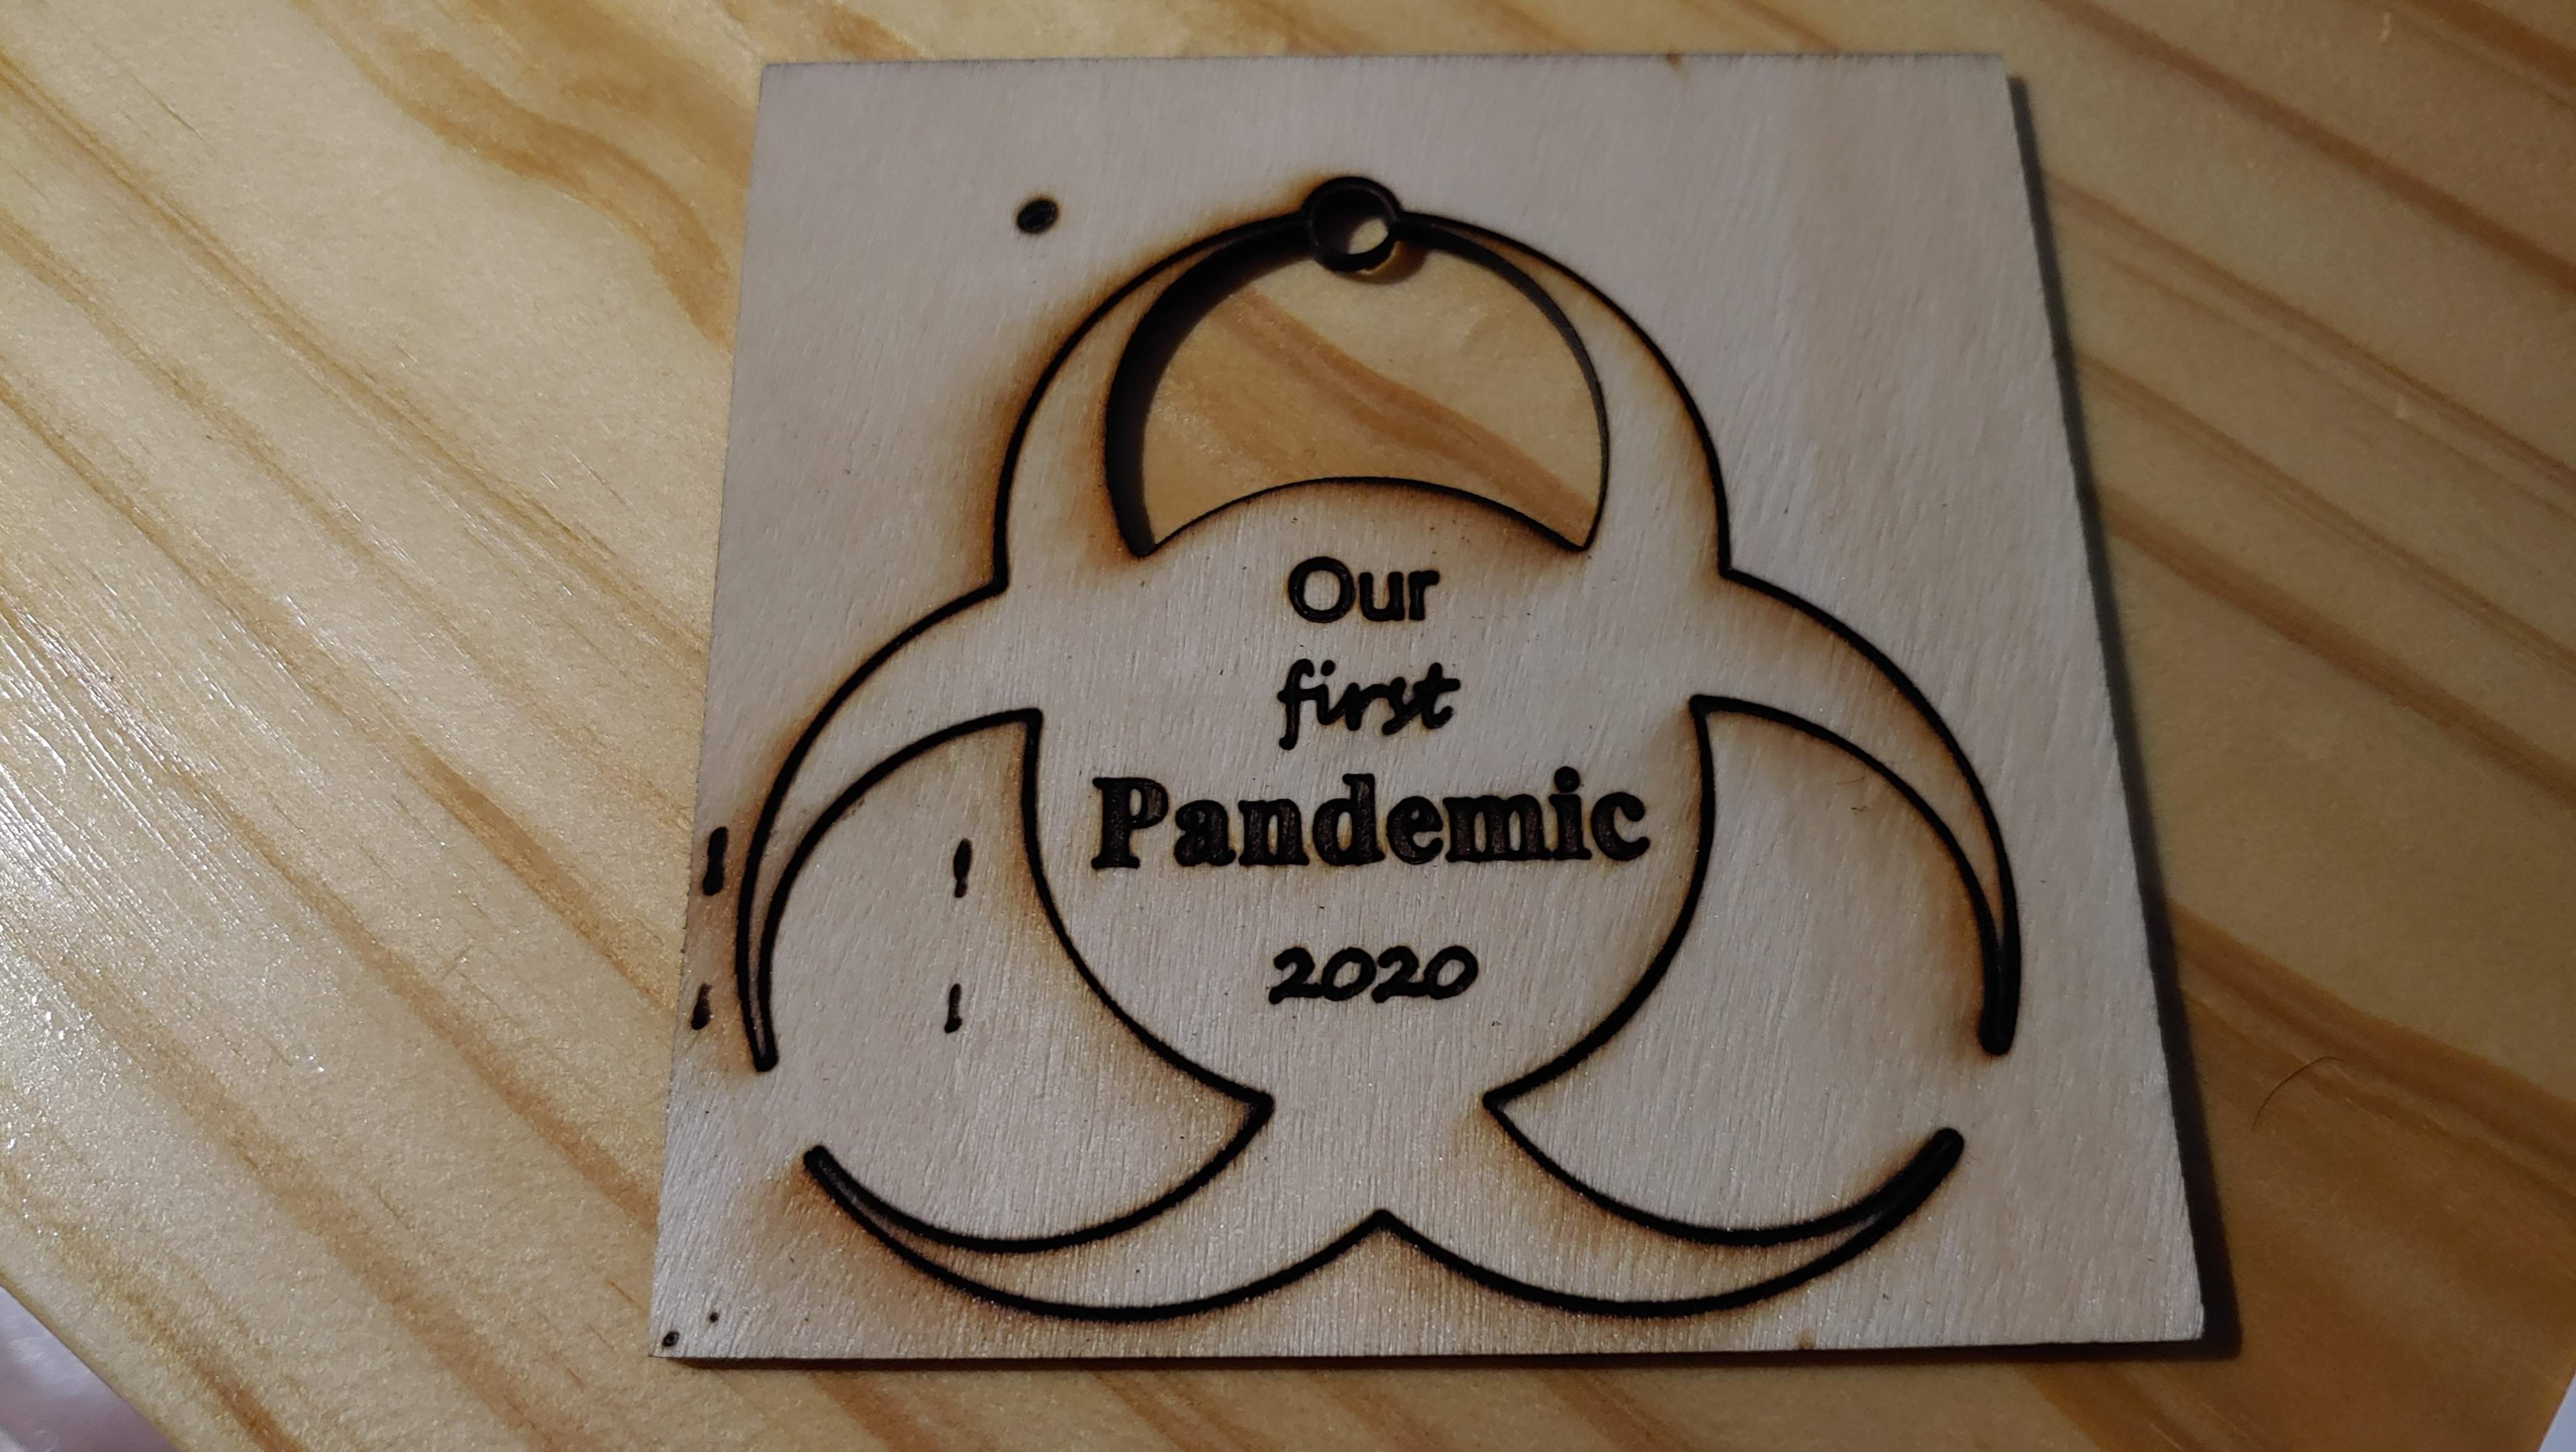
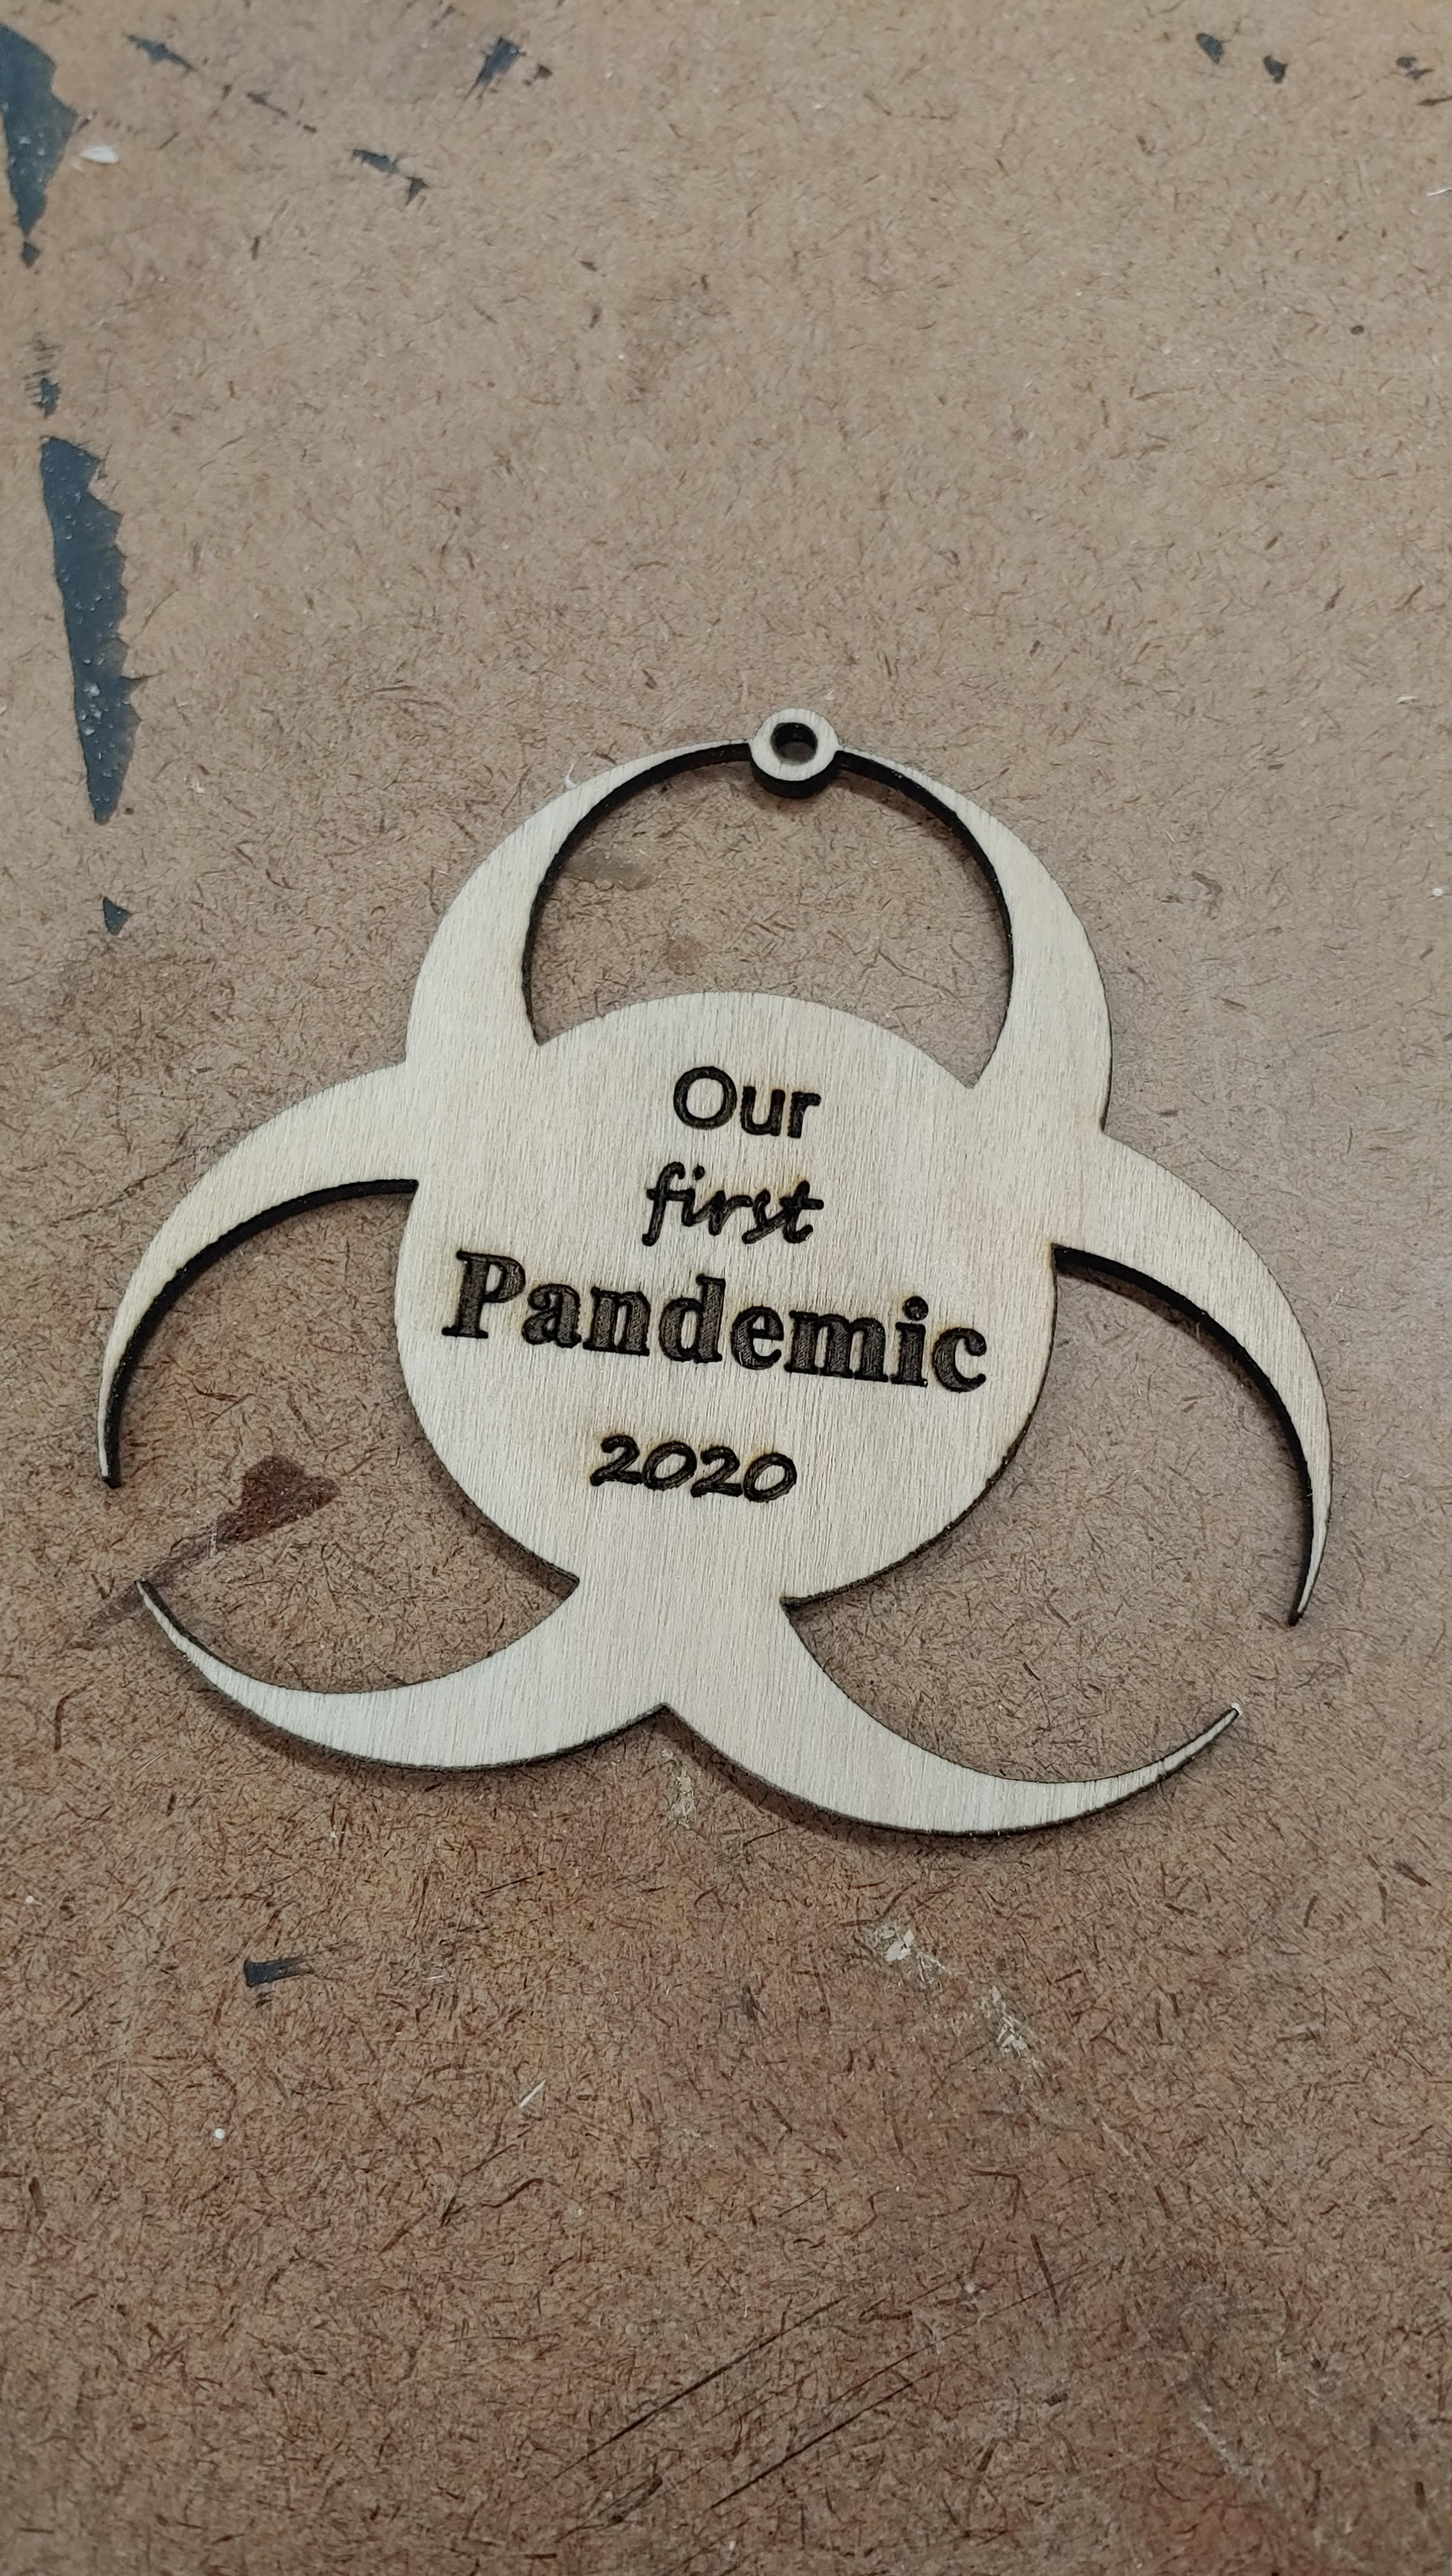
Anyways. This was my quick test burn. I need to adjust the design a little for the little hanger too.
The faster speed makes a cleaner cut on the top and bottom. More passes helps it with the last little bit to get through. The slower 100mm/min speed made it through in more places on 2 passes, but it left more charing around the edge of the cut.
I also rigged up the air assist. Did do a bit of light sanding with 220 grit just to clean it up a little.
This is just one. I need to cut about 10 more for stocking stuffers for Saturday. We’ll see how consistent this setup gets through the rest of them.