I was just looking at the LR3 documentation, at the XZ Plates, but got confused.
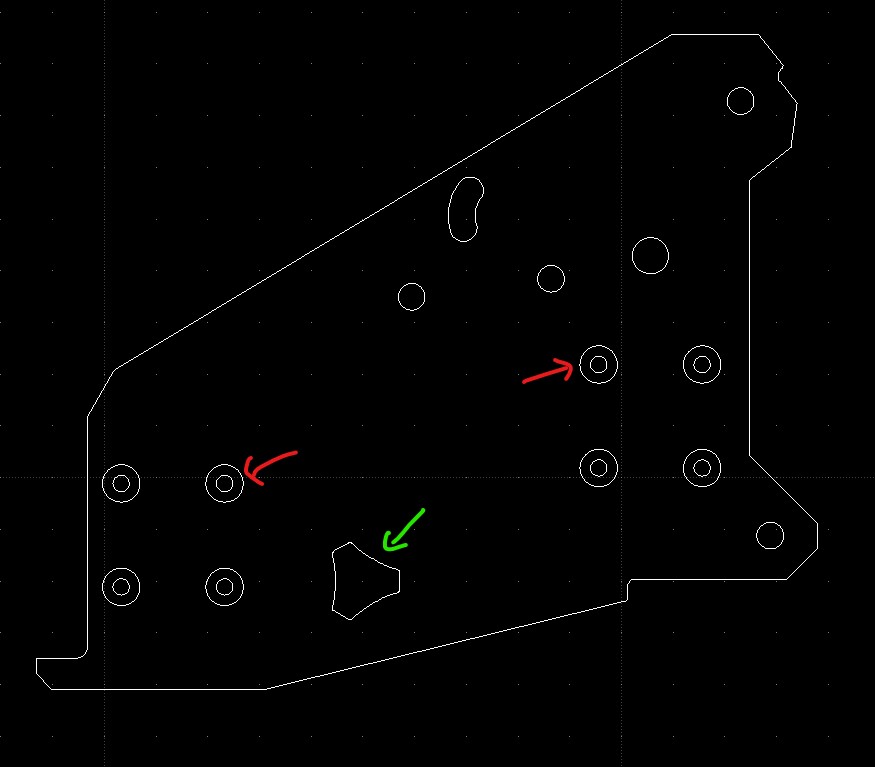
I´ve checked the file in Fusion, FreeCAD and LibreCAD; there are 8 times 2 pair of holes shown in the DXF that do not make sense. I supose that I only need the inner ones, right?
Am I also correct that the triangle (shown in green) is optional? Would there be any harm if I left it out of the part?
Yeah I figured they are for the rail carriage, but is this (=circle in circle) an indication to do some counterbore to set the screwhead flush to the sides? It looks a bit confusing
I am planning to make them out of 6mm Alu, so I will skip the counterbore holes if they are not a key design element.
I think it you are doing them in something thick, then the counter bore should be used to bring the thickness back down for the screws. But I’m not 100% sure. They are definitely for counter bores.
Since the design calls for M3-10mm screws to fasten the plate to the linear rails, the thickness of the plate either can’t be more than about 6-7mm or else you have to bore out the outside of the hole to make a part that is thinner. If you are using (for example) 12mm MDF to make that plate, you would then need to take out about 5-6mm of material inside the larger hole. before cutting through with the smaller one.
with 6mm material, you might need a washer. The MGN12H sleds are sup[posed to take 4mm depth screws, but my observation is that they sometimes only take about 3.5mm. We seem to get away with 1/4" (6.35mm) but I have one screw that is definitely bottomed out.
Okay, so you have an M3x10mm screw. It goes through 6mm of plate, leaving 4mm of thread to go into the rail block. The rail blocks have nominally 4mm of thread depth to them, but I’ve found that it’s more like 3.5mm, and sometimes less. This means that you cannot tighten the screw before it bottoms out in the block, which will leave a little bit of play in the XZ plate.
If you use a 1mm washer, then you should have no problems.
The 1/4" plate (6.35mm) is usually OK, but I found that I needed a washer in 1 location, since that one had just a little less thread depth than the others. I installed washers in all 16 locations when assembling though, for consistency.