Yes, Dave… that is the way I have that Eleksmaker board wired to my Neje laser. I really like that board… it’s nice quality, is easy to interface, and generally works well… IF you can get the Nano to connect properly to CNC.js, as we’ve discussed elsewhere. One other small quirk… it doesn’t have jumpers for micro-stepping. It appears to have all the drivers hard-wired… so its 1:32 for DRV8825 and 1:16 for A4988. That usually works for me but if you need something else, you might want a different board.
Not sure of the “gold standard” label, Mike… just familiar enough with my relatively small arsenal of parts to [usually] hook them up NON-destructively. Static electricity events, excluded.
I suspect you’re right about it being the optics, more than the diode itself, that determines the spot size. I played a bit with the lens screw adjustment and focal distance to find a rough distance where the spot seemed a bit more “round” and distinct (about 50-55 mm from bottom of heatsink to material surface) and then use Ryan’s script to adjust Z for best focus on surface of the material.
I’'m generally impressed with the physical construction of these laser modules. And they work well enough that, had I not had another laser to compare to, I would be ecstatic with their performance… especially for the price. They are perfectly usable as they are. I just wish that they weren’t “misrepresented” as being higher-powered than they really are… and that there wasn’t so much confusion around the voltage levels used for PWM [though most of that looks to be IMO a community “ignorance” or lack of trust… rather than actual vendor misrepresentation; i.e. most listings I see do indeed show a 3.3V to 12V range on the PWM].
1 Like
Have any of you used one of these?
I use one on my zenxy. It works great, but no Z stepper motor (you could use a servo).
Not I. Not to beat a dead horse, I prefer a “real” Z-axis. I’d be more inclined to go with this one, for just a couple of dollars more …
I have one of those too. It used to run my zxy, but I wanted to make it quieter, so I swapped it for one with tmc drivers.
1 Like
After @dart1280 got me interested in looking at designs on EasyEDA, there are some interesting PCB designs there & JLCPCB also offers the service of adding the SMT components. What do you think of this PCB design?
https://easyeda.com/oleg.tchurilo/writing-machine-controller-esp32-grbl-3axis
I did a search for “grbl esp32” in their designs to find this one.
I don’t know enough to do a deep review, but it is neat that it uses the smaller integrated esp32. I like the big one too, but once it’s installed, I wish it were the smaller one.
2 Likes
You don’t know whether his design actually works since he does not give any comments about testing it. Guess that is what you mean by deep review.
Yeah. I didn’t really look close. I would at least check all the pins and compare to the grbl esp32 boards.
Yes… LOOKS nice  I would be a bit wary as it employs a CH340C for the serial interface…I had a problem with a couple of ESP32 Dev Modules that used a CH340D in the same configuration as this in one of Bart’s ESP32 boards. It would not be a problem if you intend to use the wired serial USB connection but if you get a problem of the wifi not initialising the serial port properly without a wired serial connection don’t say you weren’t warned.
Also you are right Dave, these files are not necessarily tried and tested designs…although, looking at the professionalism of this particular offering, I would trust it more than one of my feeble attempts :
Would this remote control board designed for the EleksMaker IVAxis 4 Axis do anything for you.
https://easyeda.com/ezio66/remote-controller-cnc
This is a small Uni-Polar stepper I have had for a while. Do I just cut the center connection there in the center to make it bi-polar?
Then what current did you set yours to use?
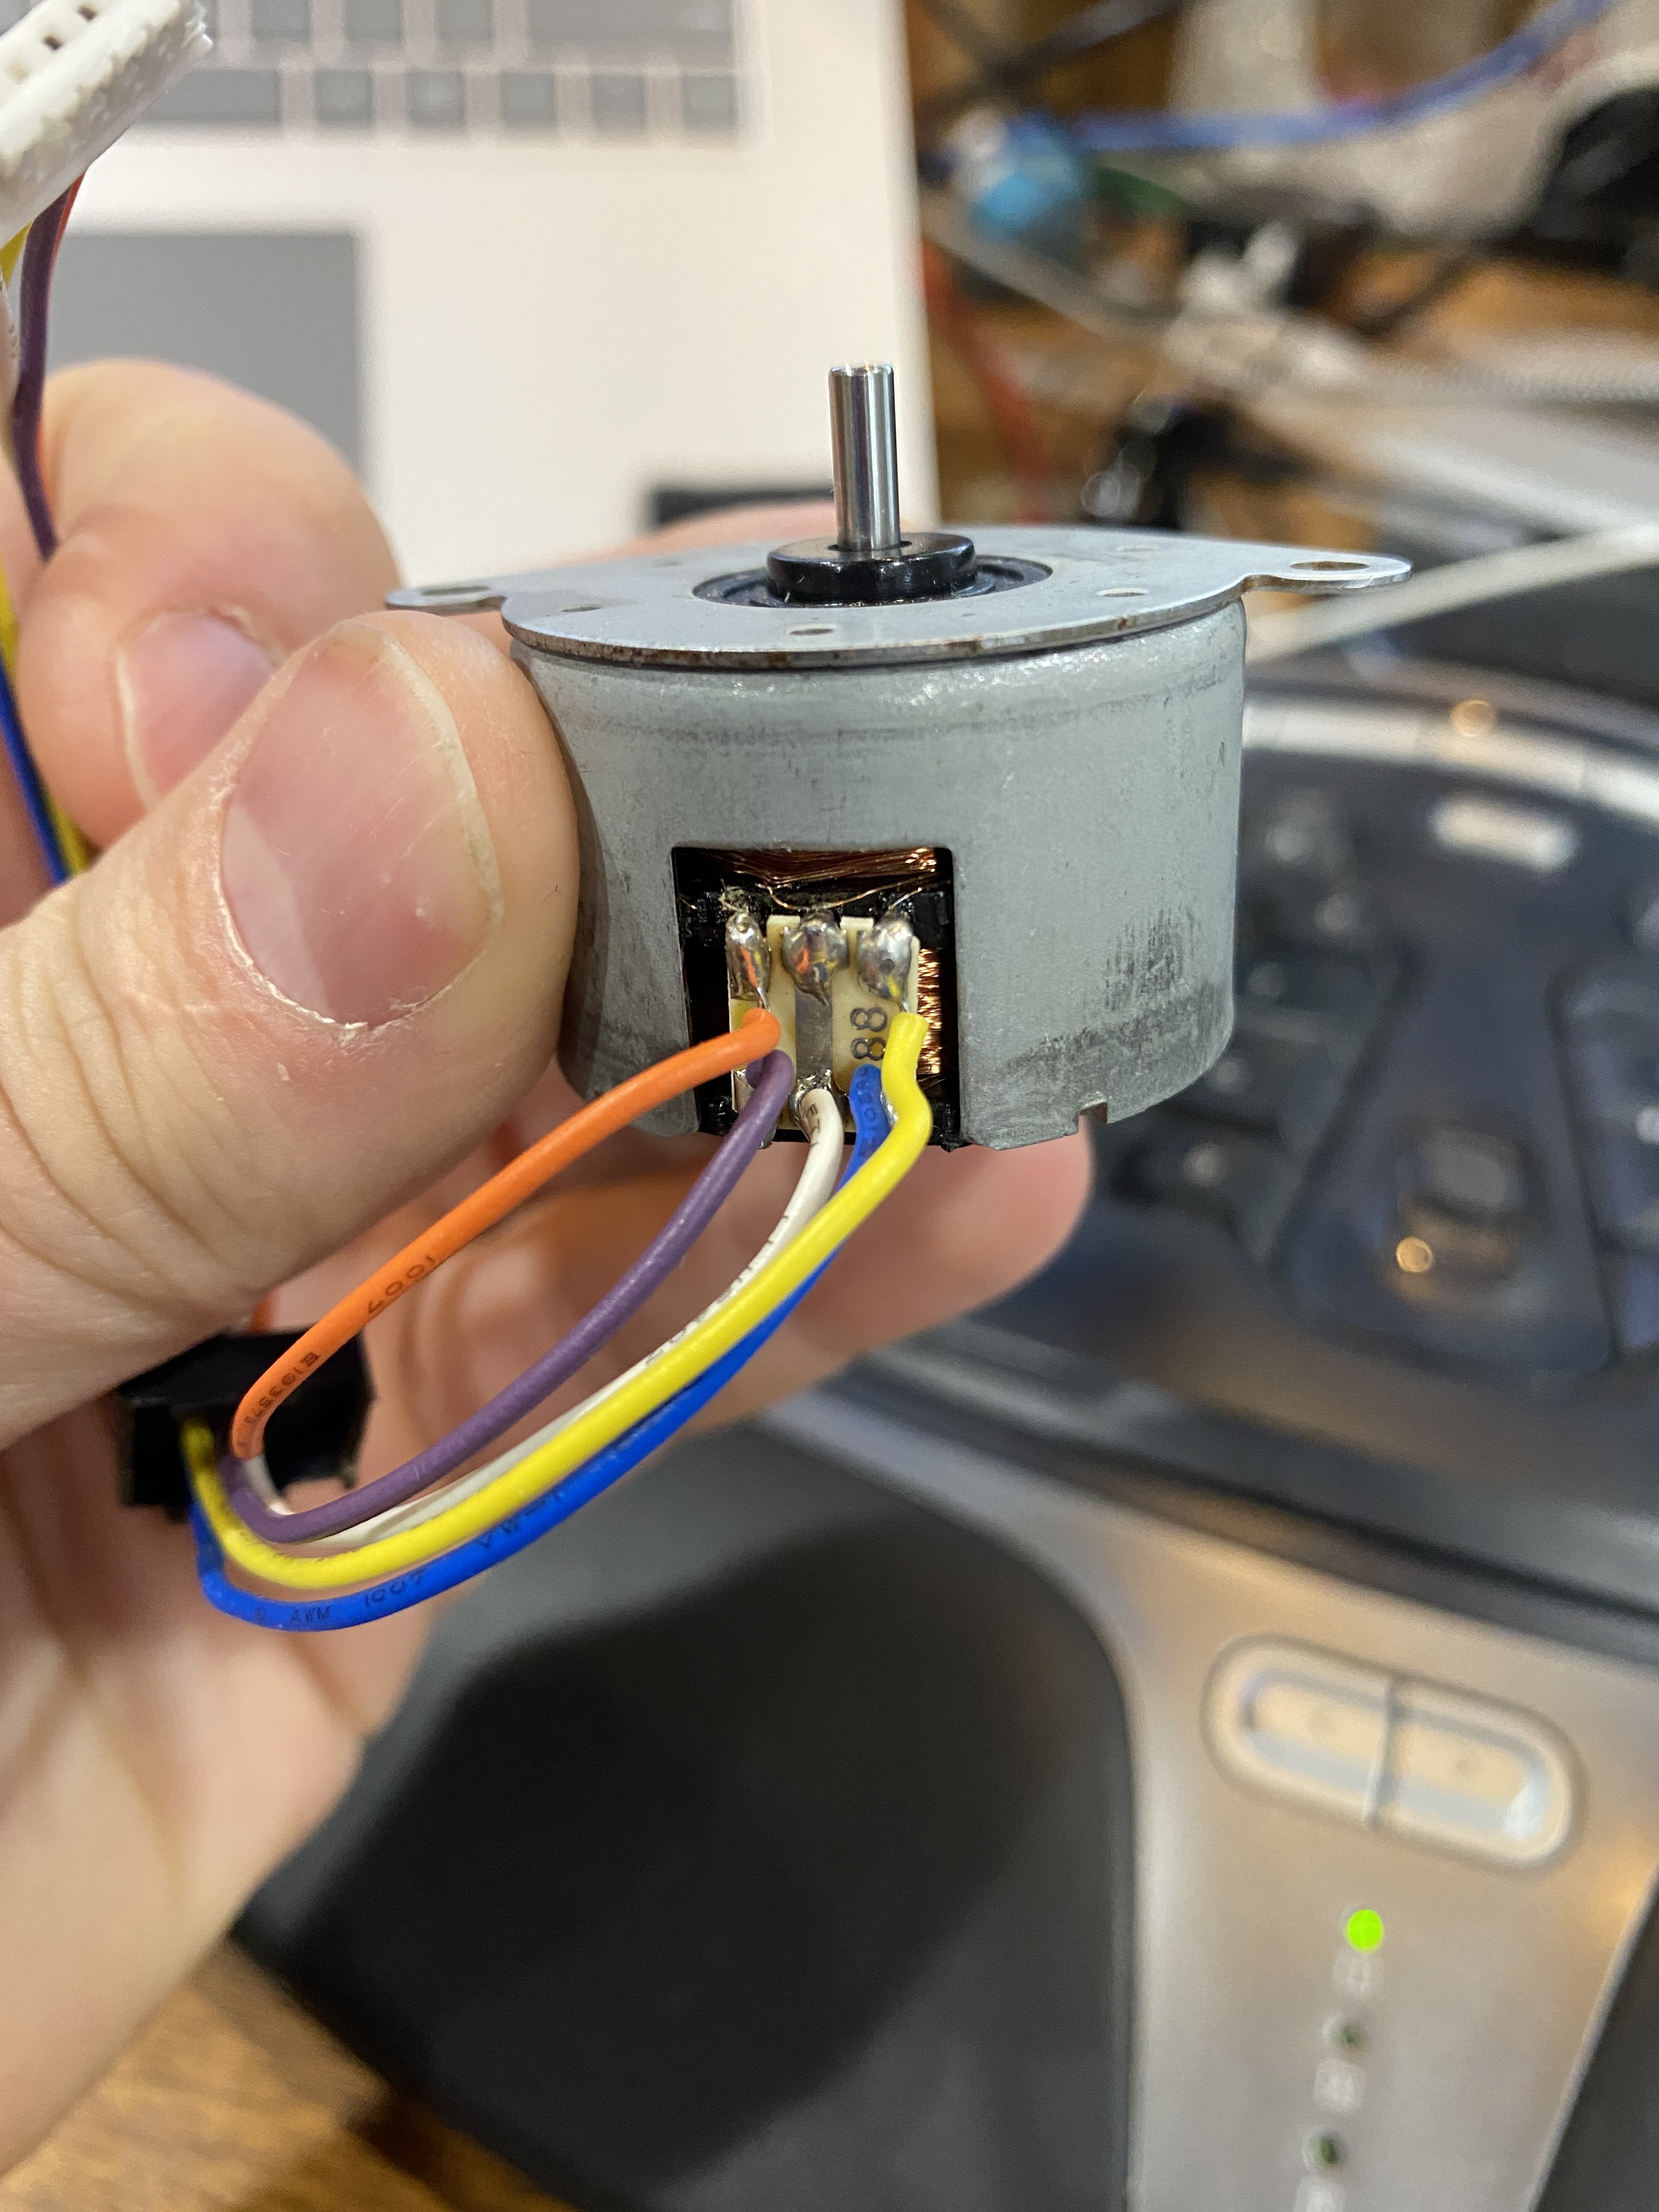
Assuming is the ubiquitous 28BYJ-48, here is a link to the reference I believe I used (ages ago) for converting to bi-polar:
1 Like
Also, assuming the 28BYJ-48 motor, Robert’s PDF link looks to be pretty much exactly the instruction I’ve followed. After cutting the trace and snipping out the red wire, I also rearranged the pins in the connector to match the consecutive coils arrangement similar to the driver outputs… though this isn’t really necessary. I also use an A4988 driver, set to 1:1 stepping since it’s mechanically geared so low already… and I try to set the Vref below 0.1V (or just about as low as it’ll go)… as the motor’s required coil current is very low.
It’s not a difficult hack but it will greatly increase the motor’s torque and allow using the same stepstick drivers we all know and love…
EDIT: Looking at your motor, I’m not sure it’s the same one Robert and I have described hacking. I’d check the wiring against the schematic in the PDF and, if similar, you may be able to perform the same, or similar, surgery. Is your motor mechanically geared down as well?
1 Like
Yeah. My motor is not the same and it doesn’t have the step down gearing. They are cheap enough that I will look for the same kind you guys mentioned. The gearing would be a really good idea to have.
Do you think the foam ripper needle could cut through carpet pad? I need to potentially cut smaller parts out of large sheets and was thinking about trying to add it to the low rider. The little LED diode laser I have is not tough enough to cut through it.
Dan,
If you are talking of the needle cutter functionality, I suspect it could/would do well with most soft foams… if well-built/tuned and made to handle the thickness of the foam. And that most likely will be a sizable hurdle if this is your first attempt at building and using a needle cutter and cutting a thicker foam.
The needle cutters in common use are used to cut the ~ 1/4" (5-6mm) paper-clad foamboard found at most dollar stores in the US. They normally use the brushless RC motors used to power RC aircraft… which of course vary greatly in size and power. These motors virtually loaf along when used to power a needle cutter… requiring nothing close to the current/power required when swinging a prop.
While the needle cutter is a deceptively simple DIY mechanism, it does require some care in its construction and use… and it has its quirks. It can require considerable time and patience to get it dialed in and cutting properly and it isn’t generally something you can just throw together and start getting production-quality parts over a weekend. While piercing the foam with a sharp needle is easily accomplished, it generally requires considerable trial and error to dial in the feeds/speeds for the material you’re cutting.
I’ve got a very lengthy thread over on the FliteTest forum dealing with the construction and evolution of many needle cutters with a stroke length of about 12-15 mm… more than enough for the foams commonly used for small-/mid-sized RC aircraft. If the carpet pad is thicker, I’m sure it’s possible to up-size the needle cutter to handle it… but I don’t know of anyone who has ever done it.
– David
1 Like
acetone! ok… ignore some post I did somewhere about that!
I’m really not sure what “scraping and all that” you are talking about. I do in fact use paint thinner and/or acetone to remove the paint from the tile/glass after lasering. If you are talking of this post/video…
the scraping I’m doing is to demonstrate the texture of the surface after paint removal… not removing the paint.