LowRider2 build in NY with DIY linear rails

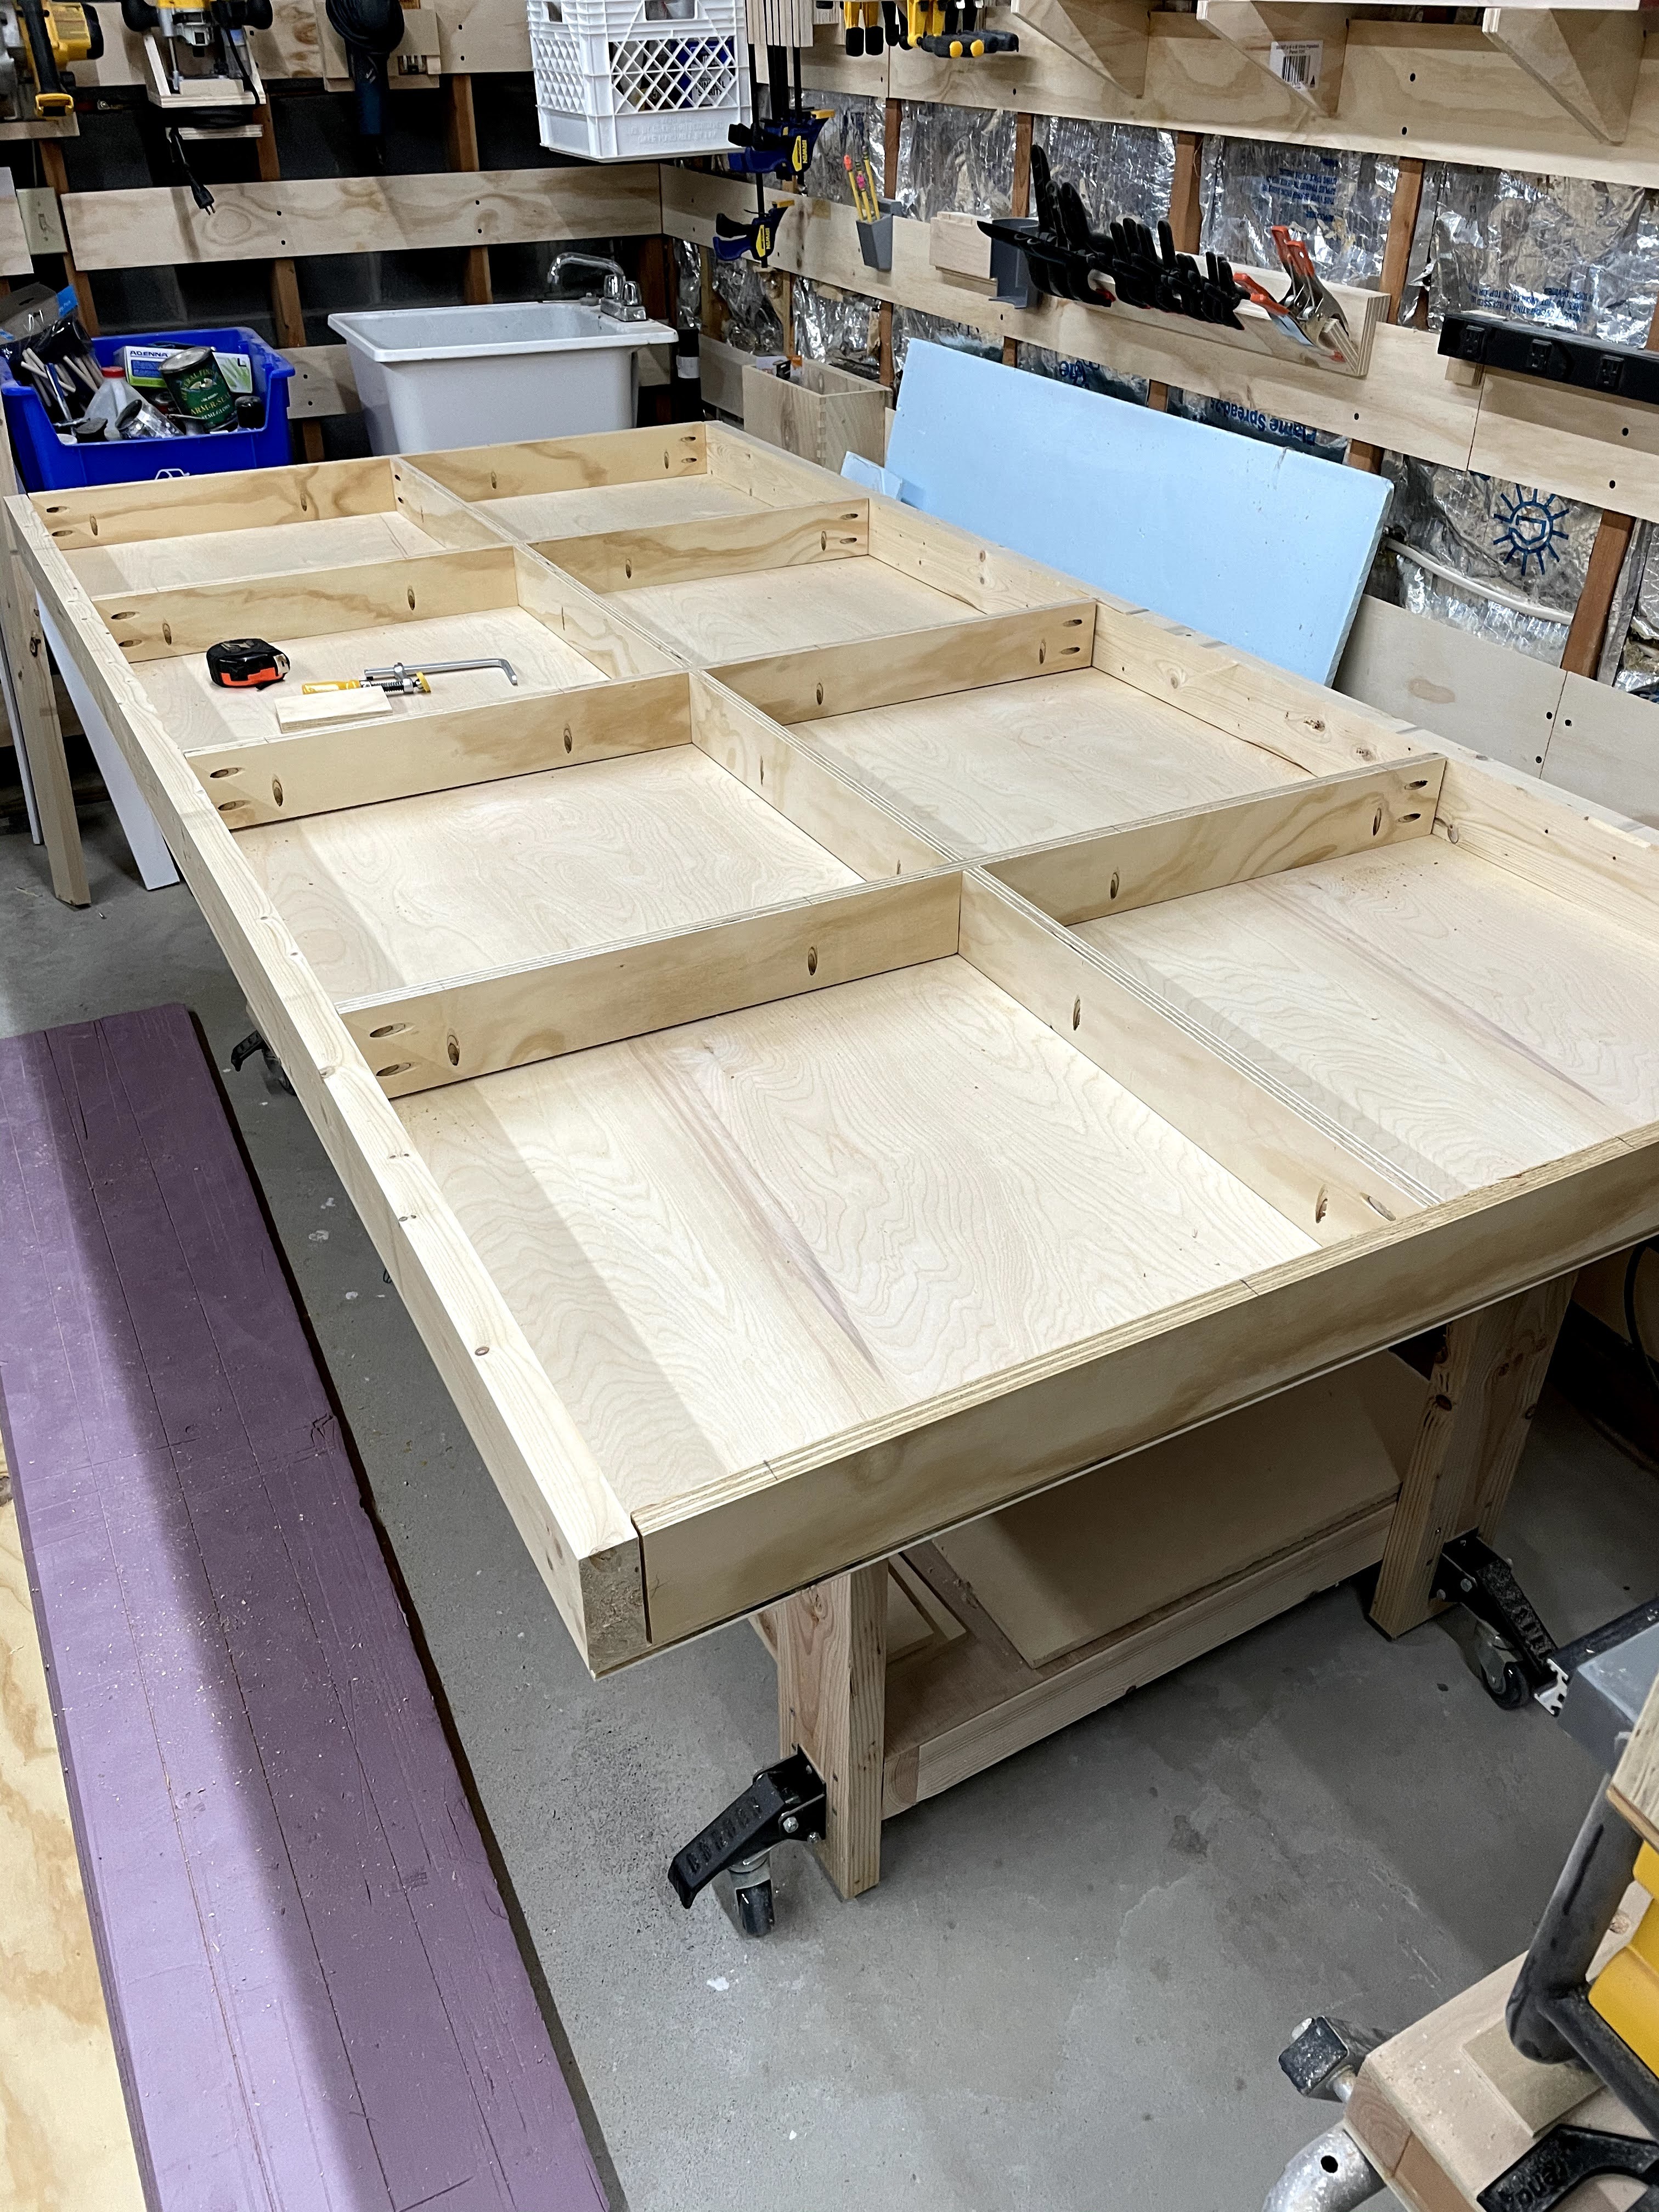
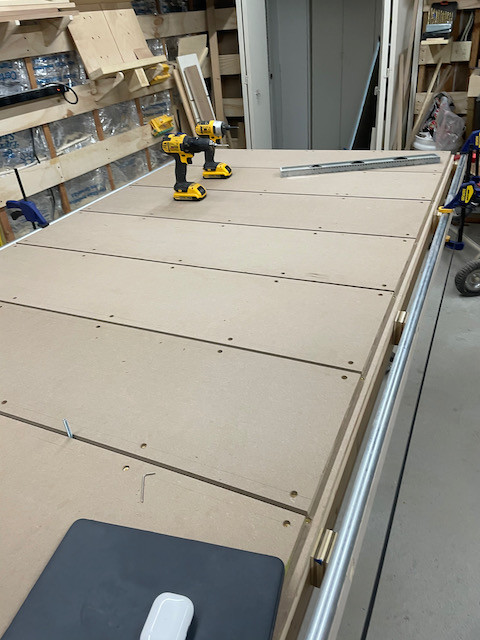
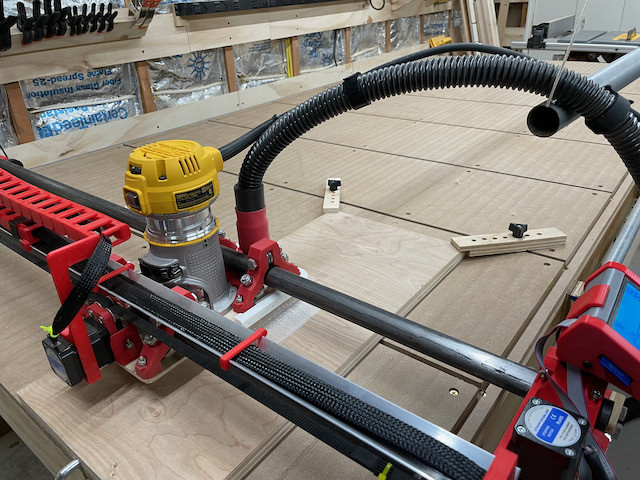
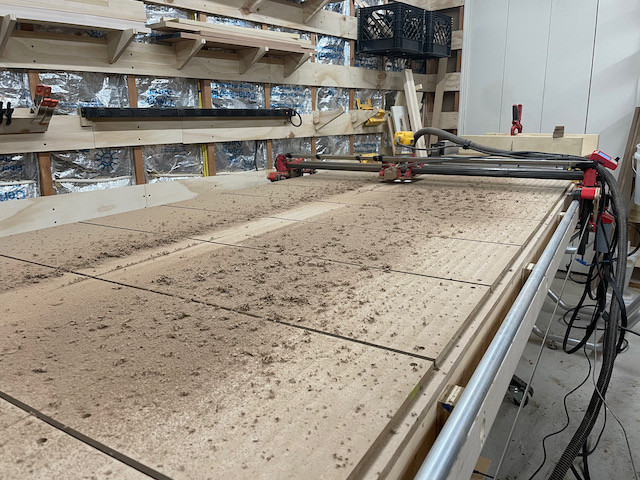
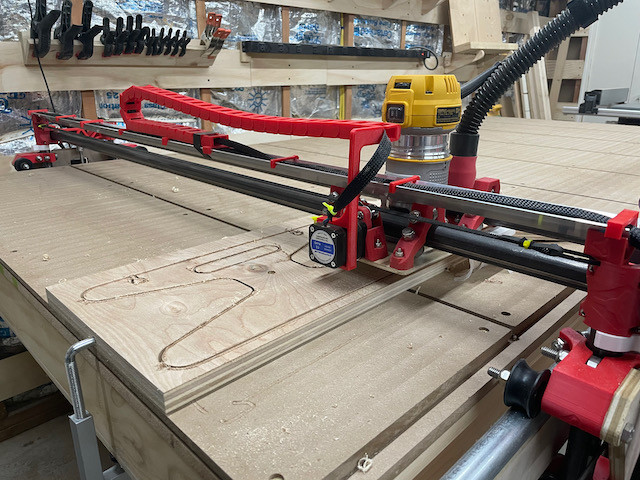
Finally finished my LR2 build after constantly getting sidetracked. Have a Shapeoko that’s worked well for me but often wish for more work area. Long ago I had access to a 4’x8’ ShopBot Alpha and really missed having that size, so this is a 4’x8’ torsion box design for the table with a replaceable 1/2” MDF top secured with endmill-friendlier brass screws. I had originally planned to use my Paulk workbench, but the 2 pieces were very awkward to get aligned perfectly with each other so I converted that to a miter/router station and used the wheeled base for the new table.

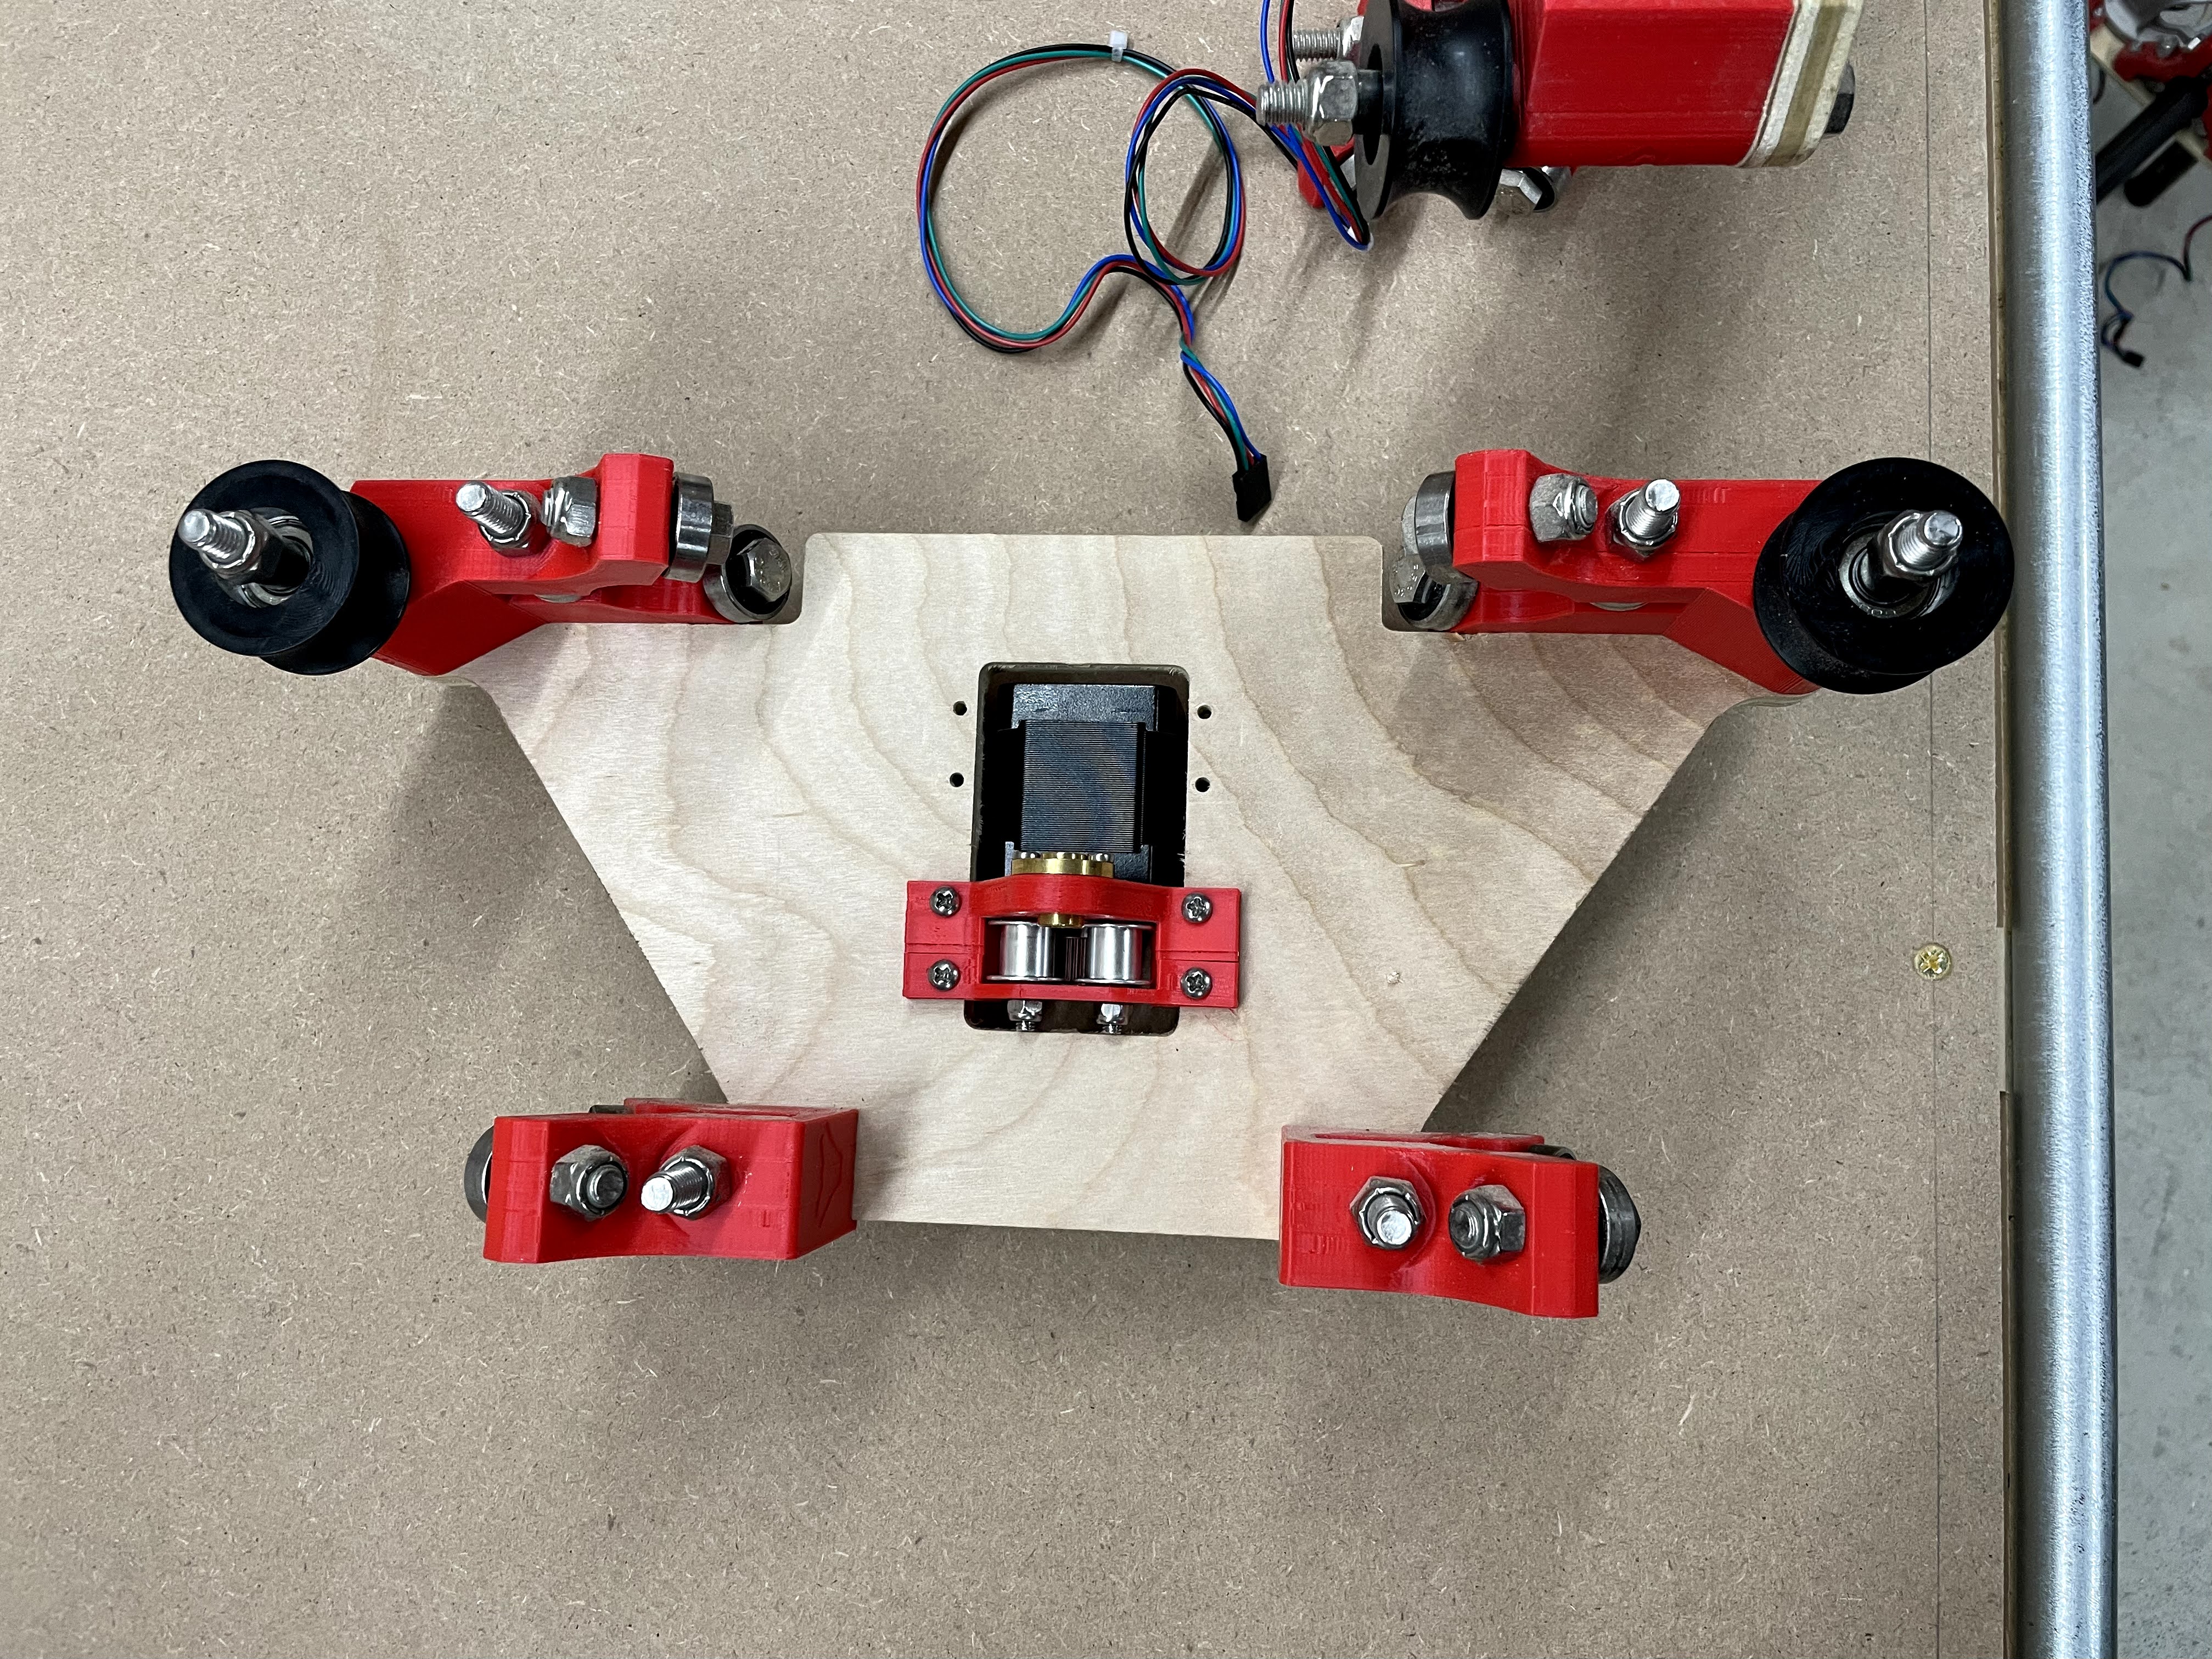
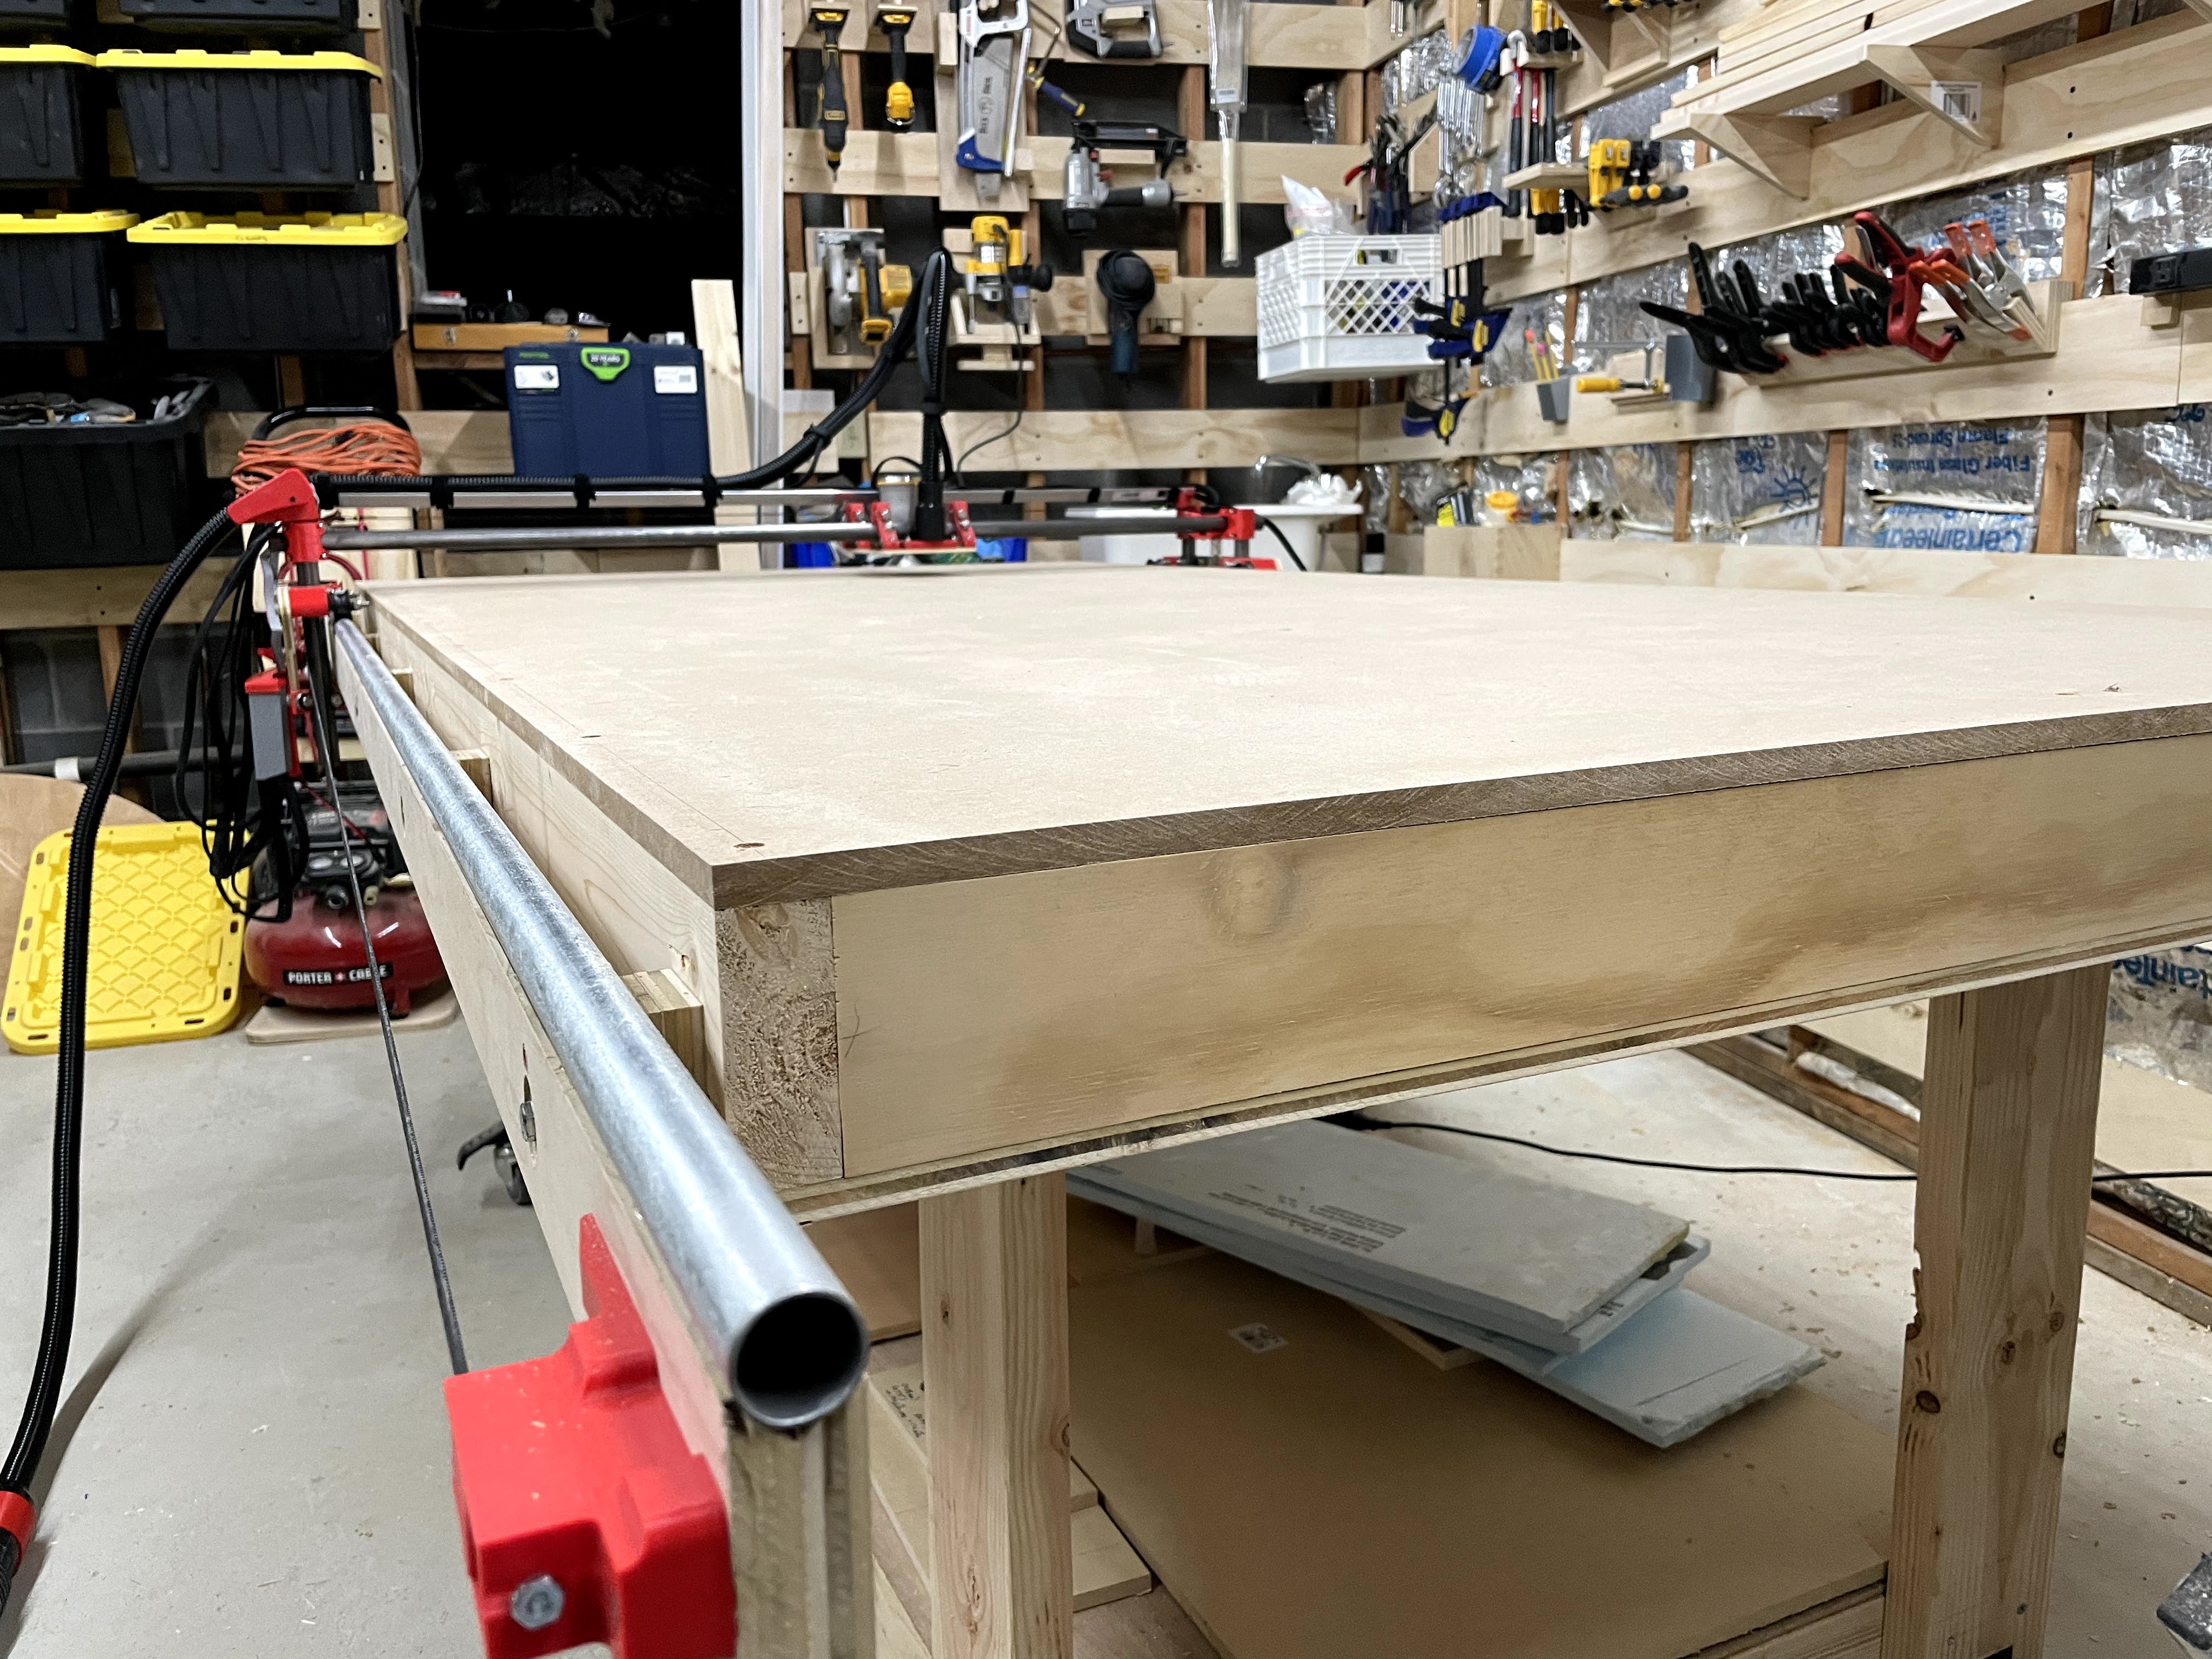
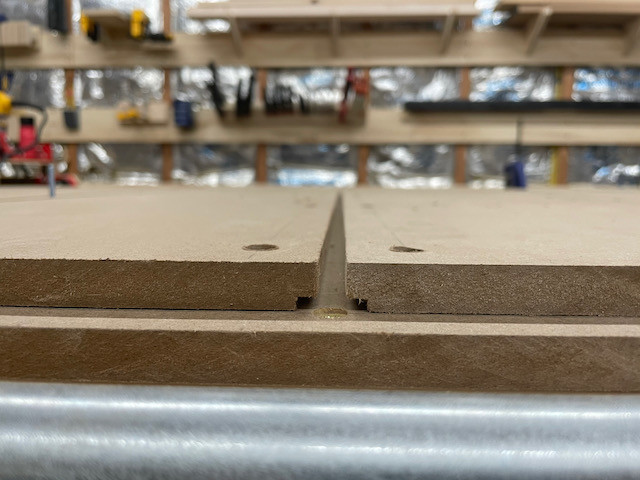
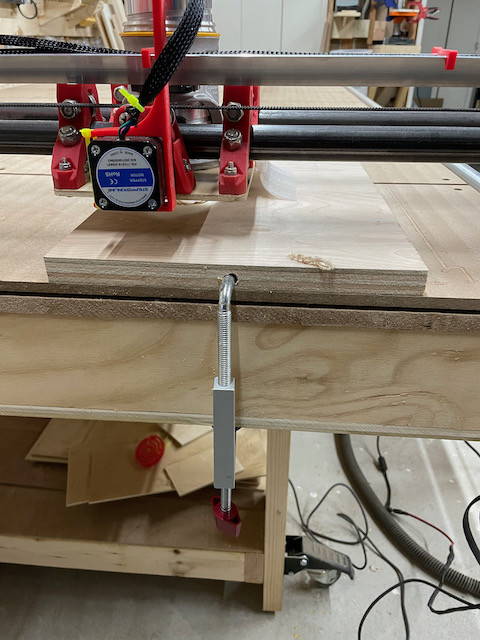
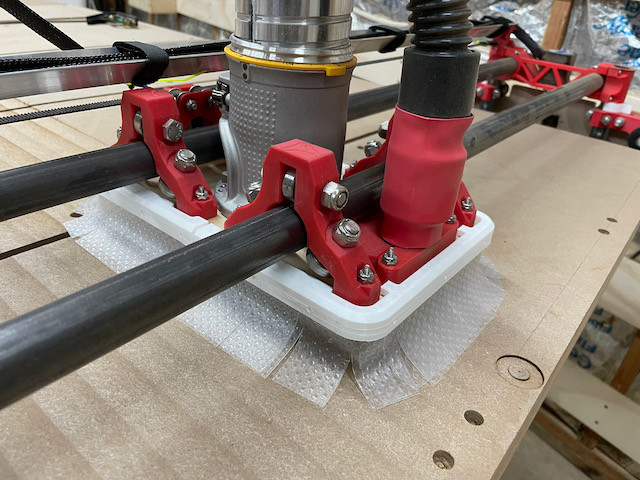
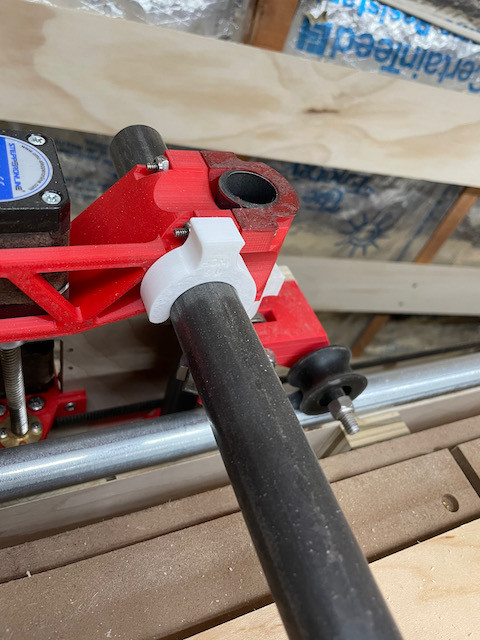
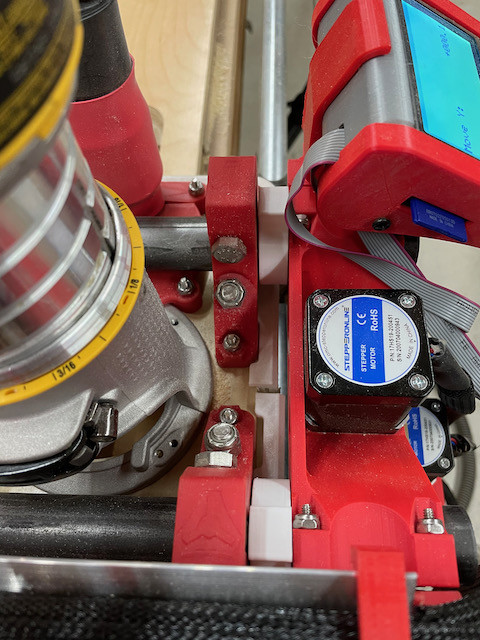
The interesting part was the long axis: I hacked together some linear rails out of EMT conduit and laminated ply. These rails are attached with spacers to the edge of the table to allow dust to fall off before reaching the rails and extends the cutting size on the short axis. I used U-groove pulley wheels instead of skate wheels. These ride on the conduit on the very edges of the pulleys and tracks on the tubes very nicely. Had to modify the Y plate and YZ rollers slightly to shift them downward since I wanted the rail below the surface of the table (so I could still use it as an assembly and table saw outfeed table). Also had to invert the long axis steppers and mount in the Y plate so that the belt could be mounted lower.

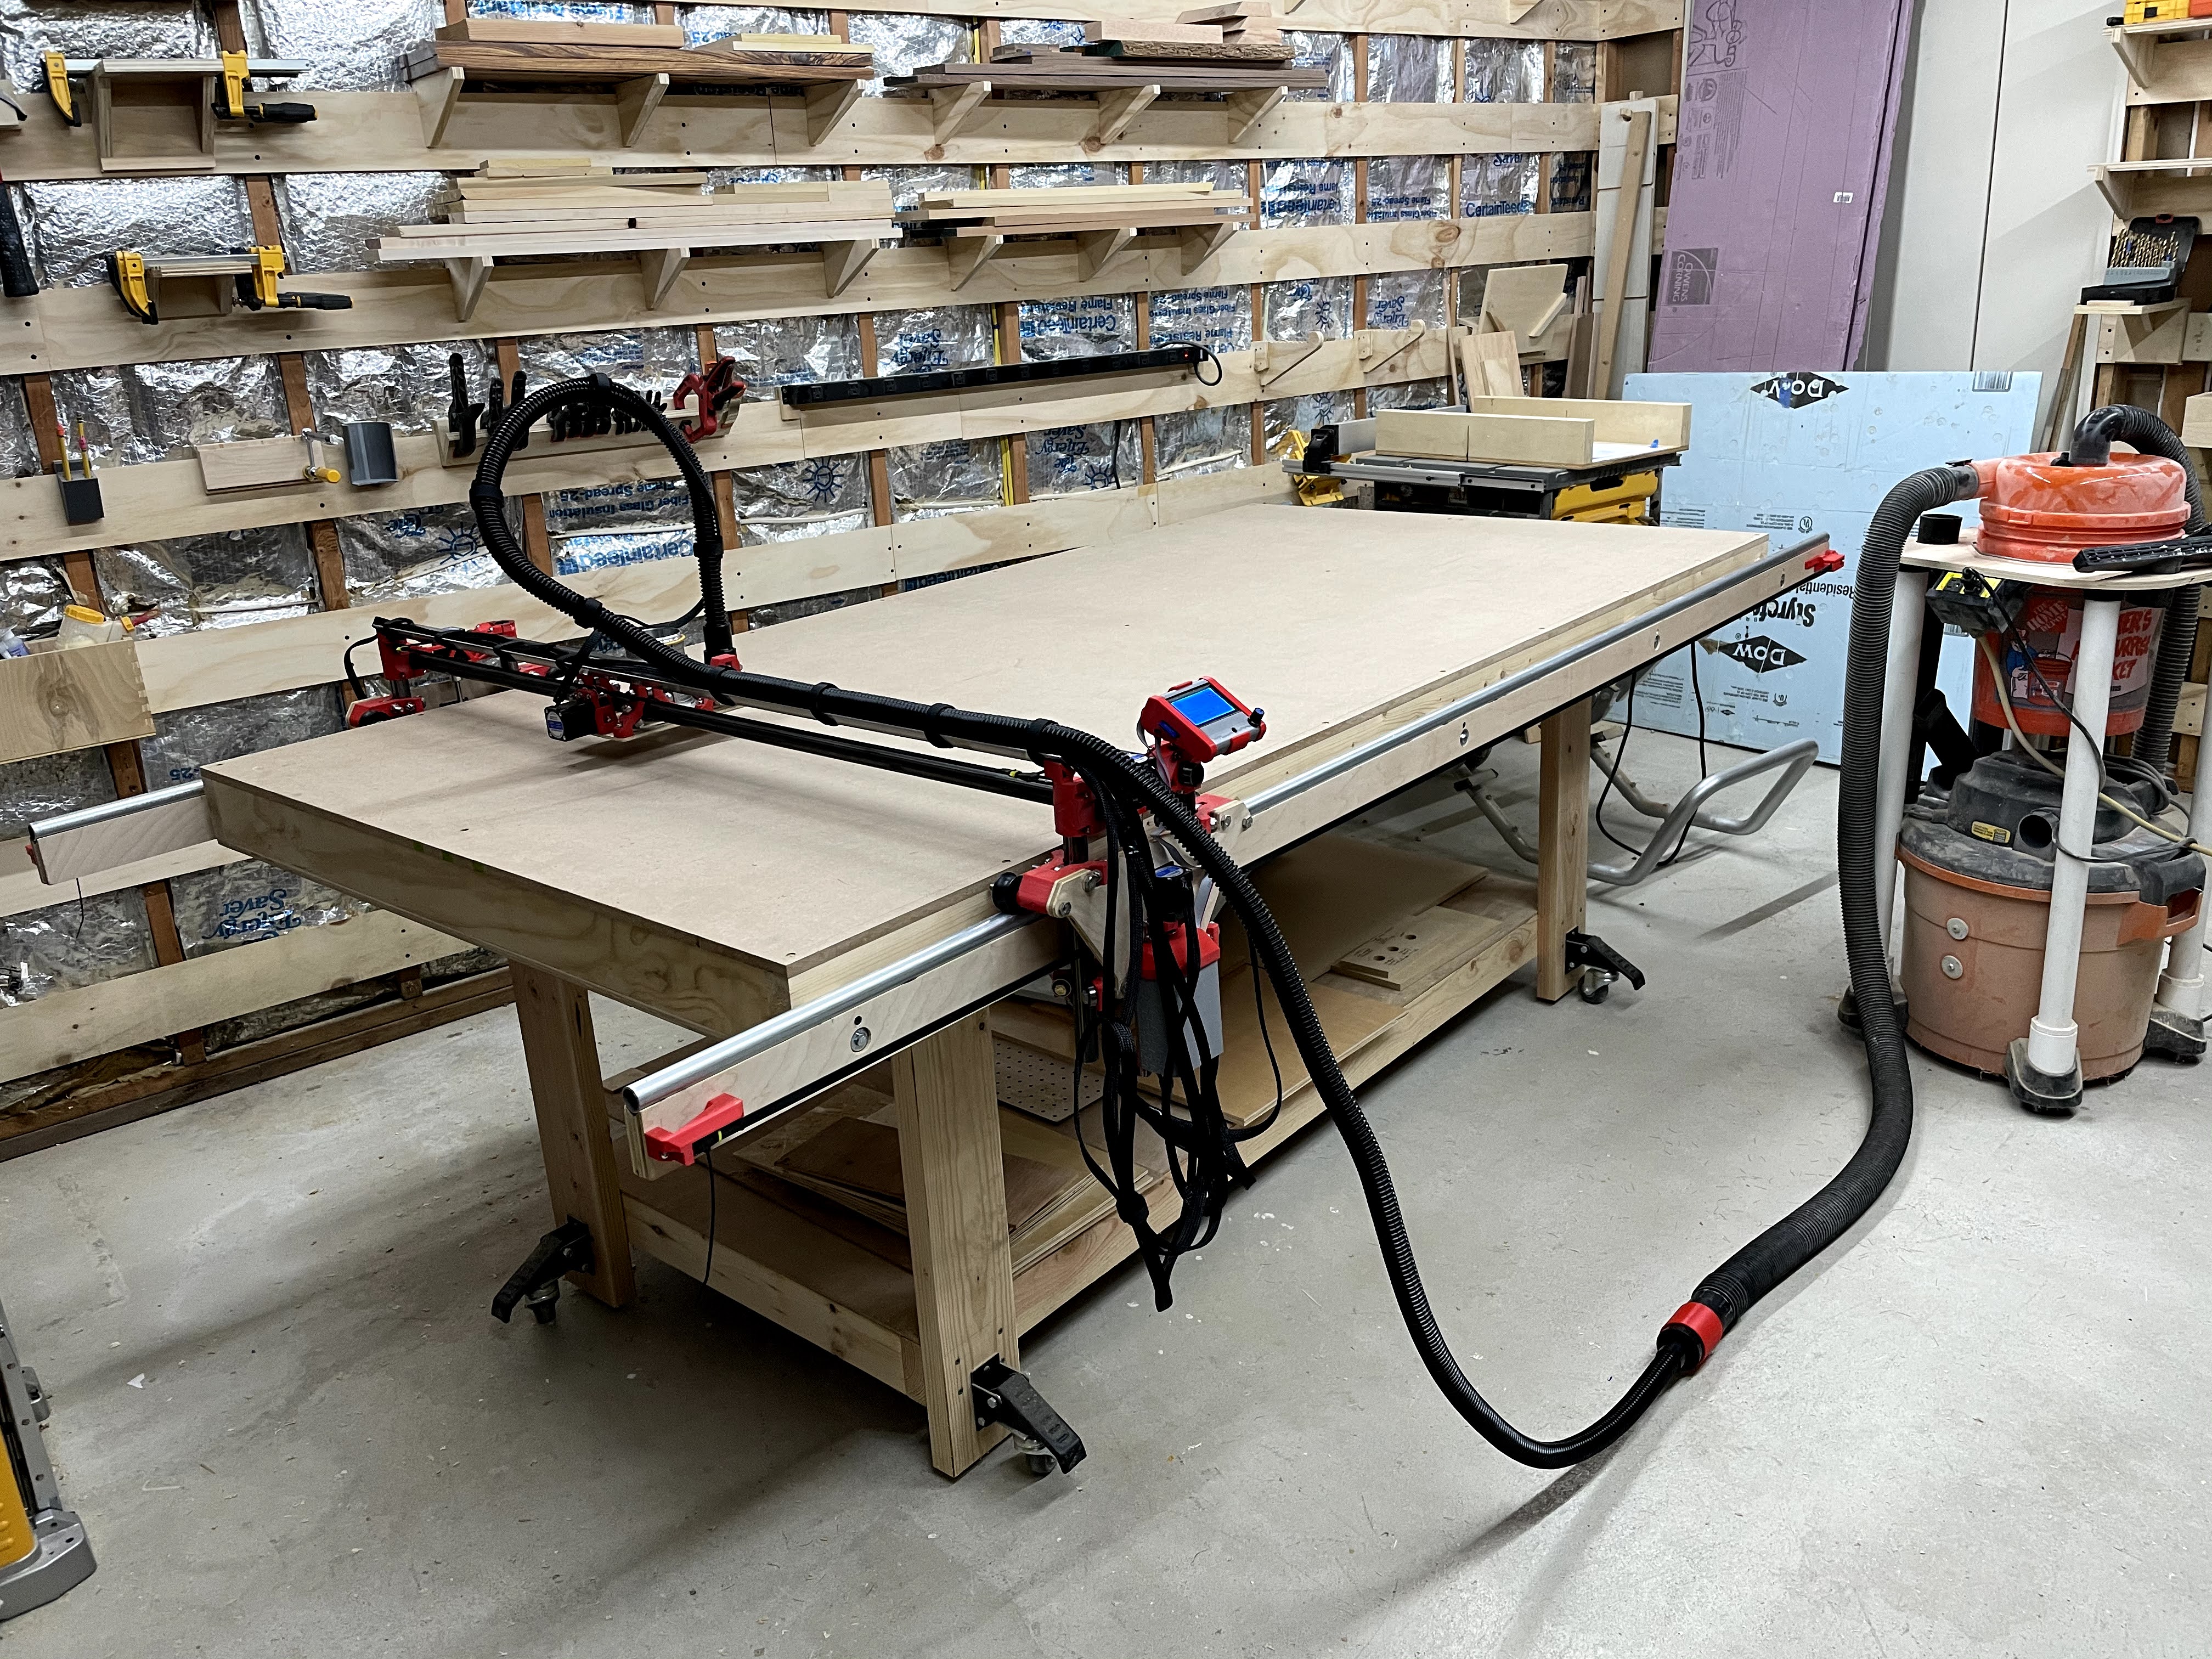
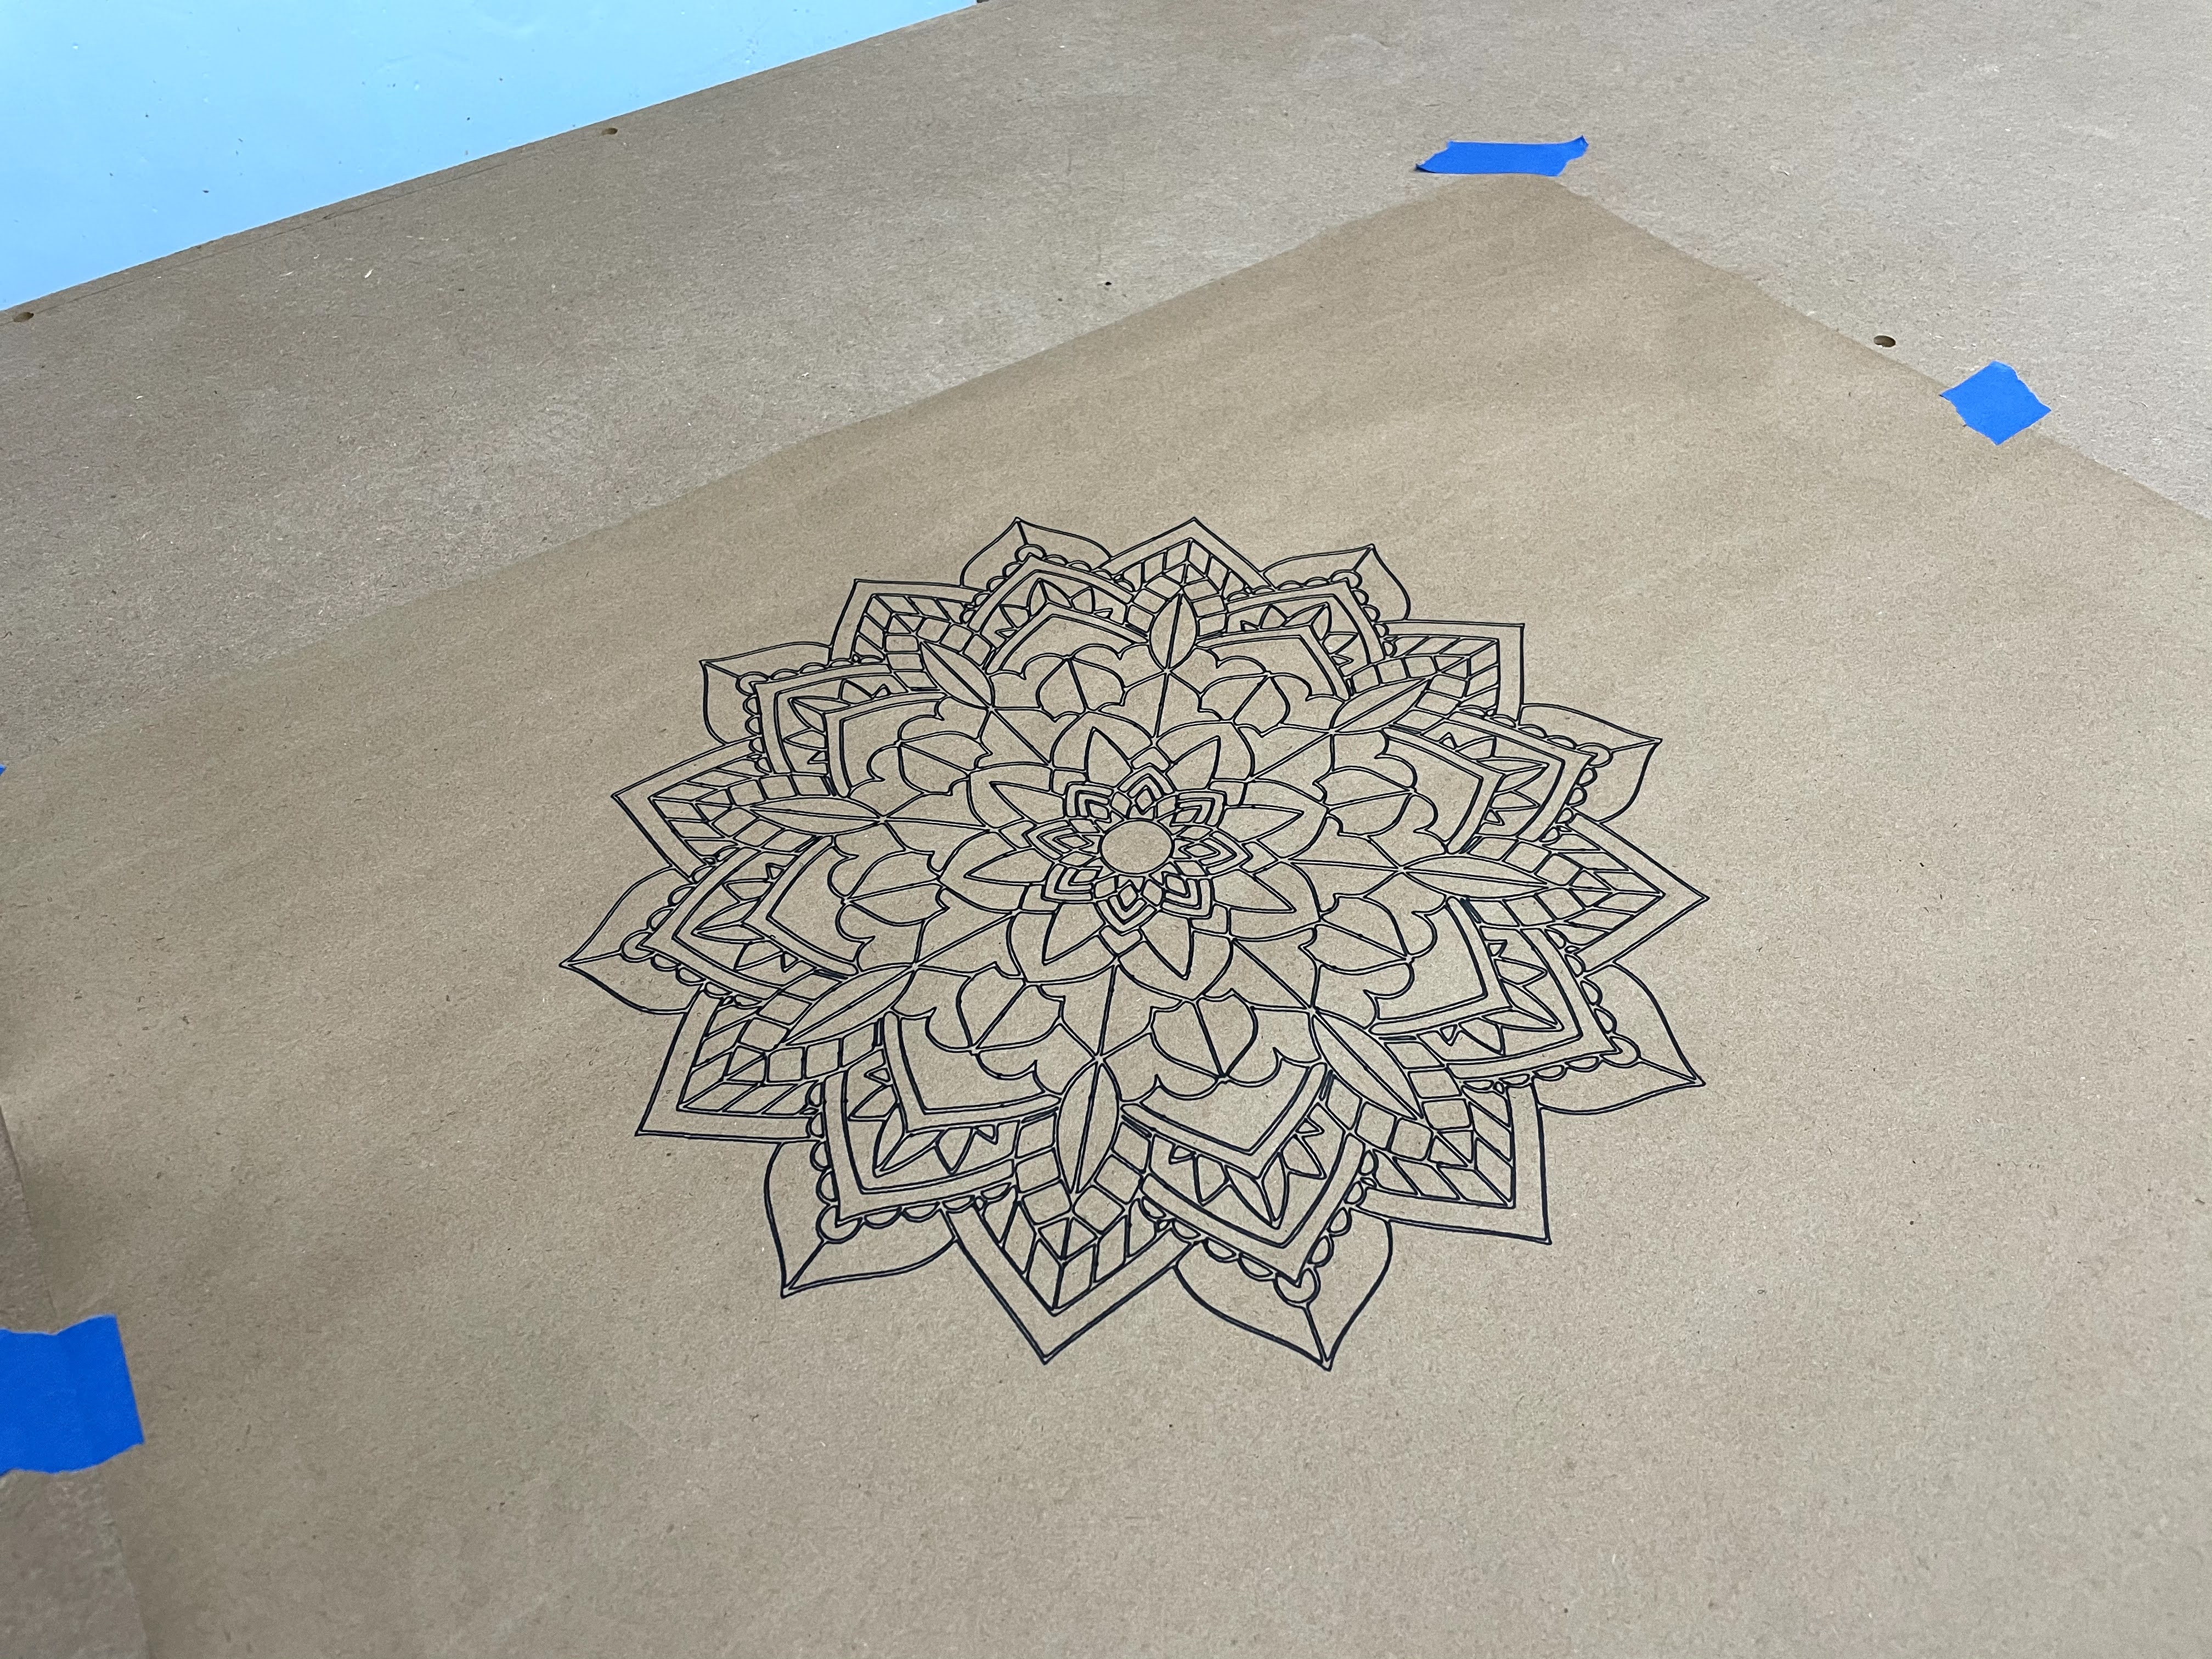
Got everything together and the crown printed with only minor hiccups. Then tested my normal toolchain with Cut2D and a bigger mandala design to put it through its paces. Size was spot-on and I thought it all turned out great! Having the whole machine on a wheeled base is nice so that you can pull it to the center of the room and have access to all 4 sides while running.

Mostly lurk here, but while I’m posting wanted to say a genuine thank you to all here: very good info and inspiring ideas and projects. Definitely want to try Rich’s aluminum extrusion XZ (“Upgrades on stiffness”) in the near future to see how that combined with the rails works out.

22 Likes

Great idea with the rails!

1 Like

What a great intro. Great stuff and it looks like that experience paid off with a pretty tremendous start. The rail idea is a good one and seemed to require very little change to accomplish.

I hope you keep adding in here as it seems you’ve got some more ideas to add yourself.

1 Like

Those rails look like they will do a great job. I think the main reason something like that isn’t the standard is that you’ve made an awesome and precise table. I am not sure I can do that so easily, so I wouldn’t be confident my rails would end up parallel.

But this is clearly going to be a strong machine. I hope you share what you make with it. I am expecting some great projects.

2 Likes

Thanks… yeah I wasn’t sure what to expect but have been pleasantly surprised so far. Definitely still have some adjustments to make here and there but I’m hoping to be able to get some good use out of it.

I think getting the table square definitely helps. I tried for square (and got close enough for my own abilities), but theoretically you could shim a side on an imperfect table and as long as you got the rails parallel, you could run a surfacing bit over your surface and get it all level for cutting purposes. That’s what I had expected to need to do at some point.

That looks awesome. I’ve been looking to build a low rider for a year now, but kept putting it off because my shop is too small- 11x13 - and it is a functioning traditional wood shop. So I don’t have space. We just bought a house with a dedicated 17x17 wood shop- yay- but it seems I’m limited to 5x4 table size for the LR2. This approach would let me put together a removable 5x9 top surface and rail system
I could store horizontally for most of the time, or dispense with my table saw out feed/assembly table and make a single
Large combination outfeed/assembly/LR2 table

Any additional info on the linear rails and how you set them onto the plywood standoffs would be appreciated. Also- is the conduit just resting in there or attached in some way? If I could remove the conduit and just leave the standoffs and store that with the parked (wall cradle) lr2, that would be amazing!

Thanks!

Sounds cool… would be nice to suddenly more than double your workshop space! I think we had similar ideas for how to integrate a LR2 into a shop. There are probably a few issues with the LR2 and my implementation of it that would you’d want to consider before going for it.

I think the main issue with trying to use the table for multiple purposes is the belts: They are always there and slightly in the way. They’re also very fragile compared to large sheet goods and stock that would be going on and off the table. That’s one reason I wanted to lower them… get them even slightly out of the way. But if you’re sliding off a full 3/4” sheet of something from the table yourself, you’d probably still break something.

The belts would also make removing the LR tedious in that you’d have to undo them to get the long-axis steppers free from the rails.

So step 1 would be to undo both long belts from one end of their mounts, unthread both long-axis steppers from each belt. Even free from that, my LR would not come off easily since the bottom hardware on each Y Plate extends underneath the rails, preventing lifting straight up for removal. You could roll it off either end of the rails instead, but your Y-Plate assemblies will fall off at that point unless previously secured somehow.

The rails are currently attached with 5 bolts each fed into t-nuts mounted from the inside of the torsion box table. You could undo these bolts and remove the rails, but alignment of them to the table is important, so factor in time and have a jig ready to align them relative to the table top again when putting it back together.

All that said, I think you could get a lot of use out of the table just by parking the LR2 at one end instead of removing it and using the rest of the table like I do. Build it at the same height as your tablesaw and cut miter slots in it and it’s and effective outfeed table (if your saw fits between the rails extending from the end). Leaving the LR2 on has other upsides: I already had 1 stepper wire connection at a connecting pin go bad just in jostling wires while setting up, so I’d be very wary of trying to repeatedly take the whole assembly off and on repeatedly.

Also, while I’m not trying to deter you from my modification, I don’t think there’s anything in the original design that would prevent you from doing the same thing if you used unistrut fastened to the side for the wheels as several have done here. The unistruts are effectively removable rails themselves. The main reason for my rails was just stronger tracking on the long axis: It’s very hard to shift my assemblies off of their trackline because the pulleys self-center on the conduit.

For the rails: I ripped 8’ long sections of plywood and glued them together staggered against a flat reference so that I could make a section longer than 9’ out of 8’ sections and build up the thickness in the process. Set the table saw for a 45’ cut to the center of these (edge center) and ripped, flipped around, and ripped the top side of each glued strip to create a v-groove for the tube to sit centered in. I had the conduit just sitting in the groove for a long time to try things out, but kept bumping it out, so I epoxied it into place. You could also drill holes in the top (large enough for a screwdriver and screw head ) and bottom (smaller, but big enough for your screw) at intervals along the tube and fasten it with screws. The pulleys ride on their edges, so chances are they would go around the top hole if it was centered and small enough.

Spacers are easy: glue how ever many layers of ply to get the space you want and cut it equally into 10 or so pieces that should all be the same thickness. Glue them to the rails at your fastening points and drill recessed holes for bolts through all from the outside.

1 Like

I too have a small shop woes - but most of my shops I have had were in areas with a high ceiling. If you have tall enough walls, you could consider making a table top with rails, etc. and rig lift points for tie downs then raise the top up to the rafters - depending on the height, you could keep the router in the sled. Then just raise it up to lift it out of the way. Of course consideration is going to be needed for the z axis tubes below the table top. Or some sort of blocking mechanism on the top of the table to keep the LR2 from movement while stored.

Definitely thought of that, but my ceiling is too low and it would block a lot of the shop lights

Updating for posterity…

Had some distractions again but am finally cutting wood with it. Just testing things out by making tablesaw pushsticks and extension cord wraps out of scrap. Turned out nicely even with an older bit, nice 3d tabs and a fairly uniform cut just barely into the spoil board.

IMG_0229

IMG_0230

It was a journey even from the last post. I found the LCD controller very hard to use to set things up, so I got it wired into a pi for cncjs control which is amazing.

I added another layer of MDF: this one in sections with small rabbets cut in the sides so that they all together can act as cheap T-track for work holding. I found that using Milescraft fence clamps on the end of the table worked well by just drilling a hole in the side in an unused part of the material and clamping to the underside of the table

IMG_0204

IMG_0228

Trying to surface the new table revealed a need for tramming, so I followed the posts here and improved things. I still see faint stripes on the board, but I think that’s more due to the opposing directions of cut with the surfacing bit on MDF fibers because it’s very hard to feel any ridge between the surfacing passes now. It’s good enough for me now but I might mess with it further later.

Dust control and wire management became immediate issues, so I added a dustshoe from 4noxx on Thingiverse made out of cut-up shelf liner hot-glued into the groove, and some drag chain and a modified clip to mount the chain to the short-axis stepper.

IMG_0209

IMG_0220

IMG_0231

Probably will try a desk soon from full sheets after a few more scrap tests.

6 Likes

One other simple accessory that’s come in handy are these simple tubing clips. They provide known constant spacing once snapped on, and I use them for both limiting the plunge depth of the Z-axis (4 clips on all 4 tubes, limits the plunge if the steppers are disabled and saves the spoilboard), and for providing a hard limit zero point for the short axis. I made 0.5" and 0.75" sizes. They come off and on easily and can be modified or stacked for custom thicknesses.

5 Likes

I love this. It basically leverages the idea that if the EMT is straight and stiff enough for the gantry, it can be for the table as well.

Where did you source the pulleys? They look like a somewhat non-standard size, in the sense that they’re squat but wide.

These are the pulleys I used, but there are several options. I wanted just the edges to ride on the rails so I went with ones that were undersized relative to the EMT.

what size is your u groove wheels. and the pipe tube you are using with them.

I think the product link and sizes are all in the thread… don’t remember them offhand. The important thing is that the edges of the pulley ride on the tubing, not the center. That’s what keeps it firmly in line, so you want your pully width smaller than your tubing width.

Or to put it another way (apologies):

If the gully of the pulley ever contacts the tube fully,
then it might just shift around and your tolerance will sully.