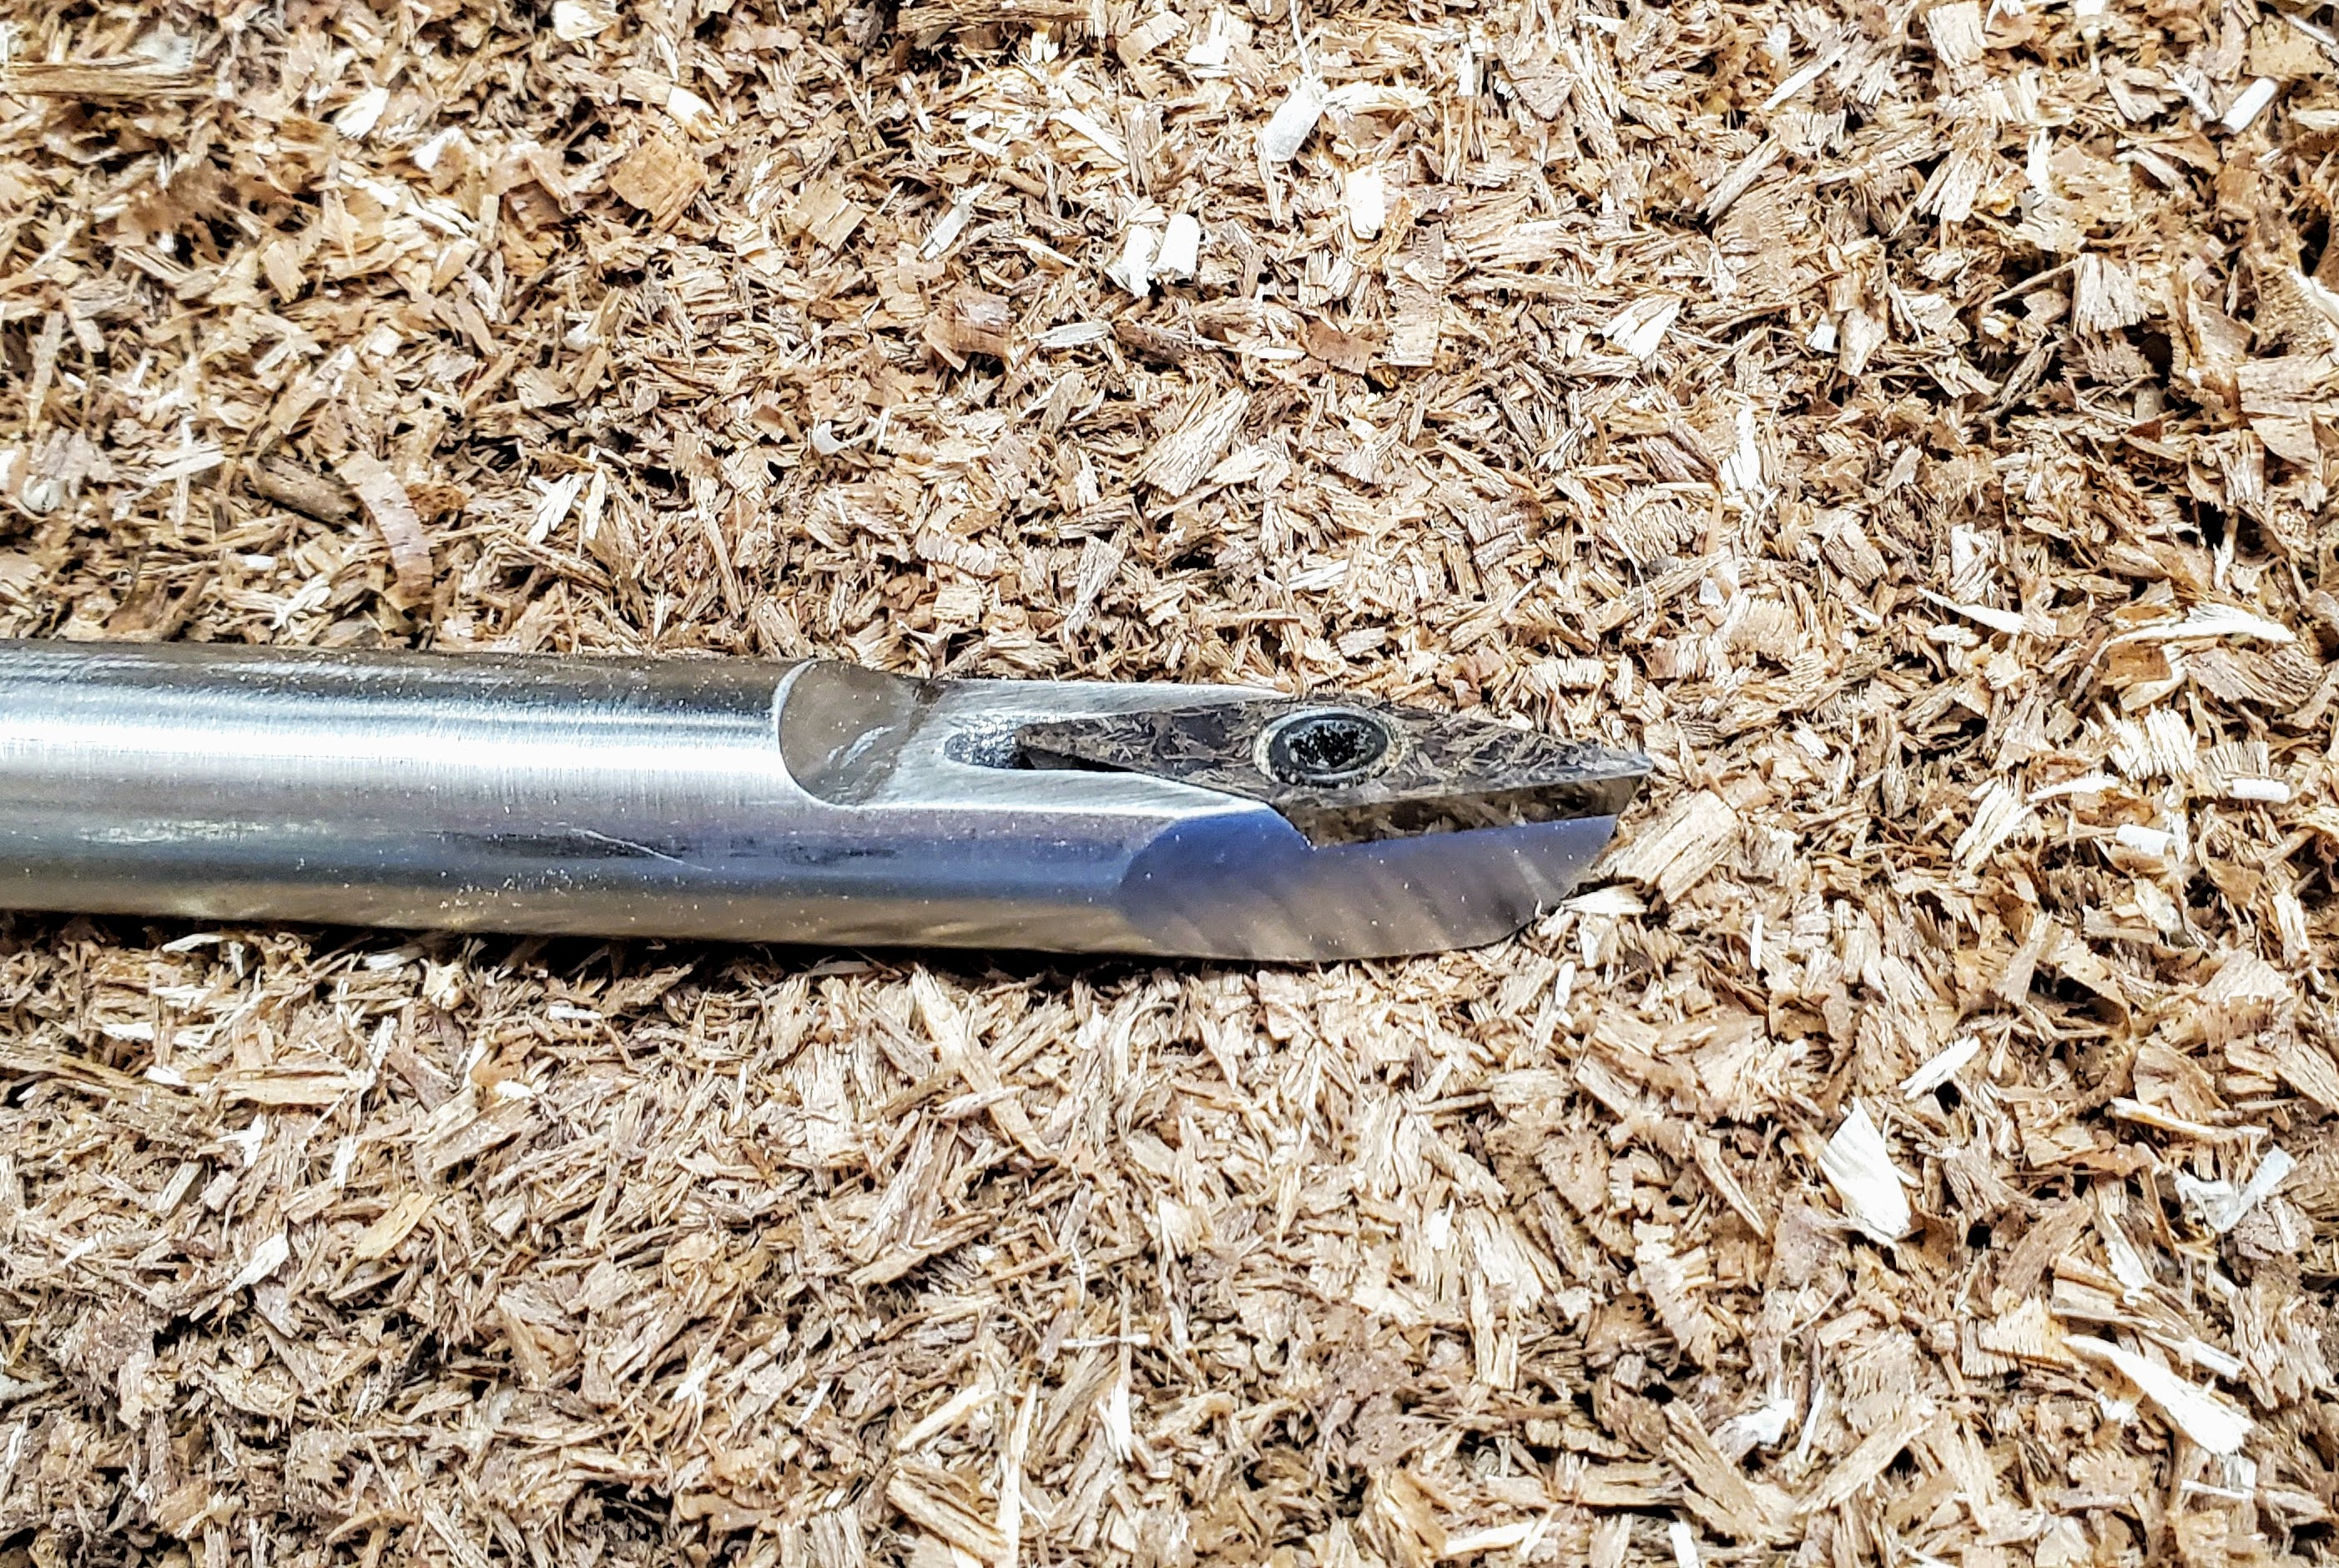
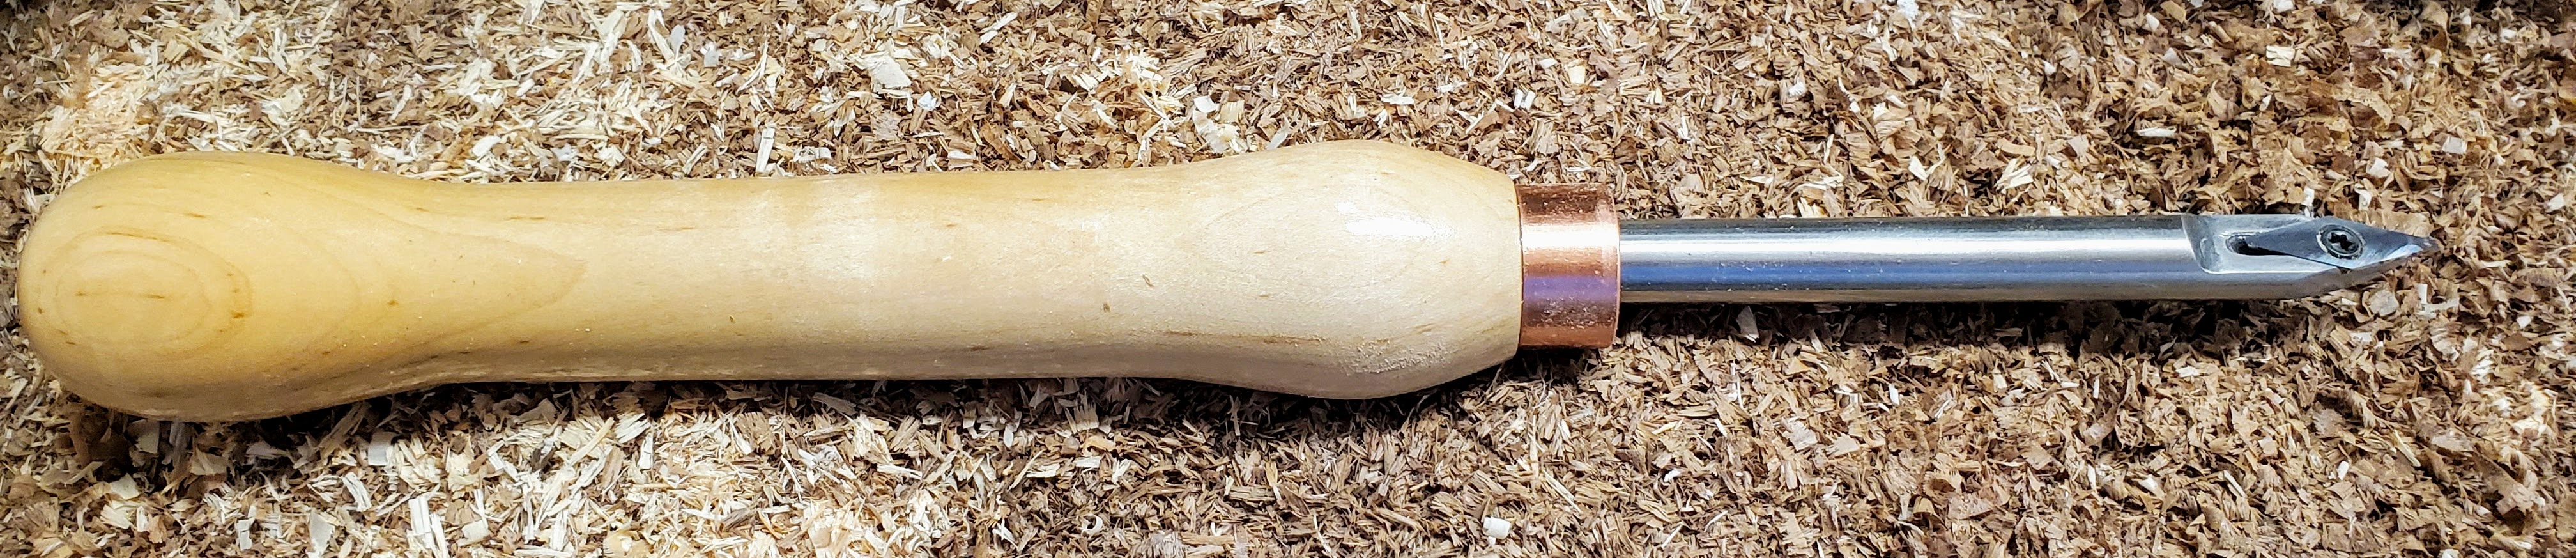
I needed some better wood lathe tools and I had some carbide inserts. I also noticed the MPCNC was not doing anything at the moment and so decided to see if it’d mill some stainless steel. I only took 0.1mm passes, and the bit got quite hot (thus needing a bit of cutting oil), but it came out much better than I thought it would. It’s a pleasure using this new tool on the lathe. (Yes, the handle was turned on the lathe and the ring is copper pipe).
I may also try some granite engraving with a diamond insert.
A suggestion, if I may. Instead of taking tiny passes, like 0.1 mm, try using the whole depth of the cut (or the flute length, whichever is less) and use an adaptive tool path to ensure an even load on the cutter. That and a continuous air blast with an oil mist aimed at the cutter for chip evacuation and cooler could speed up the operation while extending the life of the cutter. A win win, even if it’s for personal use
I used 304 stainless obtained through Metalsdepot. I don’t know if it was annealed.
As for the adaptive cutting, I may try that out as this was just a test to see if anything would work. I use the MPCNC for primarily wood and so don’t want to corrupt the spoil board with a mister. I was just surprised that it came out as well as it did.
Next time you may try 303 instead. It has some trace elements added that make it more machining friendly than 304.
I dont think either grade can be treatment hardened, so it is likely they were in an annealed condition. They do work harden, though, which can make them tough to machine.
I will definitely try 303 if I do something like this again.
And, the suggestion to use adaptive clearing is great. I’ve started doing this for other projects and after tuning I like the results a lot better. The only downside is figuring out how to get finish passes in Fusion 360 from adaptively cleared pockets. I may eventually screw up my courage and try some pockets in aluminum before doing it with stainless again.
The way I do it, and the way I was taught, is to use an adaptive strategy to hog out as much material as quickly as possible, but to leave between 10 and 30 thou of stock so you can com back with a traditional pass as a finishing pass. So, for example, for an outside edge you could use a 2D contour pass, and for a pocket you could use a 2D pocket pass to finish both the floor and the inside edges of a flat pocket.
Keep in mind, both of those are 2D strategies where the Z axis stays at one level. If you have a sloped floor, using a ball end mill and a 3D parallel pass with a few thou step over is a good finishing strategy for a relatively shallow angle, while a 3D contour is a good option for steeper angles, again with a ball end mill and small step overs. I’d recommend experimenting a bit with aluminum and seeing if you like the results before going to a more expensive stainless; you’ll need to adjust the feeds and speeds for the roughing operations when going from aluminum to stainless, but the finishing passes should be able to transfer from aluminum to stainless without a problem.