Now you have to figure out a two step process to do black and white on the same glass.
You use acetone to remove the extra paint, right? So it probably doesn’t matter which order it goes.
Now you have to figure out a two step process to do black and white on the same glass.
You use acetone to remove the extra paint, right? So it probably doesn’t matter which order it goes.
I wonder if you get Gray if you layer balck on white or white on black?
oh that sounds cool… make a multi-tone image. though you can do that with a dithering pattern.
Still playing with tempera paint and glass… and getting even, consistent, coat of paint. Currently trying to use a bit of Dawn dish soap, water, and tempera paint to break the surface tension but haven’t found a way to spread it without streaks.
Multiple coats can help a bit but, again, still has streaks…
Tim O. mentioned that this might make neat edge-lit signs… so did the following quick and dirty test…
– David
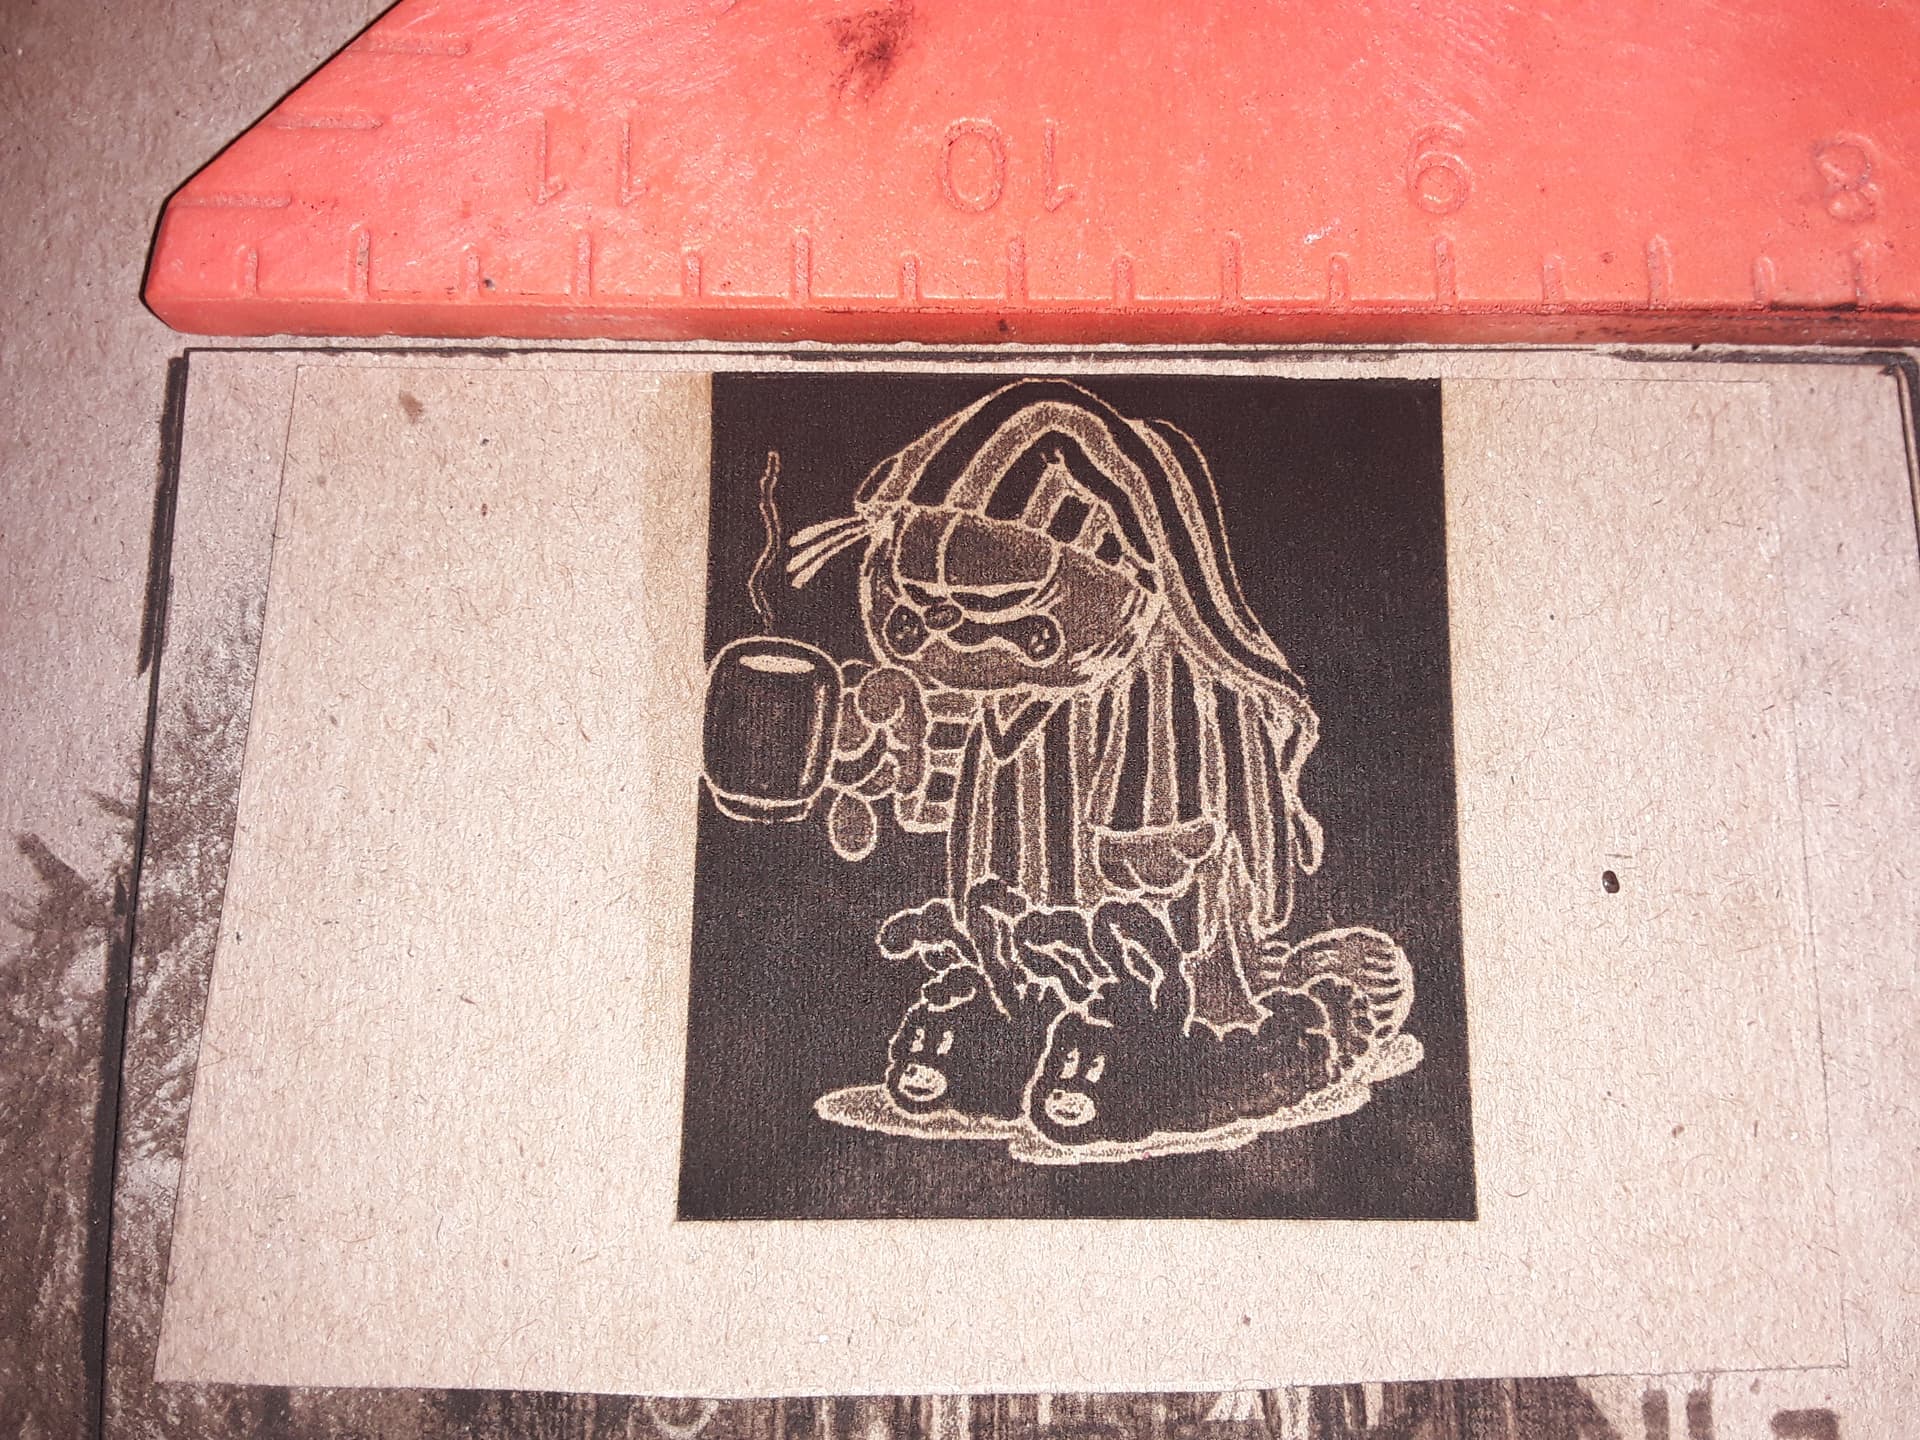
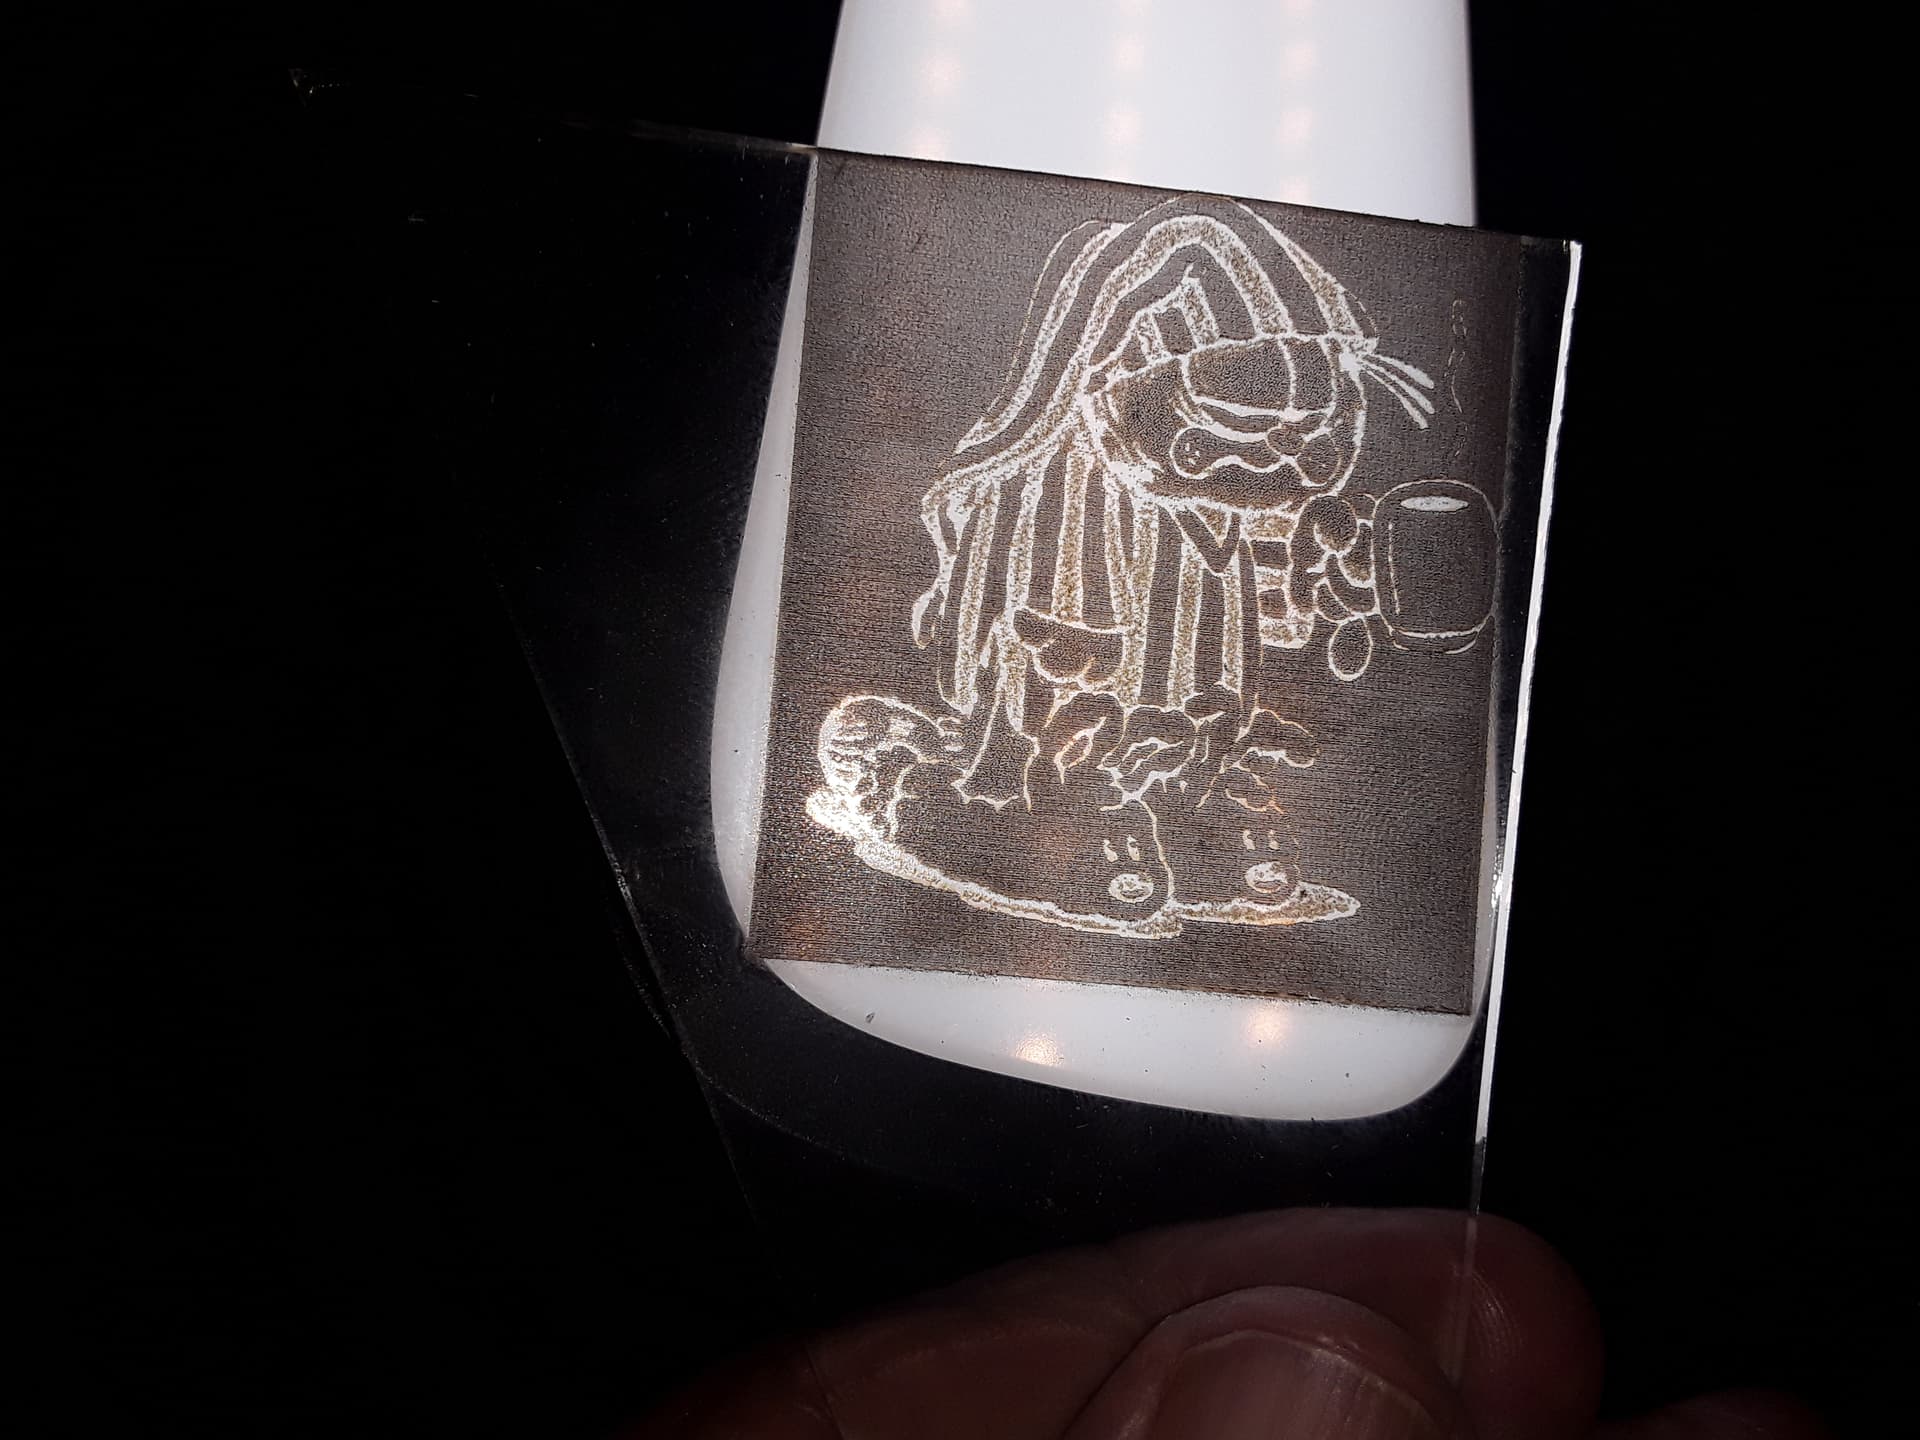
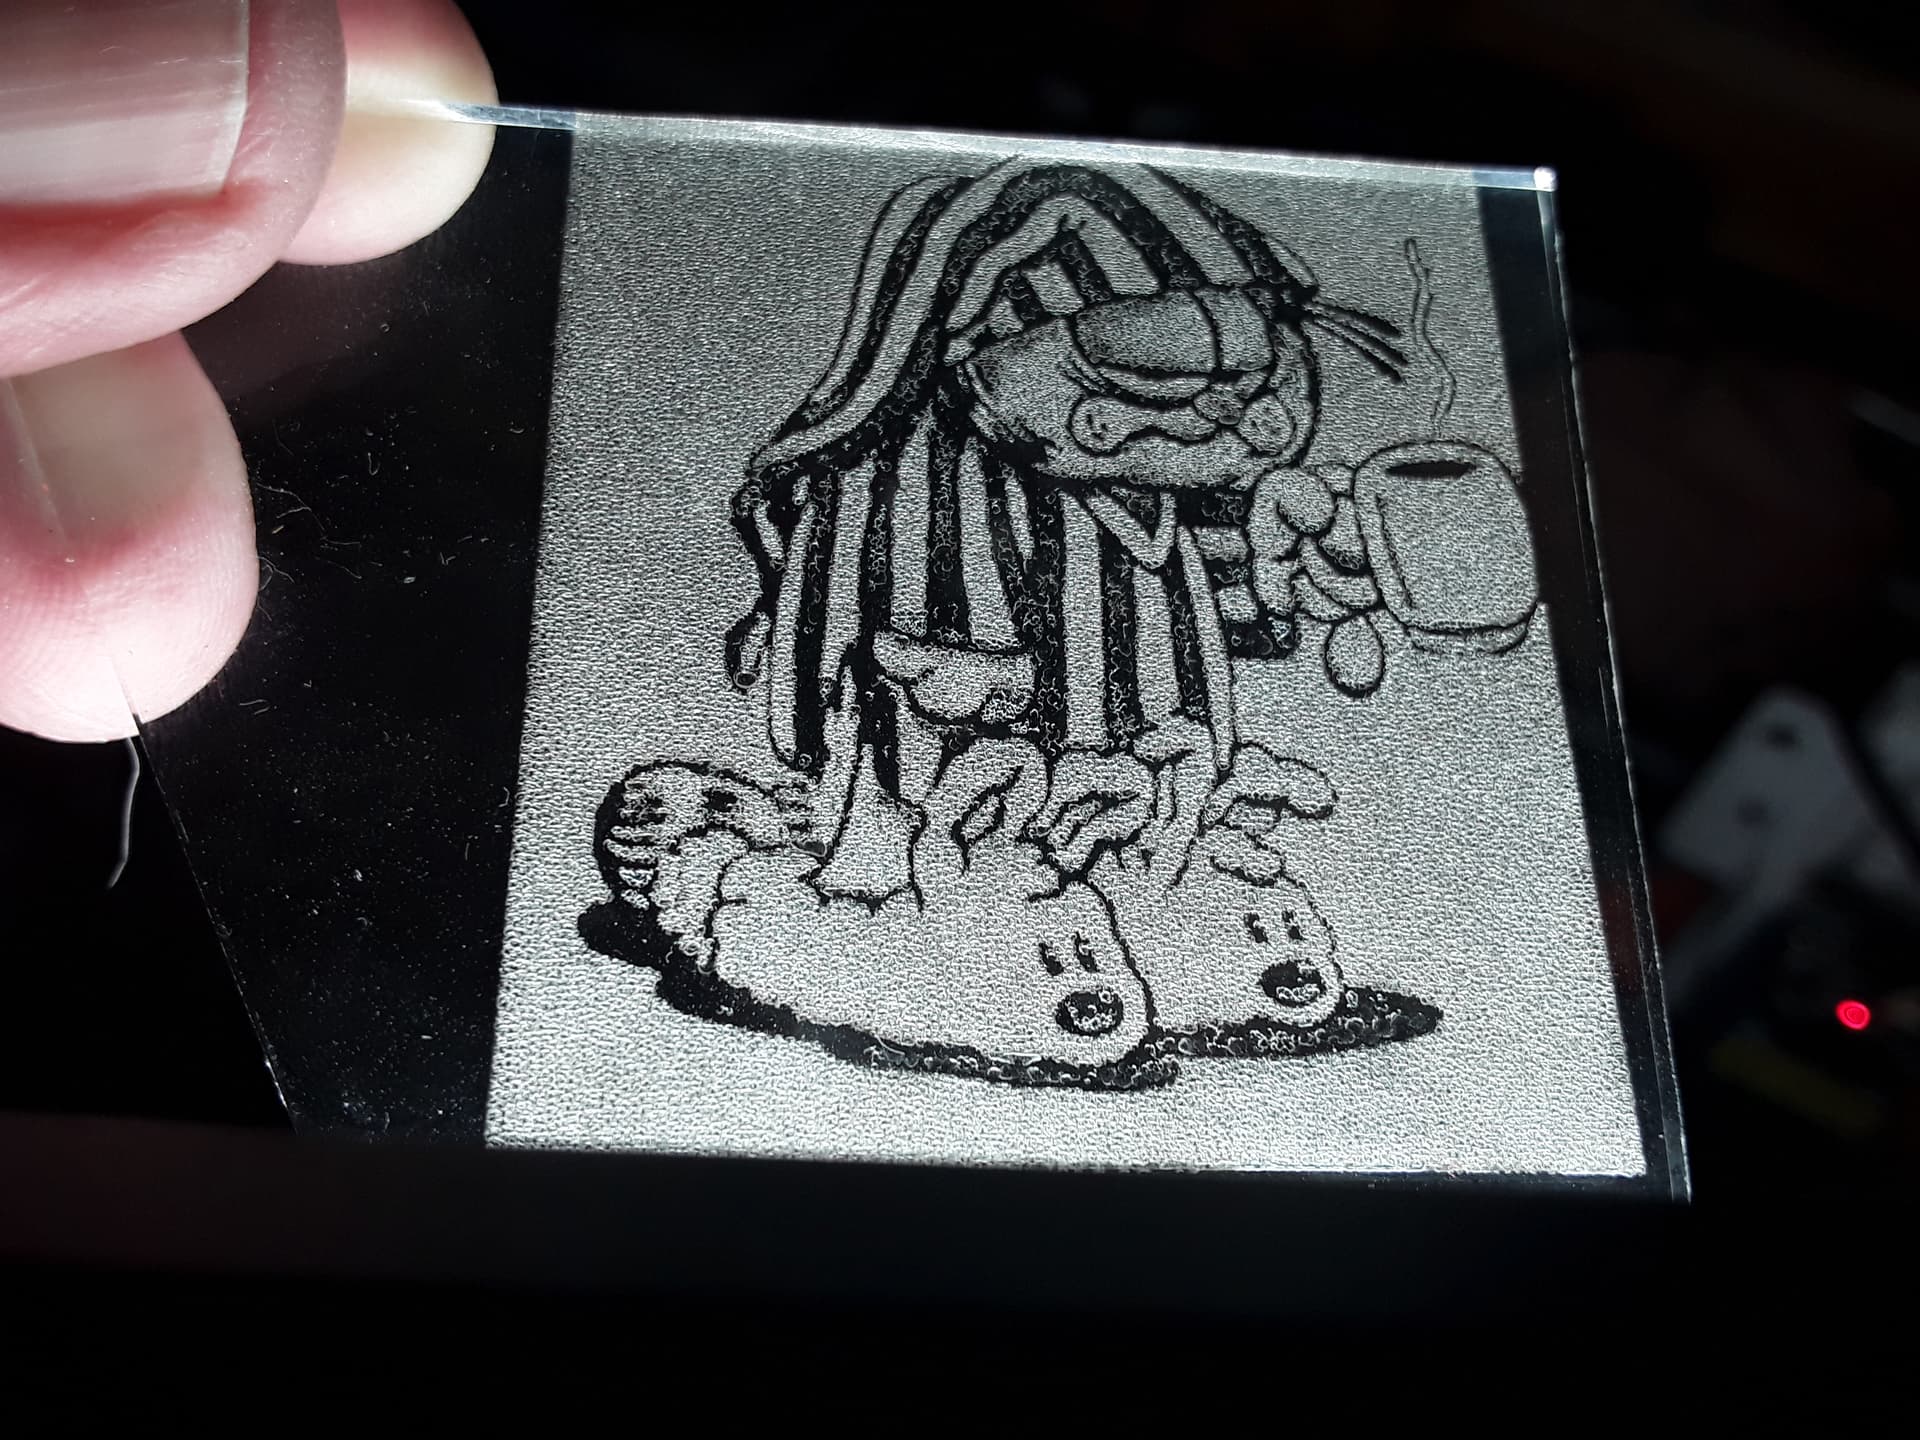
Here’s our trusty Garfield shaded (dithered) image… not much to look at
until you edge-light it…
Still needs to have a more consistent paint coating. I’m gonna give Ryan’s pump sprayer idea a rip tomorrow… my daughter uses those in her greenhouse to spritz plant seedlings. My SIL also has airbrush equipment and – if push comes to shove – I may have him help give that a try if I can’t find something simpler…
Ir’s late. Night all!
– David
I don’t know how much experience you’ve got with spraying, so excuse me if I’m telling you something you already know.
I suggest running the paint through a fine sieve, or multiple layers of cheese cloth, when putting it in the sprayer. My experience with Tempera paint is that it often had “lumps” over and above it’s general graininess. Filtering may help prevent the sprayer from clogging.
I wonder if rolling the paint on is another possibility?
I want to thank everyone profusely for their suggestions about how to get smooth, consistent, tempera paint coating but, in my best Elon Musk-like “optimization-speak”,
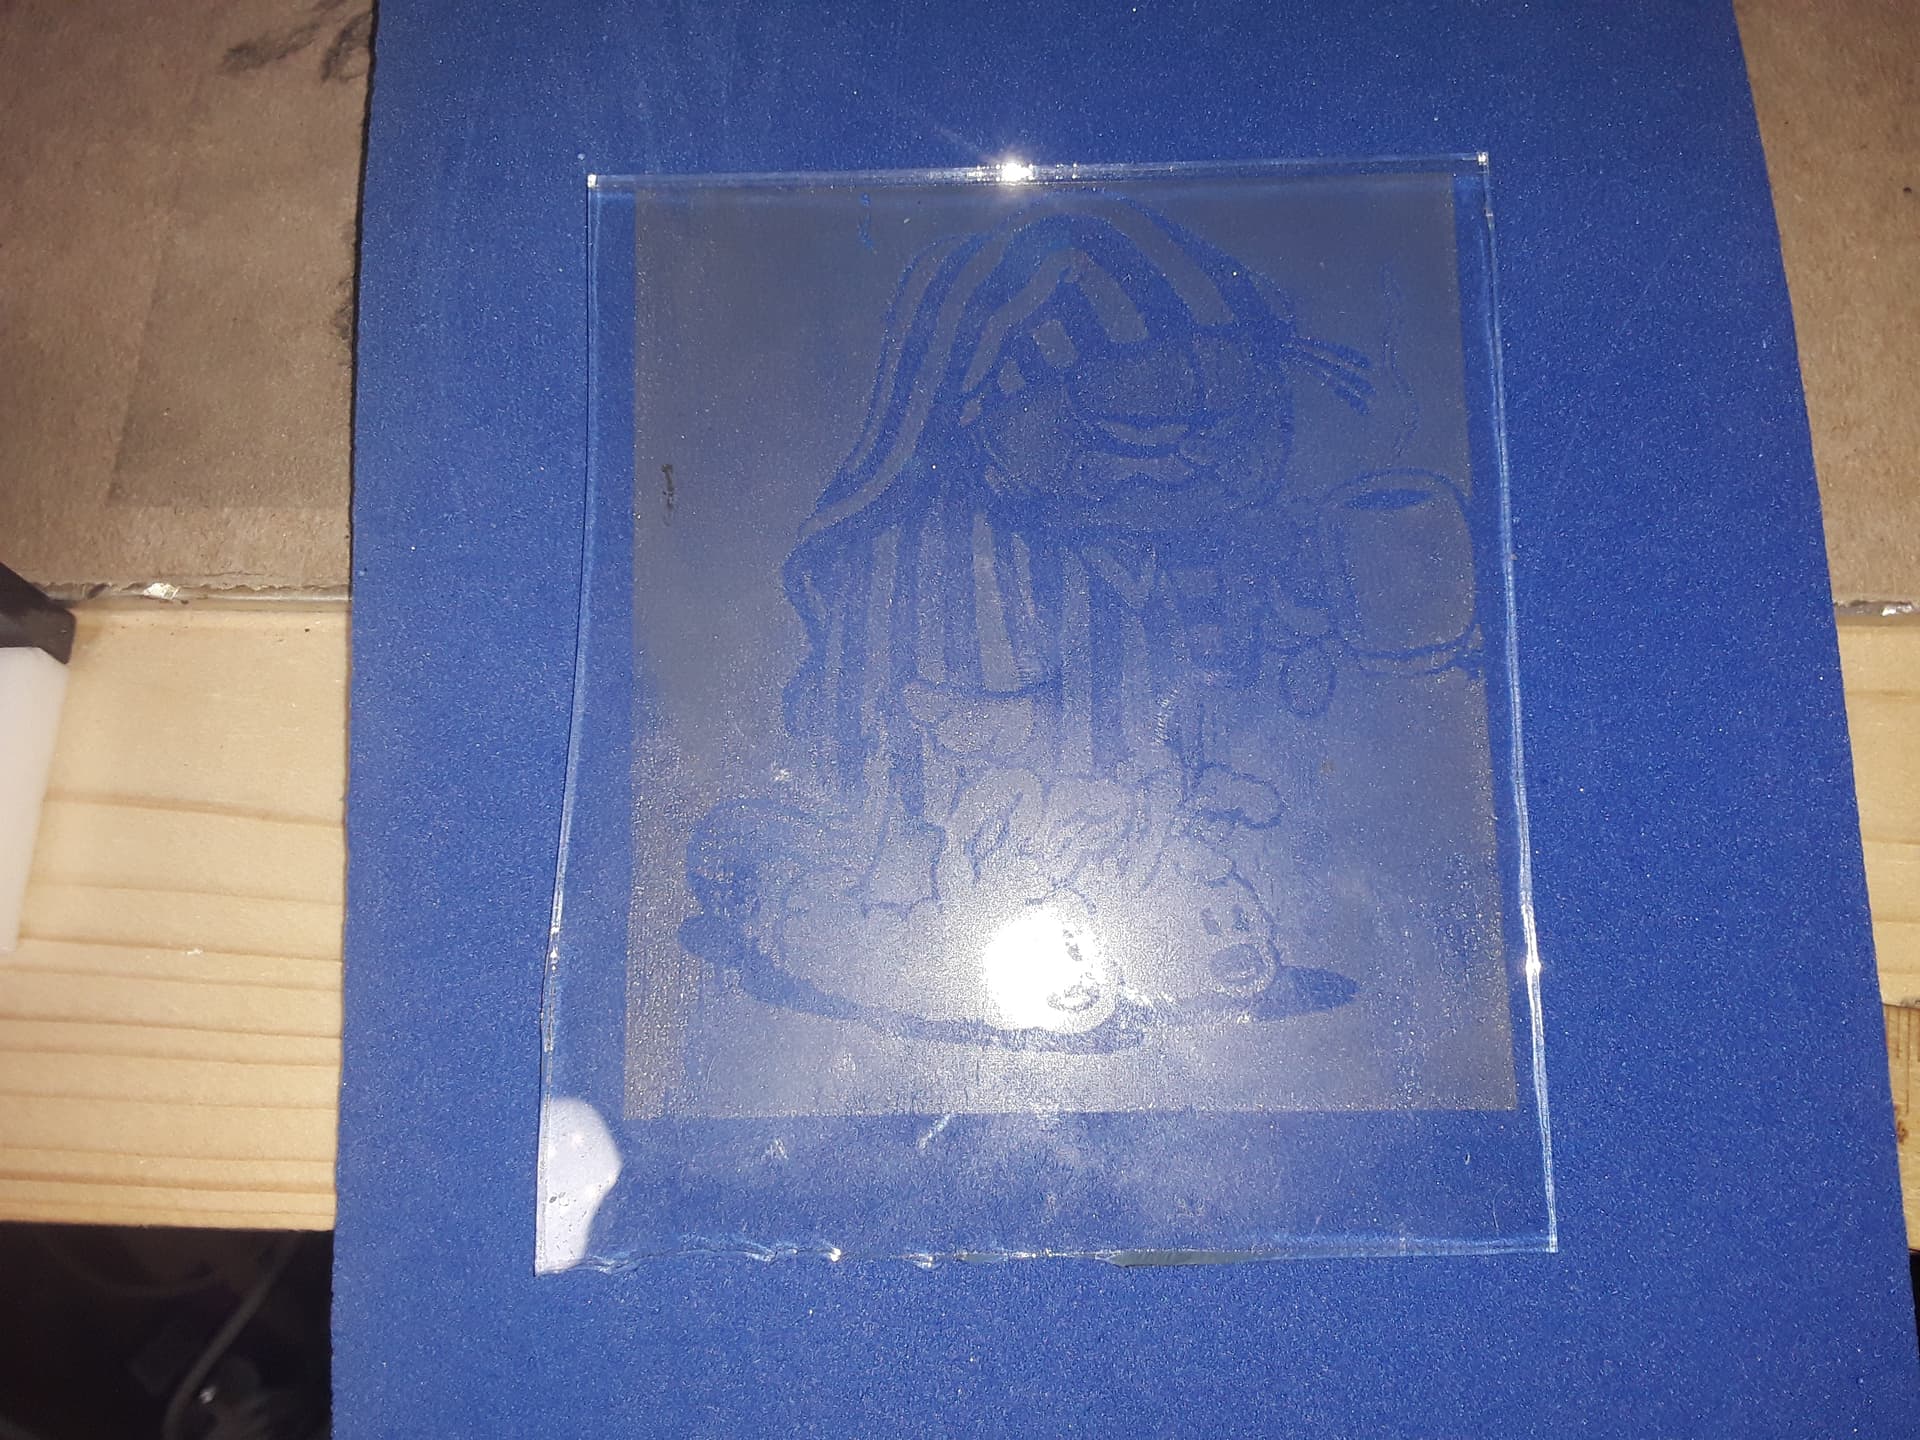
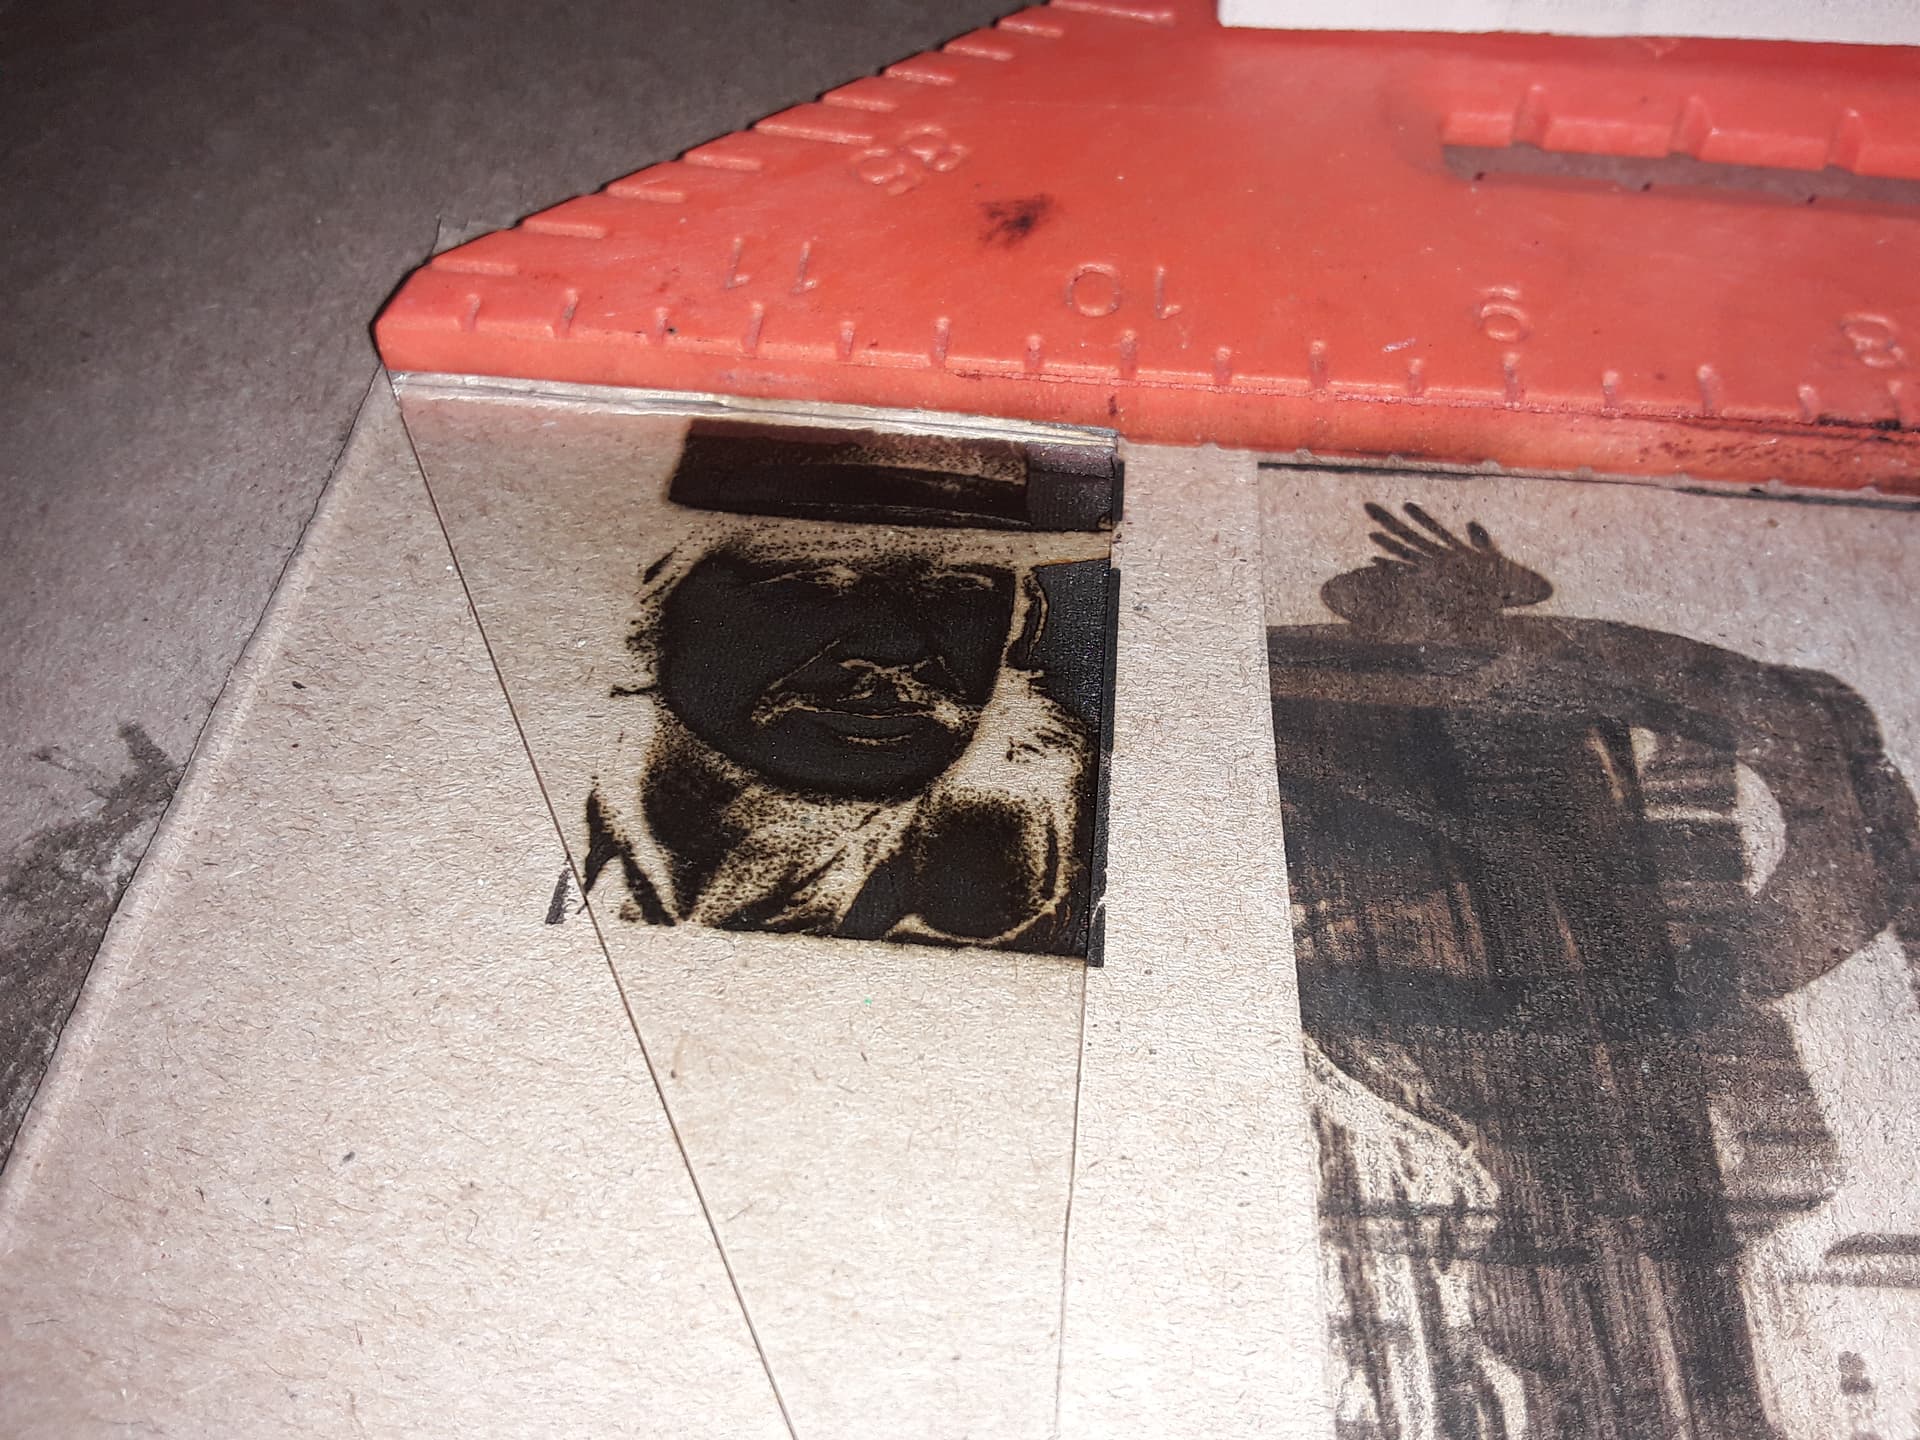
Quite by accident, I discovered one of my early test burns was actually etched on both sides of the glass…
and looking at the surface I had put the glass blank on, it was just a battle-scarred piece of cereal-box cardboard…
so I put down a fresh piece of cardboard and laid the glass intimately in contact with it… and lasered through the glass (I mirrored and inverted the image in LightBurn)…
the trapped smoke/soot/gases/residue of the lasered cardboard left on the bottom-side of the glass resulted in the mirrored image …
which, when washed with dish soapy-water, revealed a quite nice etched image…
So, it appears the tempera paint isn’t necessary at all… just a dark-colored backing in close contact with the glass. I’m pretty sure it’s the laser energy locally-heating the backing and ablating chips from the glass as it travels. Maybe black construction paper would be better than the plain brown chipboard.
Or, hey, maybe I could paint the chipboard first… with black tempera paint! 
– David
Give you something to do with the 2 litter bottles of black paint  . That was a cool find
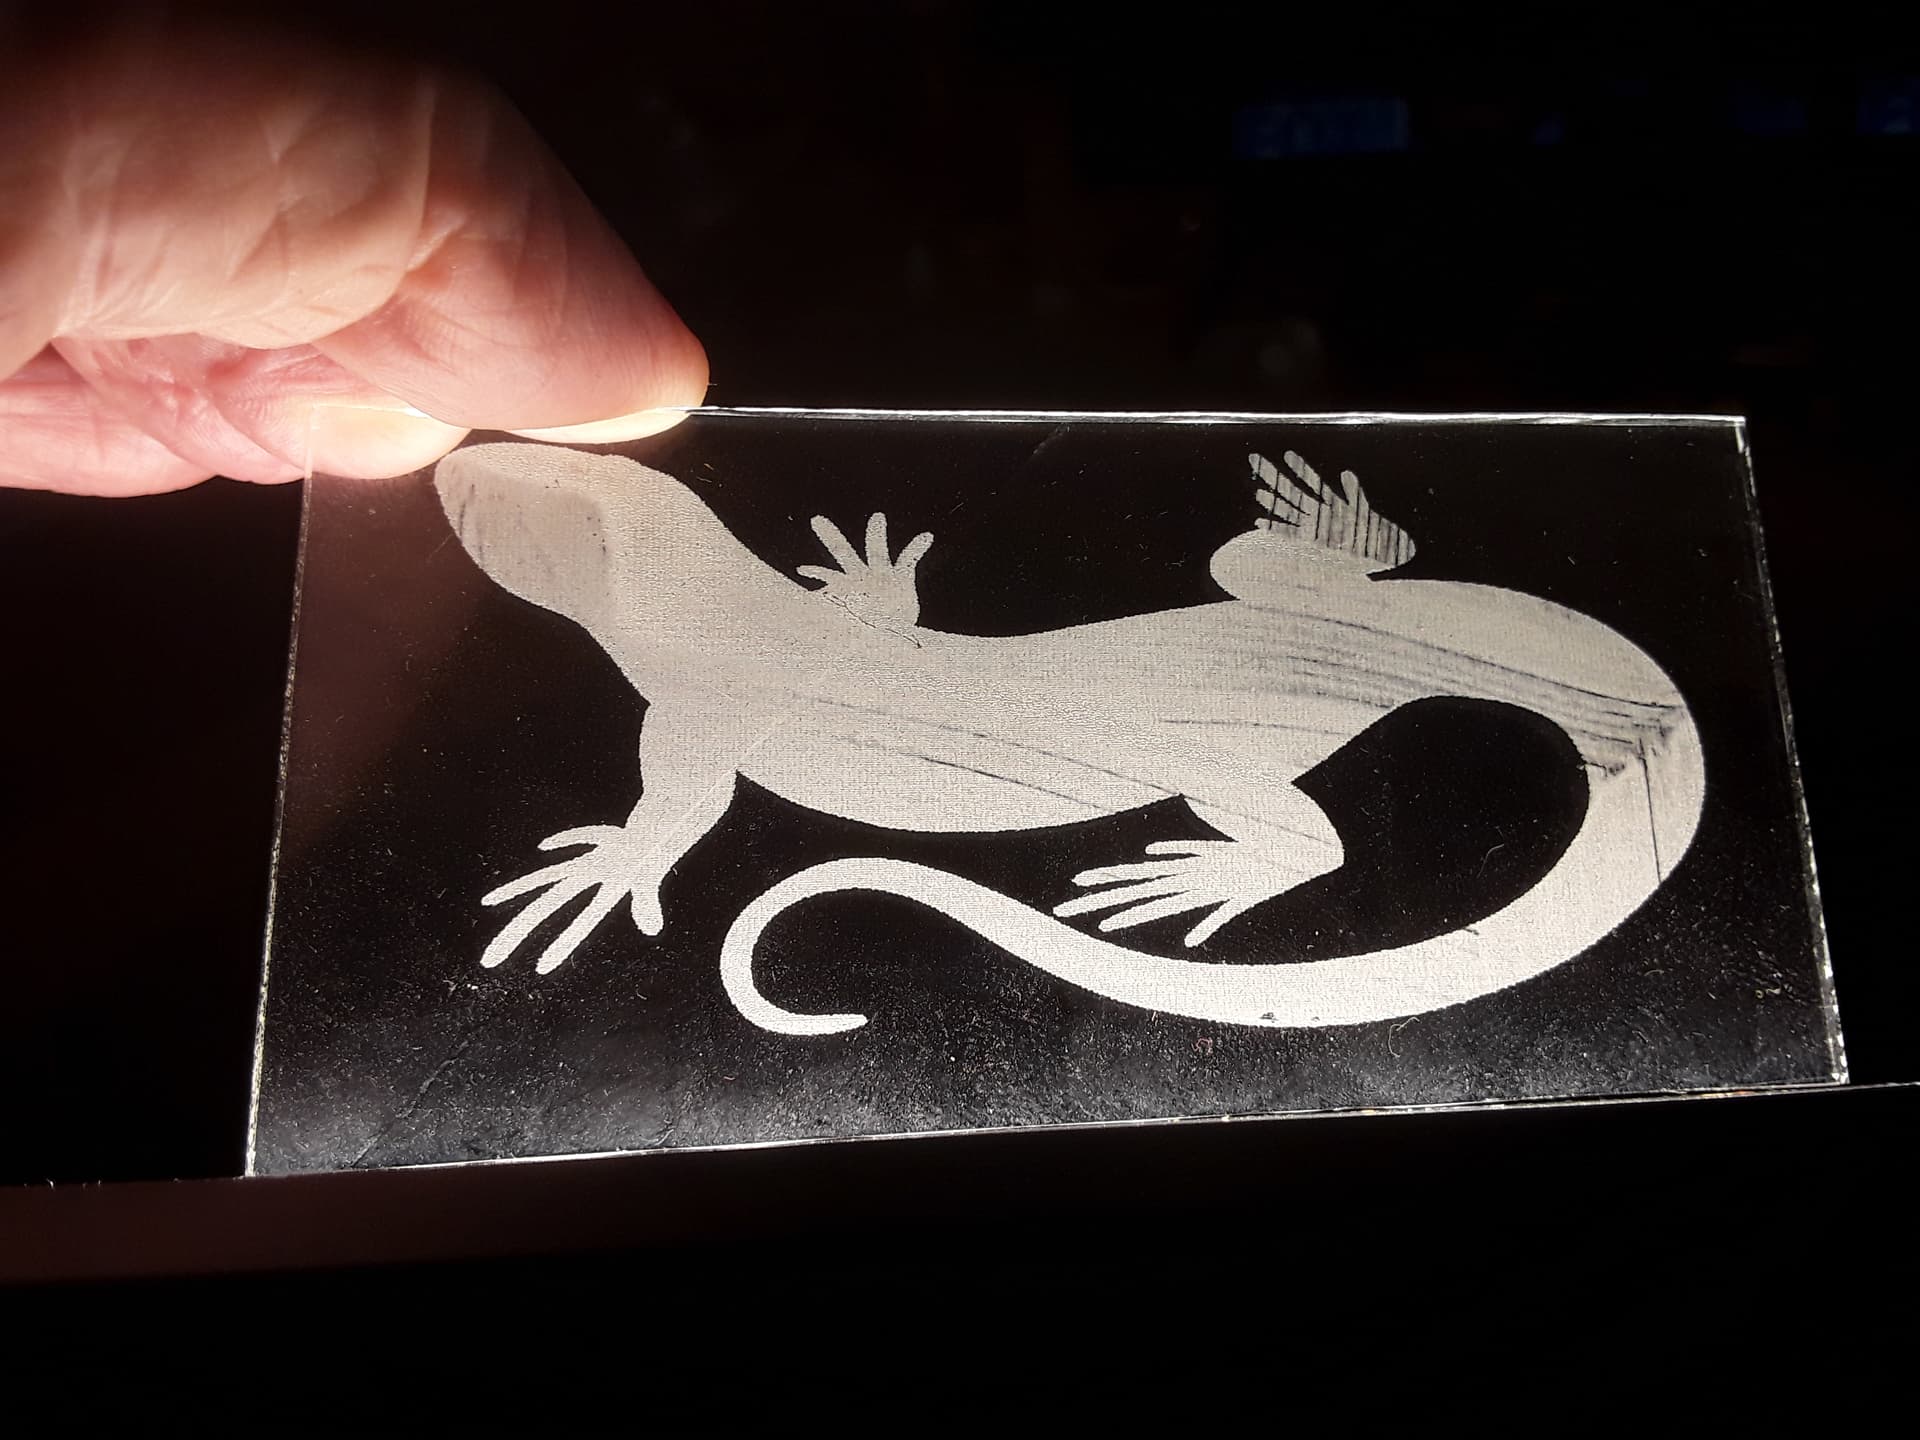
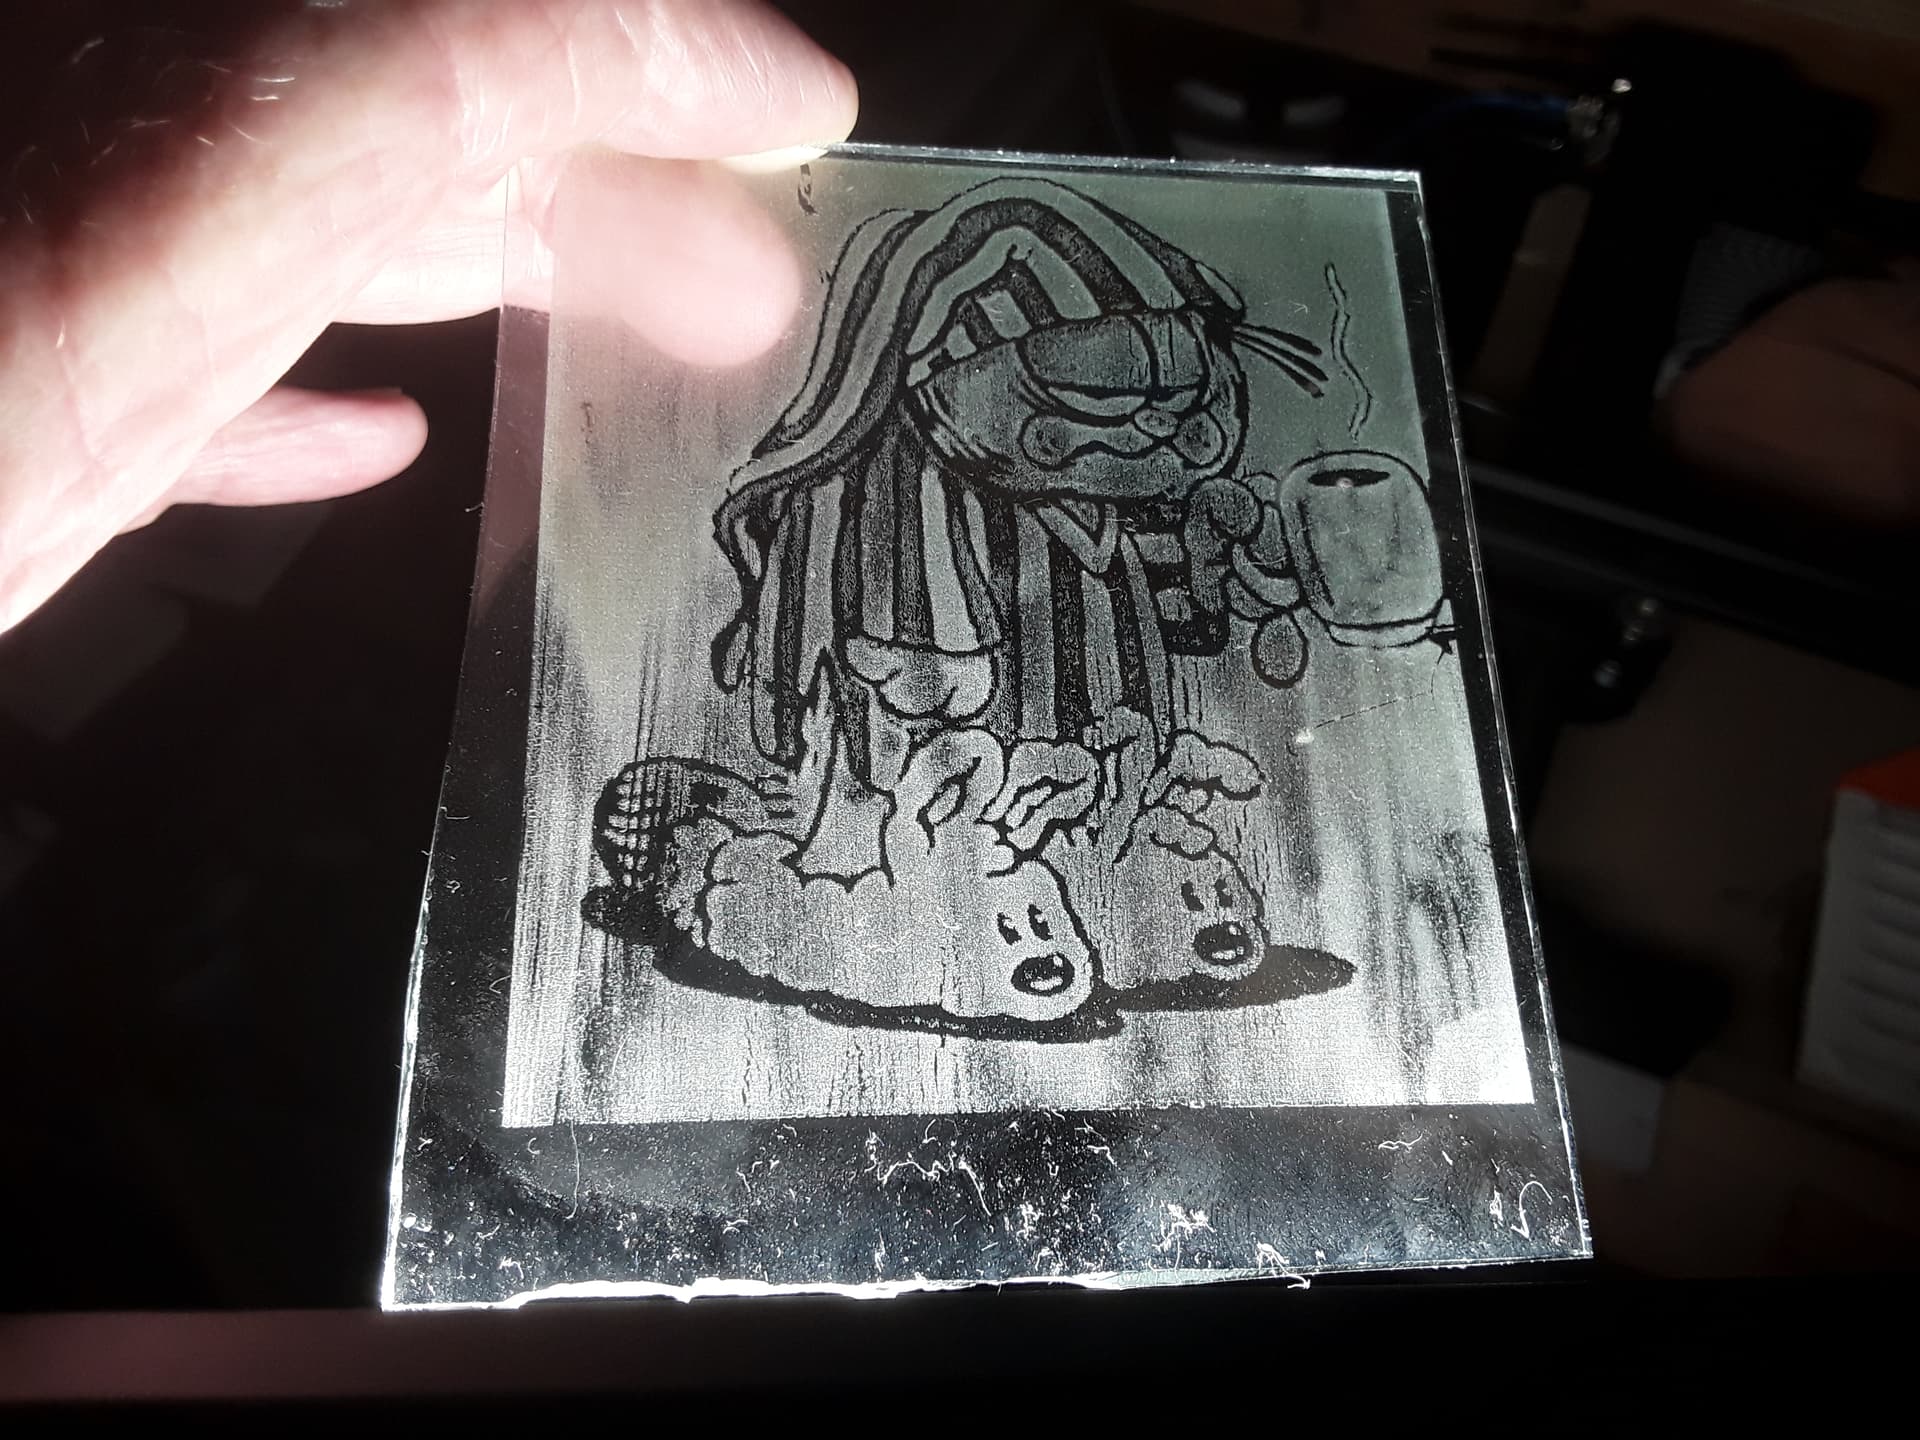
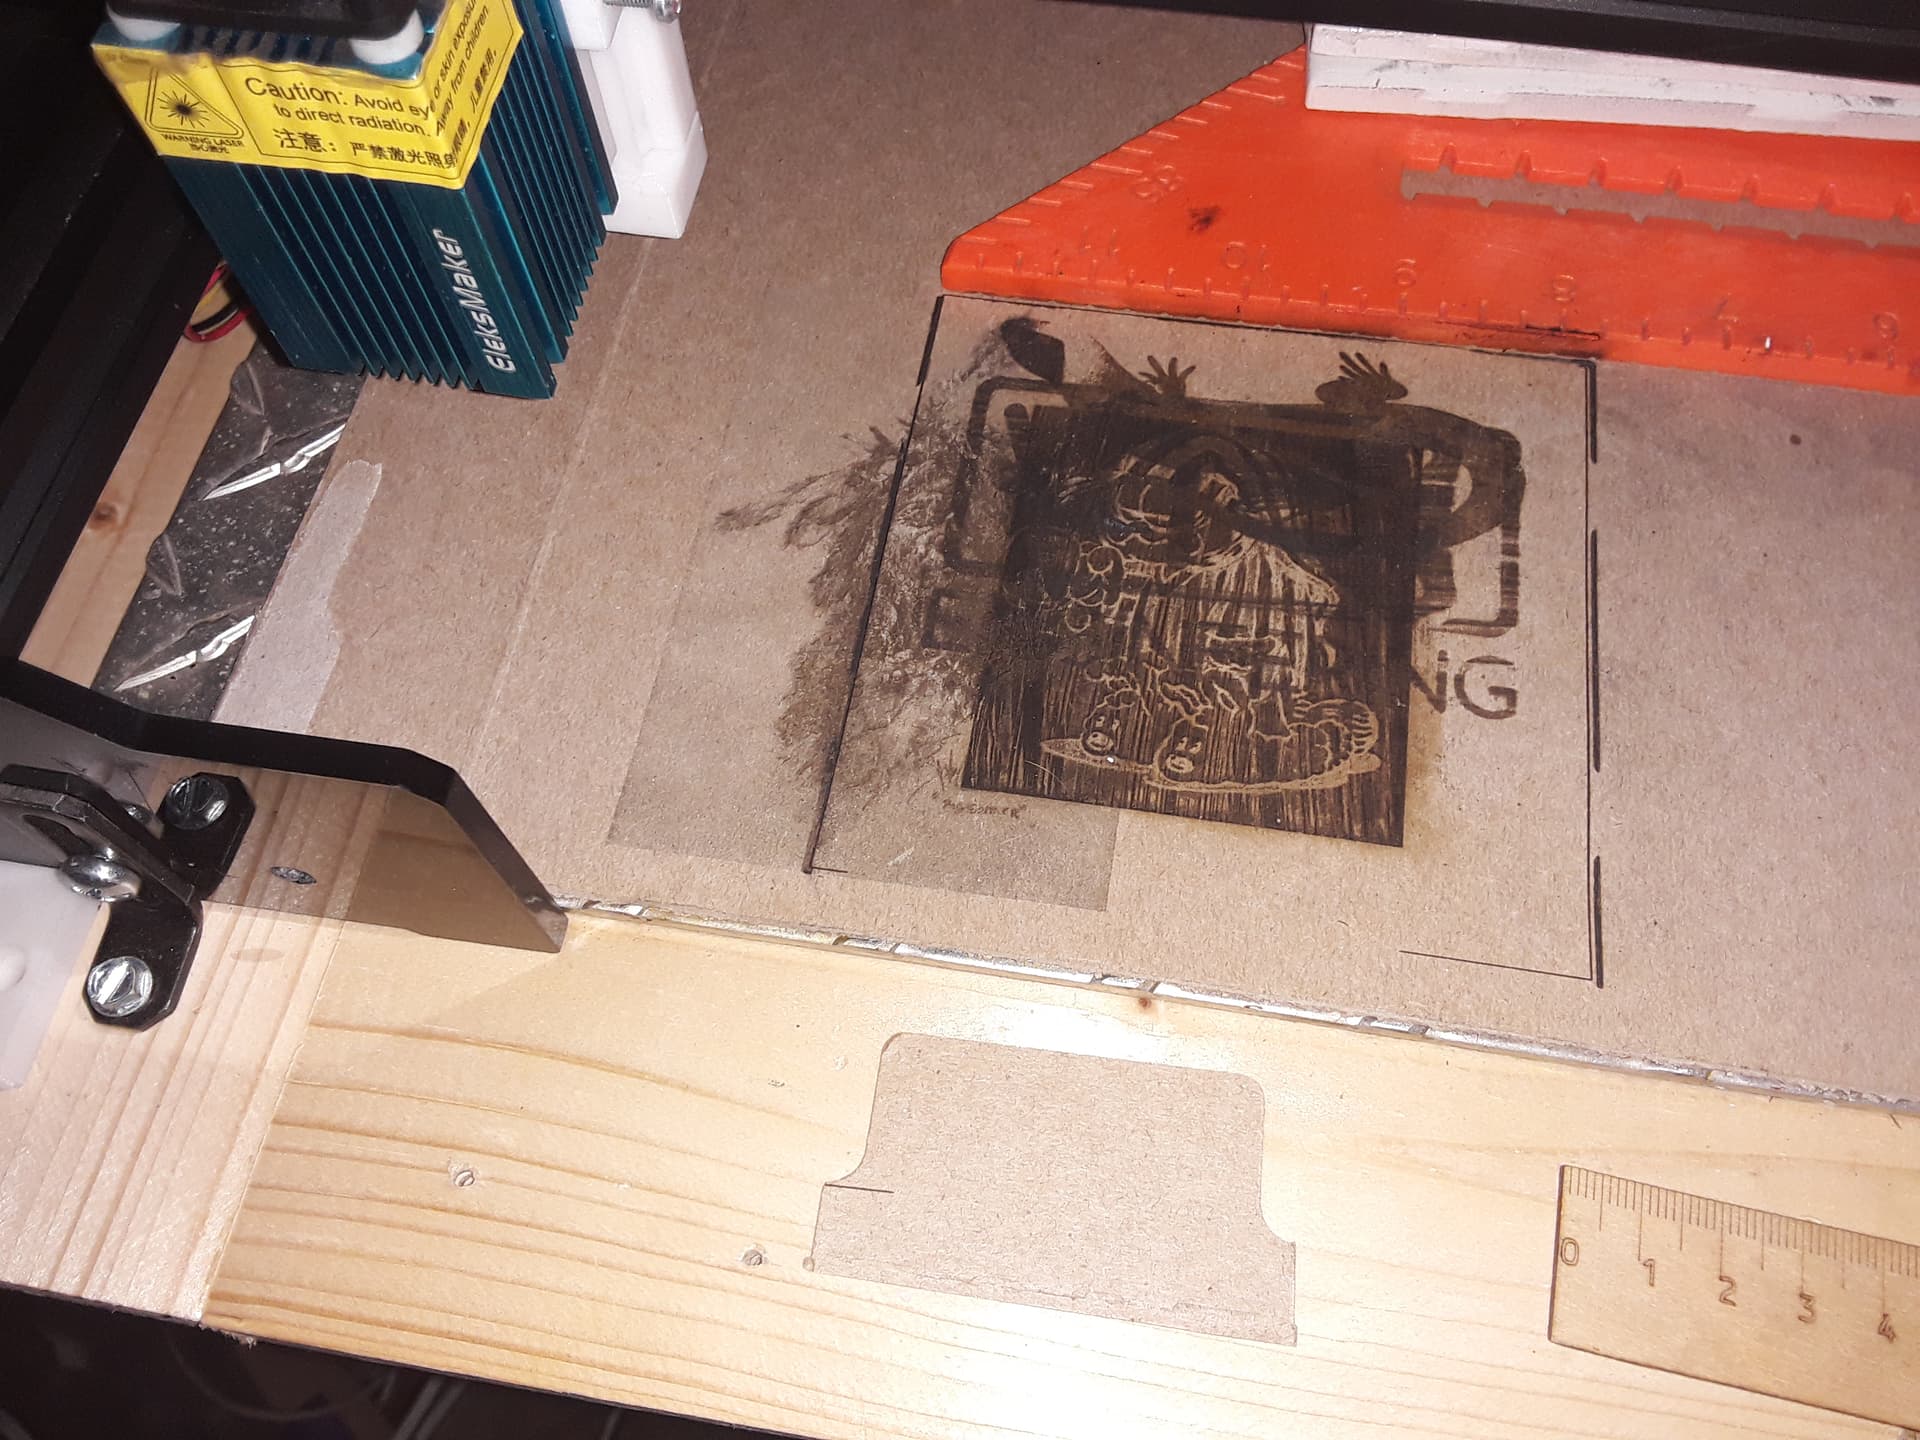
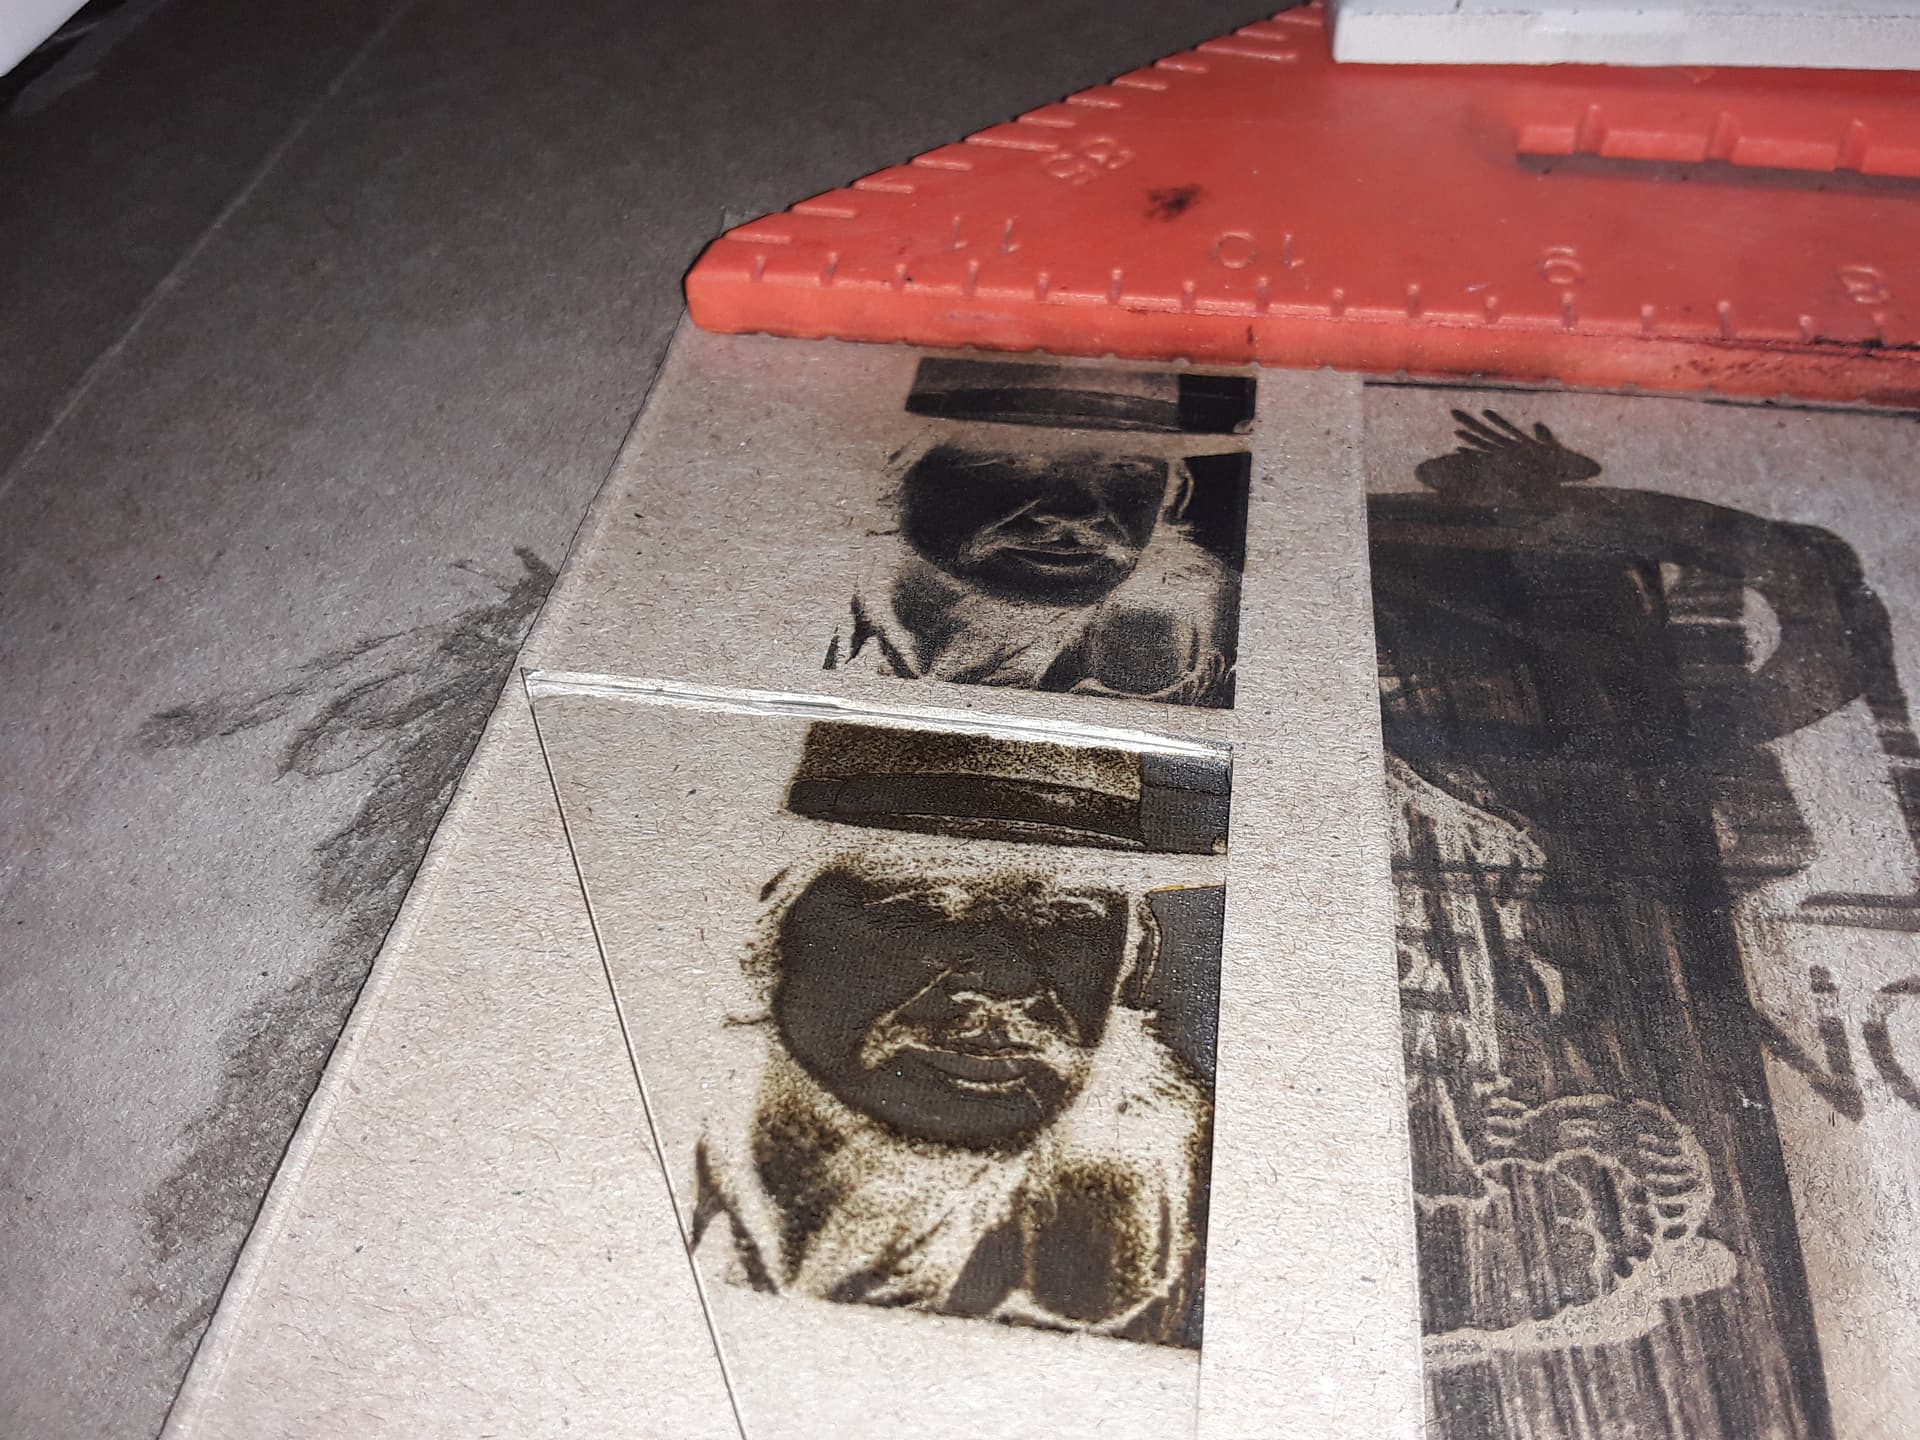
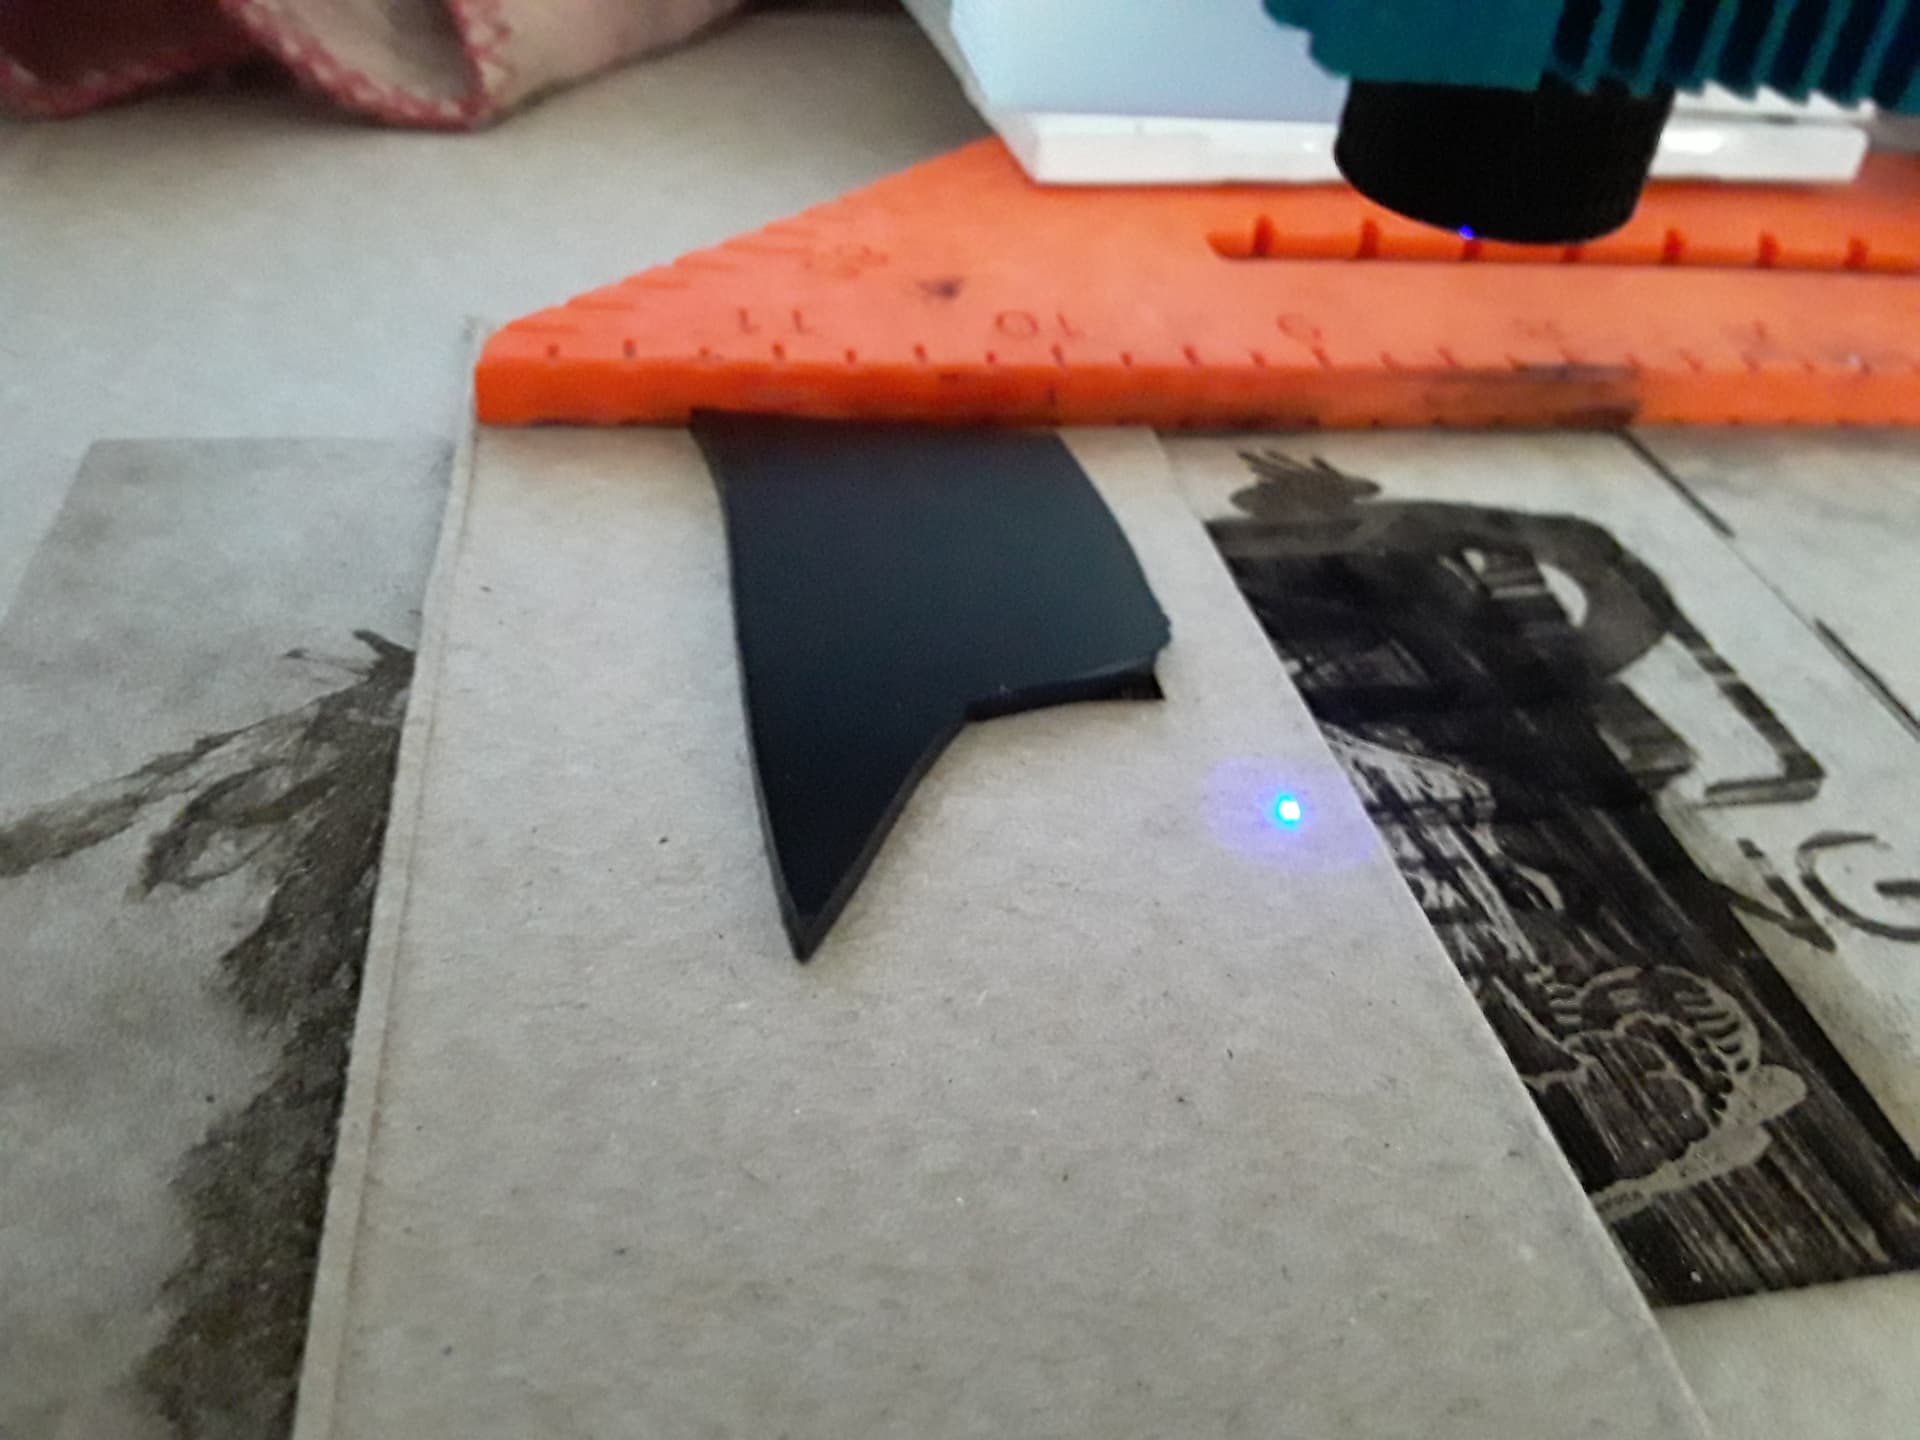
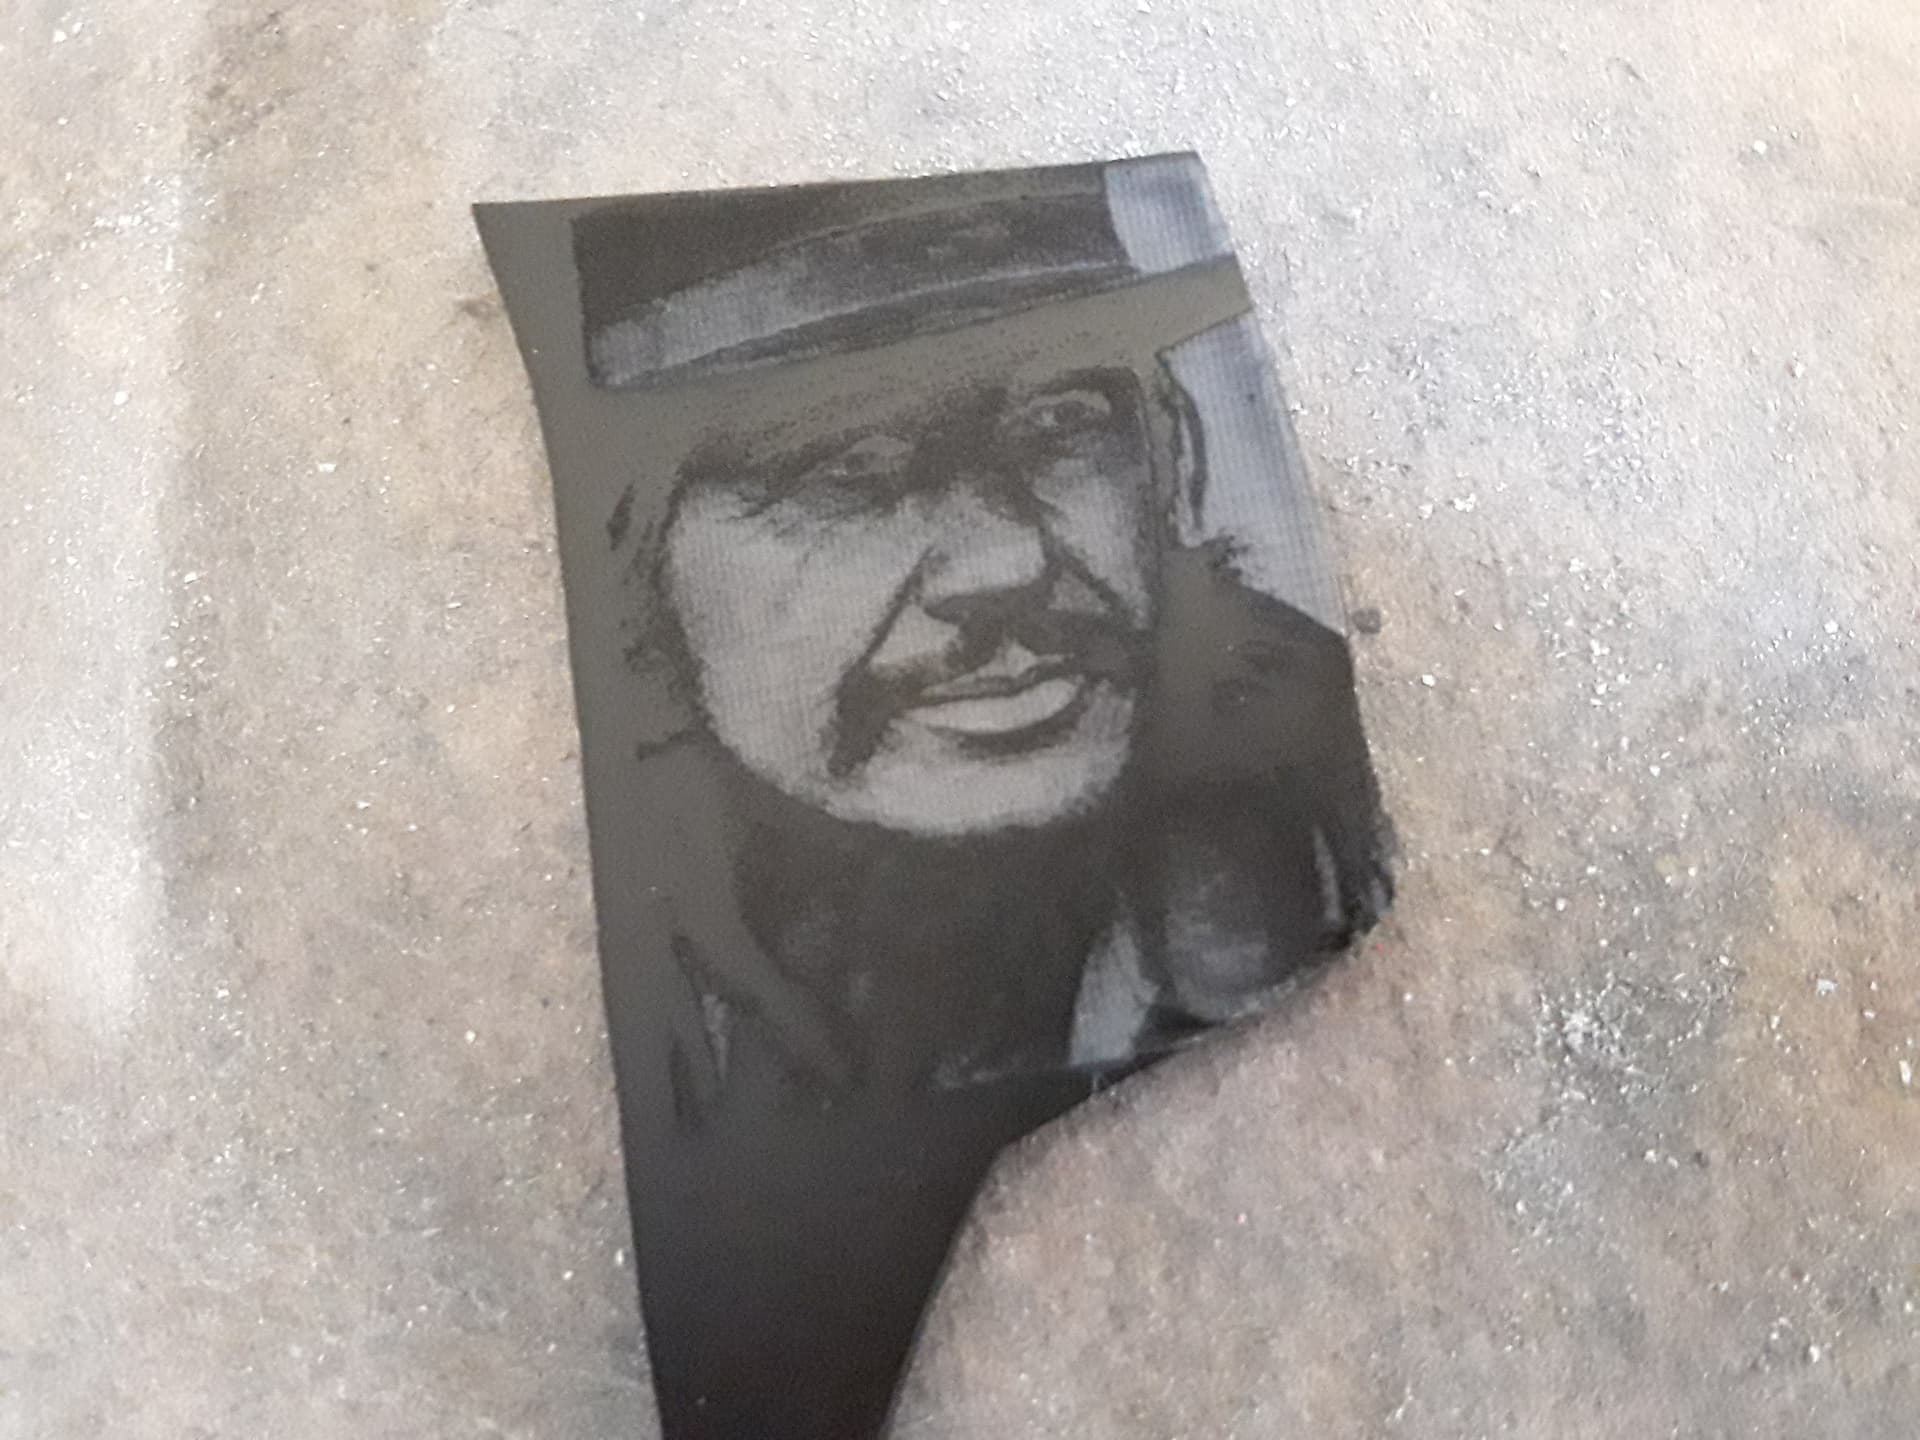
Found this unsavory character hiding on my hard drive…
and decided to immortalize him on a sliver of glass using my new-found method…
focused at surface of chipboard, 1000 mm/min, 90% power, 339 dpi… and looking pretty rough…
remember to mirror and invert the image… we’re etching the backside, which will become the frontside…
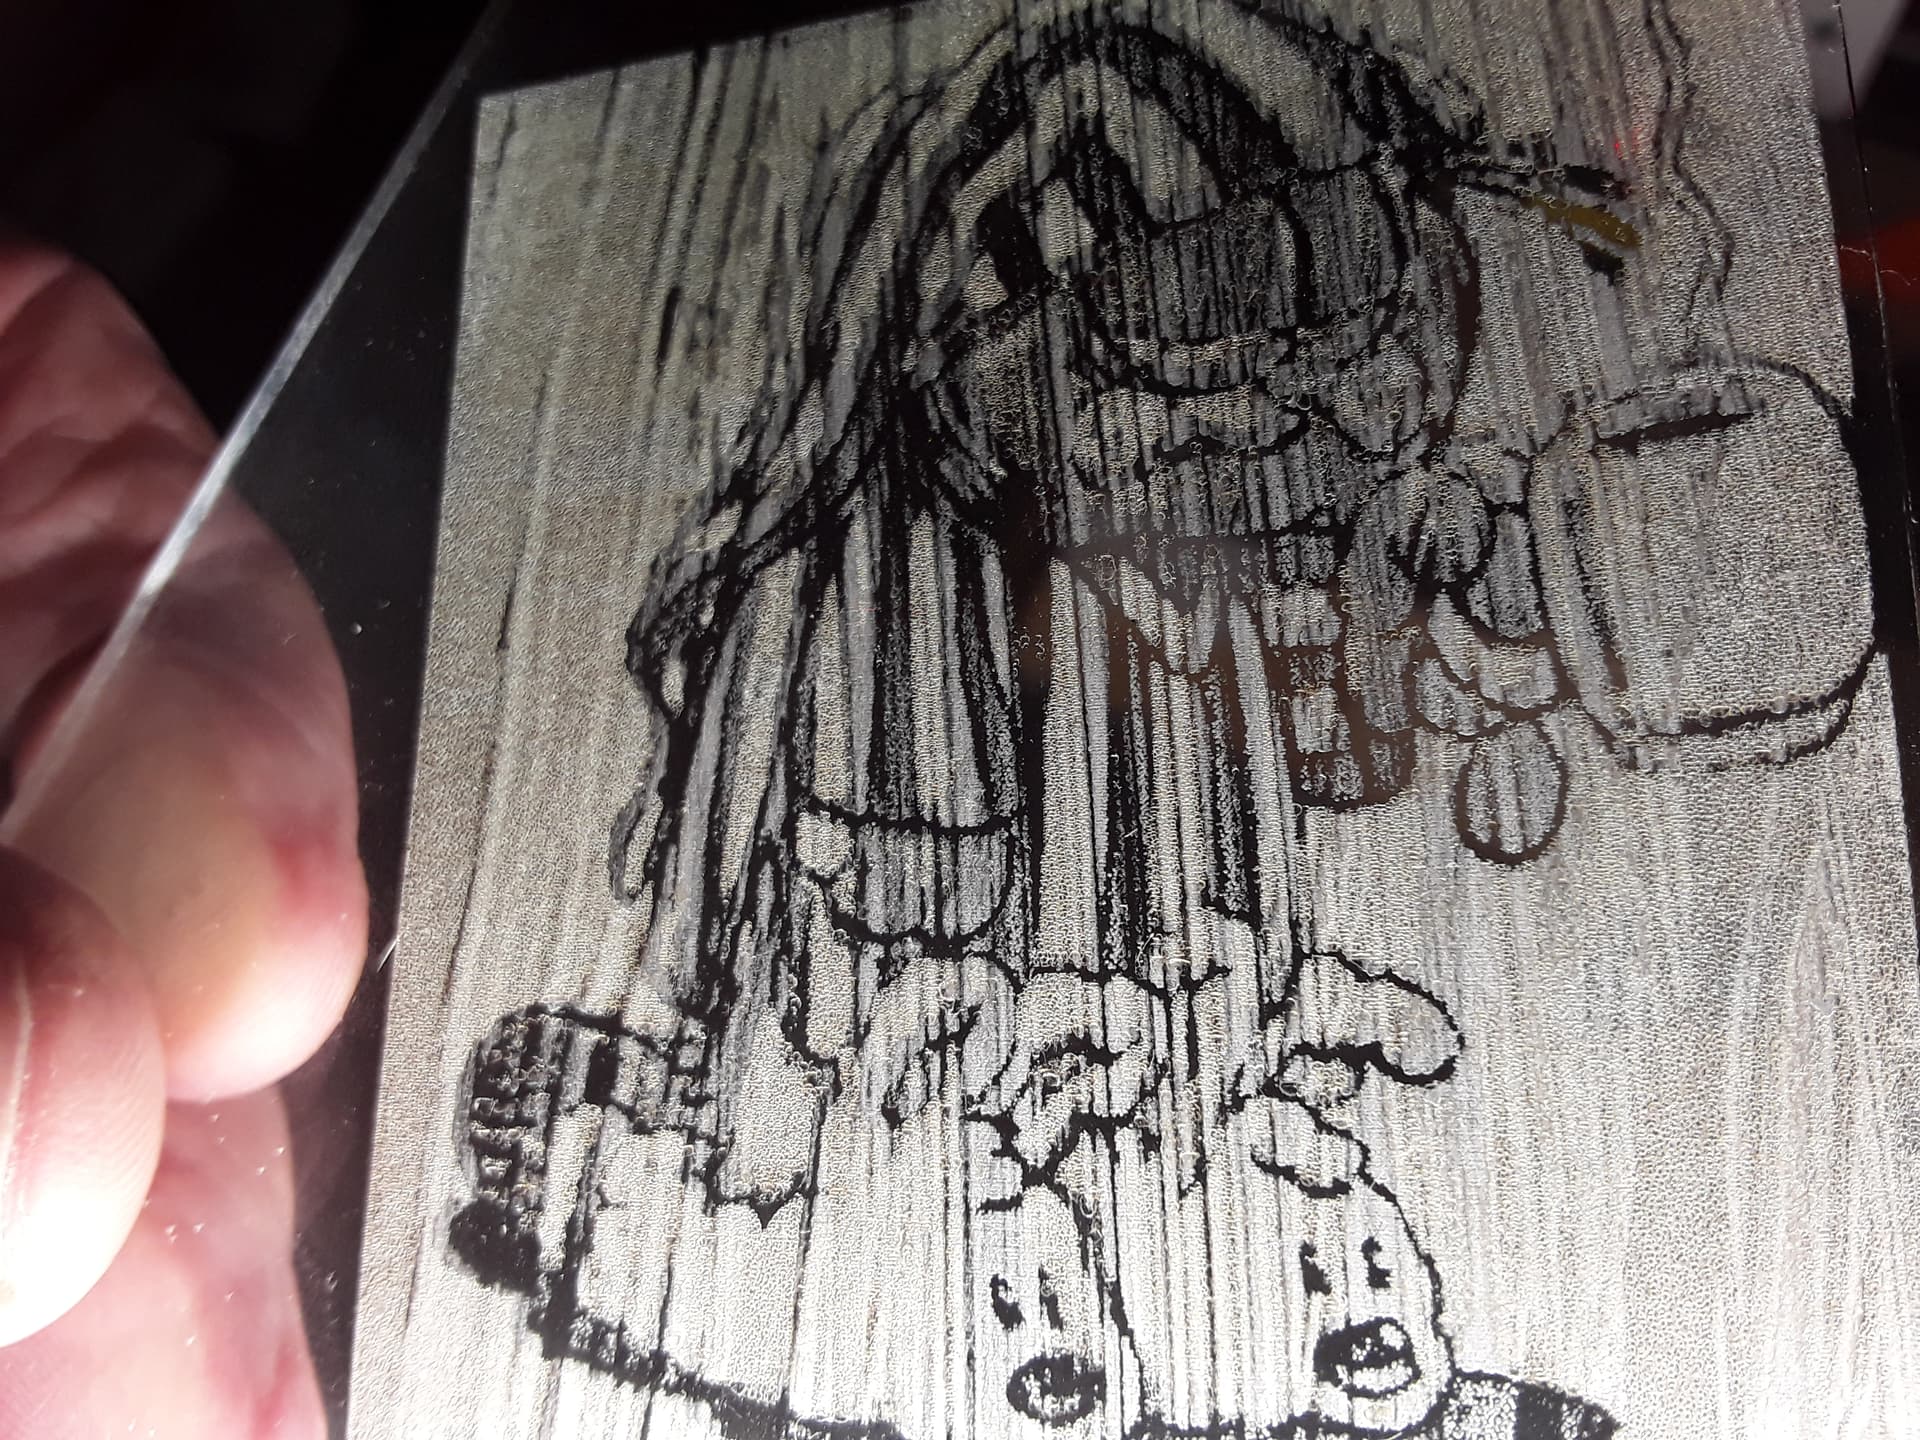
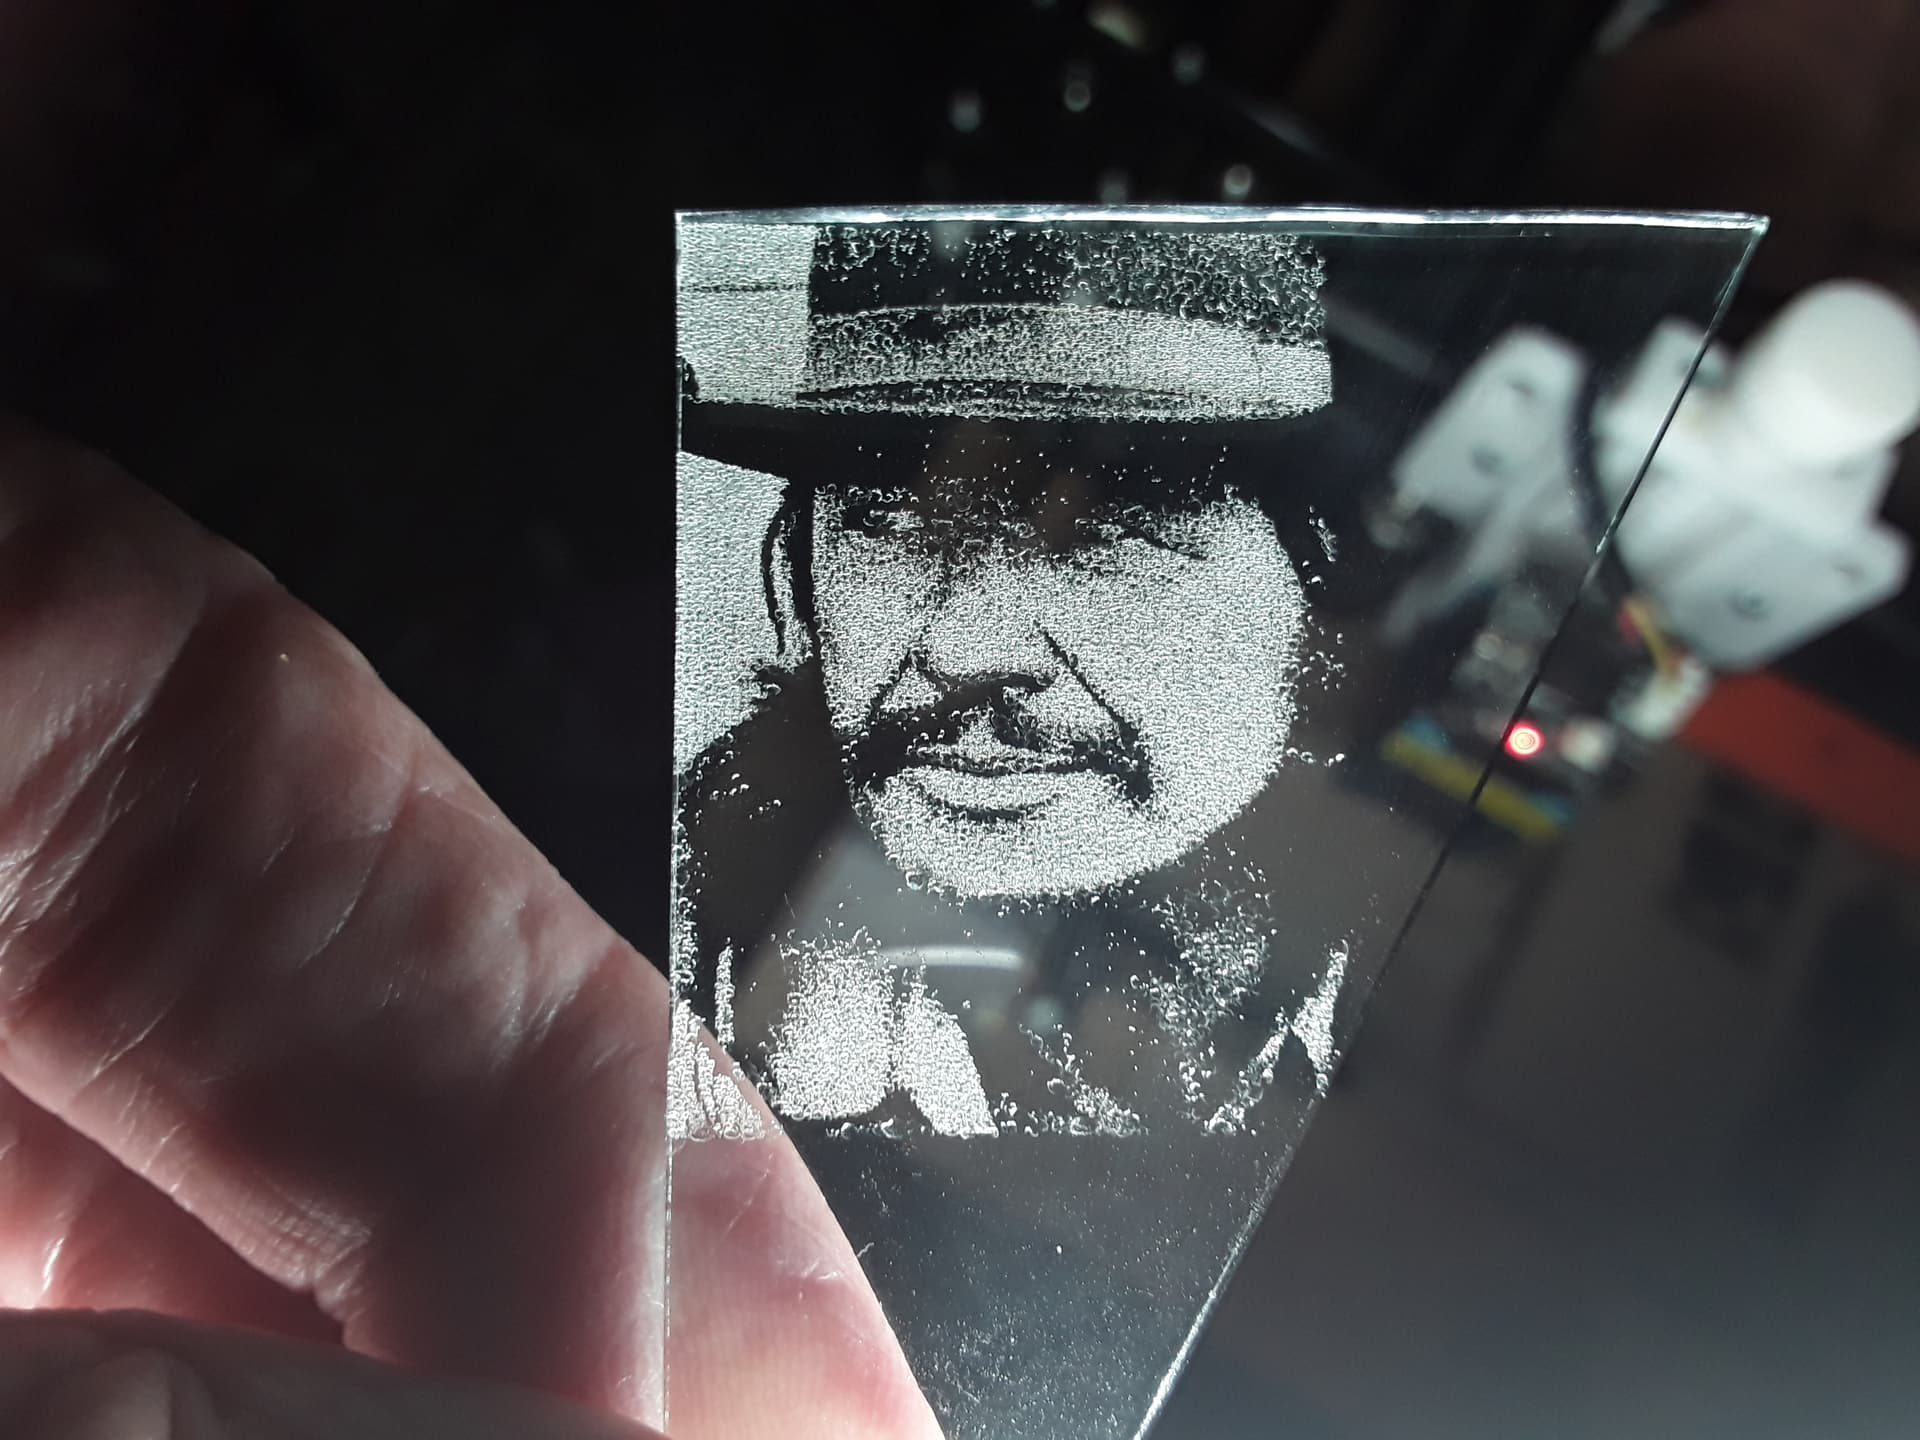
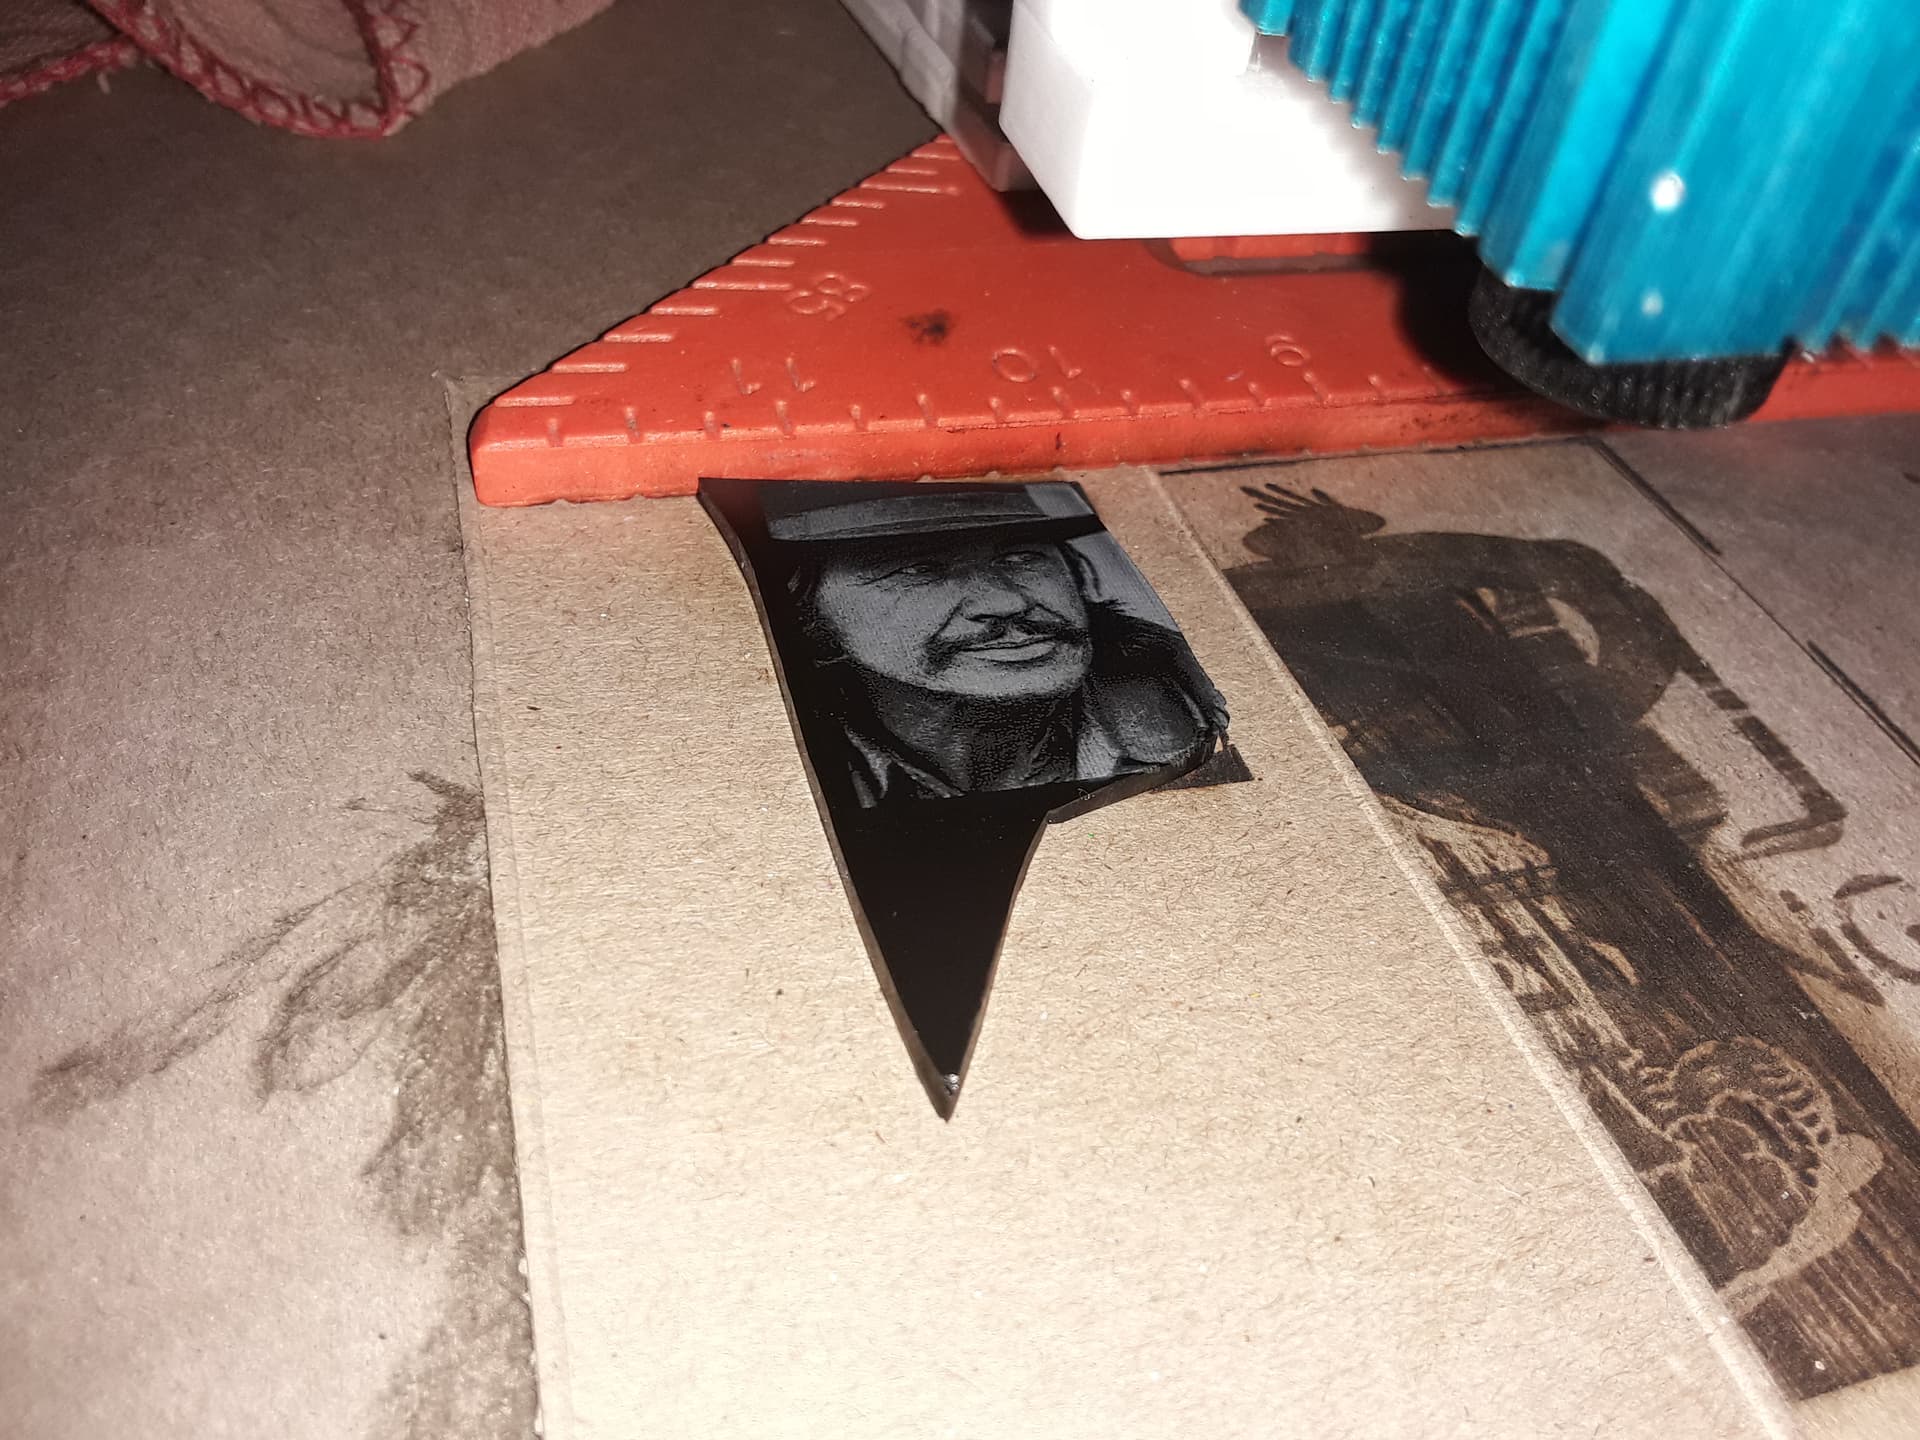
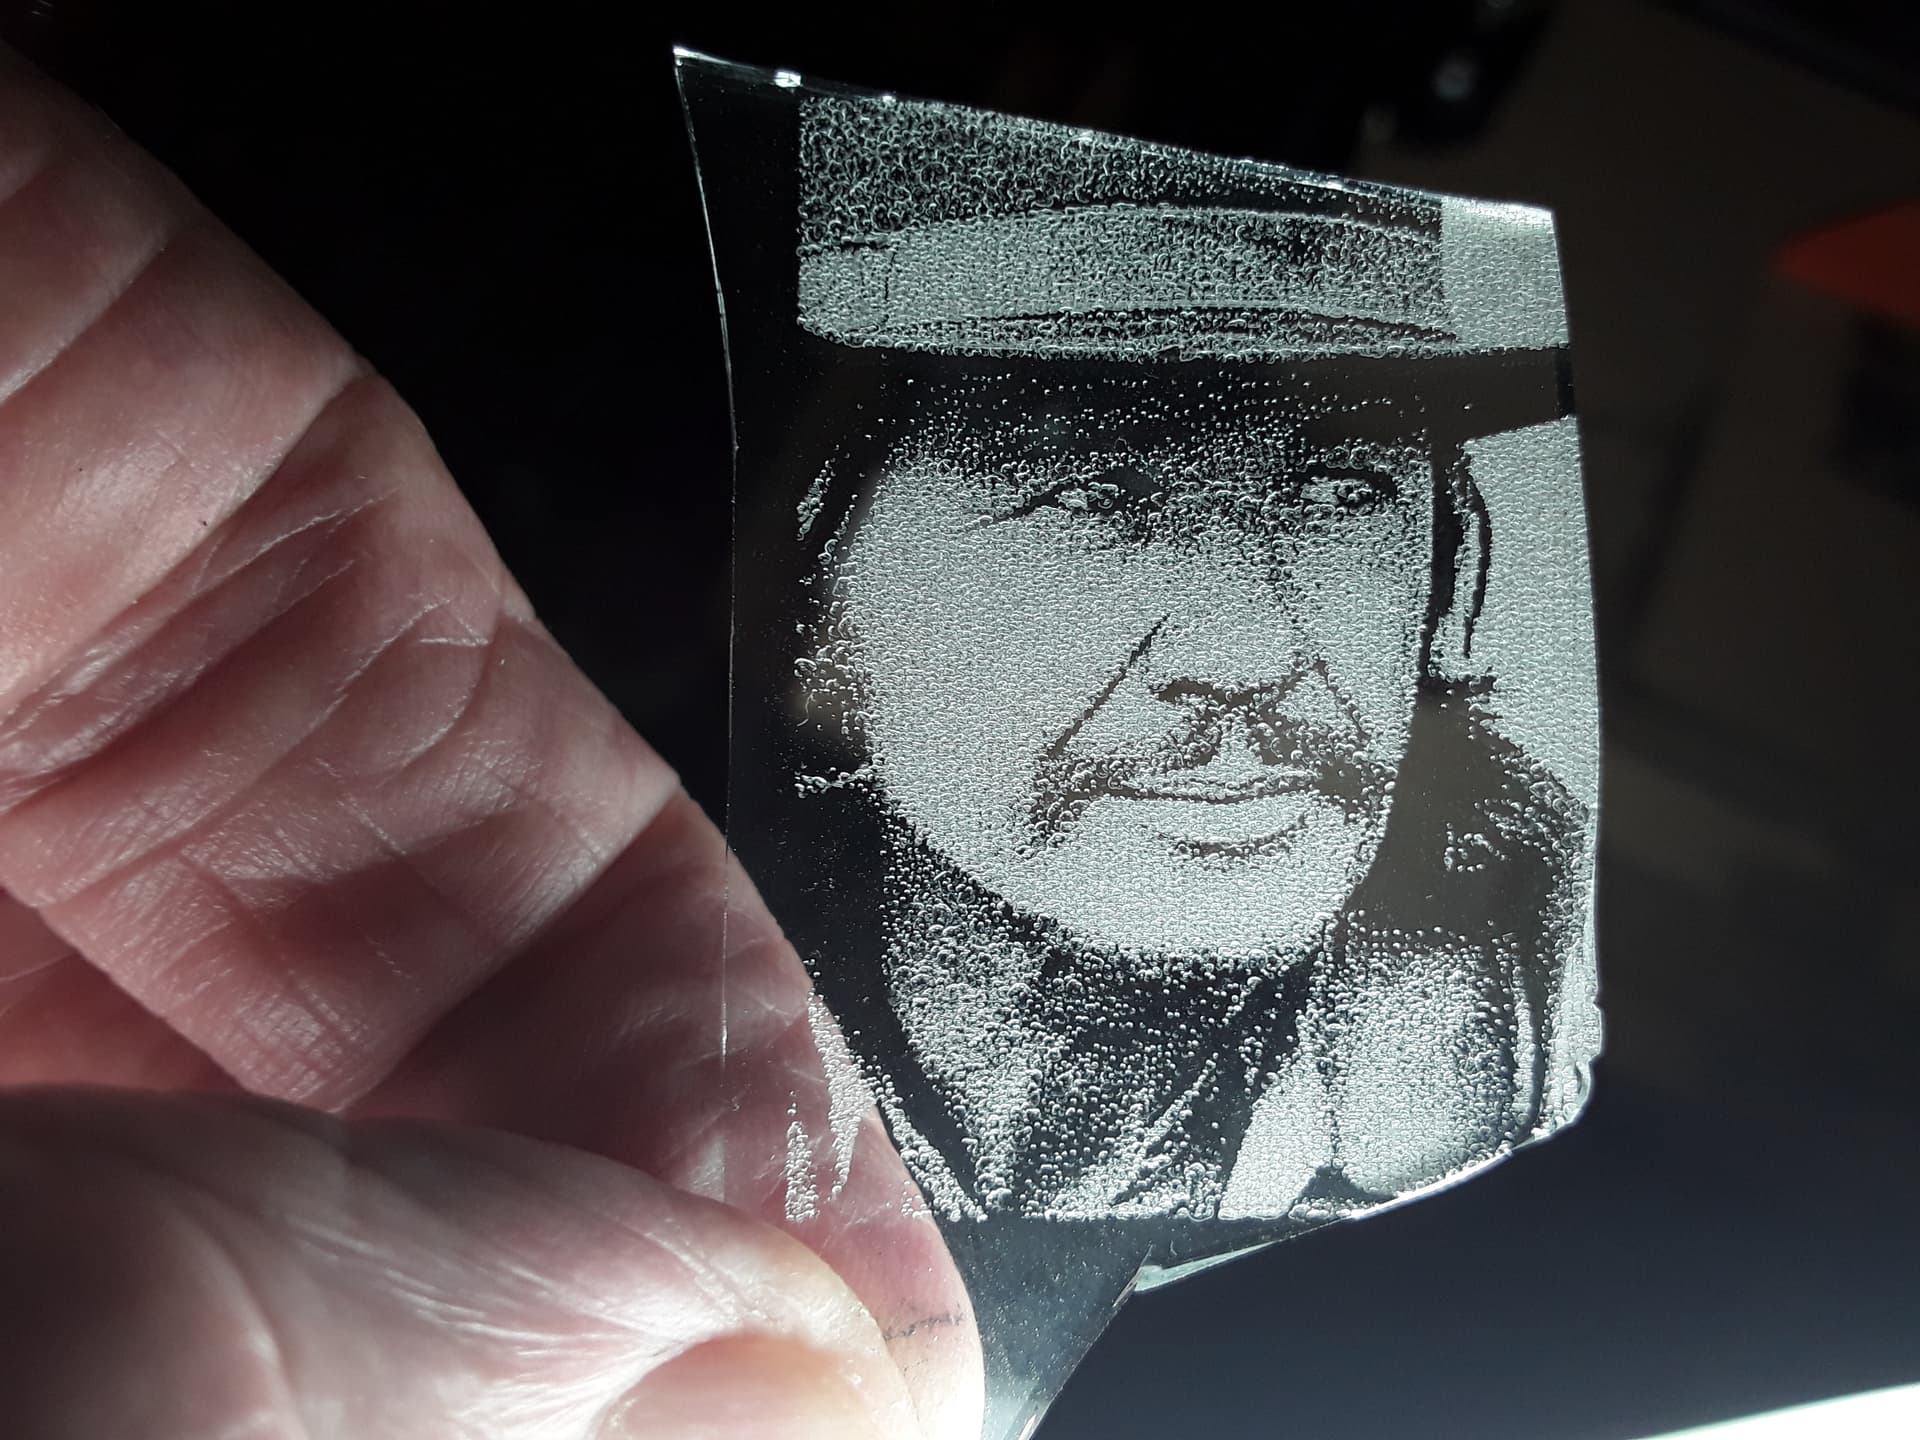
Washed in soapy dishwater and edge-lit…
It turned out far better than I expected… he’s almost recognizable.
He looks familiar… I’m pretty sure I’ve seen him someplace 
– David
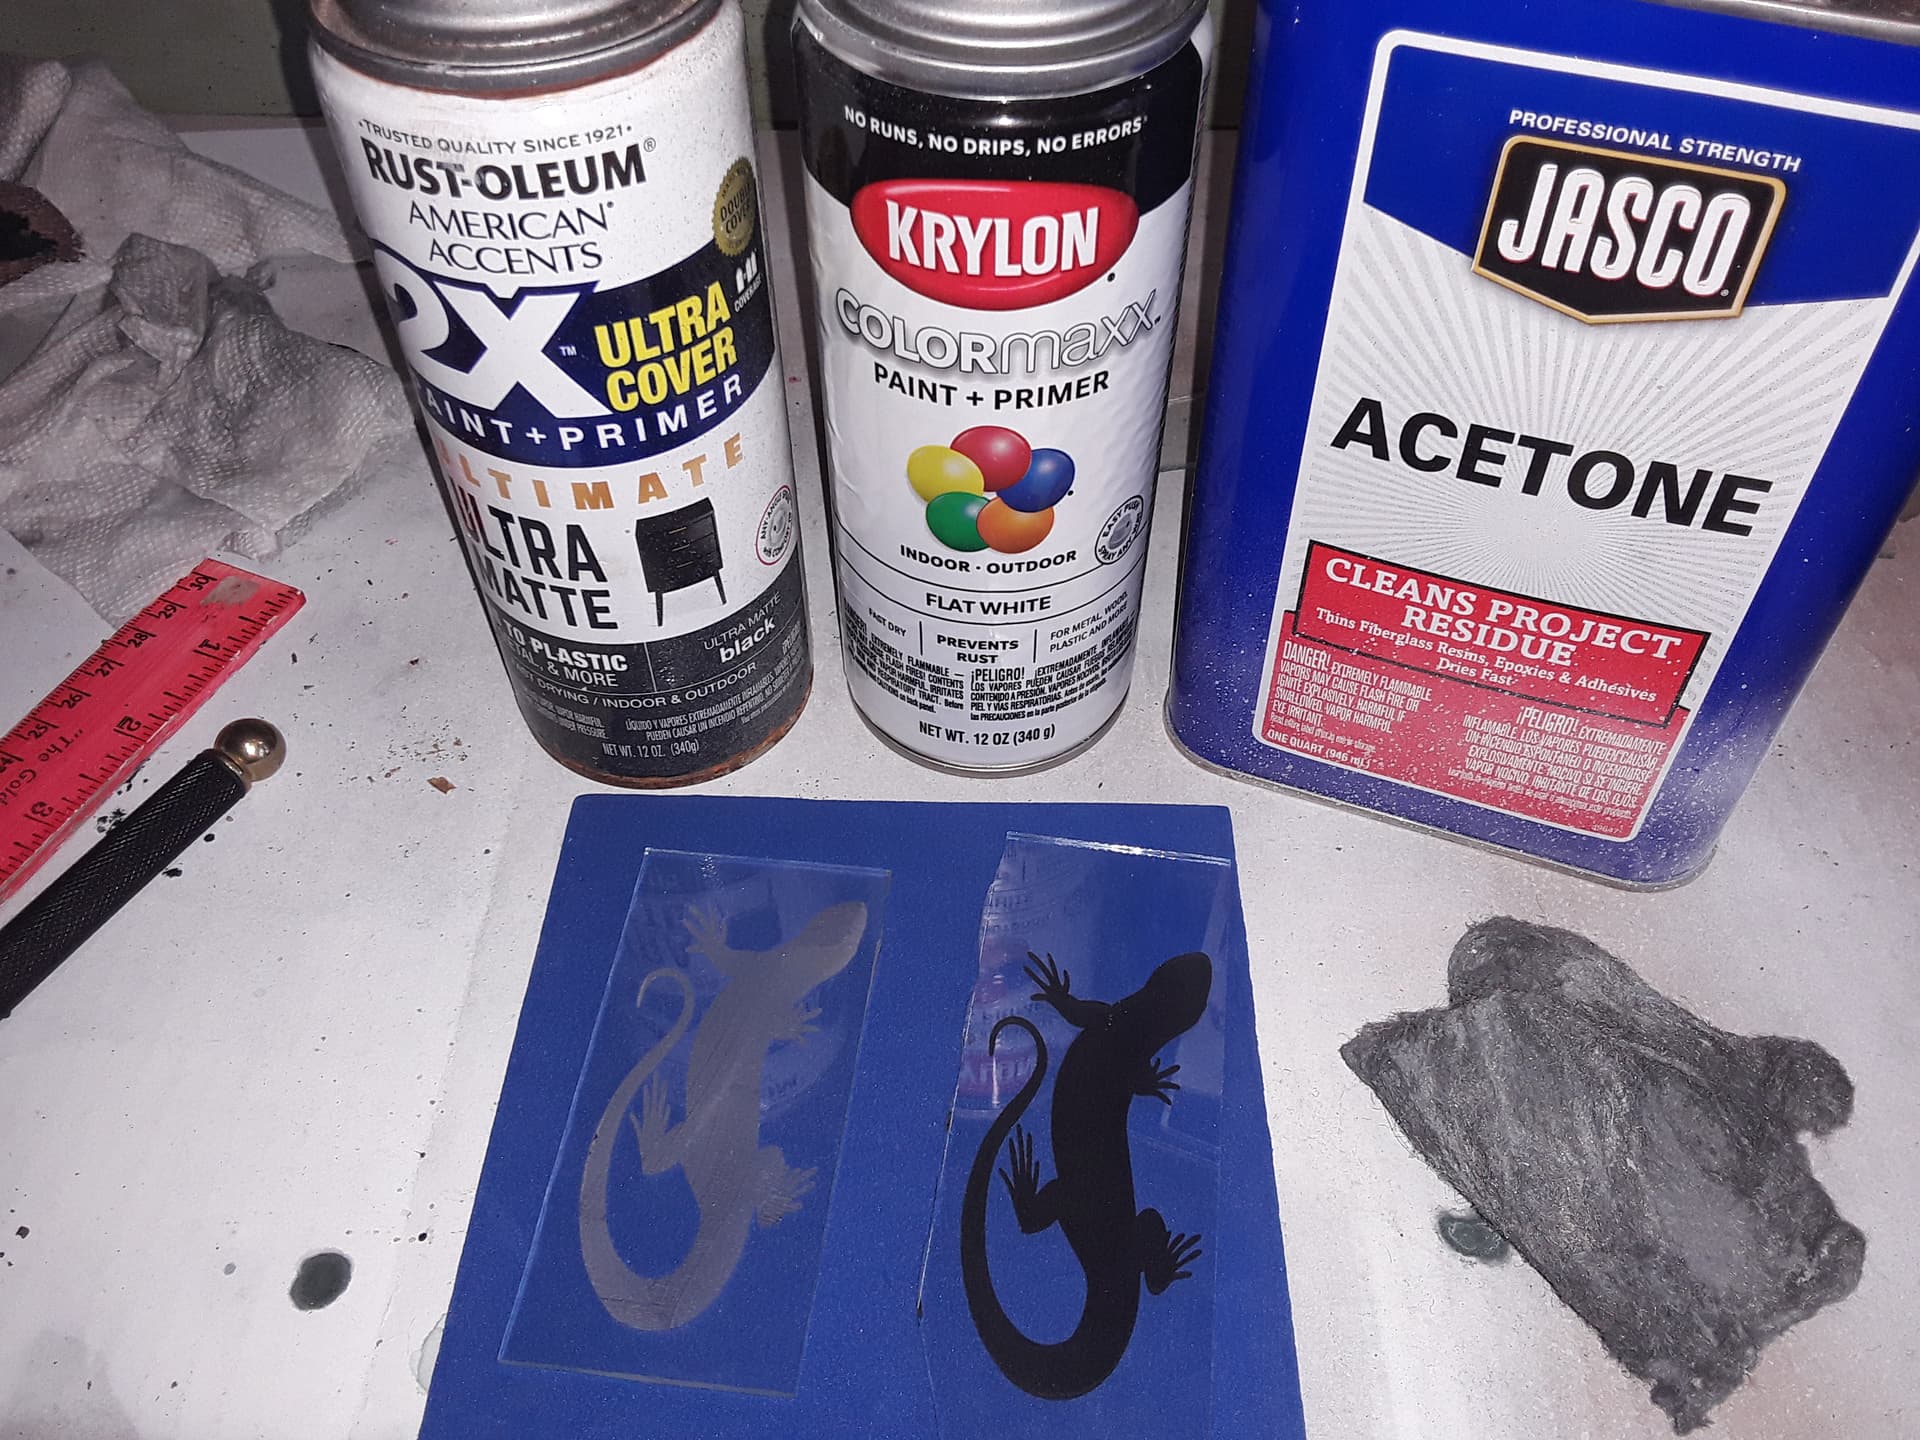
Alright… feeling a bit foolish, bypassing the most obvious candidate, to chase so many rabbits but the “candle soot” idea – and lack of handy soot-supplies – led me to pick up the can of Rustoleum ultra-matte black spray paint I already had on hand and quickly coat a piece of scrap glass.
Focused on top surface of glass…
after lasering…
and before complete paint removal with acetone…
then edge-lit…
no paint (top) vs flat-black spray paint (bottom)…
Ultimately, it appears IMHO the flat-back spray paint works as well as the “thru-the-glass, no-paint” (and tempera paint) methods I’ve tried… and is the same simple process I use for the NWT method for ceramic tiles and glass. All settings and process steps are the same.
Just use different color spray paint for either a fused-black embossed image (with flat-white paint) on white tile or frosted-white ablated image (with flat-black paint) on transparent glass.
Who’d a thunk it?
– David
I don’t have a laser and who knows when/if I will but … I have to say this thread has been both very entertaining and educational! Well done!
David,
Do you have any other colors of paint? I wonder if anything strange would happen with an orange or red. I would suspect it wouldn’t. As you’ve mentioned, the chemical in the white paint is what “burns” the glass/tile and makes it black. I’m suspecting that the black paint creating the white emboss is actually b/c of small fractures in the glass as the laser heats up the black paint. I could be totally wrong though. I just wonder if the only options are black and white.
This does bring up an interesting idea on glass. Can you paint it white and laser etch it to get the black. Then, clean it off and paint it black and laser etch an inverted image to make the white and get a more dramatic effect? I’d think this would only be helpful on glass as you’ve already got white when doing the process on white tile.
Just an idea.
Please don’t beat me up if I’m not exactly “technically” correct with my explanation but I think you’re right, except that the “white/frosted” image I’m getting is not “embossed” (raised) but “ablated” (relieved); i.e. exactly what you go on to describe.
It’s funny how we’re talking about two different “end effects”, depending on the “color” of the paint used… a “additive” one and a “subtractive” one? The white paint has TiO2 in it, which “reacts” with the laser energy in a particular way, and blackens and fuses with the glass, leaving a slightly raised image… whereas the black paint “absorbs” the laser energy, locally heats the glass, and pops out tiny chips. I don’t know why flat-white paint has TiO2 in it (a whitening agent?) and reacts with the laser energy the way it does… but I suspect any color paint that “absorbs” the laser energy should work to some degree or another to “ablate” the image, so maybe black is better?
I’ve thought of that and am actually headed in that direction… but, at my age, I work/move slowly. I’m pretty sure of the processes involved now… but more concerned at this point with re-“registration” of the workpiece, getting ready for the second laser step. And working with the broken scraps of glass that I have been playing with, it hasn’t lent itself to giving this particular idea a try yet.
Another idea that may or may not have merit, is “coloring” the ablated/frosted etching with permanent markers or paint. Just thinking out loud…
Thanks for commenting… maybe we’ll get it all figured out eventually ![]()
![]()
– David
Is white. It’s used as a white pigment.
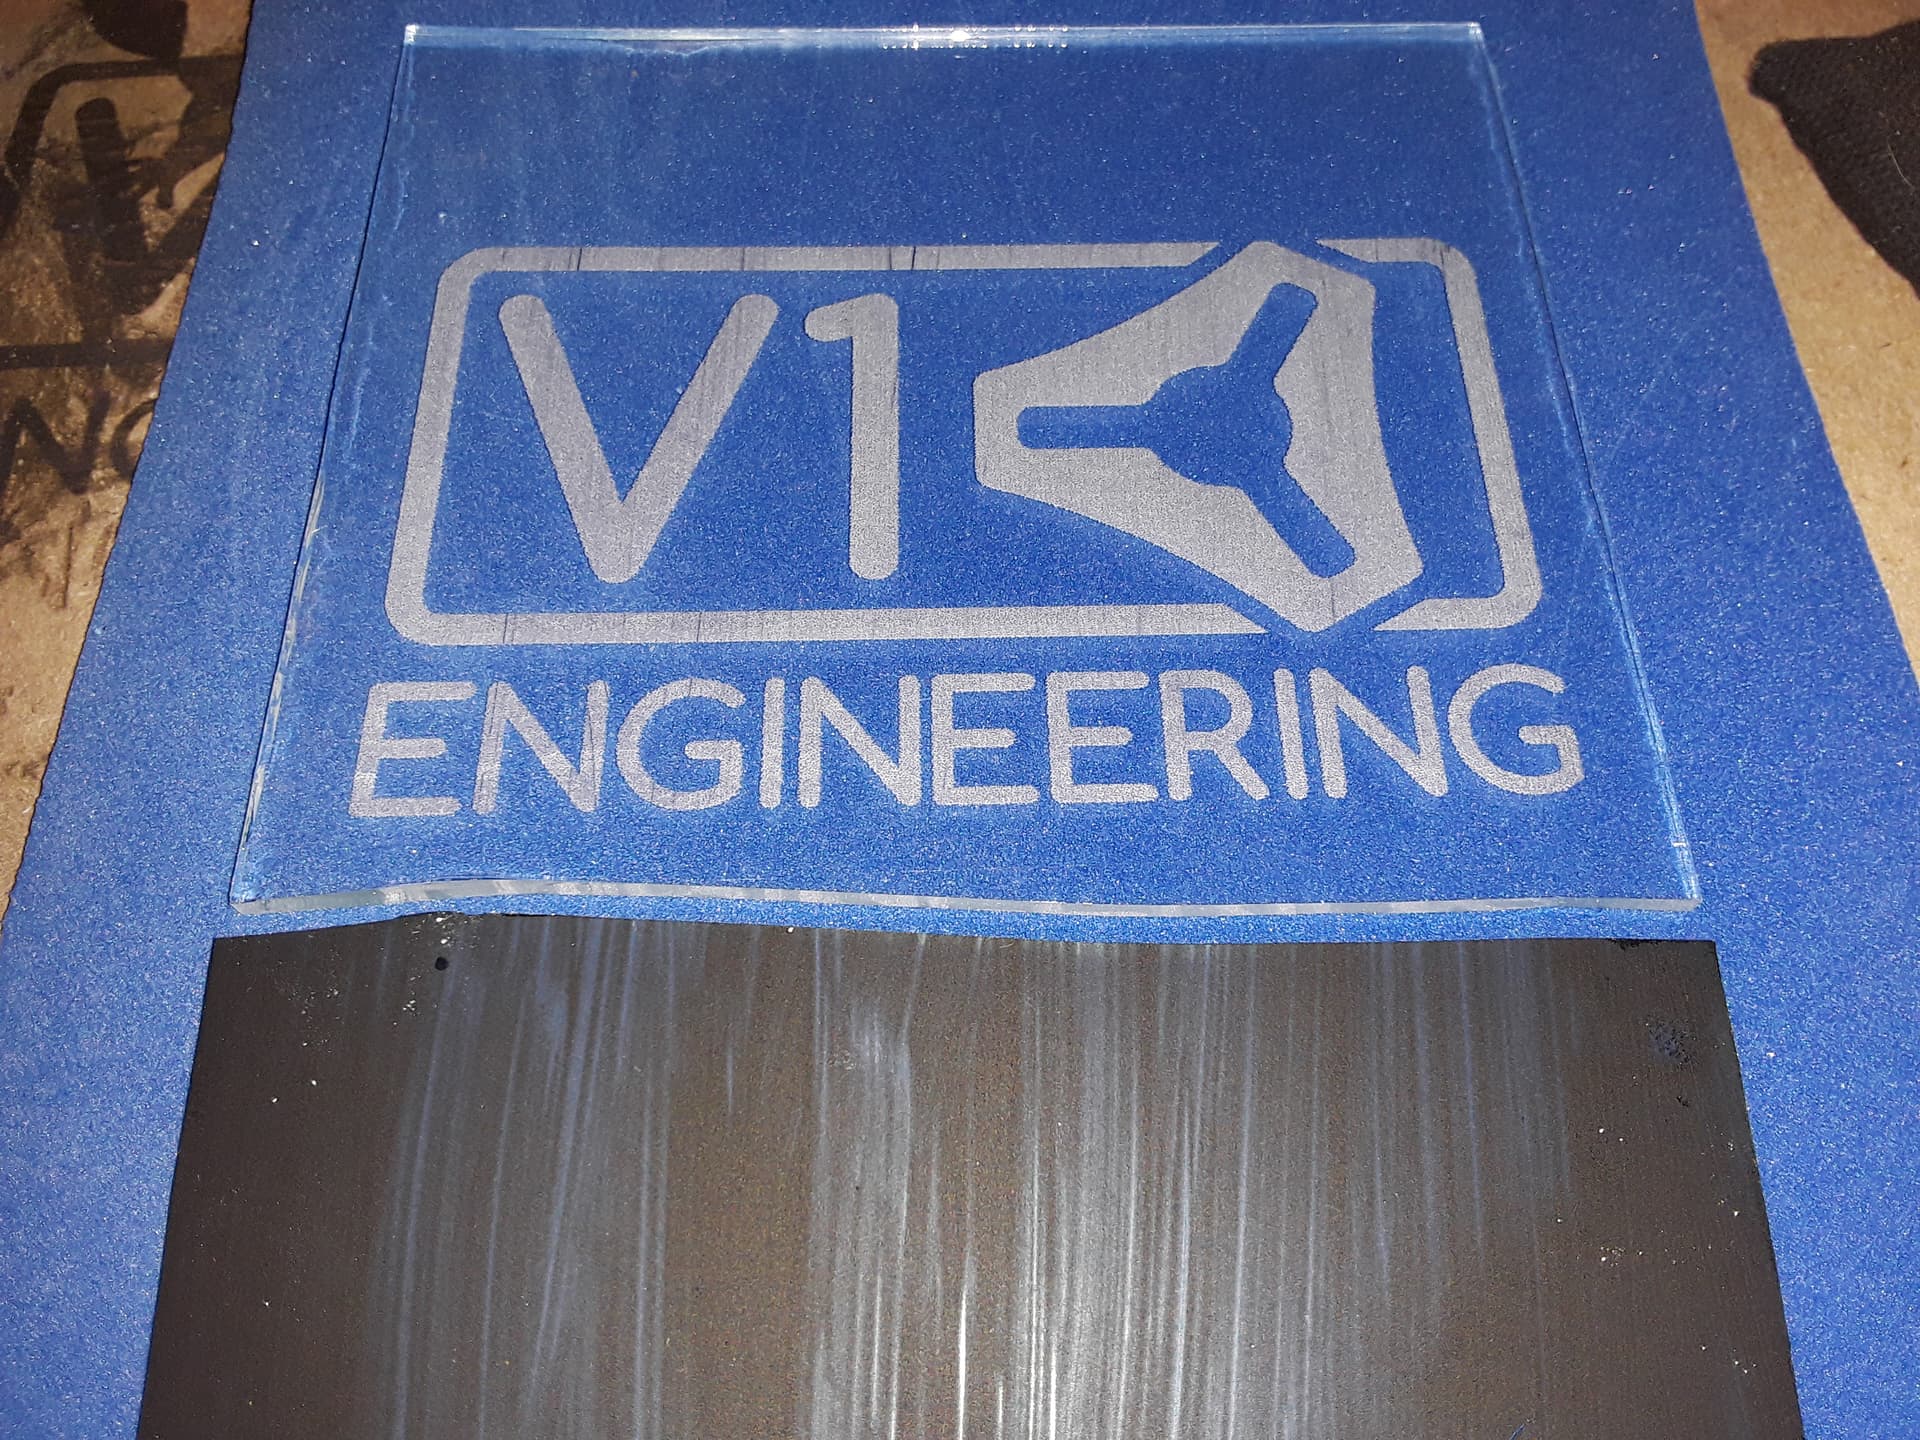
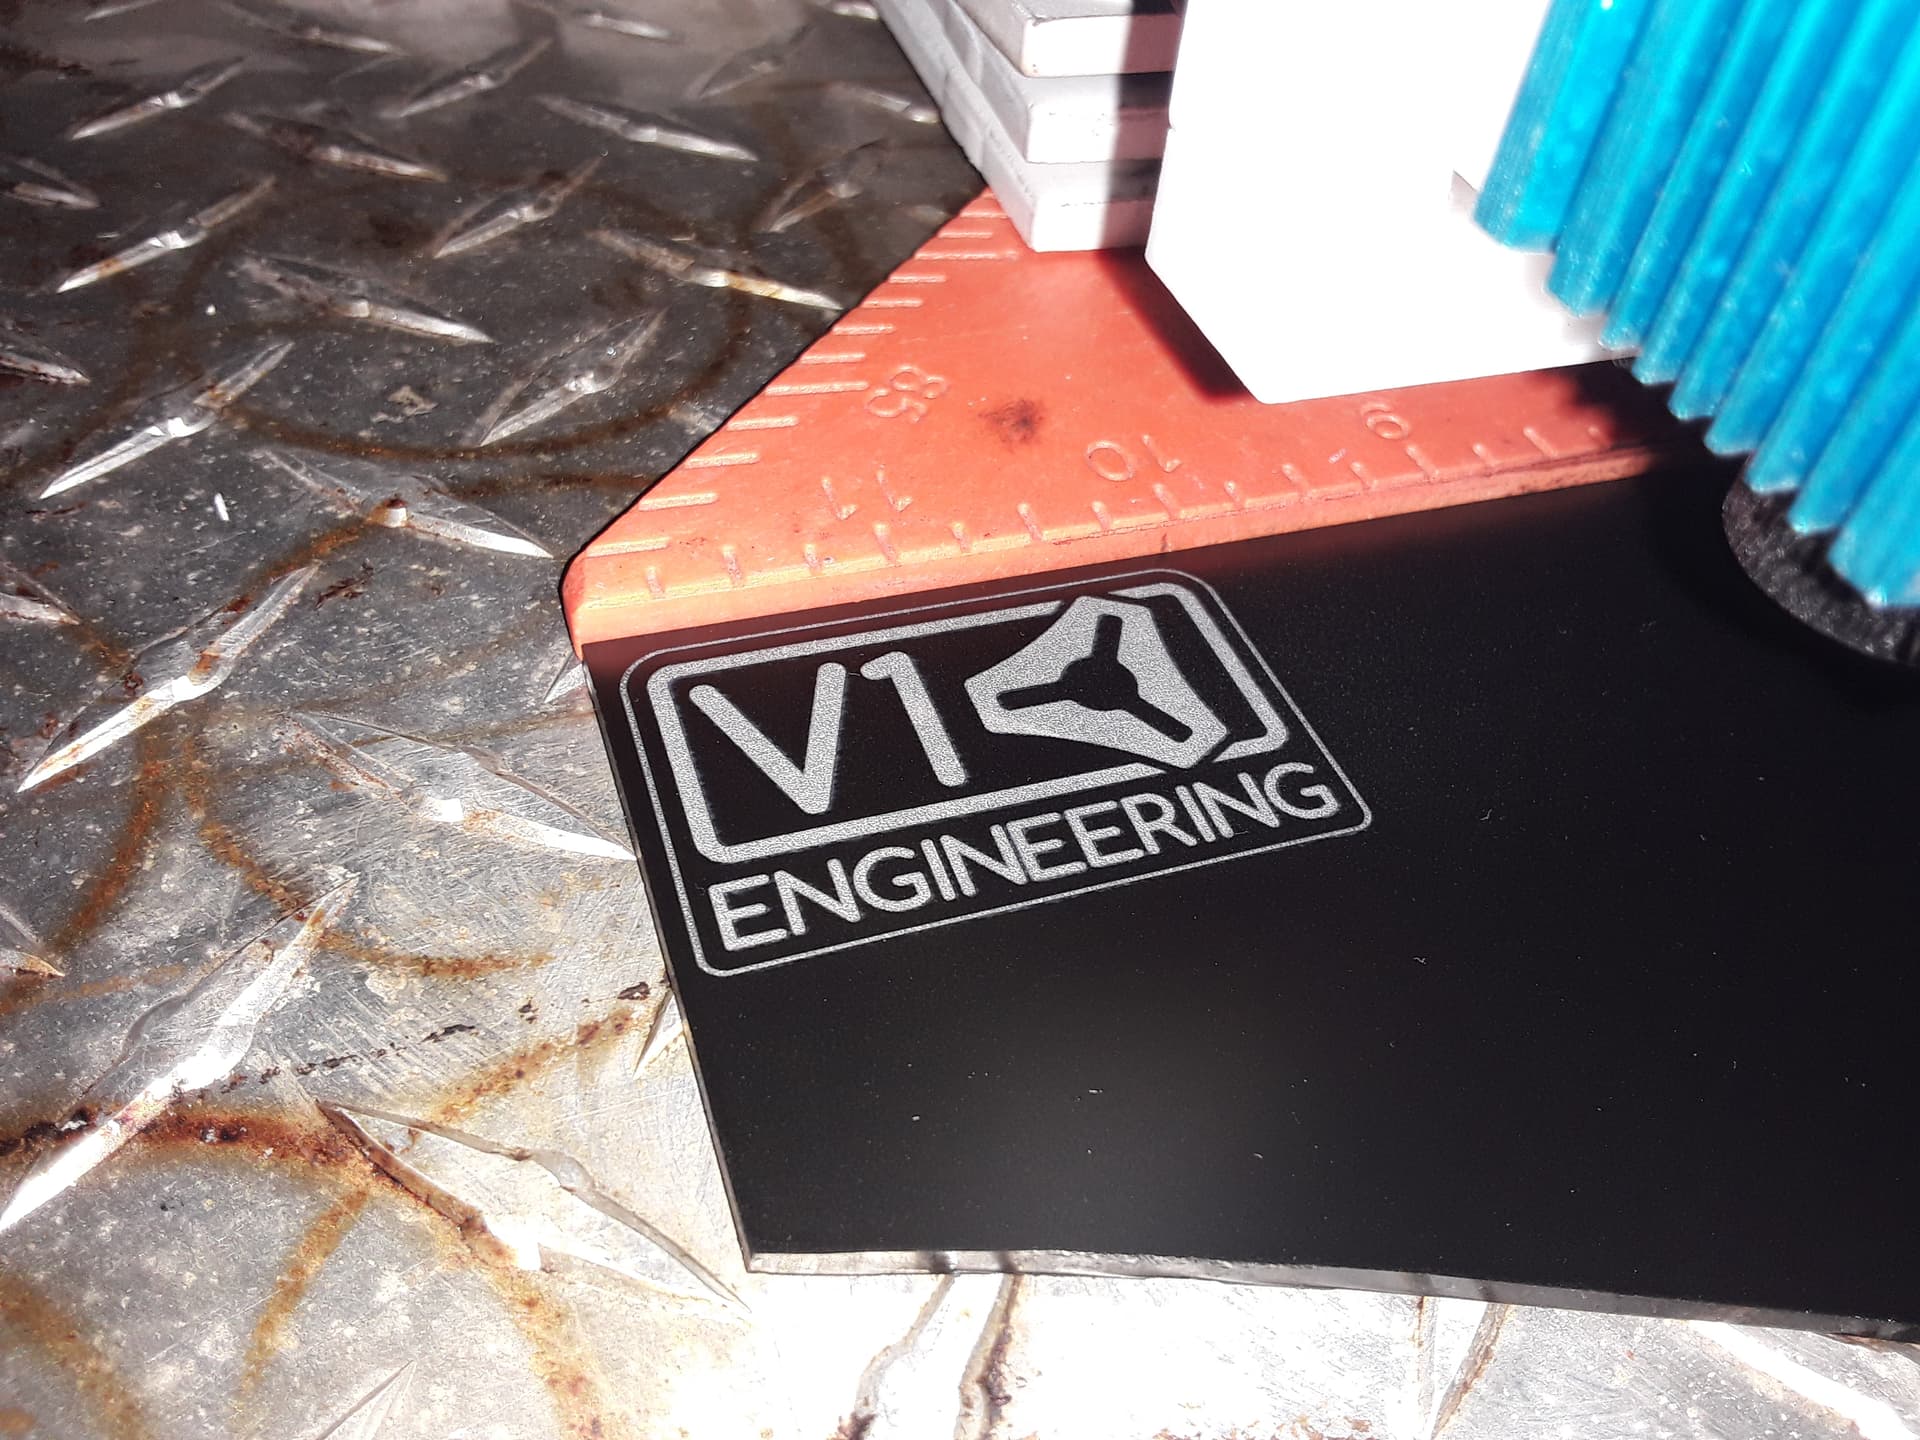
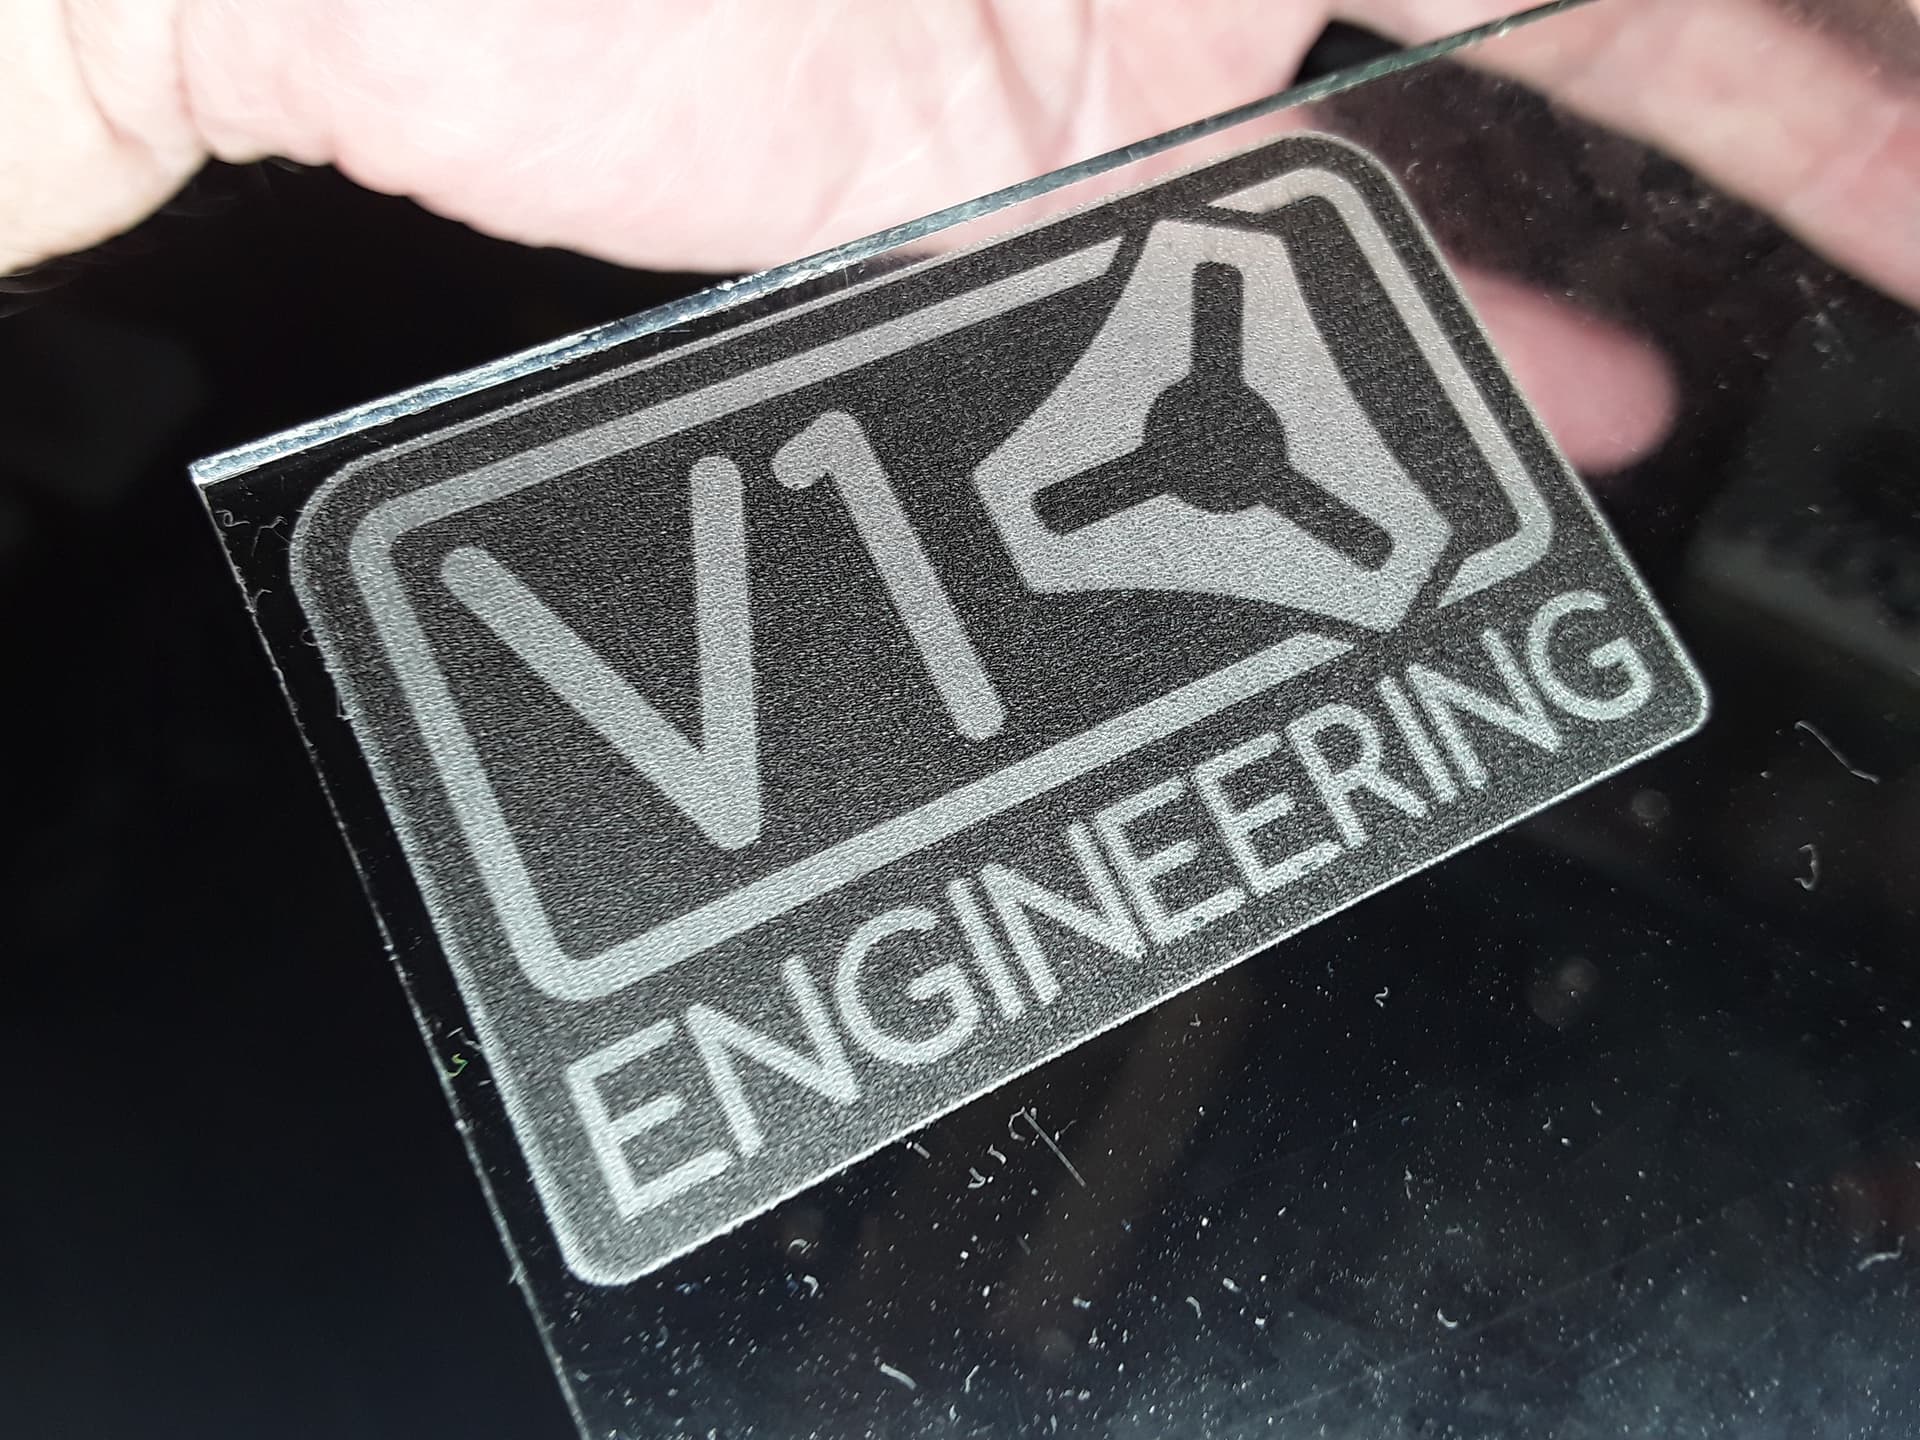
As discussed, I’m carrying on, as if I knew what I was doing…
Prepared 2 gcode files in LightBurn… one for black paint (bottom), one for white paint (top)…
Black painted glass, lasered areas should be frosted/white…
After cleaning off the black paint, painted glass white, lasered background should be black…
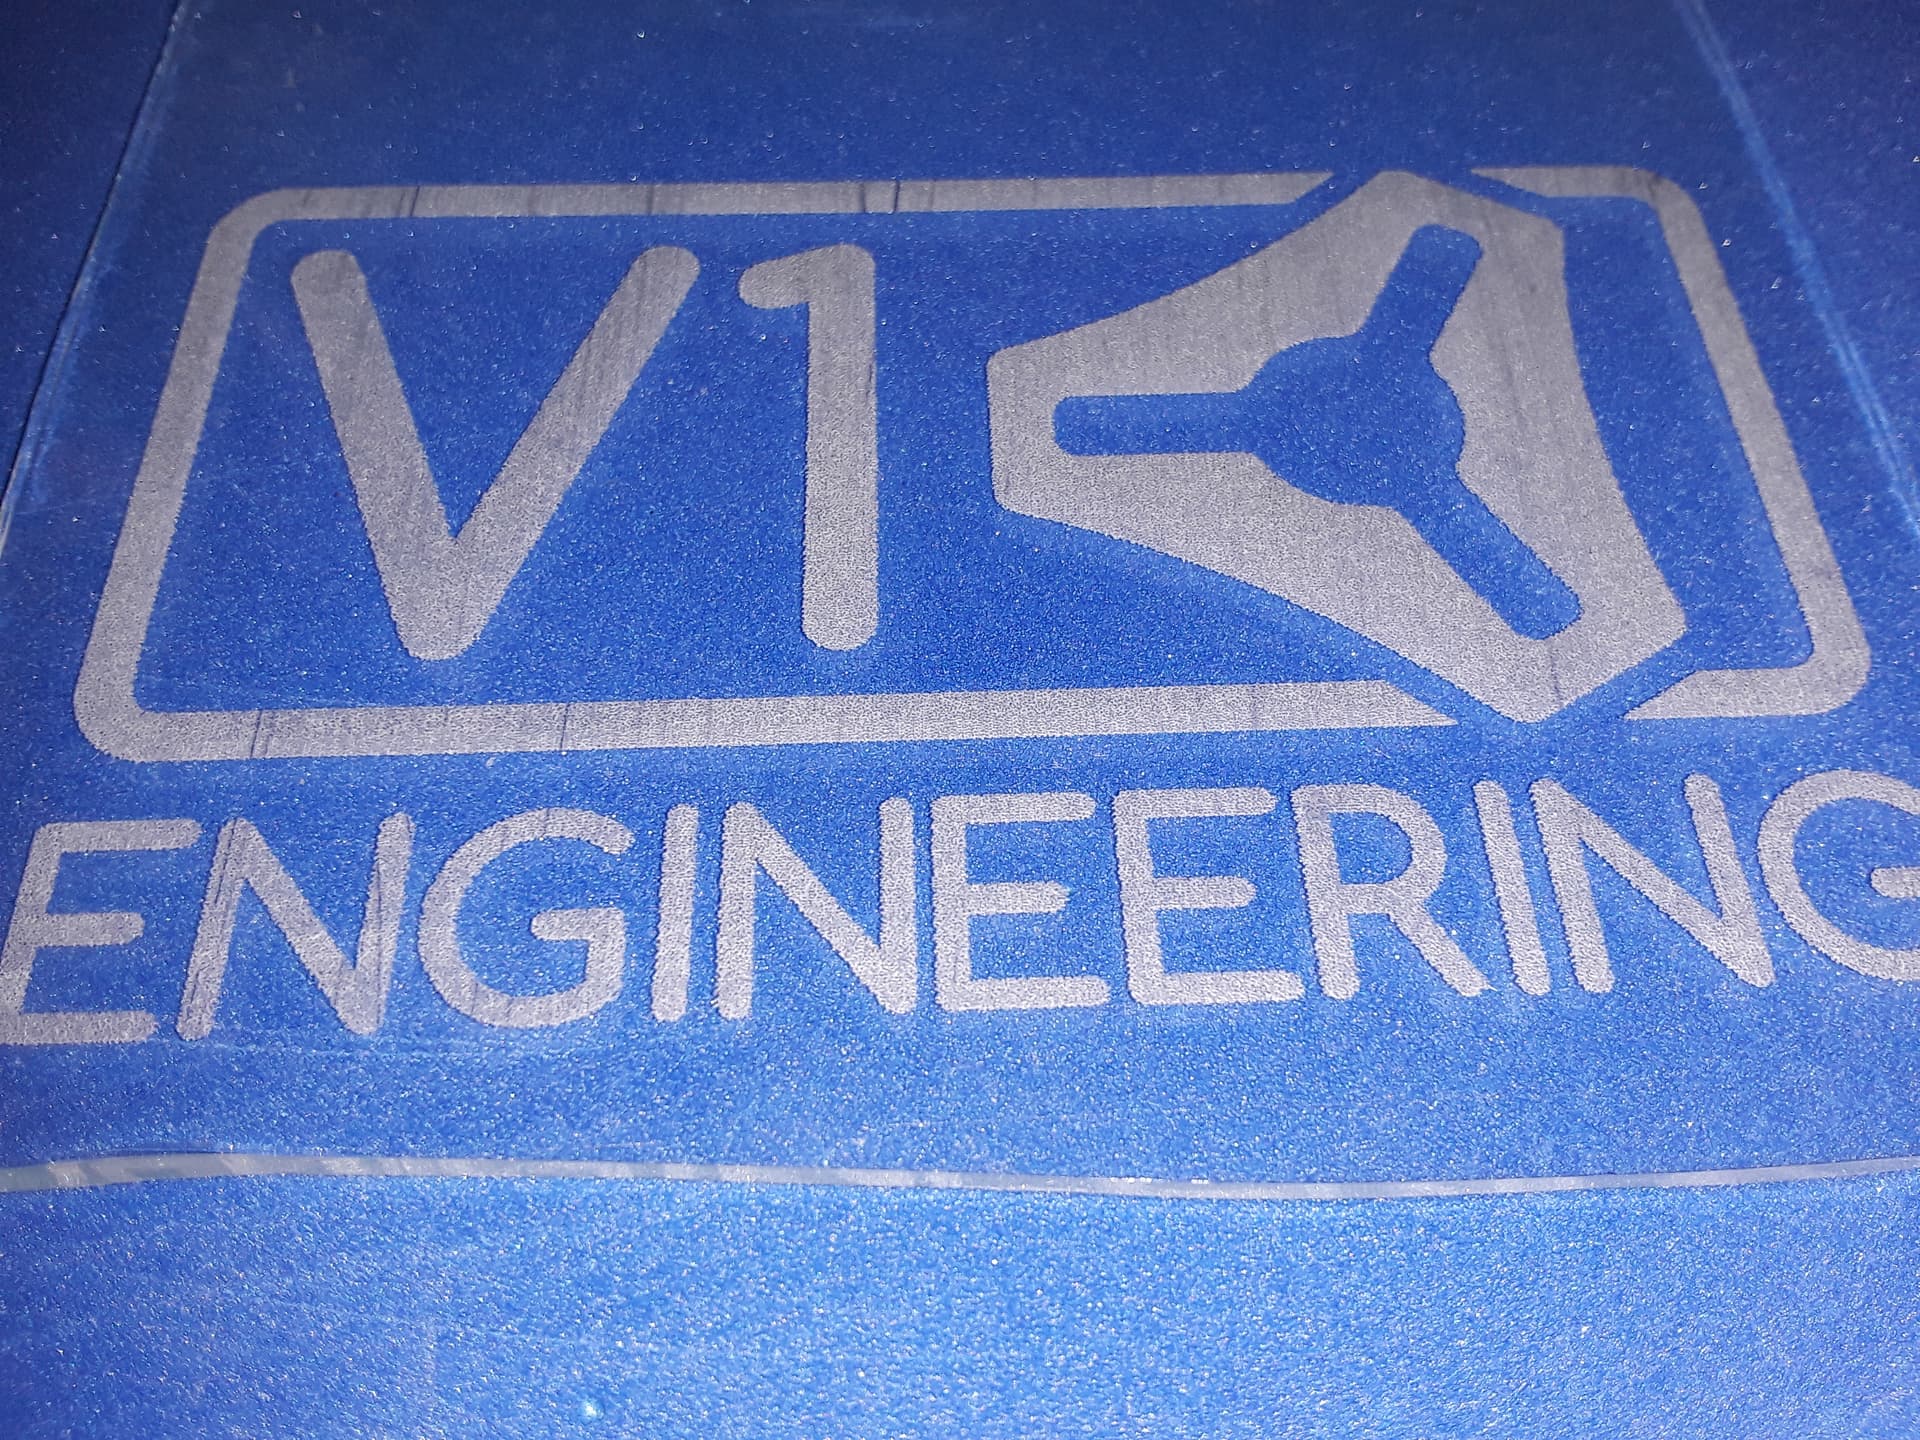
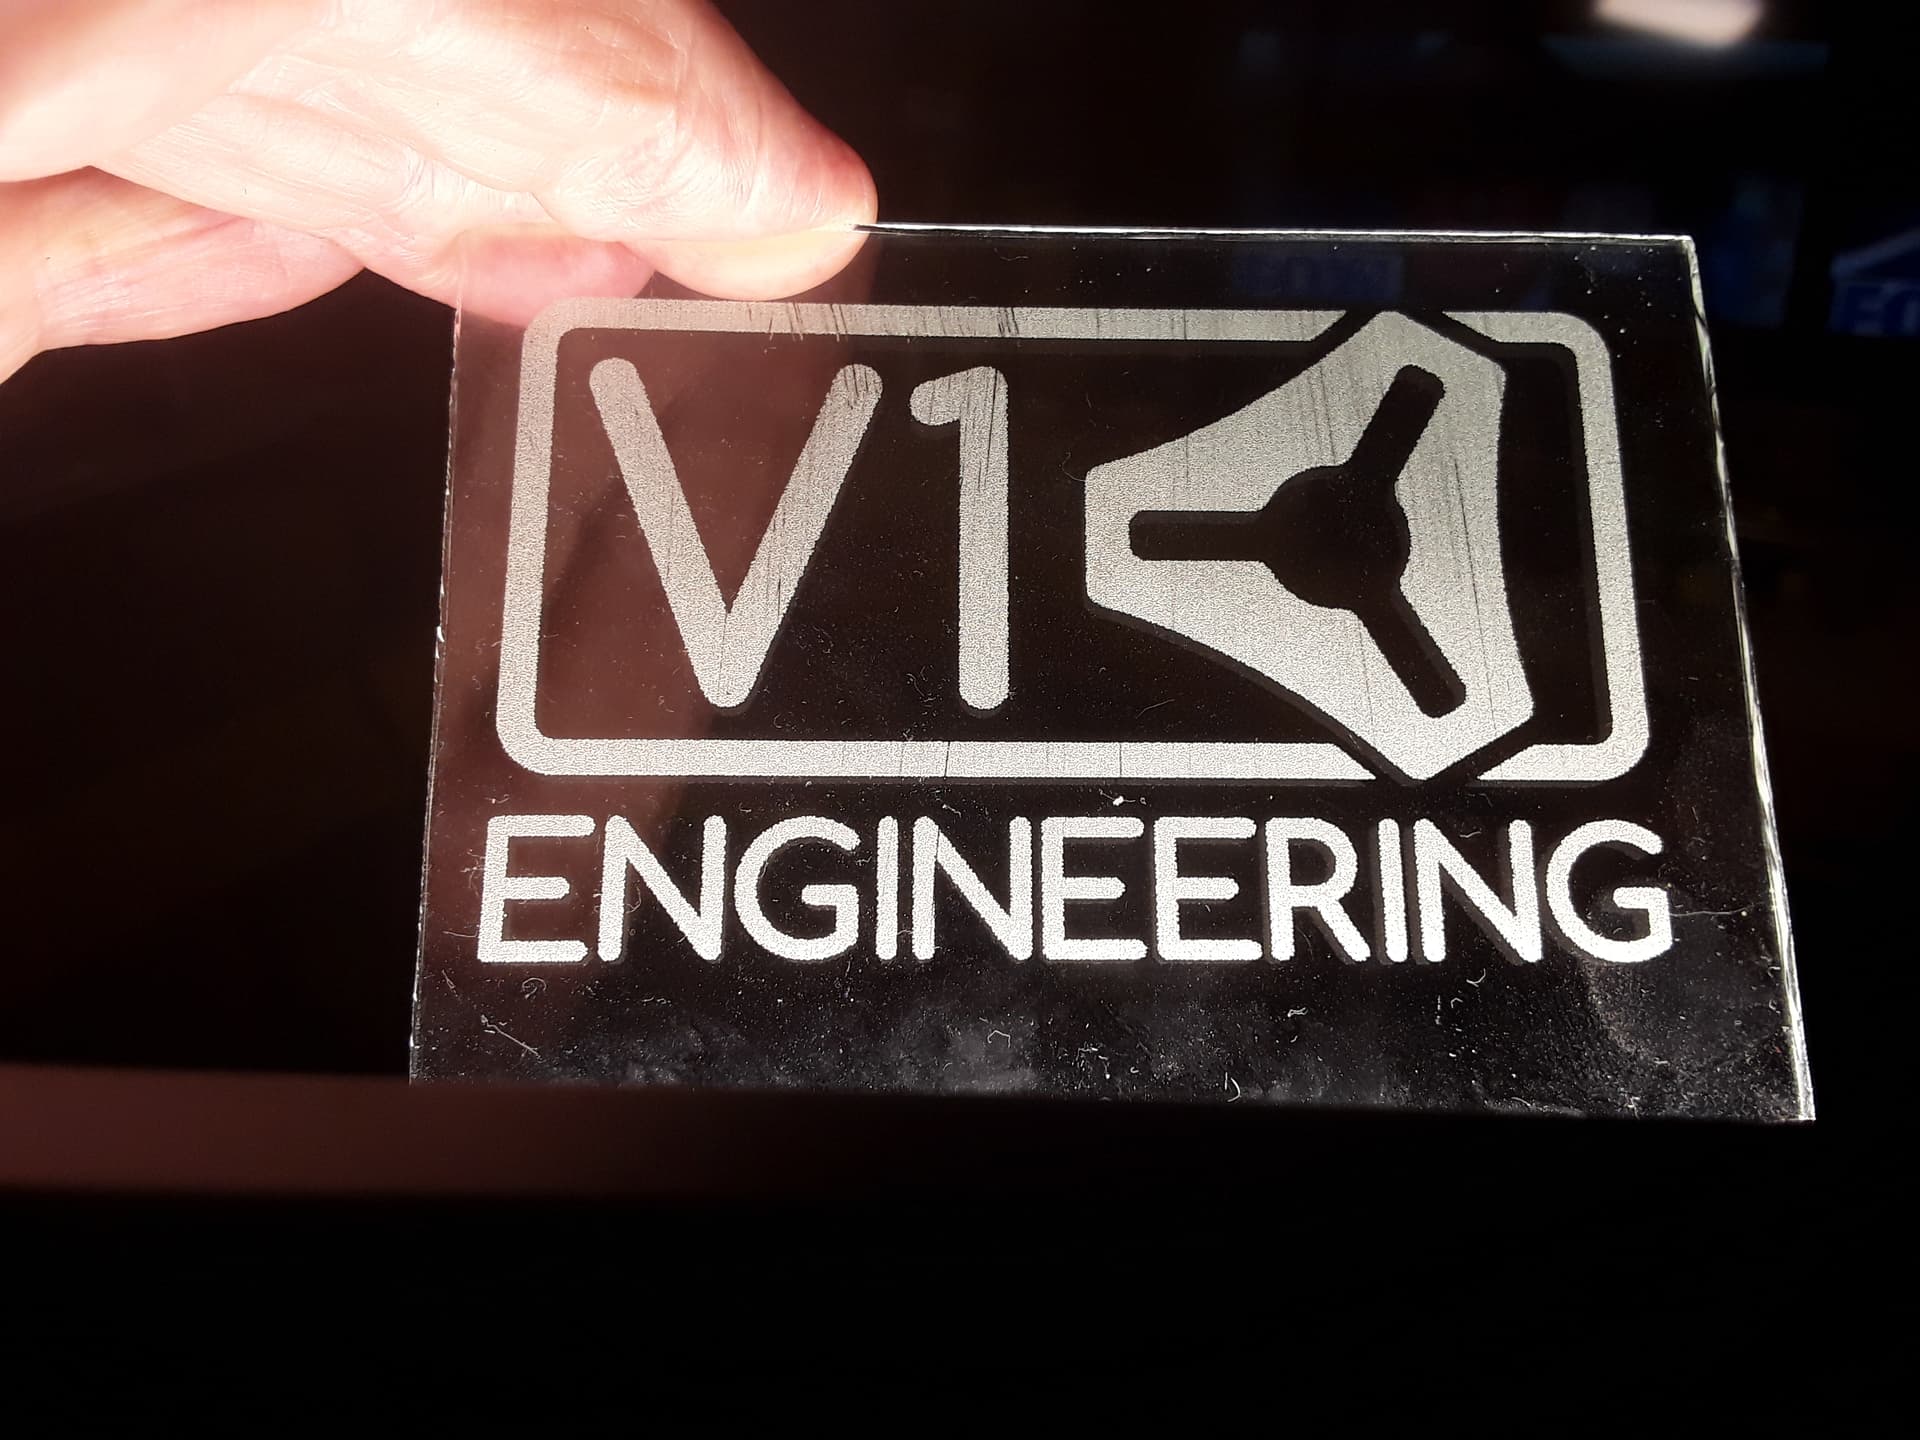
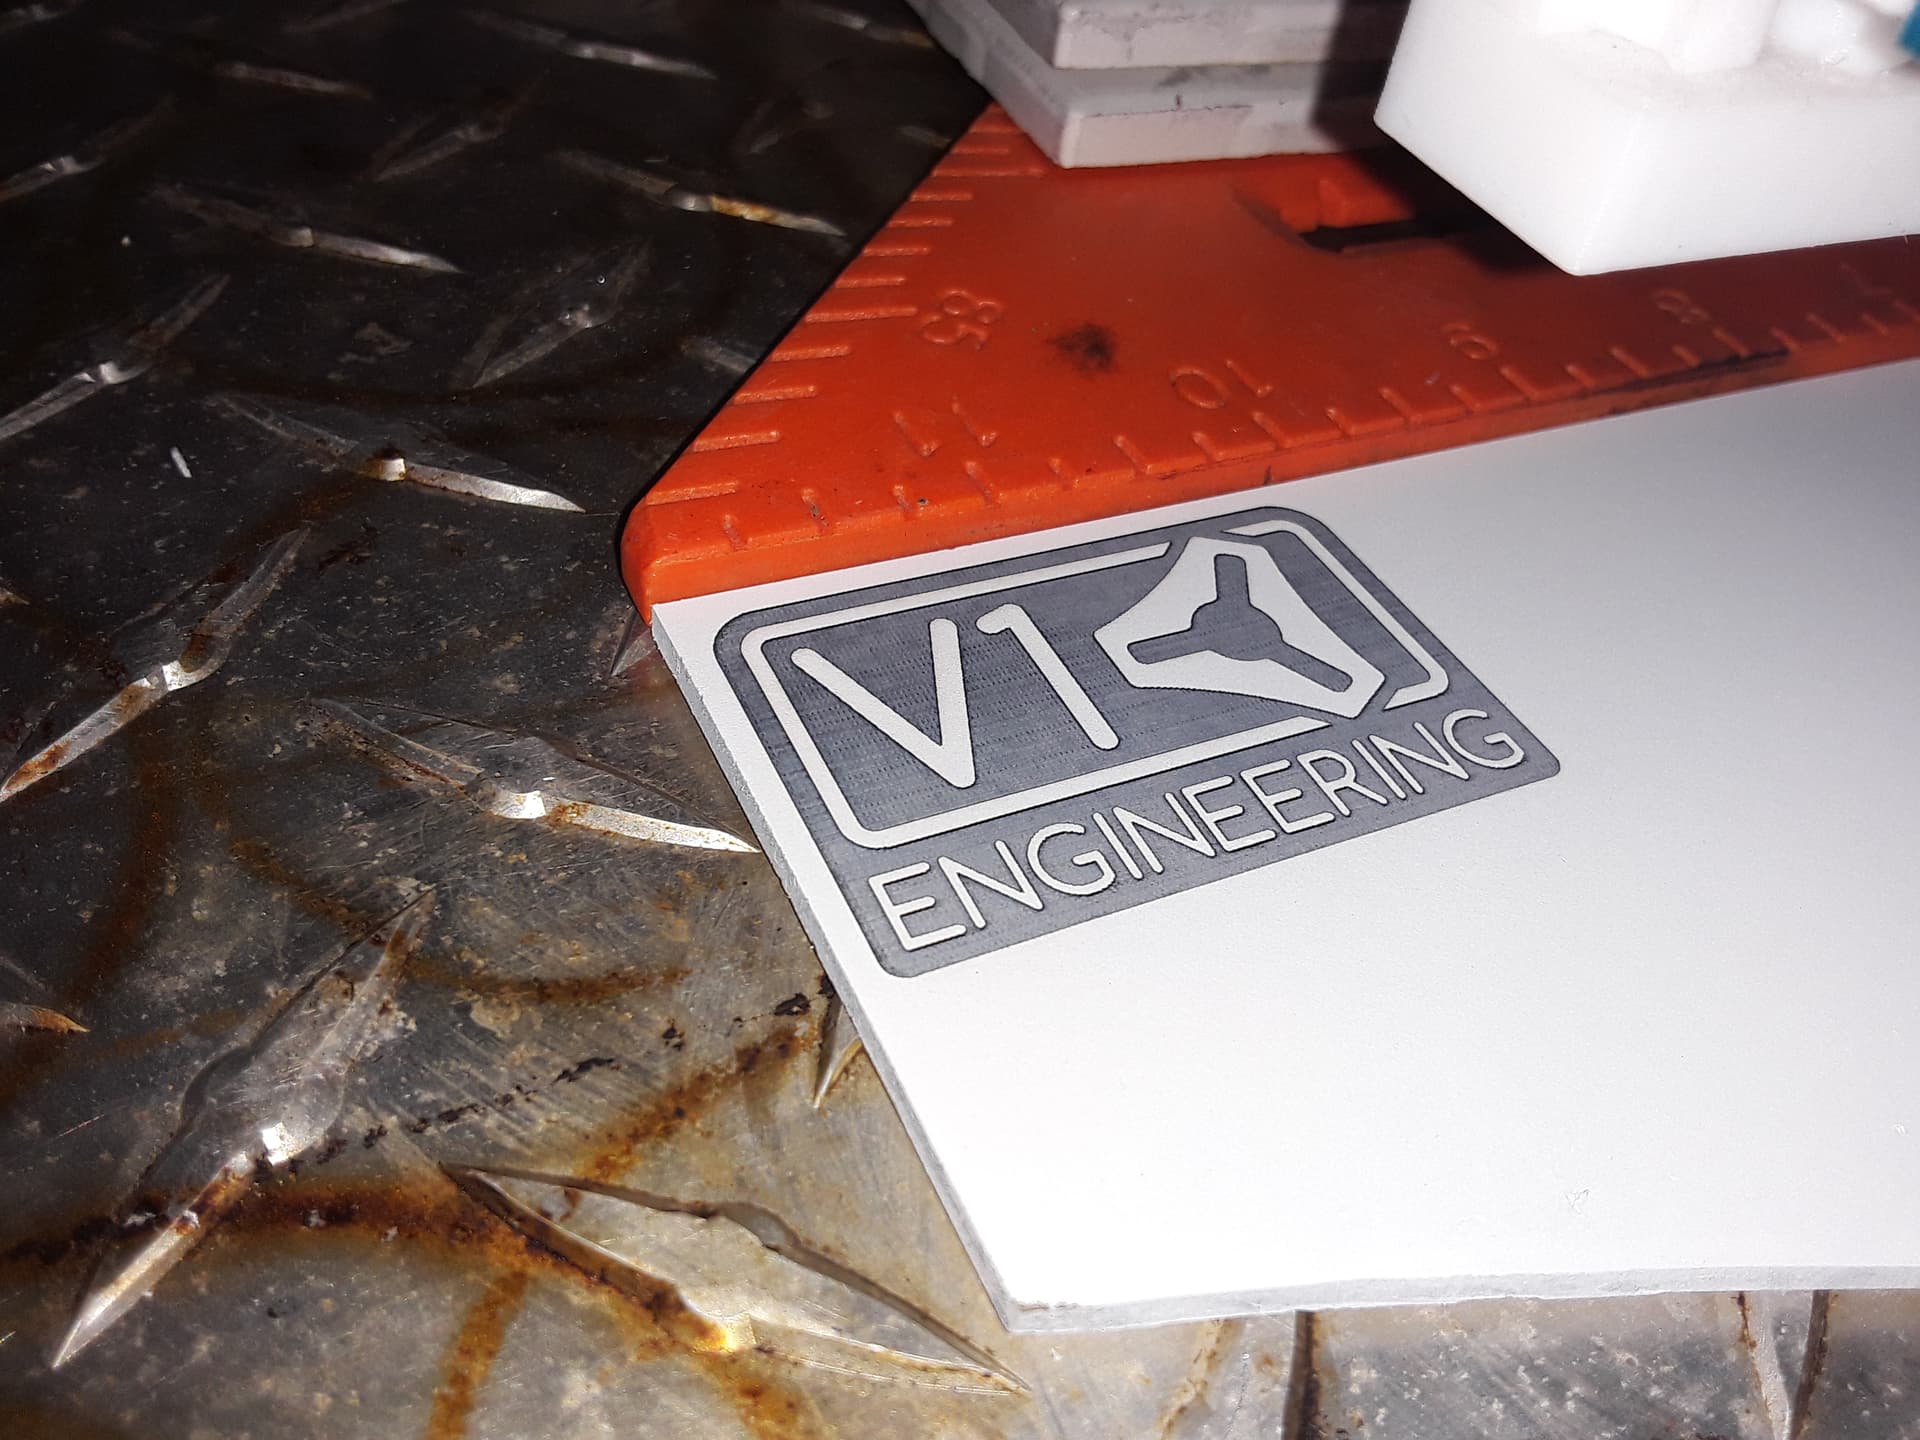
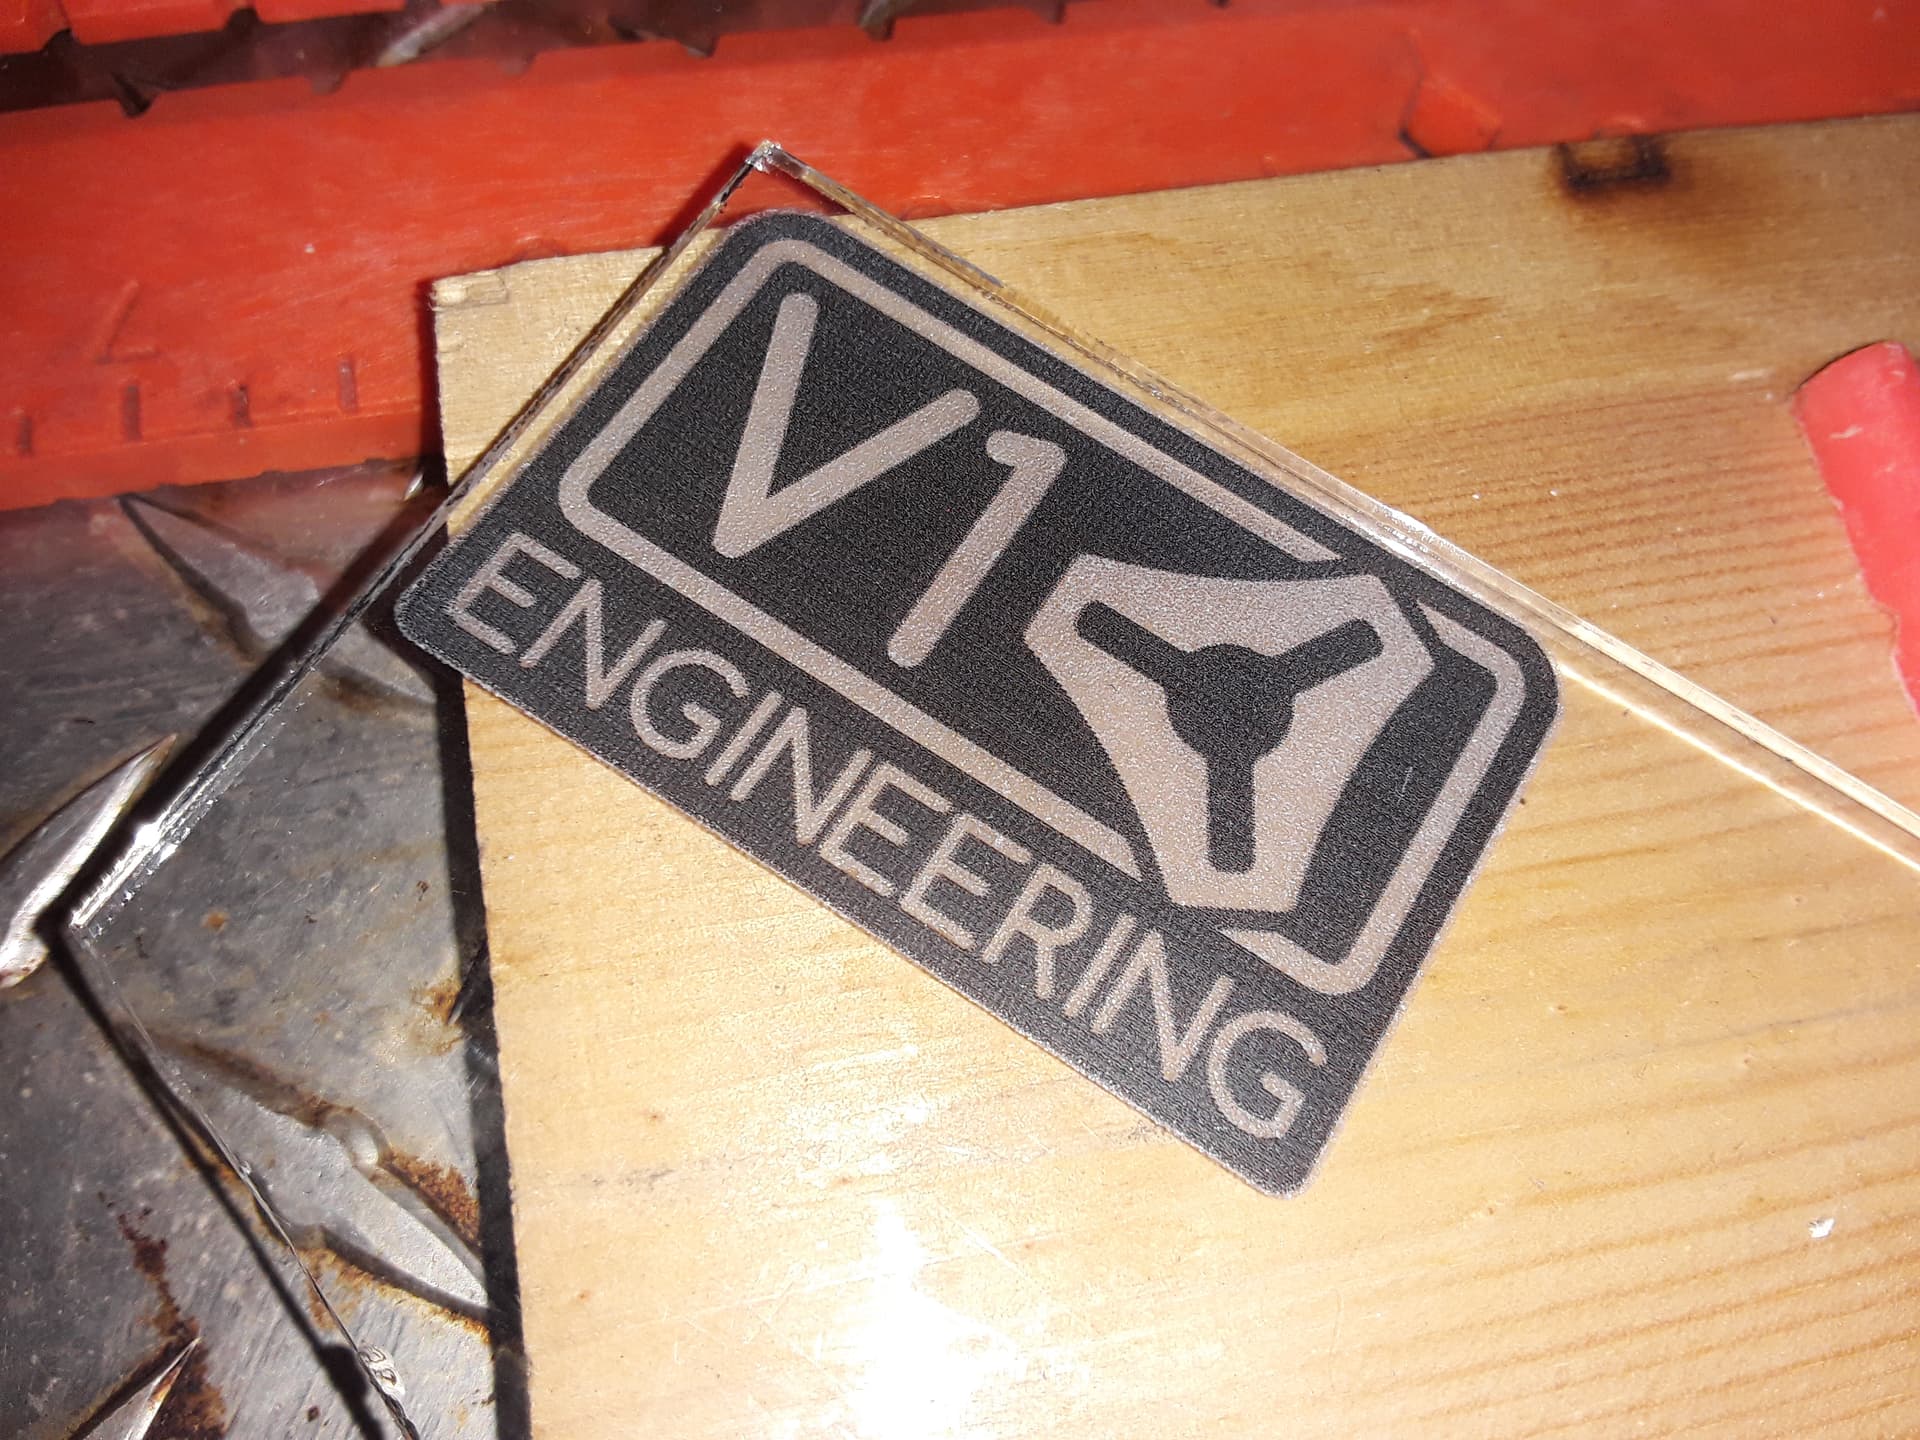
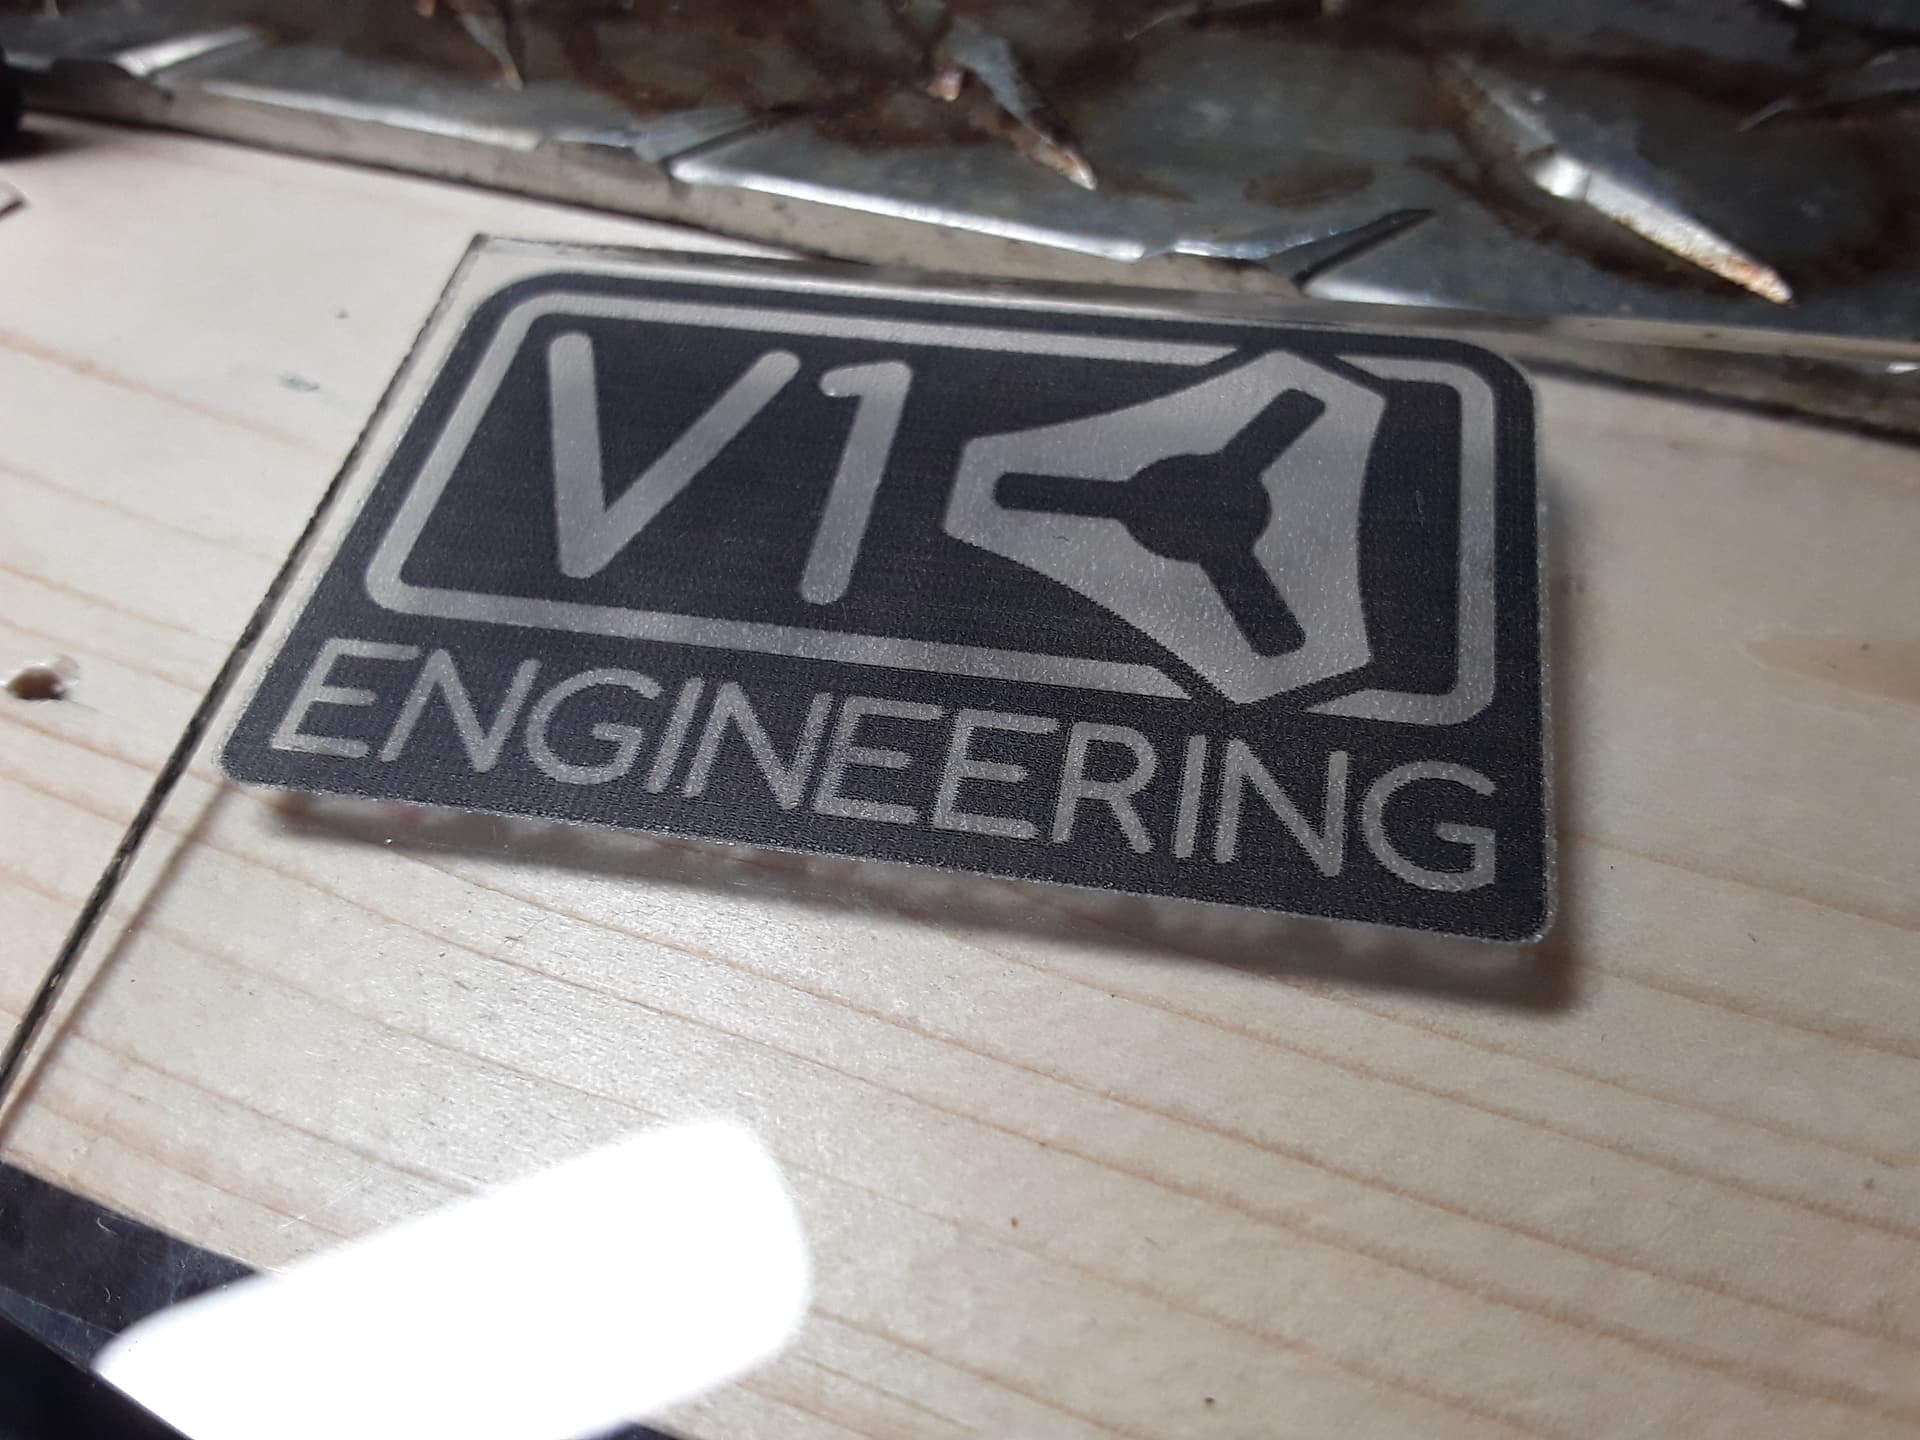
After removing all paint with acetone… leaves two-“color” logo
Edge-lit, the black background actually appears to have a frosty texture… not sure why. Possibly changing the order of operations might have an effect?
I’m reasonably pleased with the result… 
– David
I’m more pleased than you are for sure!
Yes! That is really neat looking. Good job getting it aligned. That is a very good technique.
Great job getting that working! That’s a really nice look on glass!
I also like the way you clamped the square to the table for easy positioning/aligning!
I really want to play with this but my oldest is graduating this weekend and the wife told me not to start any new projects b/c I’ve already got 3 I’m working on. It’s really more projects than that but I don’t think she knows about all of them