Thanks guys! I switched the pins around, fitted the two spare drivers, ignored the probably dead diode, set VREF=0.7v for both and now I can turn motors
Now for the belts and proper wiring, and see if I can produce a crown by the end of the weekend.
Just in case you weren’t aware – you can flip the Y direction by reversing the cable at the Ramps. Just be certain that ALL power is removed before disconnecting the cable. Otherwise you can very easily blow the driver chip.
Hi, I’m at the choosing which parts to order stage and was looking at ramps + mega+ drivers as you have done.
Could the problems you experienced have been avoided with a mini rambo? i ask as I dont think i would have the skills you do to fix it all.
Thanks
James, my RAMPS repair skills mainly involved ordering a new one for $10 ! (and luck, in that it came with 2 more driver boards than I needed, so they weren’t plugged in when I connected it incorrectly). I didn’t actually do anything to ‘fix’ it.
I think a RAMBO would have been protected by its fuse instead of blowing all the stepper drivers, so it would have been quick and easy (and super cheap) to fix. However, I could blow up a few more RAMPS boards and still not spend as much as a RAMBO. I can see why people who are serious about CNC want a better quality board though. It’s usually cheaper in the long run to buy quality gear first, rather than destroy a few cheap things and then upgrade. OTOH you appreciate the good stuff more if you’ve started on the cheap stuff
The problem I had with the wires would have been solved by ordering Ryan’s wiring loom, not by changing the board. If I hadn’t spotted the problem, I’m sure that posting a picture would have been enough for other people to spot it.
The programming problem I had would have been solved by ordering either board from Ryan, because he pre-loads the firmware for you (so long as you don’t make my other mistake and buy the wrong lead screw).
The other thing I’ll add is that learning all this stuff is daunting at first, because there’s such a wide range of technology. It’s almost guaranteed that large parts of it are completely new. However most of it just requires putting together like LEGO, and doesn’t need a lot of understanding. Pretty much anything you need to know is out there - I’m amazed by how much I’ve learned in the last few weeks.
You’re doing better than me, i am yet to get mine built. Got a collection of parts ready to go!
Have had the parts printed for 6 months now… shame on me
Cant wait to get it moving and get the crown drawn.
The mini rambo and rambo rarely have problems that require new parts. Ryan also flashes them before shipping, so you can skip that step. Ryan used to do the same thing with import ramps boards, and there were a lot of problems. I don’t want to scare you, but if you’re in the US and you’re not so sure about the electronics, it is actually not that expensive. Internationally, it is more, but still the “best” way to get started.
Today’s progress was something that had worried me - getting Estlcam running on linux. It turned out easier than expected, and @jeffeb3 's instructions worked perfectly.
I followed some instructions for tracing an image in Inkscape (much easier than expected) and created a toolpath to ‘mill’ it. My first attempt was a bit rubbish, as I kept creating new tool paths when I wanted to select old ones, but the second attempt wasn’t too bad.
I was winding the Z lead screw up and down by hand, so I missed some of the moves. I’m looking forward to trying this again in a few days when it’s fixed. The image is from the Sail Life YouTube channel about an extensive and high-quality boat restoration.
I’m most of the way though printing the ‘Minion’ RAMPS case. This took quite a lot of ‘fettling’ to make it fit. Possibly my cheapo arduino and RAMPS aren’t quite the same dimensions as the author’s.
Also I’ve hacked up an old tape measure to make drag chains, which makes everything look a bit more ‘finished’. The only problem is where you can see the yellow (and markings) through the braid!
Any suggestions for finishing the ends of the braid? I tried insulating tape, but it doesn’t look great. I’ve seen heat shrink used, but can’t imagine tube large enough to fit over the 15mm braid shrinking down enough to fit around the wire - how do you do it? Would self-amalgamating tape work better?
BTW, what’s a good way to get 12v power for the fans in the RAMPS case? Do people use the heated bed, etc outputs for that sort of thing? If so, how do you turn them on, special G-code in Estlcam?
Replying to my own question here, in case anyone else ever needs to know:
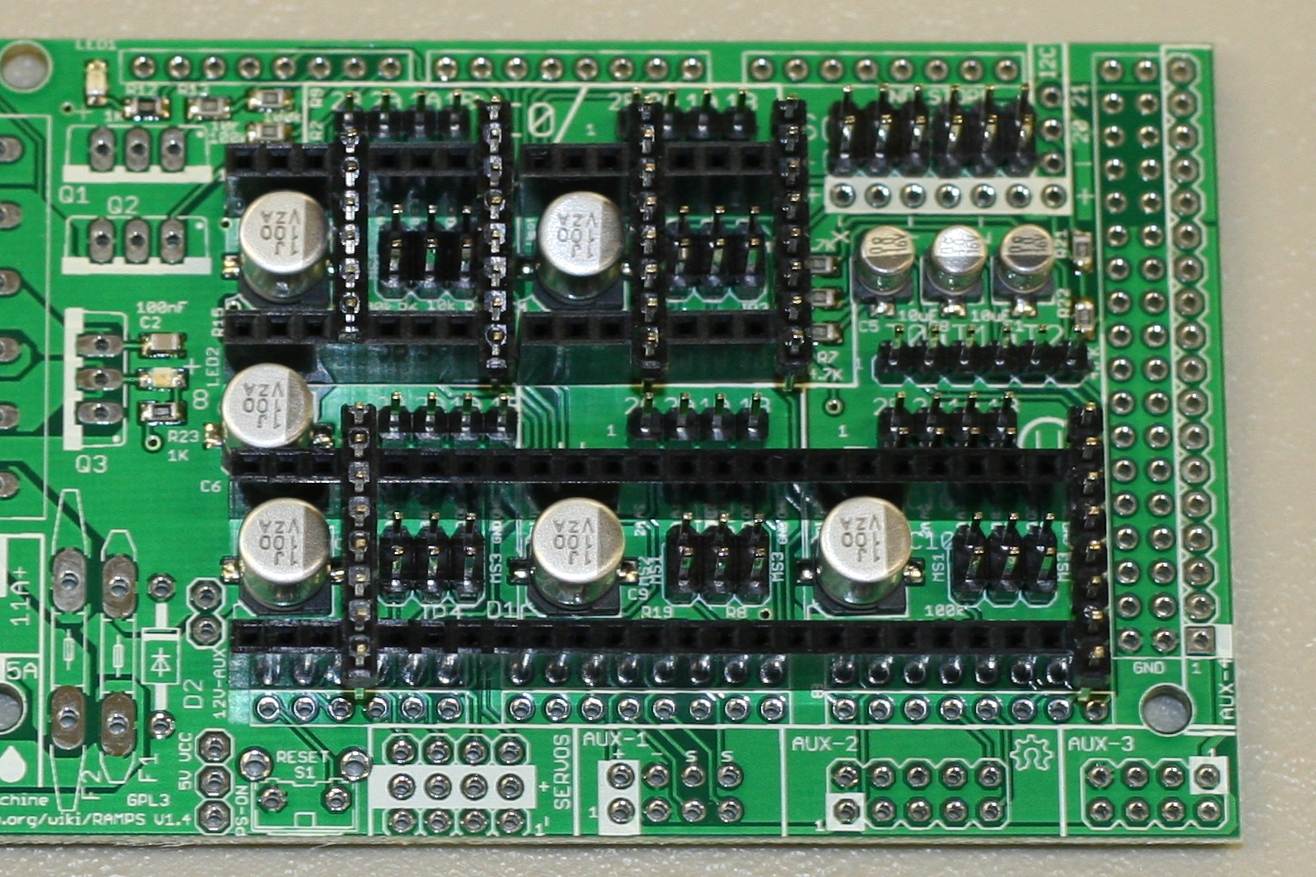
I found a pair of pins near the power connector, labelled ‘12v AUX’, just to the right of the ‘D2’ label in this picture, but clear enough. These pins appear to be connected to the power, after the 5a poly fuse, and work nicely for my fan (so far)
Use those pins with caution that just brings more power through the import molex. That is the second most common failure point after drivers on an import ramps. I only connect to the other end of the molex or even in the molex itself, but not after.
I can’t fly RC planes any more due to the lock down, and I’ve got a backlog of unflown planes, so my needle cutter is a bit pointless. Instead I ordered some Rennie router bits that was the only recommendation I could find for bits in the UK, and a 1/8" collet for my old Bosch router, printed a mount from Thingyverse and had a go at wood.
I got a bit confused in Estlcam and instead of five 1mm steps, it dug right in and cut 5mm in one go, but otherwise seemed fine. The edge was fairly neat, even before the finish cut.
There are slight marks on the bottom - is that normal, or does that mean my router is not vertical? Or deflecting as it cuts?
The marks at the top of the picture are where I was impatient waiting for the bits to arrive and experimented with an old countersink bit, just trying to cut a straight line. A 2mm depth of cut wandered all over the place, but a 1mm DOC was at least straight. The line under that was a test with the proper bit.
I have several but a) live too close to Gatwick to fly anything bigger 250g and b) it’s illegal to fly anything with a camera within 50m of anyone else’s house, so I can’t even fly the small ones in my garden. I can fly inside my house but flying the same course repeatedly gets boring with no one to race.
Actually, I’m not entirely sure that being inside my own house allows me to fly within 50m of my neighbour. The laws are quite poorly written…
I bought the shortest bits (8mm), on the assumption that I’ll probably do something dumb and break them soon enough. Overall they’re only about 40mm long, which leaves about 15mm sticking out of the collet.
Indeed, Rennie router bits are the best i could find locally, and being based in Stockport - Manchester means that i can get them on my way home from work!
Ive built both the Lowrider and the MPCNC, and those bits are the best i could find.
Thanks for the recommendation, it’s worked out well!
So now I’ve got it working with conservative settings, how do I know how far I can push it safely? I’ve read several reports where “it just went ‘ping’” with no warning - is that normal, or do you normally get some chatter or missed steps first?


