I have been struggling in retirement to keep busy with the covid lockdown. Discovery of Ryan’s MPCNC has opened an amazing world for me, best time of my retirement and plenty of shop time for tinkering. I love the mix of design, software, and woodworking .
14 Likes
I just used one of the post processors in the software page when I got started years ago, although I no longer have an MPCNC (corner mounts gave out), I still check in and see how everythings going. Looks great!
More on making box joints on my newest cnc design. Here I have the four sides taped together and clamped. The router is completing the milling of one end of the four box sides. Then I will flip it over and complete the other ends. The tearout seems terrible in this video but it is really minor as you will see in the following pictures. If tearout were to become a problem you could just clamp up sacrificial stock on both sides.

As you can see from the result below, the tearout was just peach fuzz, the joints are perfect in this cherry wood.
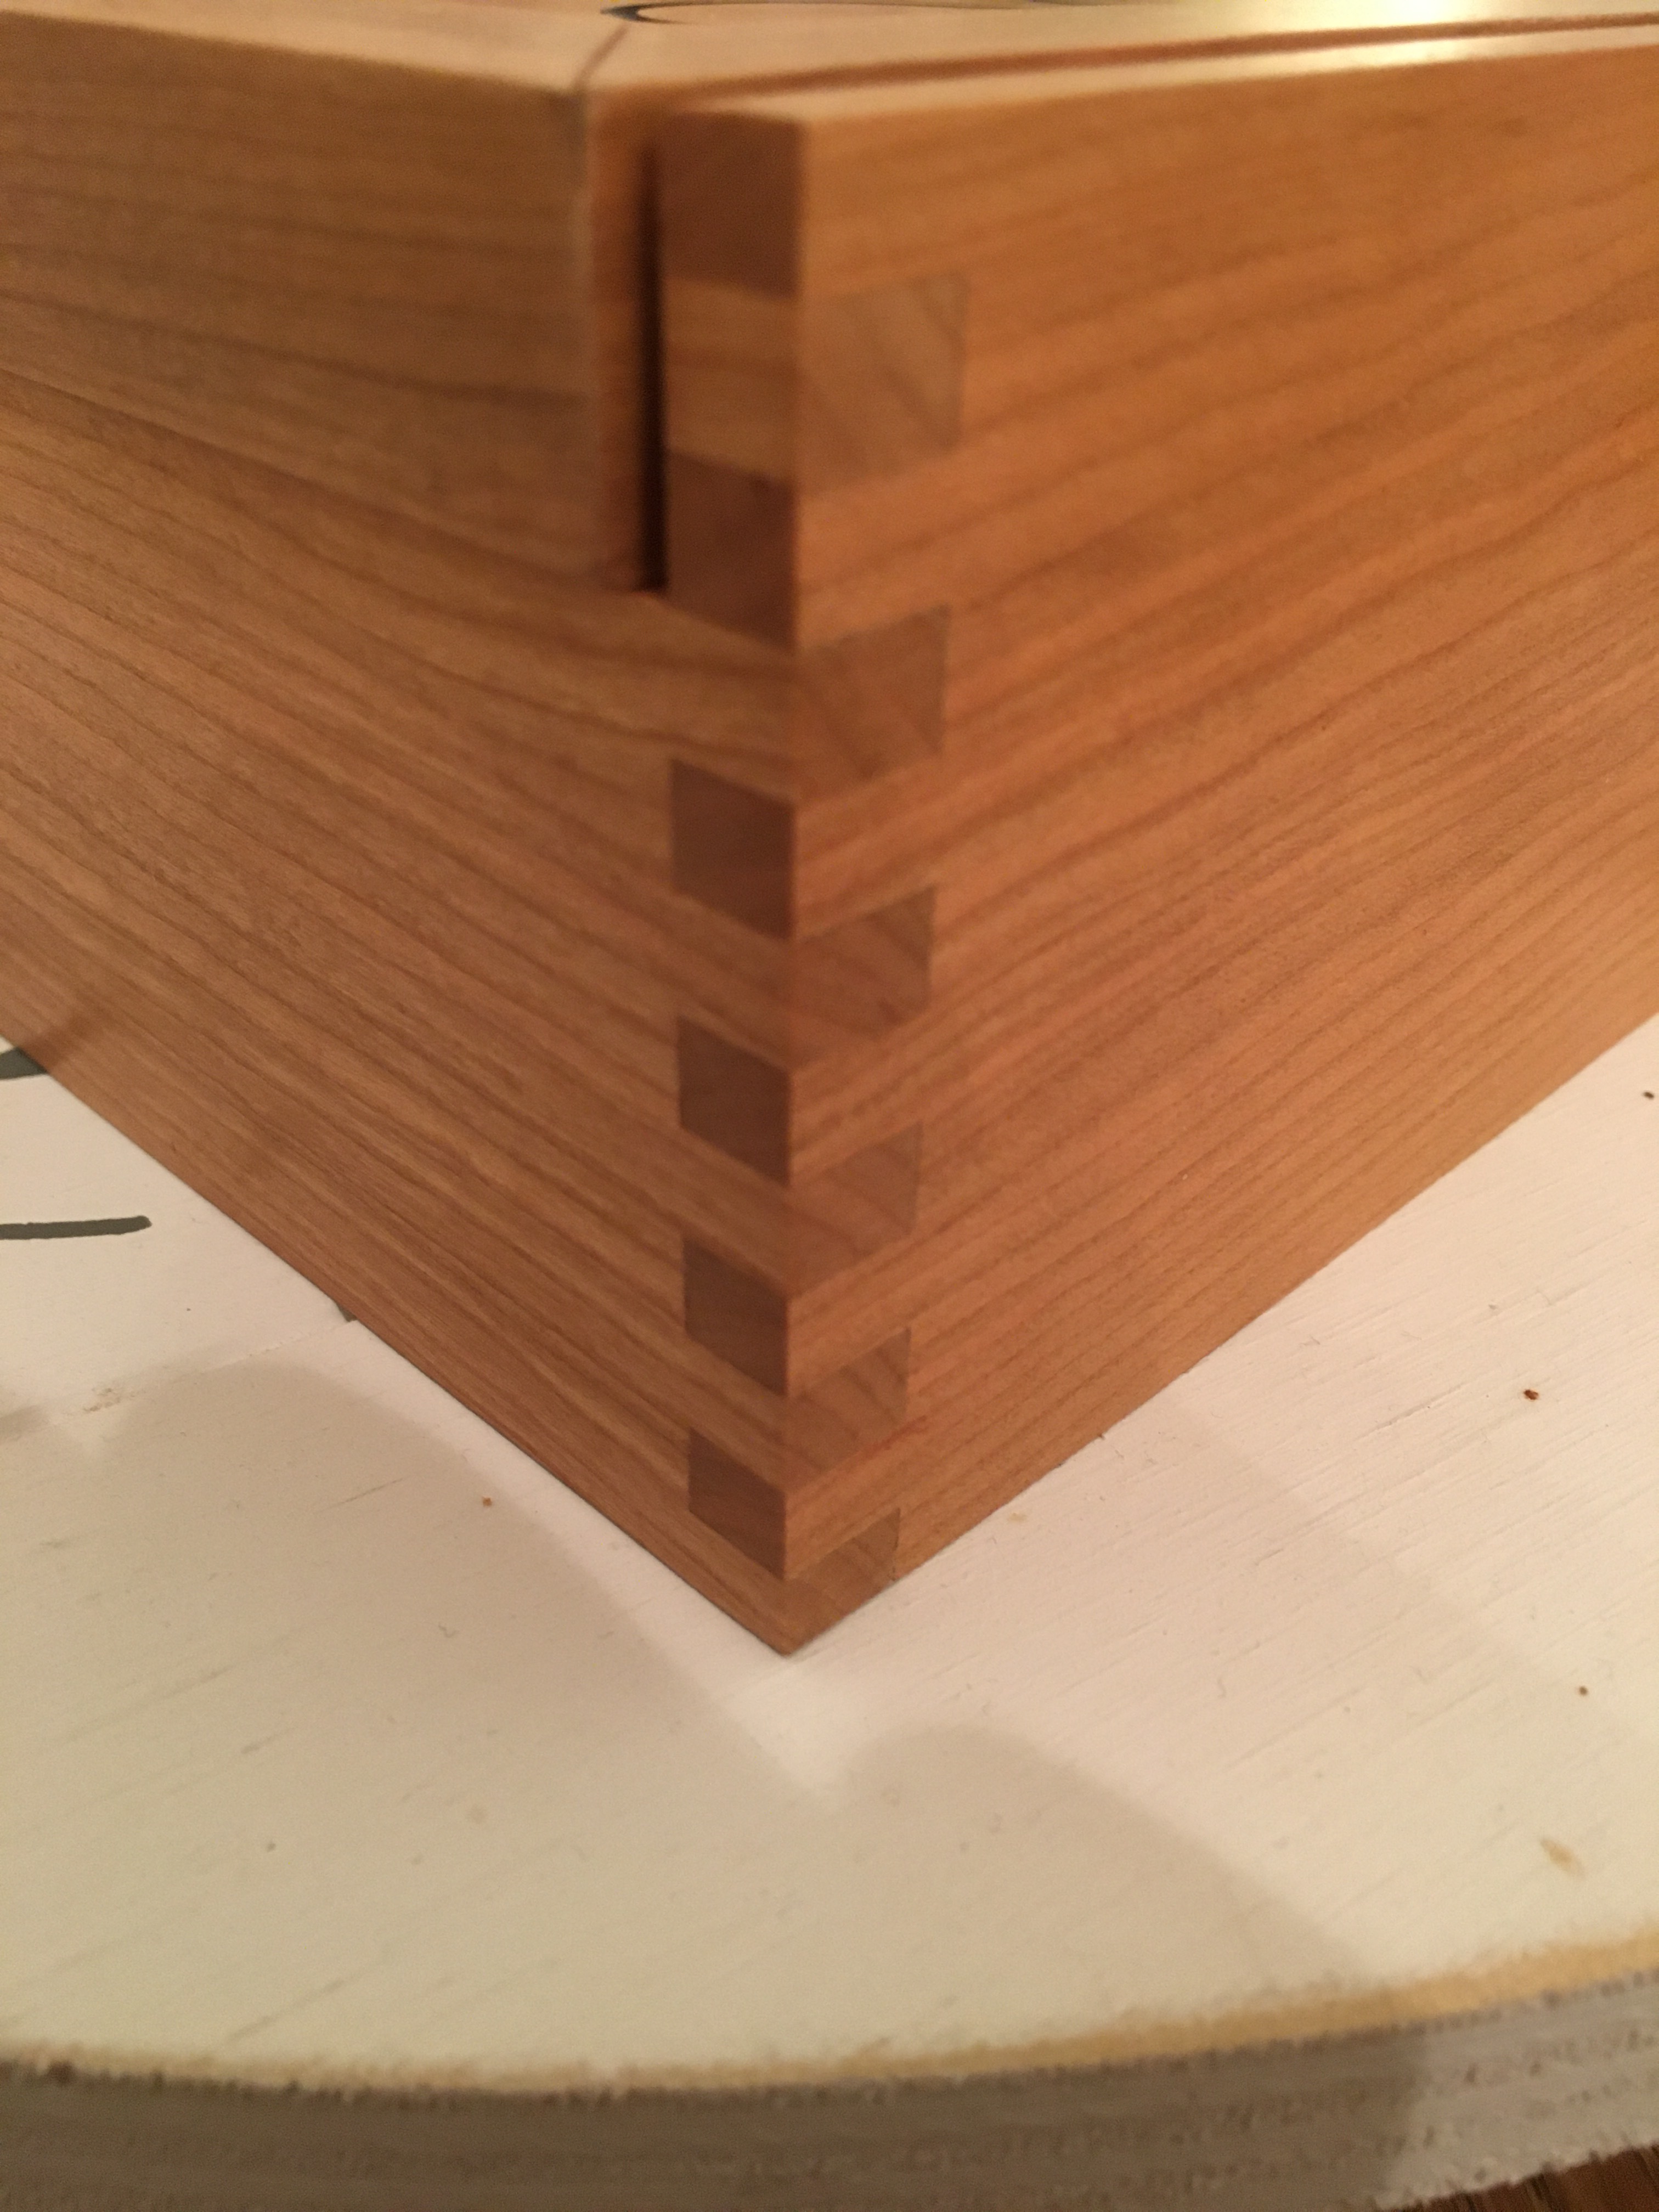
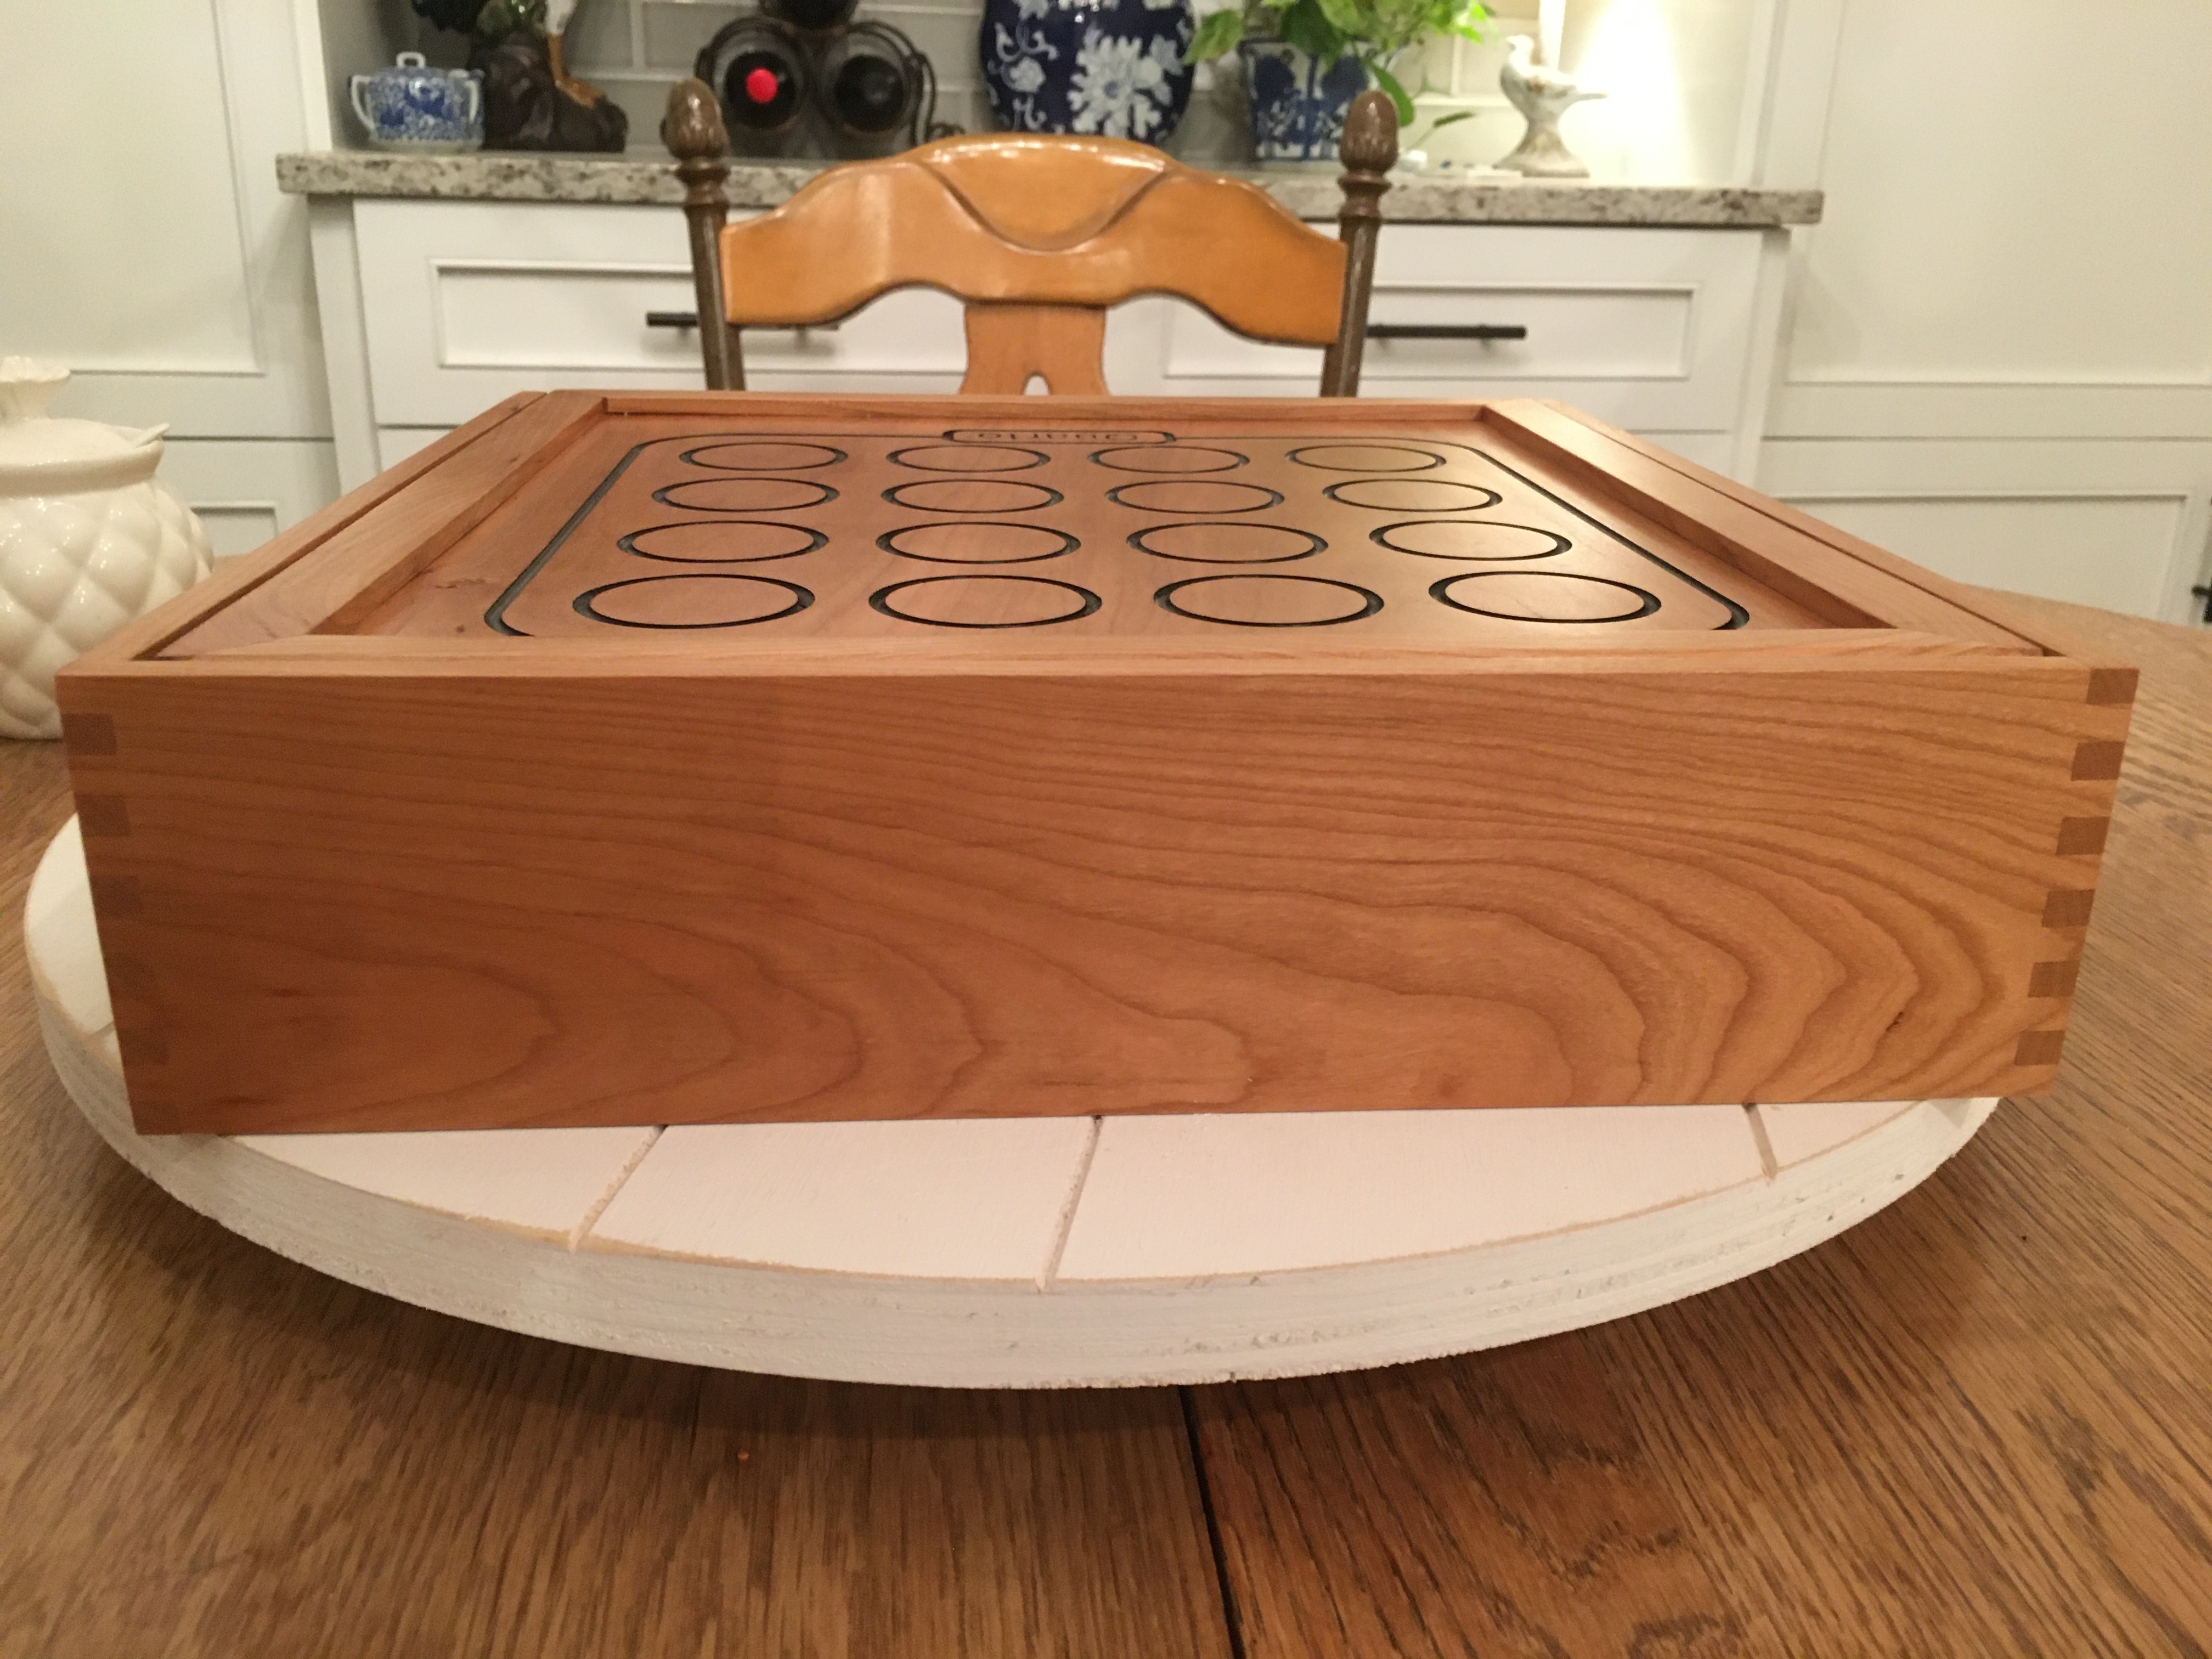
The completed box came out perfectly with good tight joints all around. There was no tearout on any corner. This puts my table saw box joint jig to shame.
13 Likes
I would really love some more detail on your table. Specifically how you set up for the box joints. Did you need to square your opening to the router or is it not significant? Is there anything you wish you would have done differently with that part of your table?
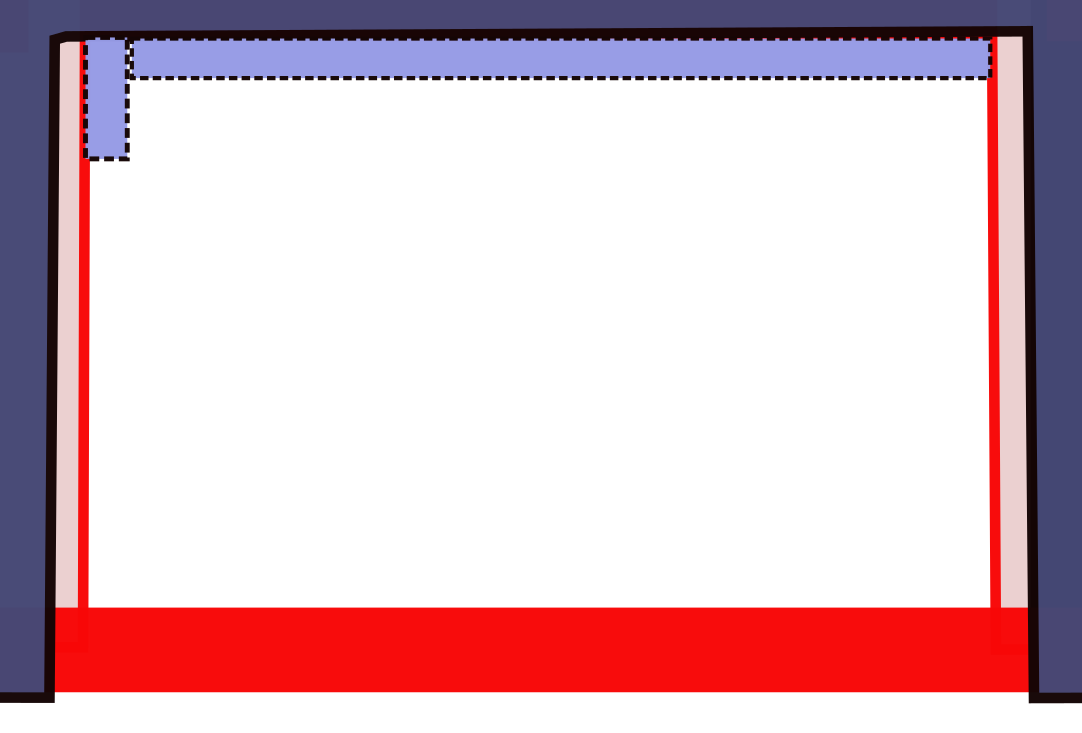
When I built the table I started with the two smaller rectangles shown in black with the red filler pieces.
I made my framing from 2x4 but you could use 3/4" plywood as well. The bottom of the torsion box shown in pink was made with 3/4" plywood. Use a framing square to insure pieces that will be clamped against are square to top and bottom plywood(arrows in photo). I put the box together with 2" screws. The top was put on as a full piece, screwed down with a couple of screws, and then marked for the opening.
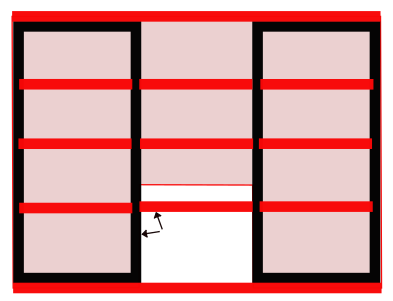
Then the top was removed and cut after adding a 3/4" reveal on both sides of the opening. The top was then placed back on the torsion box and screwed down. This left a plywood piece to put back in the opening when not in use.
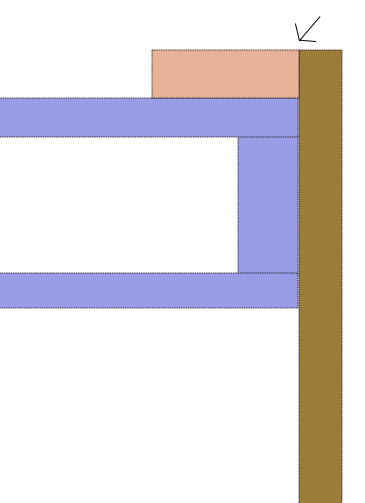
Regarding squareness to the router, I would think it is extremely important to maintain a square relationship. If your pieces end up being out of square to your router, or if you cut a hole in an existing router table, you can always shim the opening.
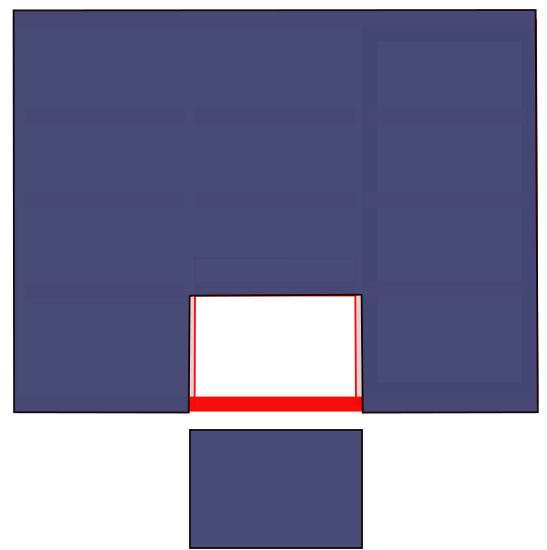
In that case, add a strip of wood fastened vertically to the left side of the opening. Shim as necessary to square it vertically for x. Then add a longer strip and shim for the y axis. You may want to leave off the piece shown in solid red to allow the bigger clamps. Doing so will require more bracing at the edges from underneath to provide tabletop support. Easier to just use shorter clamps IMHO.
To get the piece to be milled level with the tabletop, I use a piece of wood butted up against it(shown in light brown).
One of the things about this setup is the ability to mill any size and combination of box joints to your pieces with ease.
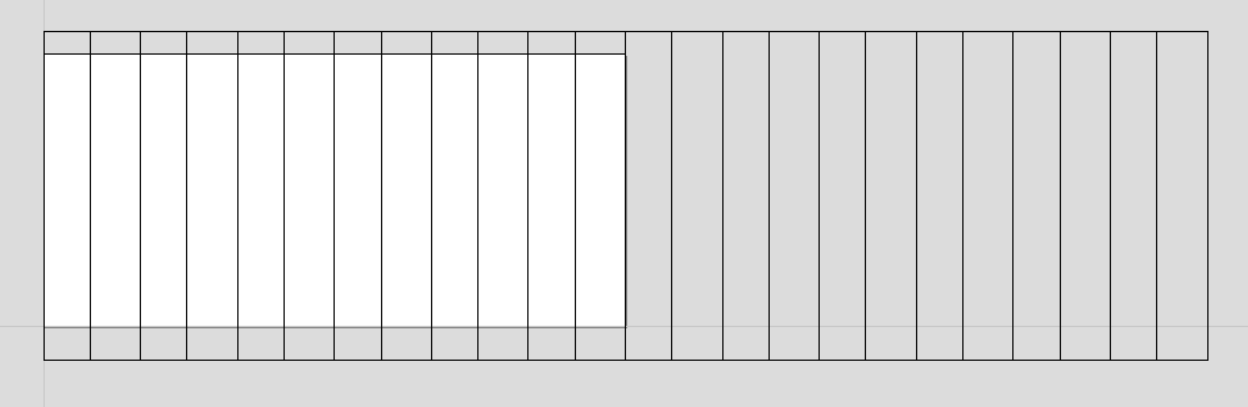
As far as layout and gcode goes, I layout the solid portions undersized slightly and the cut portions oversized slightly. As an example for 1/4" box joints, I layout the solid portions at .24 and the cut portions at .26, maintaining the 1/4" spacing overall.
The picture below shows my layout in vcarve desktop. It starts with a .24 wide rectangle, then a .26 rectangle, etc. repeating as many times as necessary across the board shown in white. The rectangles are taller than the board to allow complete through cuts of the board. For 1/4" box joints, I simply set the board size and then select enough .26 rectangles to cover the board and produce the gcode using a pocket cut. Depending on the box joint size, I use either 1/8" or 1/4" end mills.
5 Likes
This is a pretty impressive thread!
4 Likes
The ability to cut box joints has my mind running crazy with project ideas. The middle of my table top is removable to be able to replace the spoilboard, so i think I may be able to use the table cross-members in a similar fashion to what you have done.
The possibilities…
5 Likes
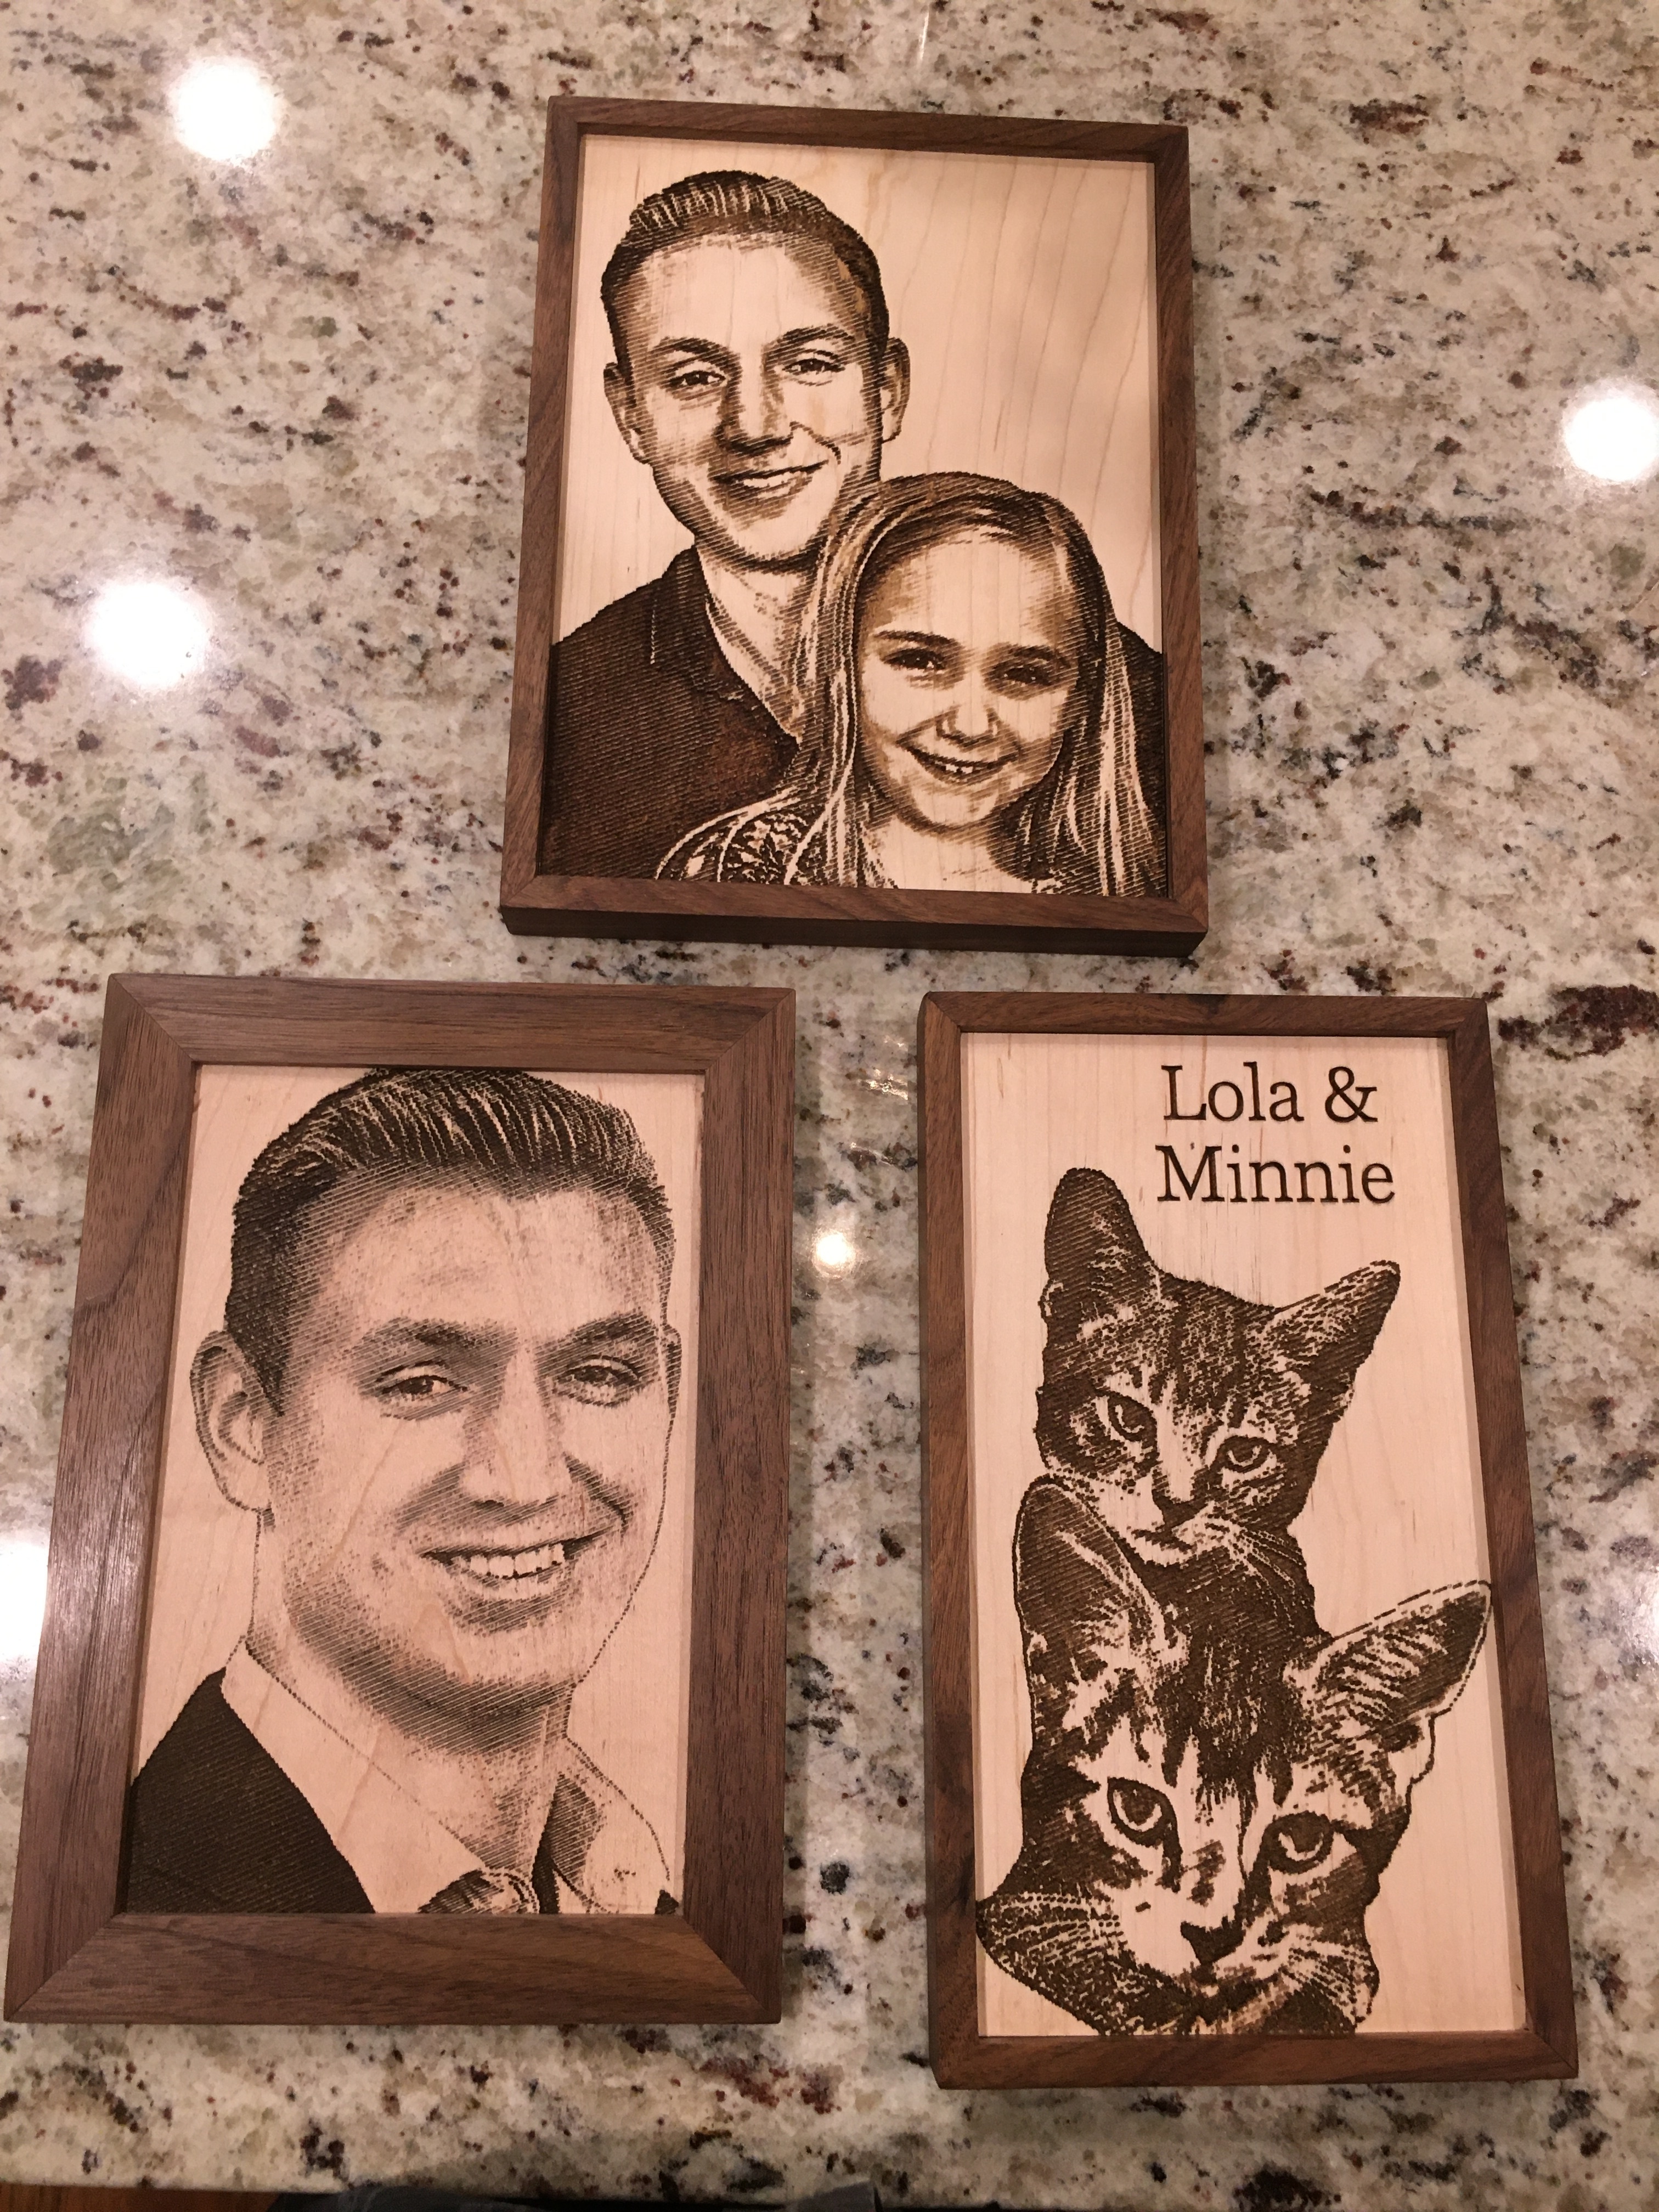
New video showing my busy bees vcarving. These are turning out to be quite popular gifts. The cats are not quite finished as I add their names and a walnut frame to complete it.

2 Likes
How do you color the carves? Paint and then sand?
After carving on maple, I apply shellac using a bedsheet scrap and hand rubbing like a french polish technique except with more shellac and no oil. I make 7 or 8 passes over the wood with this technique. This seals the grain but does not put much shellac at all in the deeper areas where you need a dark stain. I use aniline dye in denatured alcohol that I brush on after about 10 minutes of drying time on the shellac. I just brush the areas that are carved very lightly as too much brushing would start to dissolve the shellac base. The dye mixture is very thin and quickly weeps into all the crevasses with no buildup like you get with paint or gel stains. The dye mixture drys instantly and can be sanded within 5 minutes. I use 220 grit sandpaper on an orbital sander to remove the unwanted coloring on the raised areas. A minute or so of sanding brings it to the state you see in the photo. I apply Deft lacquer (yellows over time), water-based Miniwax Polycrylic (stays clear over time), french polish, or leave the surface with no overcoat depending on the effect I am after and which wood I am carving. Most all finishes adhere well to the shellac basecoat. I use maple as the wood for most of my vcarving for best contrast against the darker carved areas.
3 Likes
That Graves sign is excellent. How long did something like that take to carve? And what bits?
I’ll have to study the post-processing technique you mentioned above, because that’s something I could really play around with on my end.
4 1/2 hours to complete that sign(35 in/min , 1/8" depth/pass). 1/4" ballnose to rough it out, 1/8 ballnose to carve the background and relief on the letters, 1/8 endmill to cut out sign.
Amazing details! Is this only by carving, and is it done with the same dye technique?
Yes, and Yes.
The photos are first preprocessed using this free web based photo editor. Using this tool, I convert them to black and white, adjust brightness, contrast,sharpness, etc. This step makes a big difference in your result. There is a learning curve here to get good results. Slight changes to the light/dark , sharpness,etc, have a big effect on quality of results. But once you dial in the technique it becomes routine.
I use Vcarve Desktop software with the PhotoVcarve tool and 30 degree v-bit (just under 3 hour carve for 8x10 inch size). Then sand to remove fuzzies, sealcoat with shellac and the stain with the dye. These were then sealed with the Miniwax polycrylic I mentioned in a previous post in this thread.
These are the before and after photos done on one of the plaques shown previously.

10 Likes
That photo editing step looks like magic. Very cool.
1 Like
I’m currently using inkscape and estlcam. Been looking into vcarve. Does that software make things that much easier?
I assume you still design in inkscape and transfer to vcarve?
Your work is amazing.
Yes, vcarve makes the whole process faster and easier. I too went back and forth on its purchase. Glad I did finally purchase it. I’ve finally got undo/redo capability! But, it comes at a cost and has limits. I have the vcarve desktop package listed at $395 and it has a size limitation of 25 in x 25 in. To go bigger, you have to do multiple segments(they wanna make it just hard enough to make you buy Aspire for $2000, never gonna happen). I have done several manger scenes and reindeer/sleigh yard displays in plywood using the segmented technique and it works ok, it just slows you down a little. You can do a lot of what inkscape does in vcarve but I still use both programs. Vcarve will never have the design power of Inkscape but I do a surprising amount of signage, games, and photovcarve never using Inkscape.
Thanks for the compliment! Just an well worn old guy( 68 yrs) with plenty of time on his hands.
1 Like
I have V -carve pro to go larger then 24 x 24 cribbage boards were bigger than that and getting hole spacing
was to hard but you have to have a cutting area and a specific reason to need it at 650$ I love it i too still use inkscape on occasion
Super cool. My new lowrider has rails that extend way past the end of the bench, I’m hoping to do box joints as well. In your video it shows 4 boards lined up. Don’t two have to be offset from the other two?