Thank you for testing that. It looks like it is a bit small. Are you using a larger bit than 1/8"? Did you use the premade gcode or do the CAM yourself?
I think I have seen one stepper be bad on these forums and I have posted 15k posts. Steppers are super simple and most of the time people think it is a bad stepper, it is either the wires, or the motor shaft is skipping in the coupler.
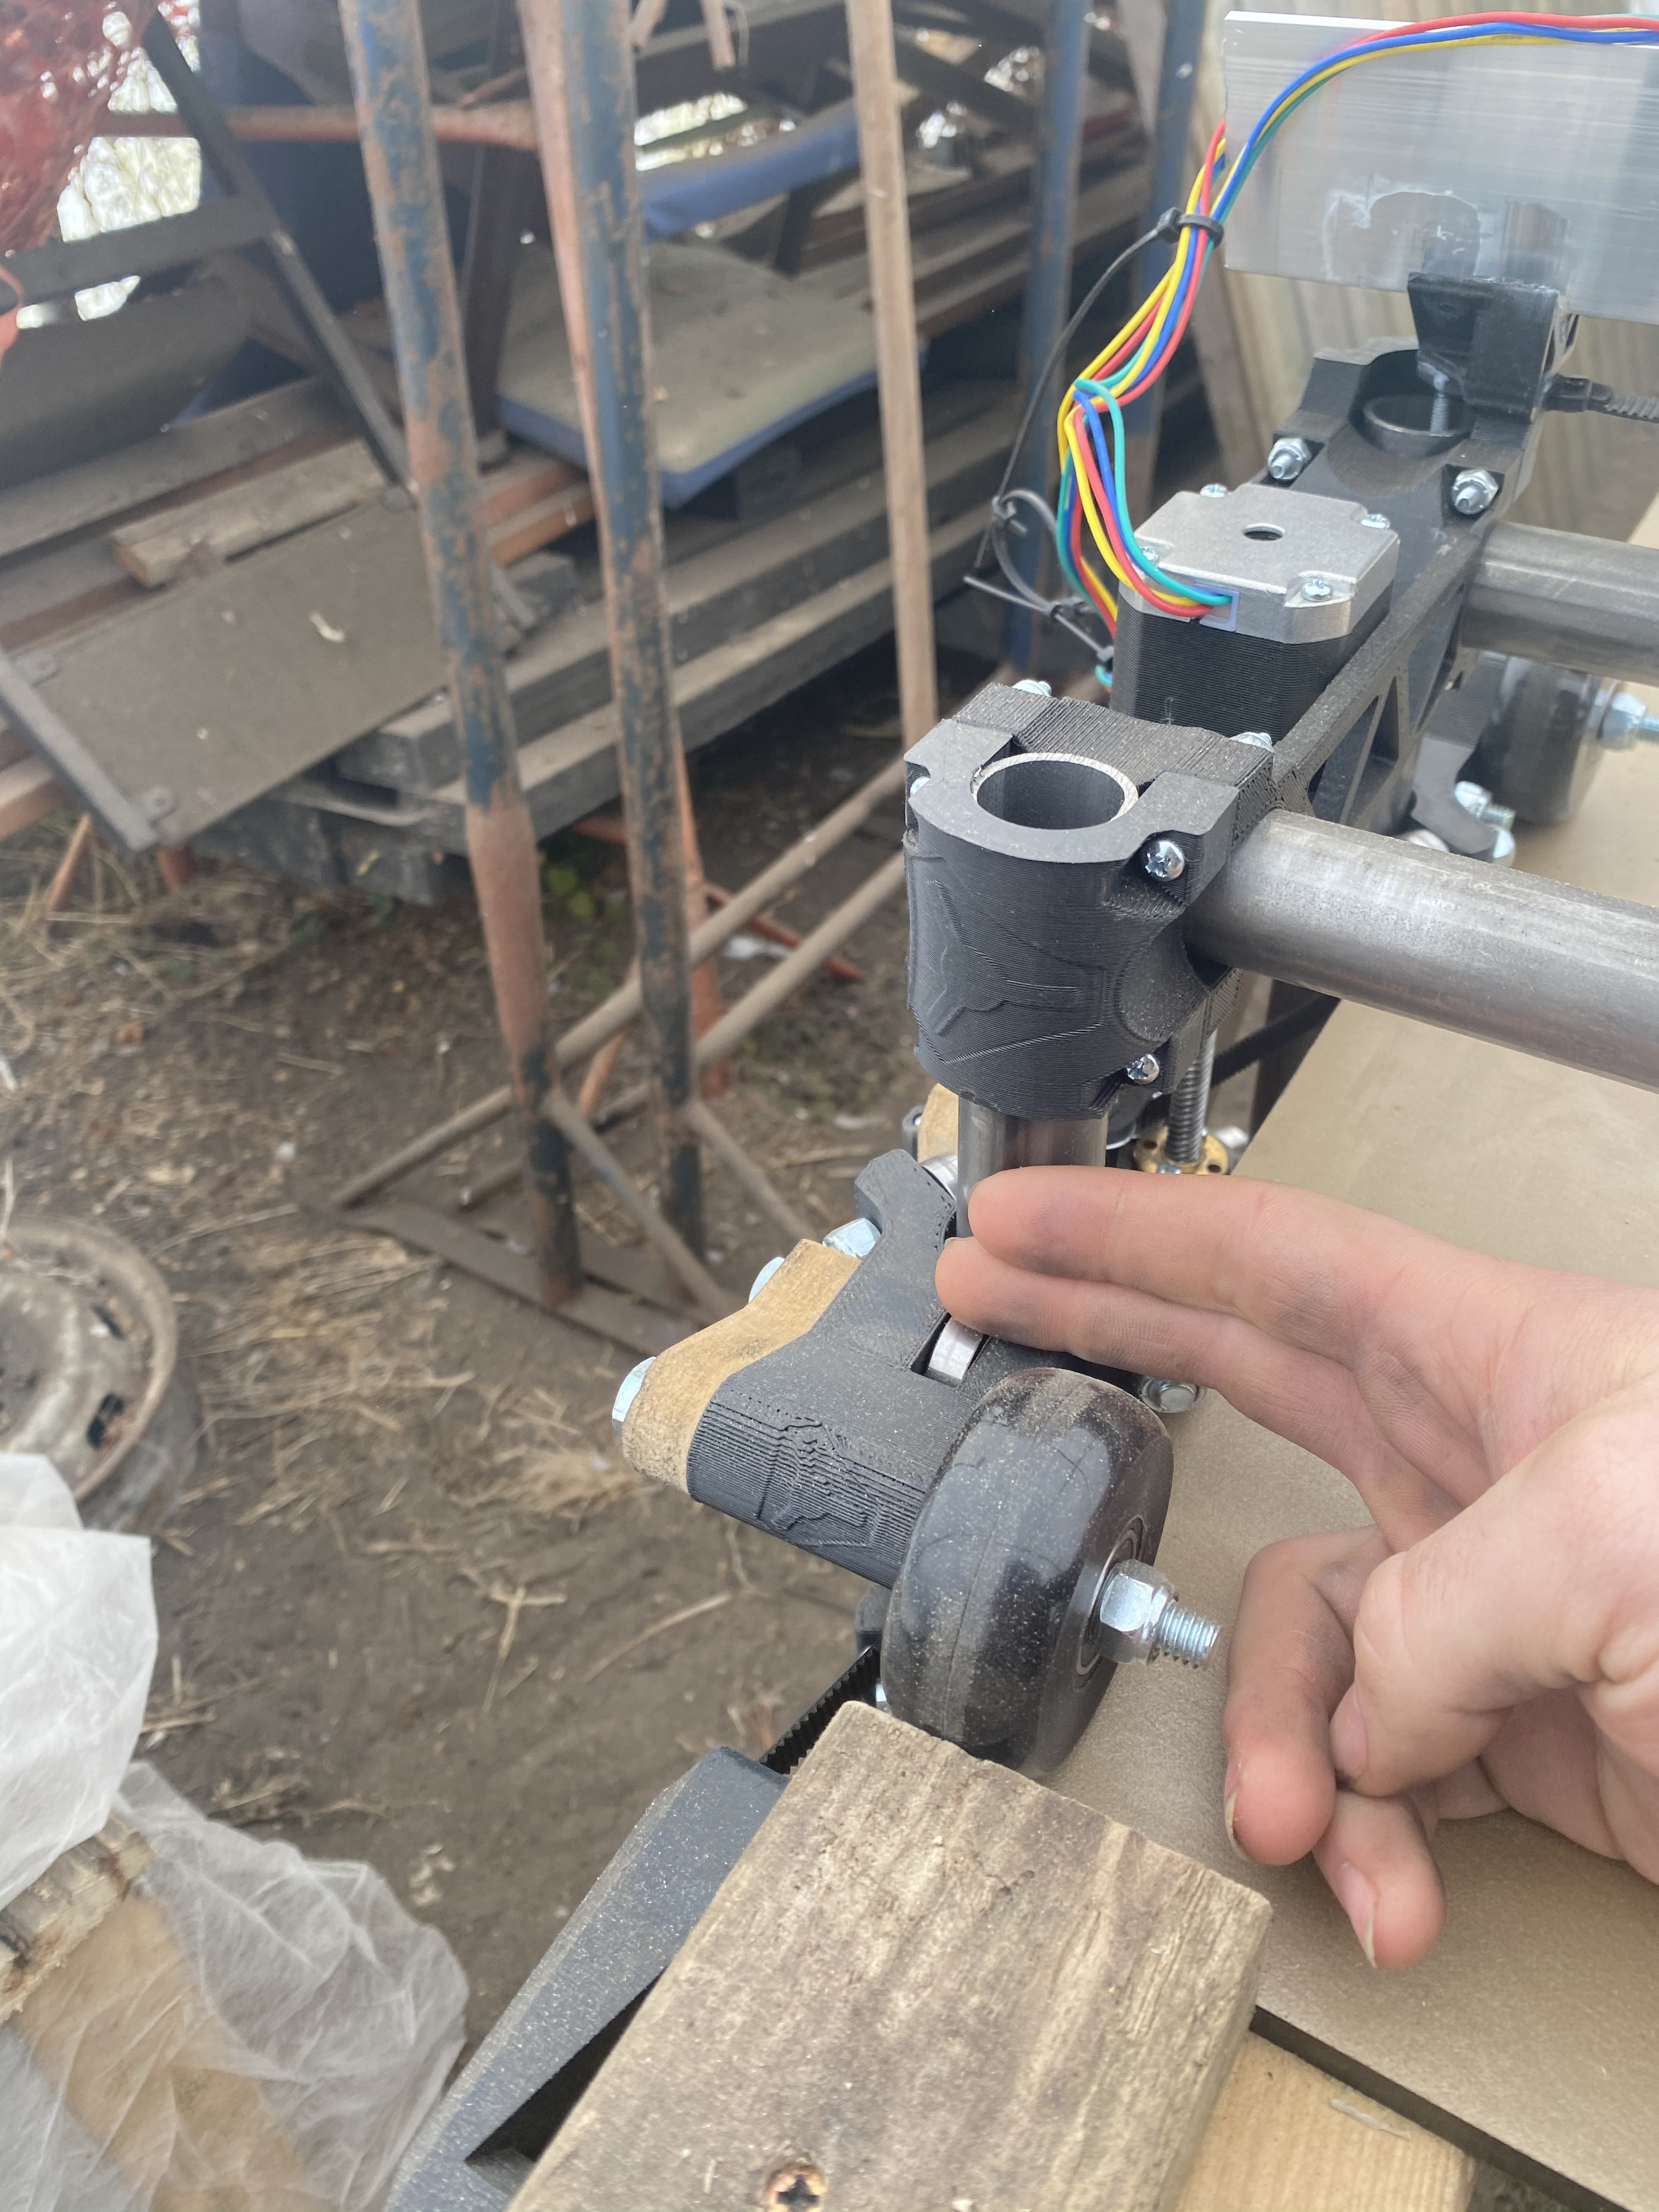
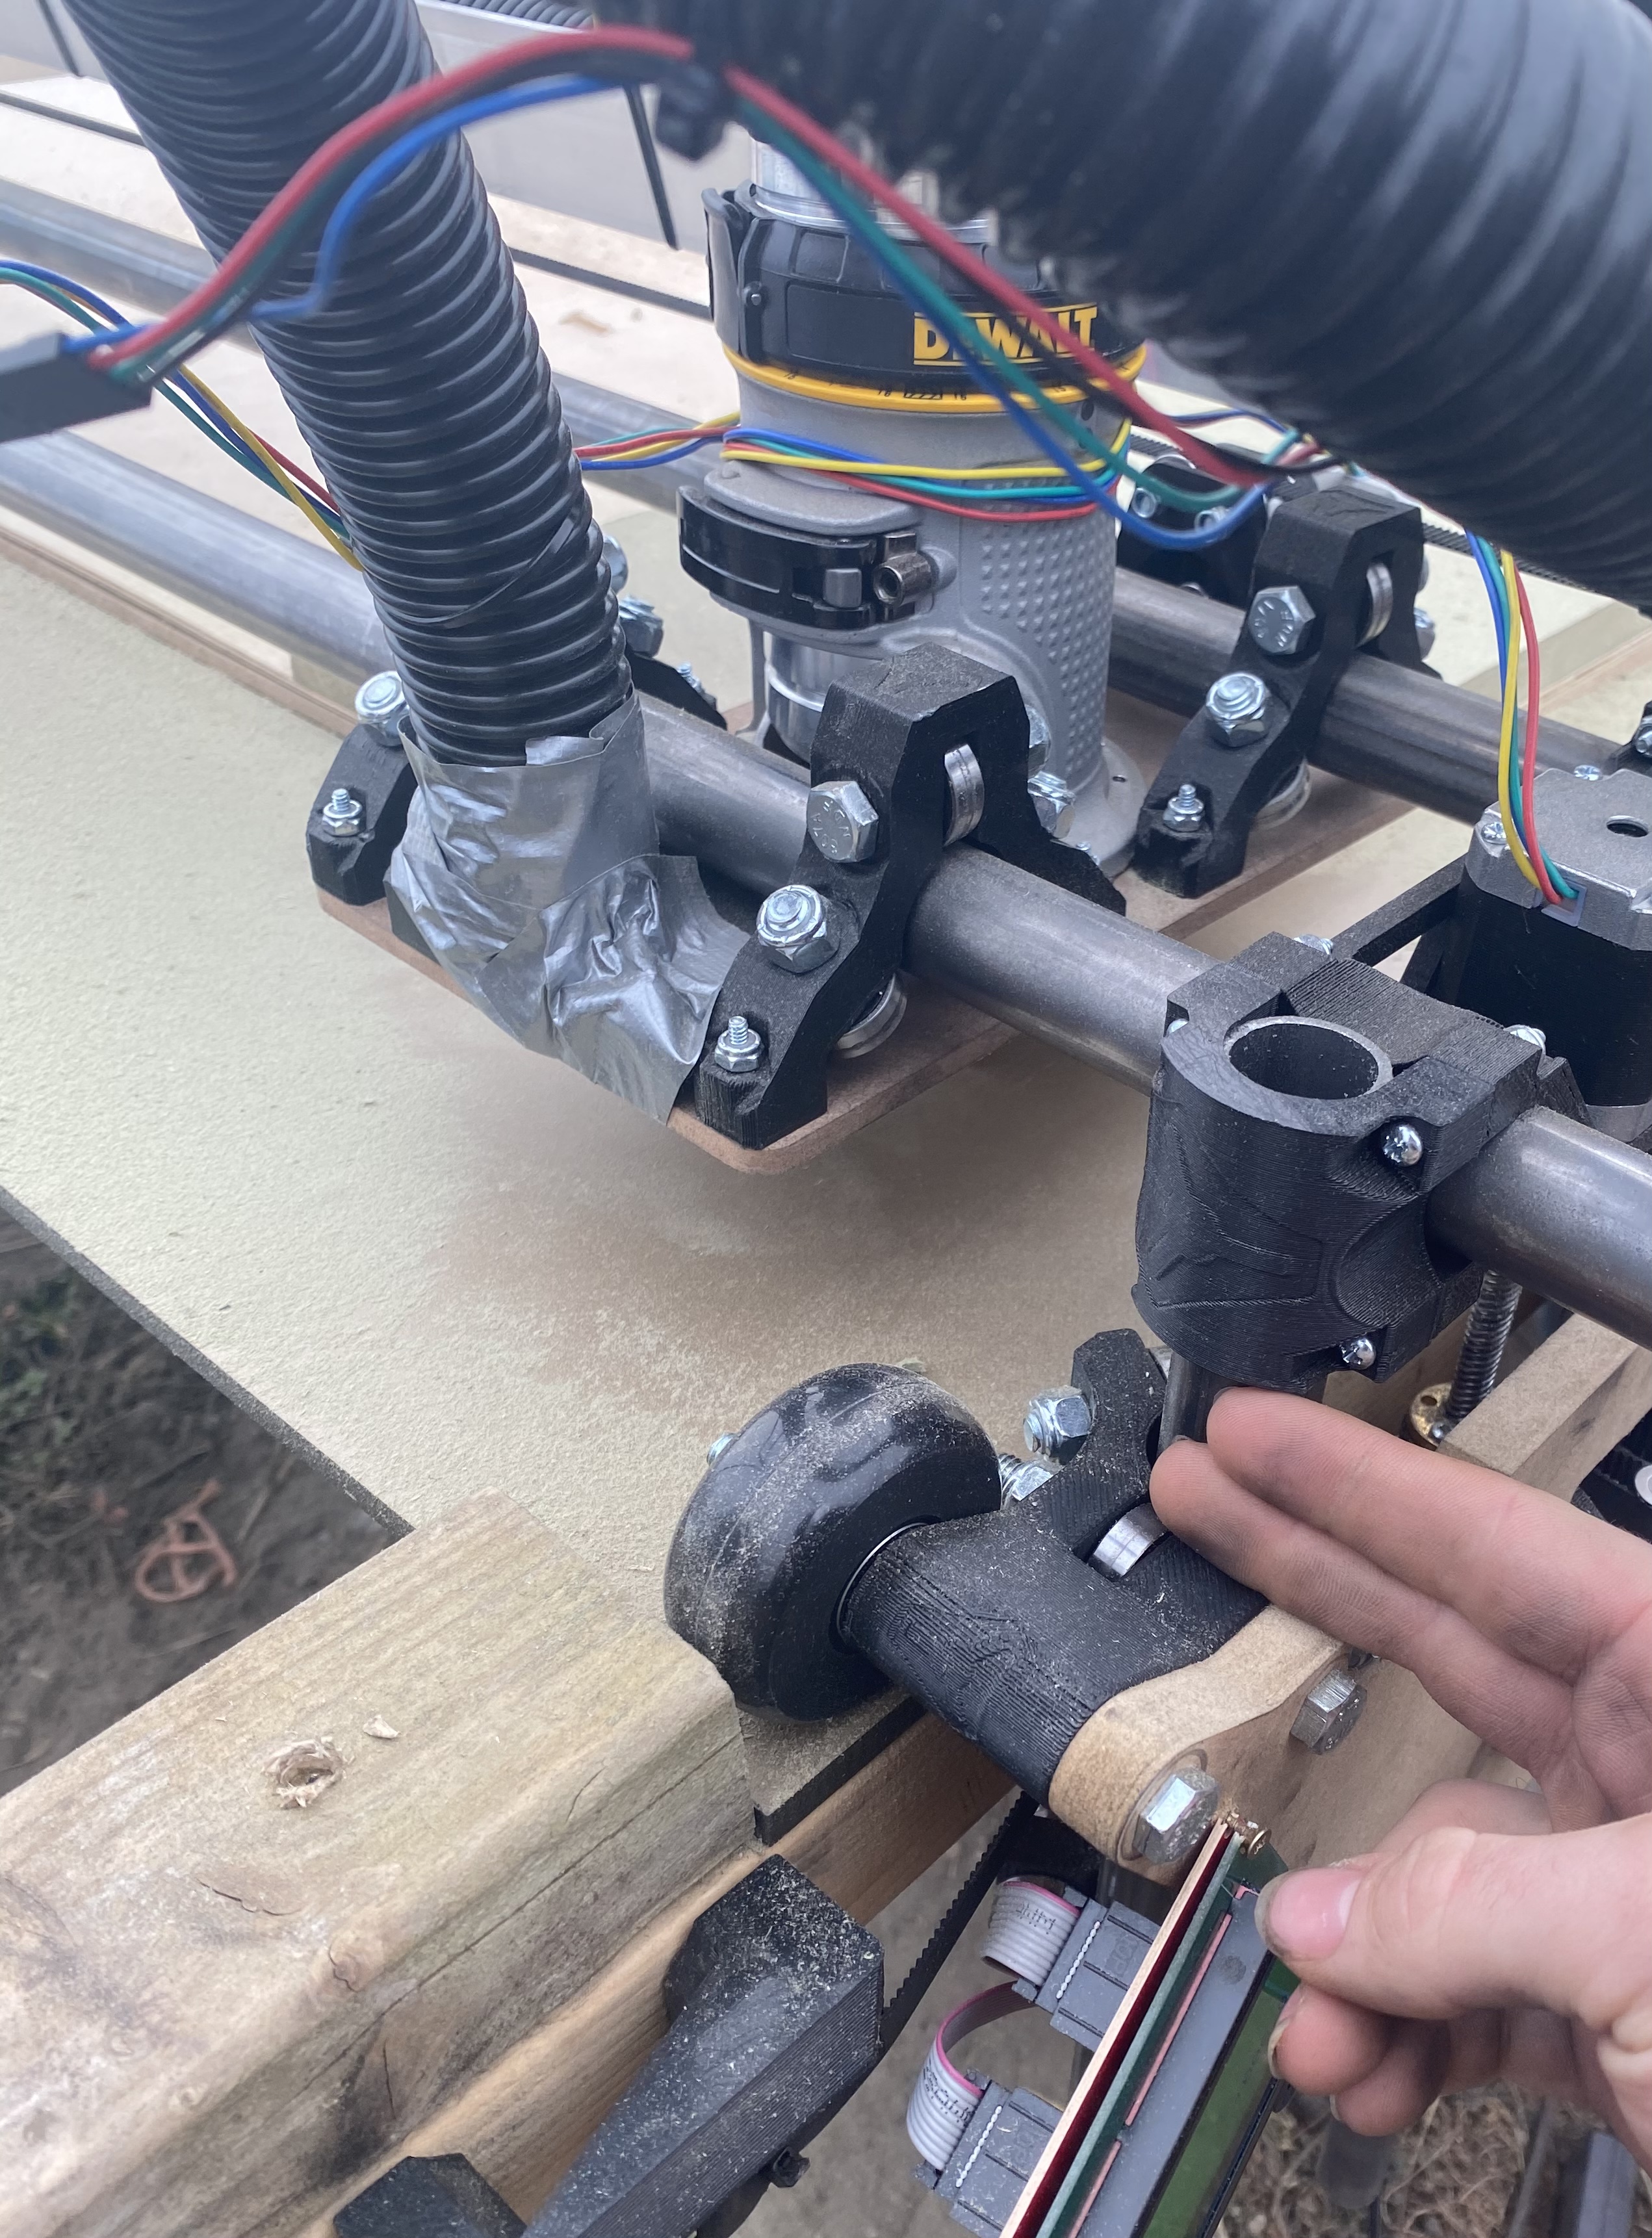
Can you share some pics of the electronics?
Does the Z fall on its own when you turn it off?
I used the pre made gcode and all I had to hand was an 1/8 inch the machine will drop when the powers off it just seemed to drop whenever the motor either in gaged or disingages I can’t picture the board atm as it’s at my workshop my setup had all the v1 parts as I bought a kit the motors all spin correctly and worked fine when I did a test run before mounting it to the table and it only dose it when it’s under its Owen weight and has dropped and gone staraight through the work pice spoil board and table previously
I’ve also checked the motor to screw connection and all grub screws are tight so it’s not slipping in that sense
Just throwing some things out there that I ran into:
My Z got messed up similar to this when I first started running it from cncjs because it was driving it too fast. Had to limit the speed as was suggested in the forums.
Also my wiring connections worked themselves loose during setup and caused flaky steps until I replaced the pins in the connectors.
The other thing I’d be curious about is the size of the gantry. I’m using thicker steel tubing over a 4’ span and if the router is all the way up against one side, it is sometimes too heavy and misses steps on that side. I’m planning on switching to 2mm lead screws to address this, as I really want to add the weight of the aluminum square tube XZ main parts described by Rich in Upgrades on Stiffness. I’d try cutting in the middle of the machine rather than the edges to see if there’s any difference in behavior.
V1 doesn’t sell ramps with drv8825s.
Did you buy the wiring harness from V1?
I had to change to ramps at my own expense as the Rambo I bought with their was faulty it started up with the marlin then went to a blank lit screen all connections where fine something went wrong
Have you reflashed it?
No I haven’t as ramps seemed an easier solution
Well it can be easy. There are two options. Platform io or xloader.
You can already flash your ramps so flashing the rambo is no harder.
Our ready to go firmware is here, and it sets the driver current even https://docs.v1engineering.com/electronics/marlin-firmware/
We have worked very hard to make all of this as easy as possible and there are a couple of really smart people here to help. Please be sure to answer any question asked of you to make it easier and keep everyone interested in helping.
I’m not bothered about the Rambo as I’m on ramps now as it’s smaller more manageable and conselable this isn’t helping with the problem I have so-far we’ve got it down to either a stepper or a wiring loom which are both been supplied by v1 could either of these be faulty
More than likely it is a loose connection. Check each connection in the Z wire loom.
Are you wired series or parallel? If you just uploaded some pictures we would have the answers to most of these questions.
The other more likely issue is some people put a couple of parts of backwards and cause the Z to bind, or just have the Z rails non parallel and it binds, wires and steppers are a far less common issue. If you upload pictures we can look into it.
If you take the entire assembly off the sides. Measure the Z rails at the top and at the bottom it the distance is not within 1mm it will bind., you can not do this in the sides.
There’s obviously no binding coz normally binding causes friction so the z axis wouldn’t drop like it is if anything it would stick rather than drop this seems to be going round in circles I’ve already said that the machine is in my work shop so not so easy to take photos at a drop of a hat. All connections have been fully seated and I even taped them so they couldn’t pull appart the looms where what v1 sent and corresponded with the build instructions of which I followed the machine works just every so often the motor drops one side when it shouldn’t even when I use your g code I’ve shown this in the photos and also every time I mention that there may be a problem with something v1 has provided you dodge it and over look it when realistically this could be possible
Sorry that is not true. The binding can cause downward pressure. It has to do it you are toe in or out.
I know some of this doesn’t make sense but I designed it and we have all been supporting it for years. None of this is new to any of us. Can you just take a leap of faith and trust us instead of fighting every single point.
So please just wait to take pictures then and wait to respond. If you are not at the machine you can not test any of the things we are asking. The very first sentence I wrote in both this topic and your emails was, Please include photos.
There have been cases of the connectors not all the way in the black housings. We are simply asking you to double check them as we have never seen a bad stepper that works a little bit. they are either dead or not.
Did you buy the series set or the individual set? We have asked this several times. If you take a picture or give me your order number I can check.
Which has been more commonly axis binding, or less common a loose connection.
I am here, on both Saturday and Sunday VALANTINES DAY…my days off I am not dodging anything.
I am going to be very honest here. I am not appreciating the attitude at all. I am here and have told you several times I will replace anything that is faulty. If you insist on not following the troubleshooting there is nothing I can do to help you. I am not just going to send parts to someone without verifying something is actually wrong. You very well could be right, but until you actually follow the steps it will never get proven, and I will absolutely not just send you parts at your request.
How about this. You don’t want to do it our way.
Take your “bad” Z Stepper off, and swap it with one of the Y steppers. Put it all back together. See if the problem persists or moves axis. Make sure to test that stepper on the Y axis as well, as testing the Z stepper.
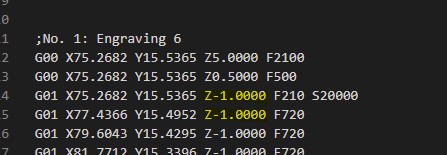
The picture of your crown is not correct. As Jeff mentioned the X y Dimensions are completely wrong and the Z dimension looks to be about 10X too deep. This means your steppers are not set correctly and you are trying to move 10X too fast in the Z axis and too slow in the XY.
You could very well still be right though so feel free to do the stepper swap and make another crown, please include something to reference dimensionally, a tape measure or calipers.
Just so you don’t think I am making things up to dodge the fault, the Gcode specifies a 1mm deep cut from the surface.
Charlie,
What do you want to happen here?
This thread has a very different feel than most. It is almost like you don’t really want to get help.
Coming late to the party here, and noticed a couple of things that haven’t been mentioned. Due to personal circumstances my time on the forum has been limited lately and will probably continue to be so for a while, so while I want to get these mentioned, I strongly recommend working through @vicious1 and @jeffeb3 process - they’ve got a long track record of success.
-
It is normal for the lowrider Z axis to “fall” under its own weight when the steppers are no longer powered. If at all possible, try to have a “parking spot” your tool can return to at the end of the job that doesn’t put your finished work piece at risk if/when this happens. Once you’re done testing with the crown pre-built code, be aware that some g-code generators automatically include commands to disable steppers at the end of the job. I would remove those commands when you go back to generating your own code.
-
Commons RAMPS stepper drivers A4988 max at 16 microsteps and DRV8825 go to 32 microsteps. RAMPS boards use a set of jumpers under the driver boards to achieve the proper micro-stepping. I don’t know which drivers and microsteps the V1 RAMPS firmware is built for, but I’m sure @jeffeb3 does. I’d suggest powering everything off and checking that the jumpers are set as expected since the size of the crown test came out off. Cross-check micro-stepping settings (or steps per mm) in the firmware against the state of the jumpers.
-
Every build has different “local conditions” as far as friction, level, squareness, etc. and therefore the maximum velocity and maximum acceleration have to be found through experiment and iteration. Losing height a little at a time throughout the job sounds like Z axis velocity or acceleration may be set too high. The machine tries to lift the tool, but because it is fighting gravity on top of all other elements it misses a micro step or two and doesn’t get to the full height, but when the tool goes down it goes down the fully commanded amount. Repeat this a few (or a few dozen) times throughout a job and the cut just keeps getting deeper.
I know it is frustrating for the machine to be so close you can run your code but not get the result you need. But you are very close, so I hope you are able to work things through.
Best of luck!