I’ve always been a fan of making, and even more a fan of making things repeatable. Something in me loves the idea of manufacturing. Honing in a process until every step is accurate and consistent and allows you to build whatever you want. At the same time I’m always weary of the failure (or something that currently lacks perfection) that iterative processes often require. It usually leads me to inaction knowing that I won’t get things right the first time.
Regardless, there was a time that I, on impulse, purchased a Silhouette Portrait plotter. I used it to make stencils and decals everything. Glass etching, painting, bleach shirts, car decals. Its been a godsend compared to cutting things out by hand, and enabled me to do more than I could before.
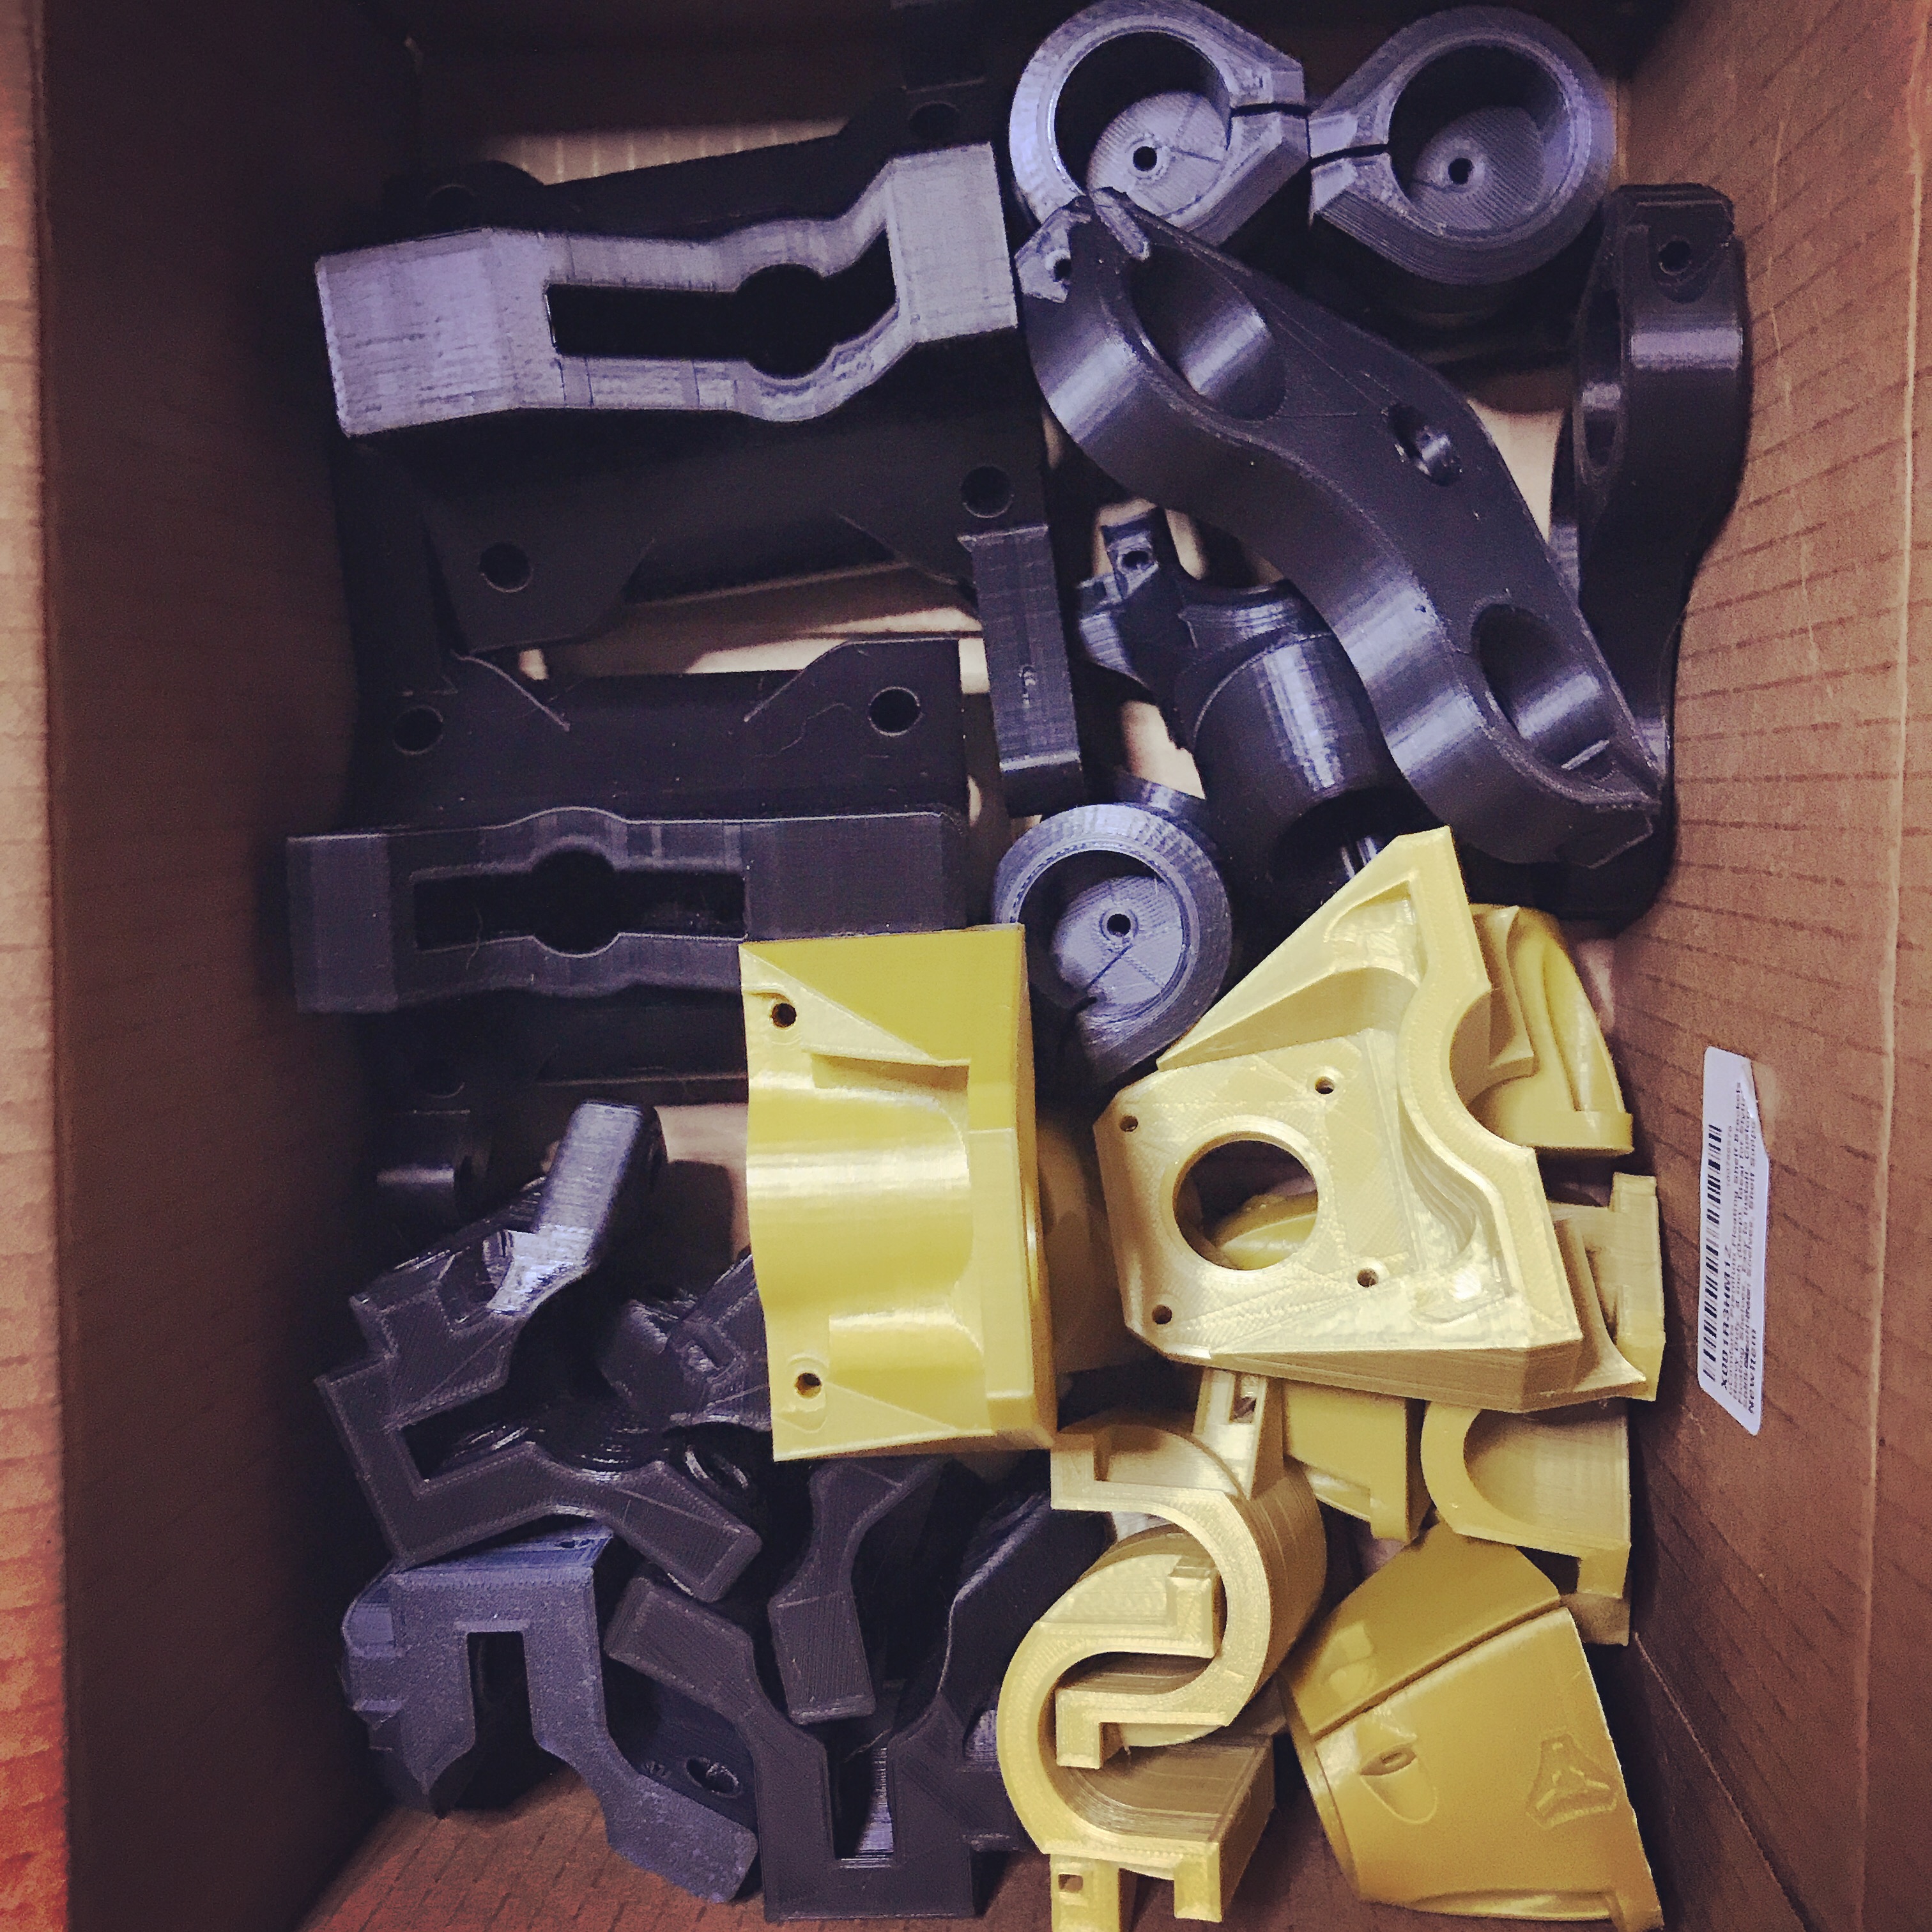
A couple years ago I got an Ender 3 and have something printing more often than not. Its so nice to print little things that I wouldn’t feel are worth buying or can’t buy. I’ve got a Steelie mount for my phone and have printed all kinds of mounts that hold a 1" ball bearing so I can throw my phone up everywhere. I have a cup holder on the side of my desk that perfectly holds my water bottle. The biggest thing I’ve done so far is print out the MPCNC parts :
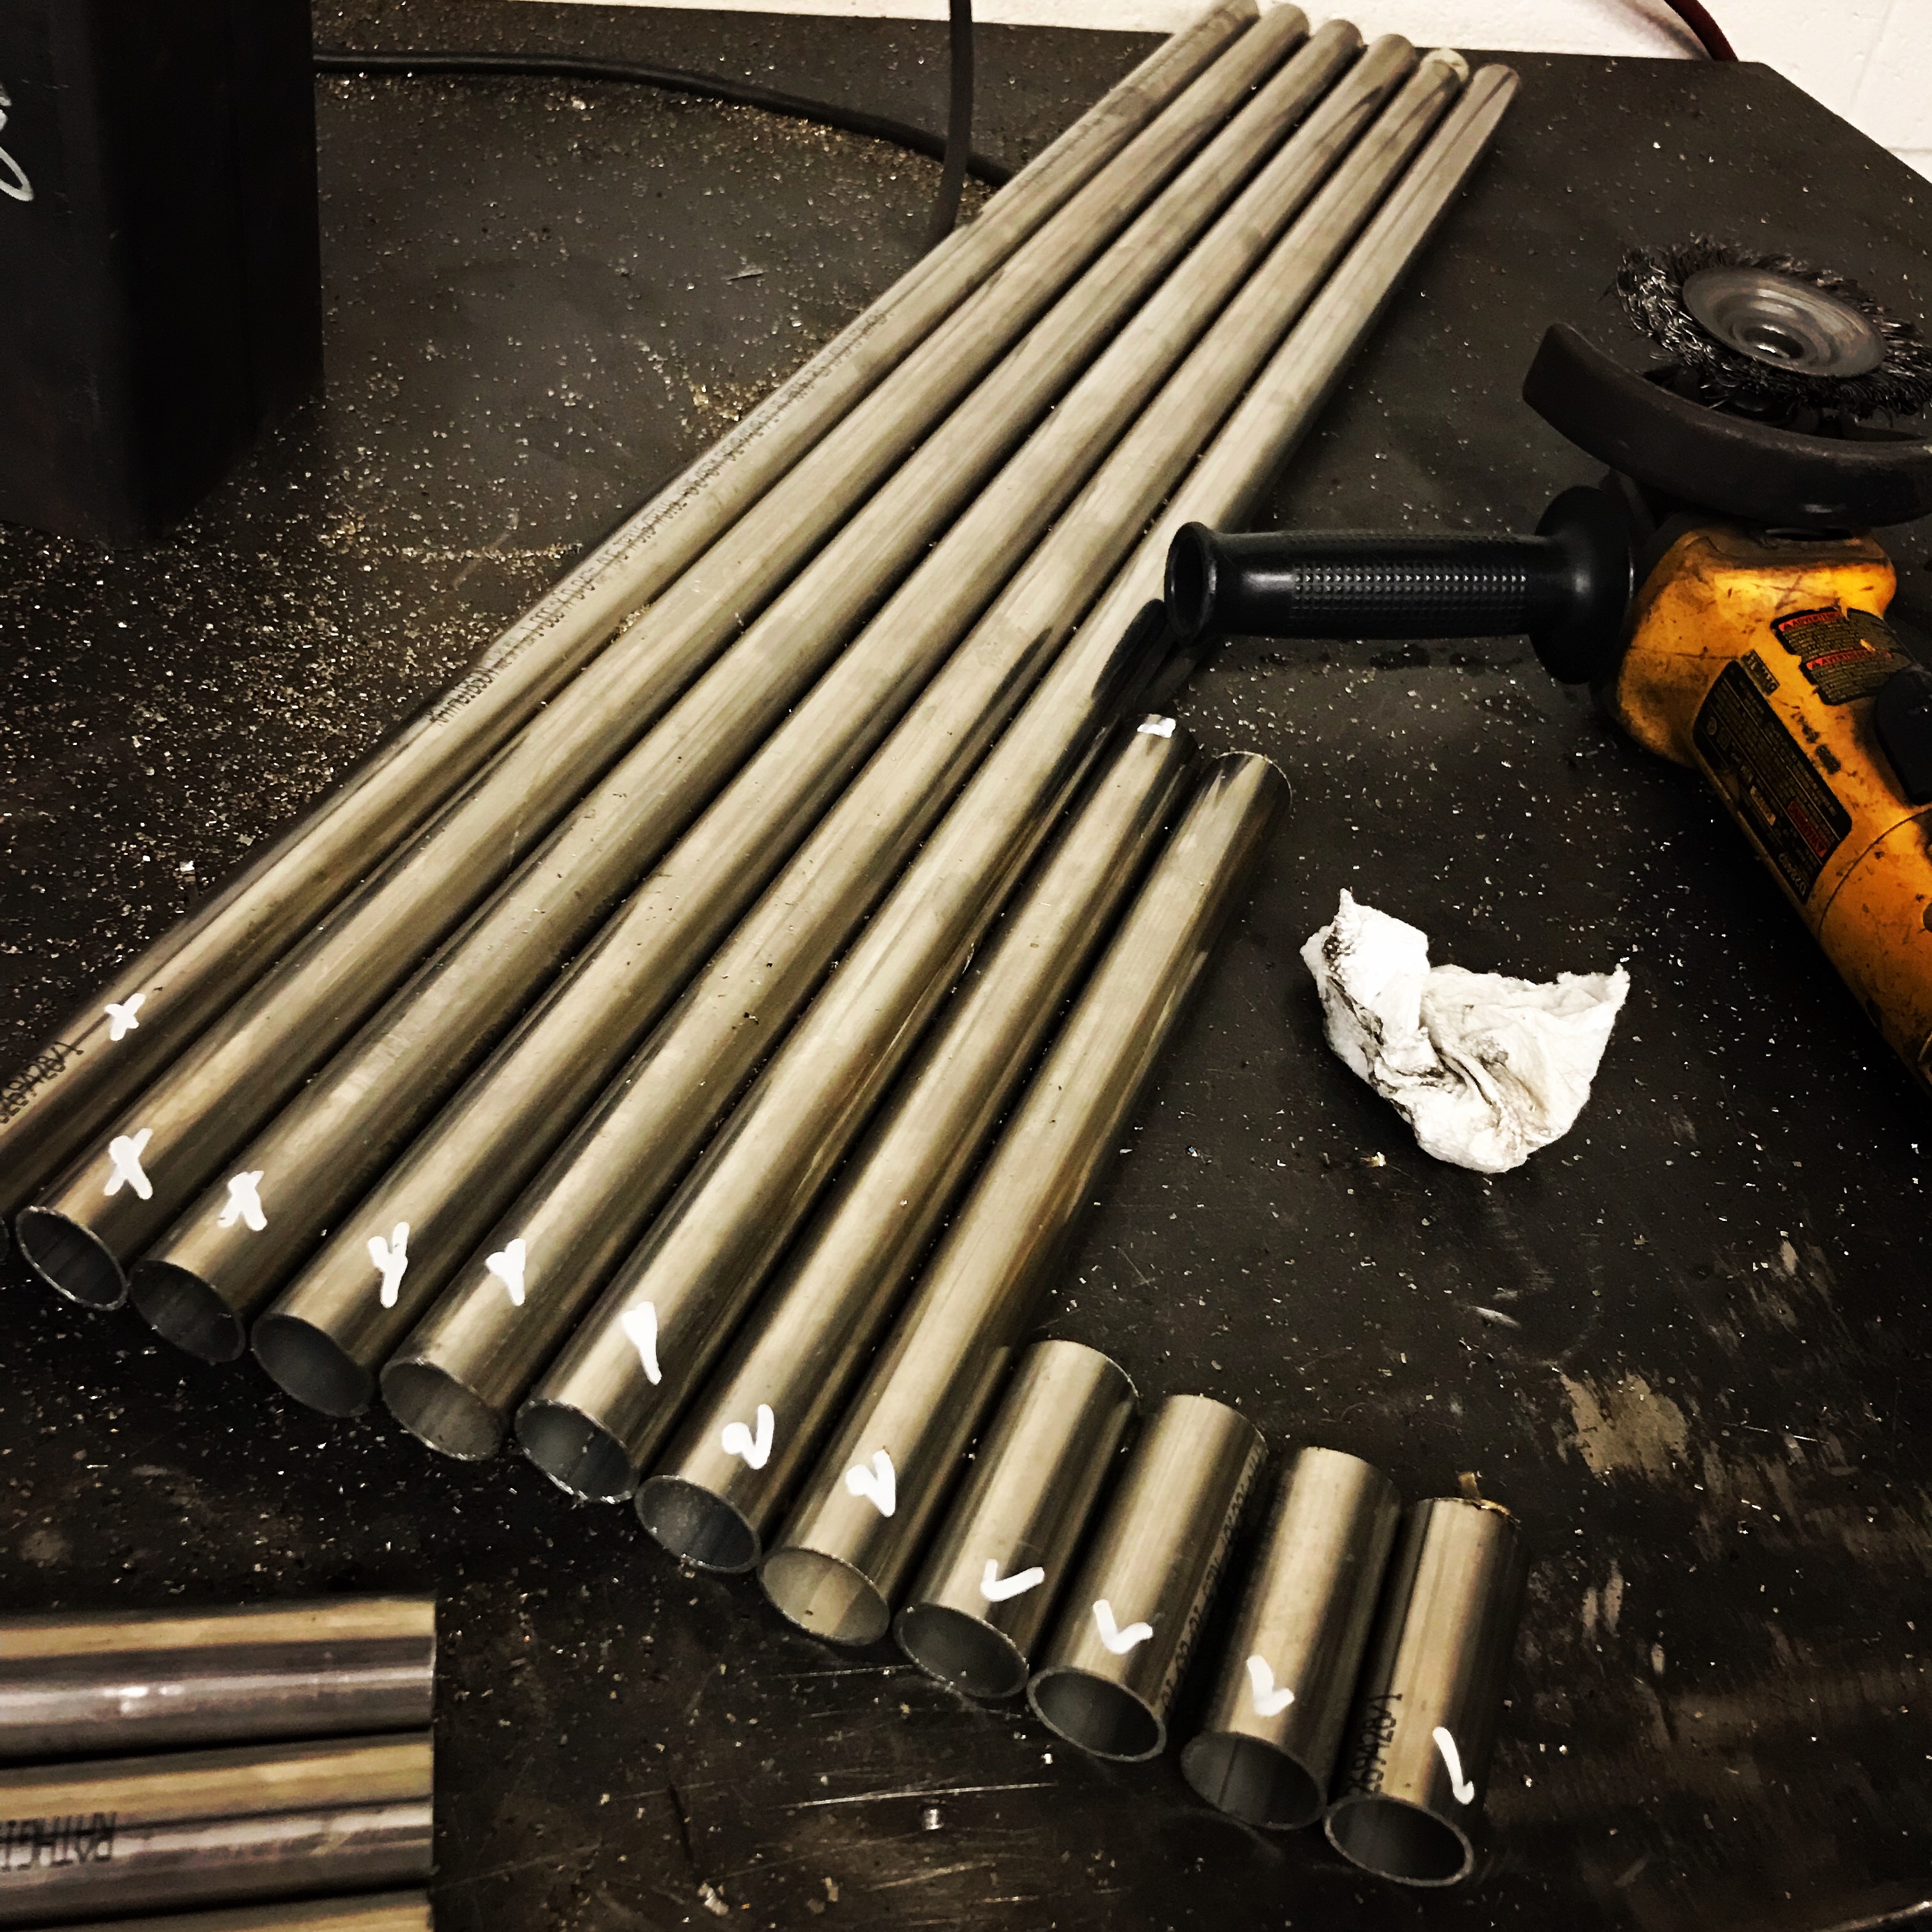
I’ve got some friends that run a great metal fab shop who let me use some tools to cut up my stainless tubes to length. Its so much easier to use a proper metal cutting chop saw than a hacksaw. Much cleaner cuts too. I got enough for a 2x2 MPCNC and a 4x8 lowrider for $40 locally. I don’t know if I’ll make a lowrider but it seems like a good time to cut the tubes in case I ever do.
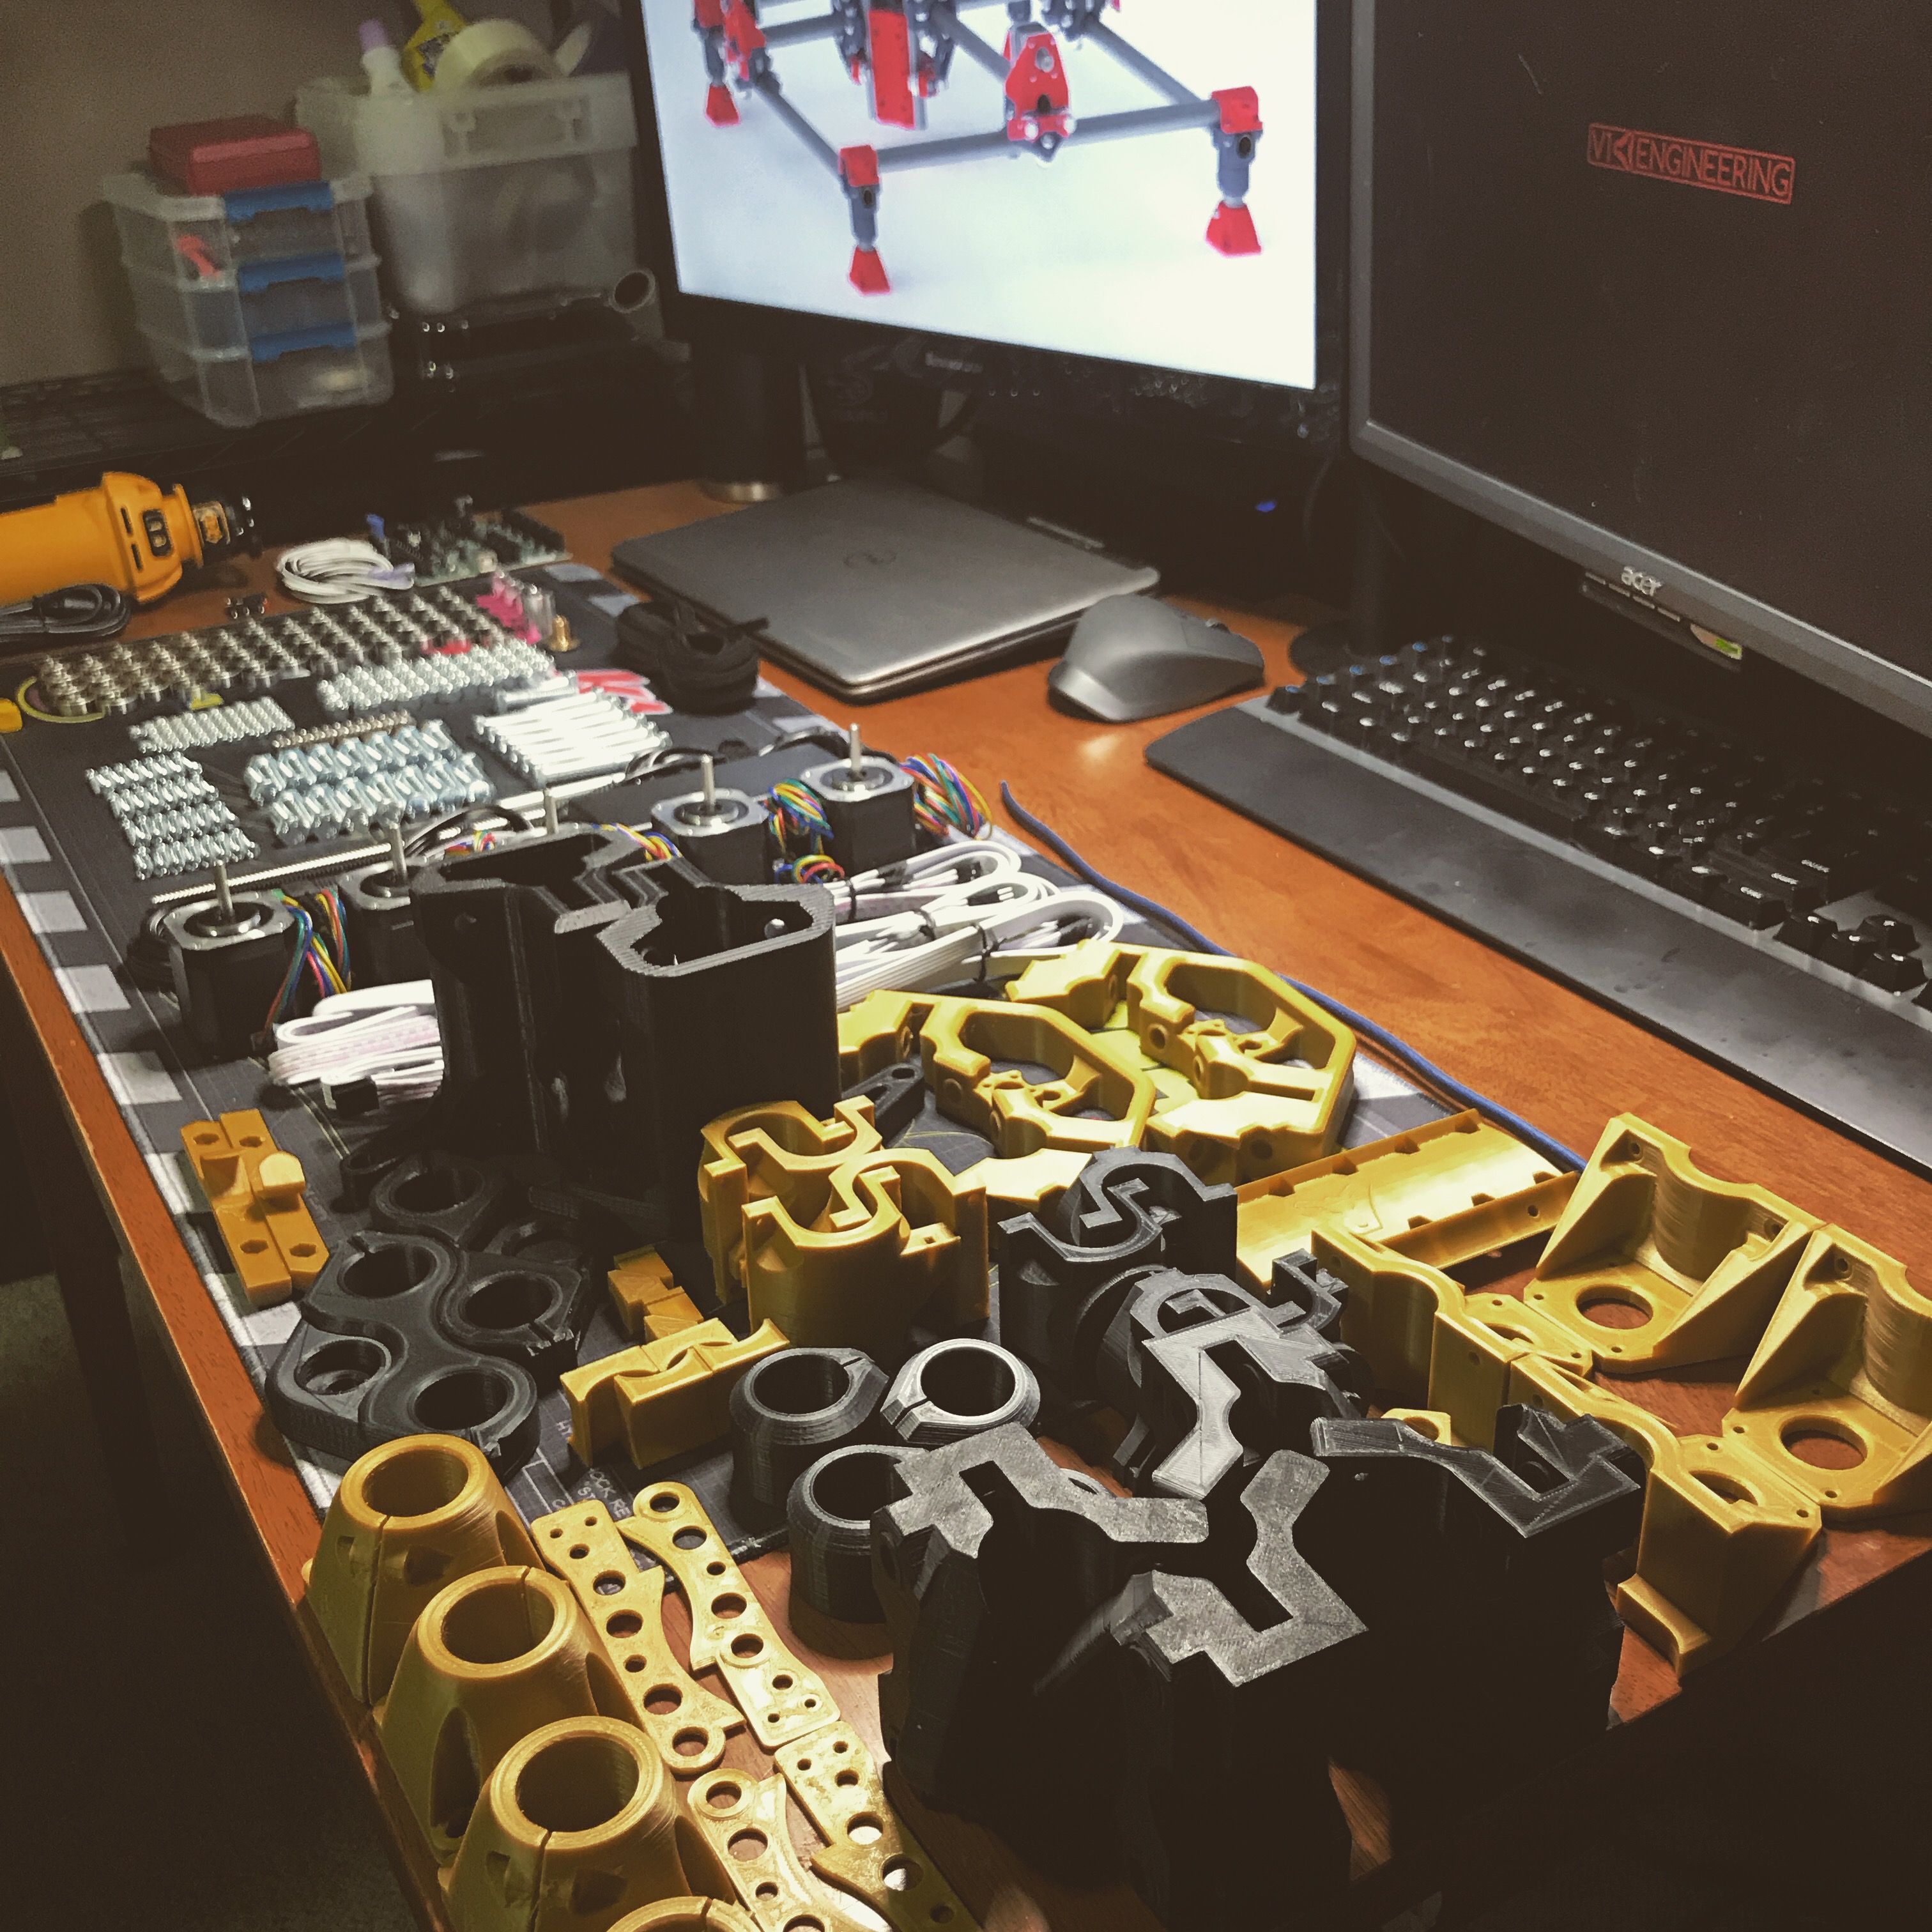
I actually got a lot of the printed parts put together. I don’t remember why I stopped, but I got busy. When I lose momentum its hard for me to pick it back up even though I still dream of having a CNC to add to my arsenal. I wan’t to build things that need one. But for nearly 5 months is been sitting unchanged in my office. I sometimes have to move it to make space for other projects or boxes.
My area is on a 30 day shelter in place order, and I have 30 days of food. I’m working from home, and since my recent trip was canceled have a 3 day weekend. Maybe if I start posting about my MPCNC I can convince myself to figure where I left off and get back into it.
Ah, so it looks like I stopped because I didn’t have any metal drill bits for the holes in the Z axis rails… Not wanting to break the shelter in place order, looks like I’m going to have to wait for Amazon.
What works for me is not to think too far ahead, because that causes indecision and procrastination. Spend time in the shop/project room, and pick something you can do, even if it’s just tidying up and making space. If you achieve some small thing every day, you’ll keep nibbling away at the list and eventually it’ll be done. Also, I find that the time I spend working on the ‘easy’ bits helps me make decisions on the things that have been holding me back, just because I’m focused on the project.
It looks like you’ve almost finished the mechanical part, so have a go at the electronics. Getting the LCD to light up is a big moment, and make a motor move is even better. It’s a small step from there to drawing a crown, and then it feels like you’re just adding polish to something that basically works.
The #1 hardest (sic) part of my MPCNC build was drilling holes in the SS z-axis parts. It’s a good thing you have a lot time on your hands. It would also be good if you had a drill press, and a grinder for sharpening dull/broken bits. DAMHIK
Here’s a trick though, use a grinder to grind a flat spot where the holes go. #1 it will give you a flat spot to start drilling, and #2 you can grind down the metal until there’s hardly any left to drill, rather than drilling thru the full .065 wall.
I was taught to always center punch when drilling metal. The bit is very prone to wander otherwise. Grinding a flat spot will help, but I would still center punch if you have one. I really like this type of center punch personally.
Also, cobalt steel drill bits are the bees knees for drilling stainless, and other hard metals.
Edit to note that low RPM, some light oil (I use 3 in 1) and fairly heavy pressure help too.
Yeah, I center-punched, had sharp bits (albeit cheap), went slow, and applied an unsafe amount of pressure…and it still took an unreasonable amount of time and effort. I wish I had a drill press.
I used this when drilling my Z-axis. Actually, I used two, one on each side, and clamped them together to keep the conduit from trying to roll as a I was drilling.
For less than $10 you can get a set of center drill bits on Amazon. They are designed to starts holes in metal. Machinist’s use them on Bridgeports, mini-mills & drillpress.
Photos and videos tomorrow I expect. I’ve got the z axis drilled and assembled. I actually have the whole thing assembled at least in its most basic form now. I’ve printed out a box for the LCD and Ramob, and wired it all up. It feels so good to see this baby move. I’m printing out the pen mount right now and cant wait to drawn some royal headgear tomorrow.
I was nervous for a bit because my X and Y axis were moving fine, but the Y made a horrible clicky noise, and only moved down. After some troubleshooting with the port, and extension, and eventually a multimeter decided that the motor was bad and opened it up. I found one of the wires from the windings sitting on top of, but not touching a ball of solder. I got that sorted out and have now drawn several crowns in the air.
Soon, I’m going to need to buy some tools and wood and make a table so I can square this puppy up. Any recommendations on a good 12" non sliding miter saw? Accuracy is desired, but only looking to spend $200-300.
Good to know. I took off the back plate, and the stator did move about 5mm back as I pulled. At least it works now and will allow me to do calibration, testing, and plotting. Thankfully they are cheap to replace if need be.
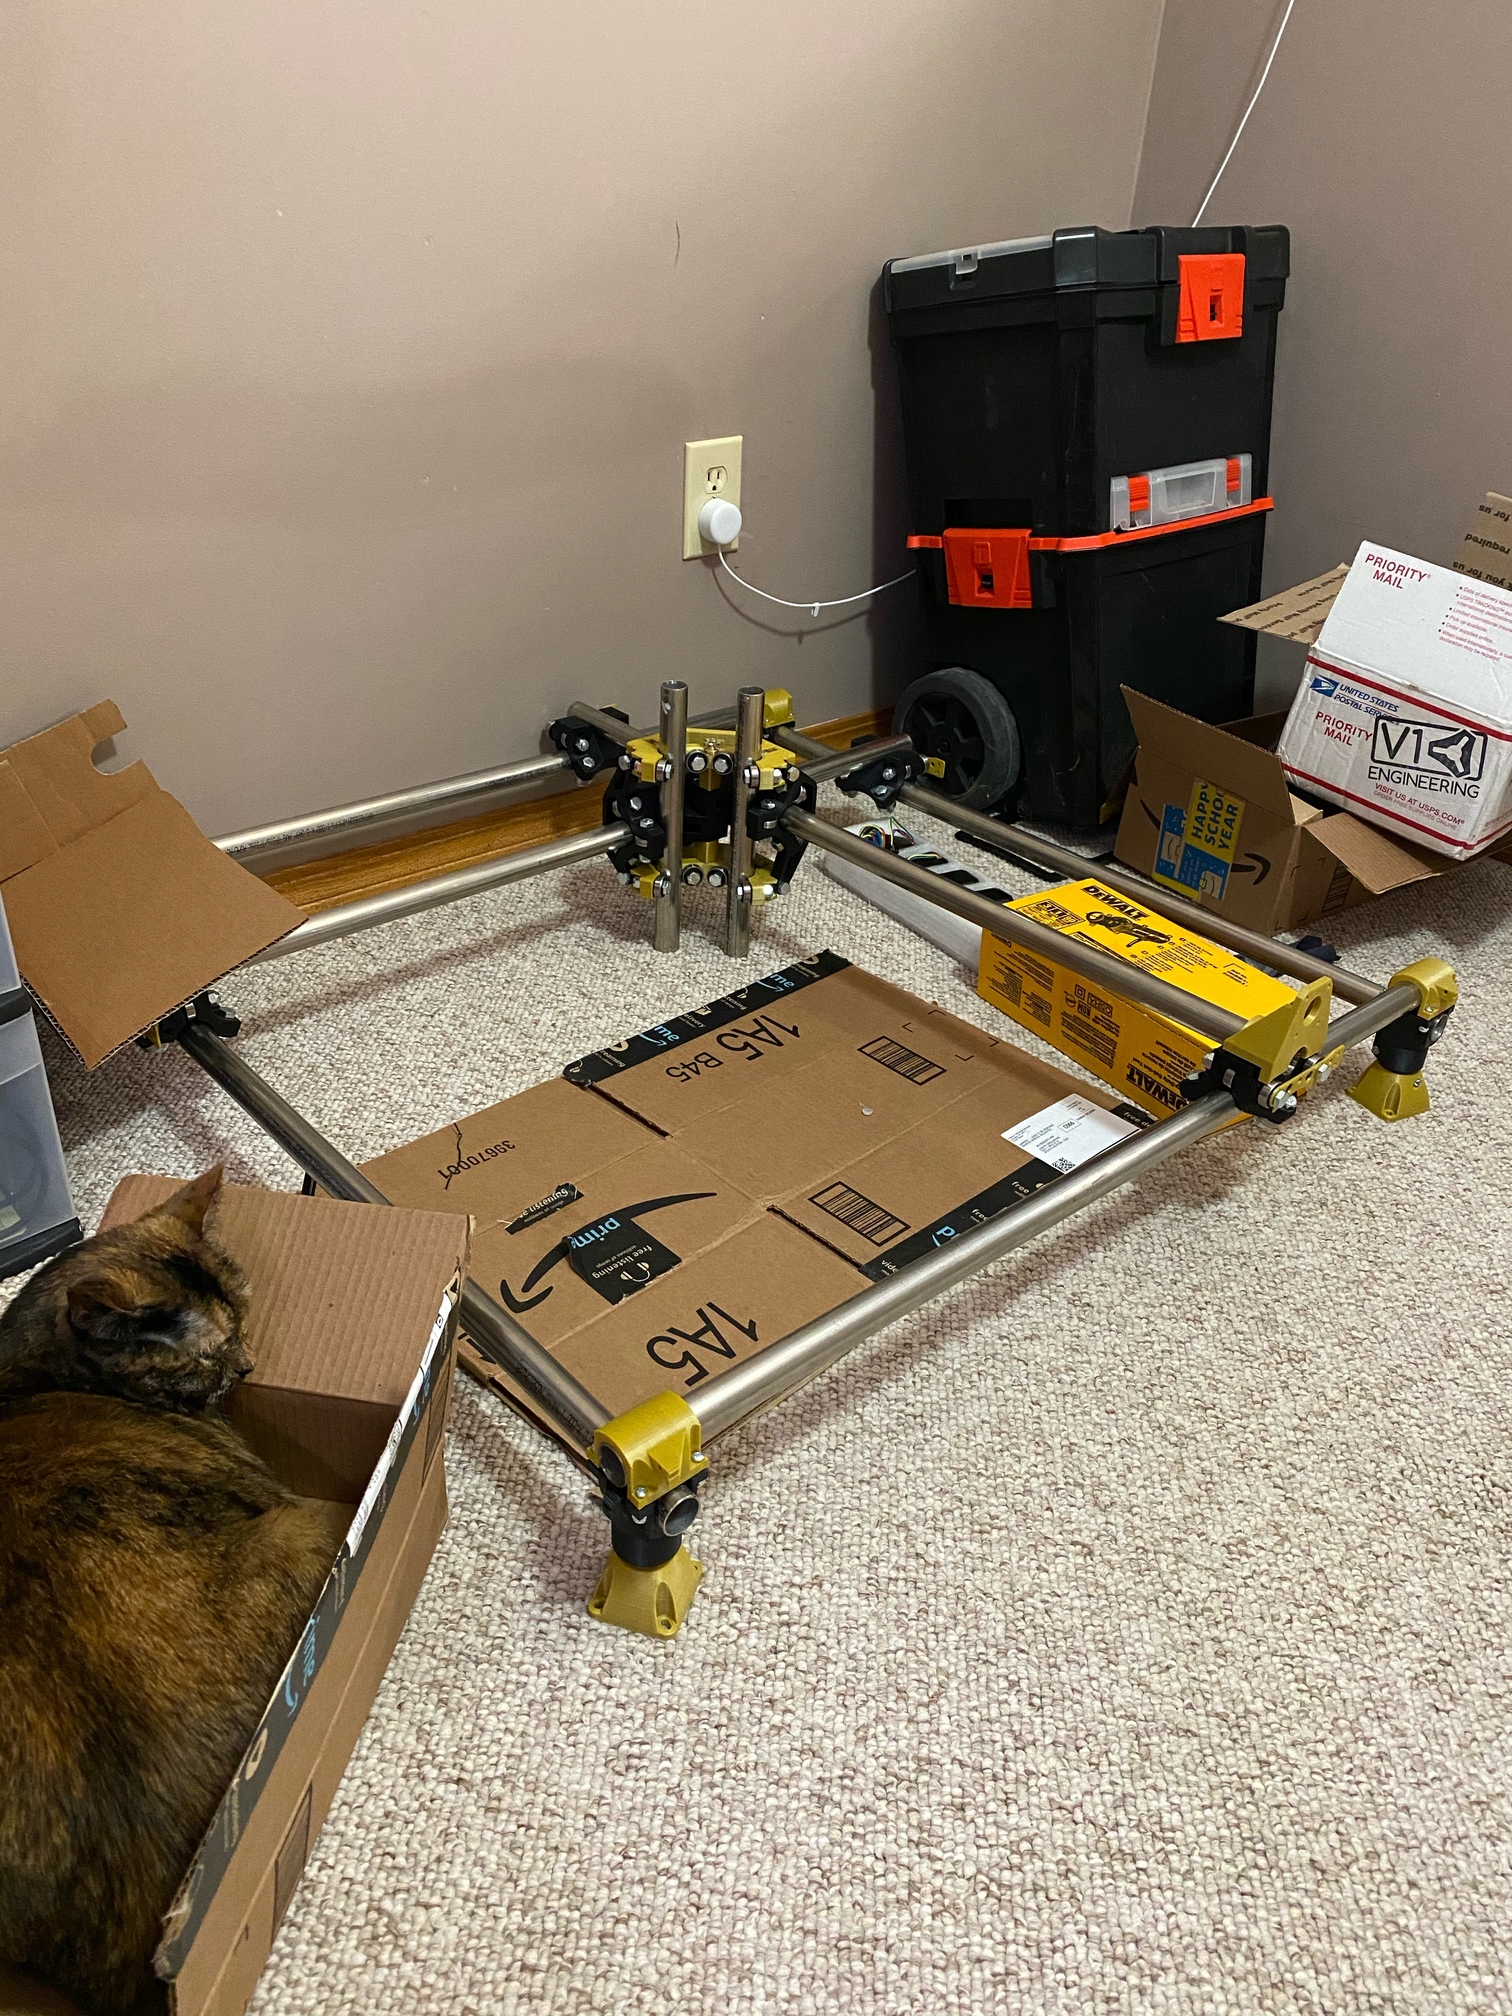
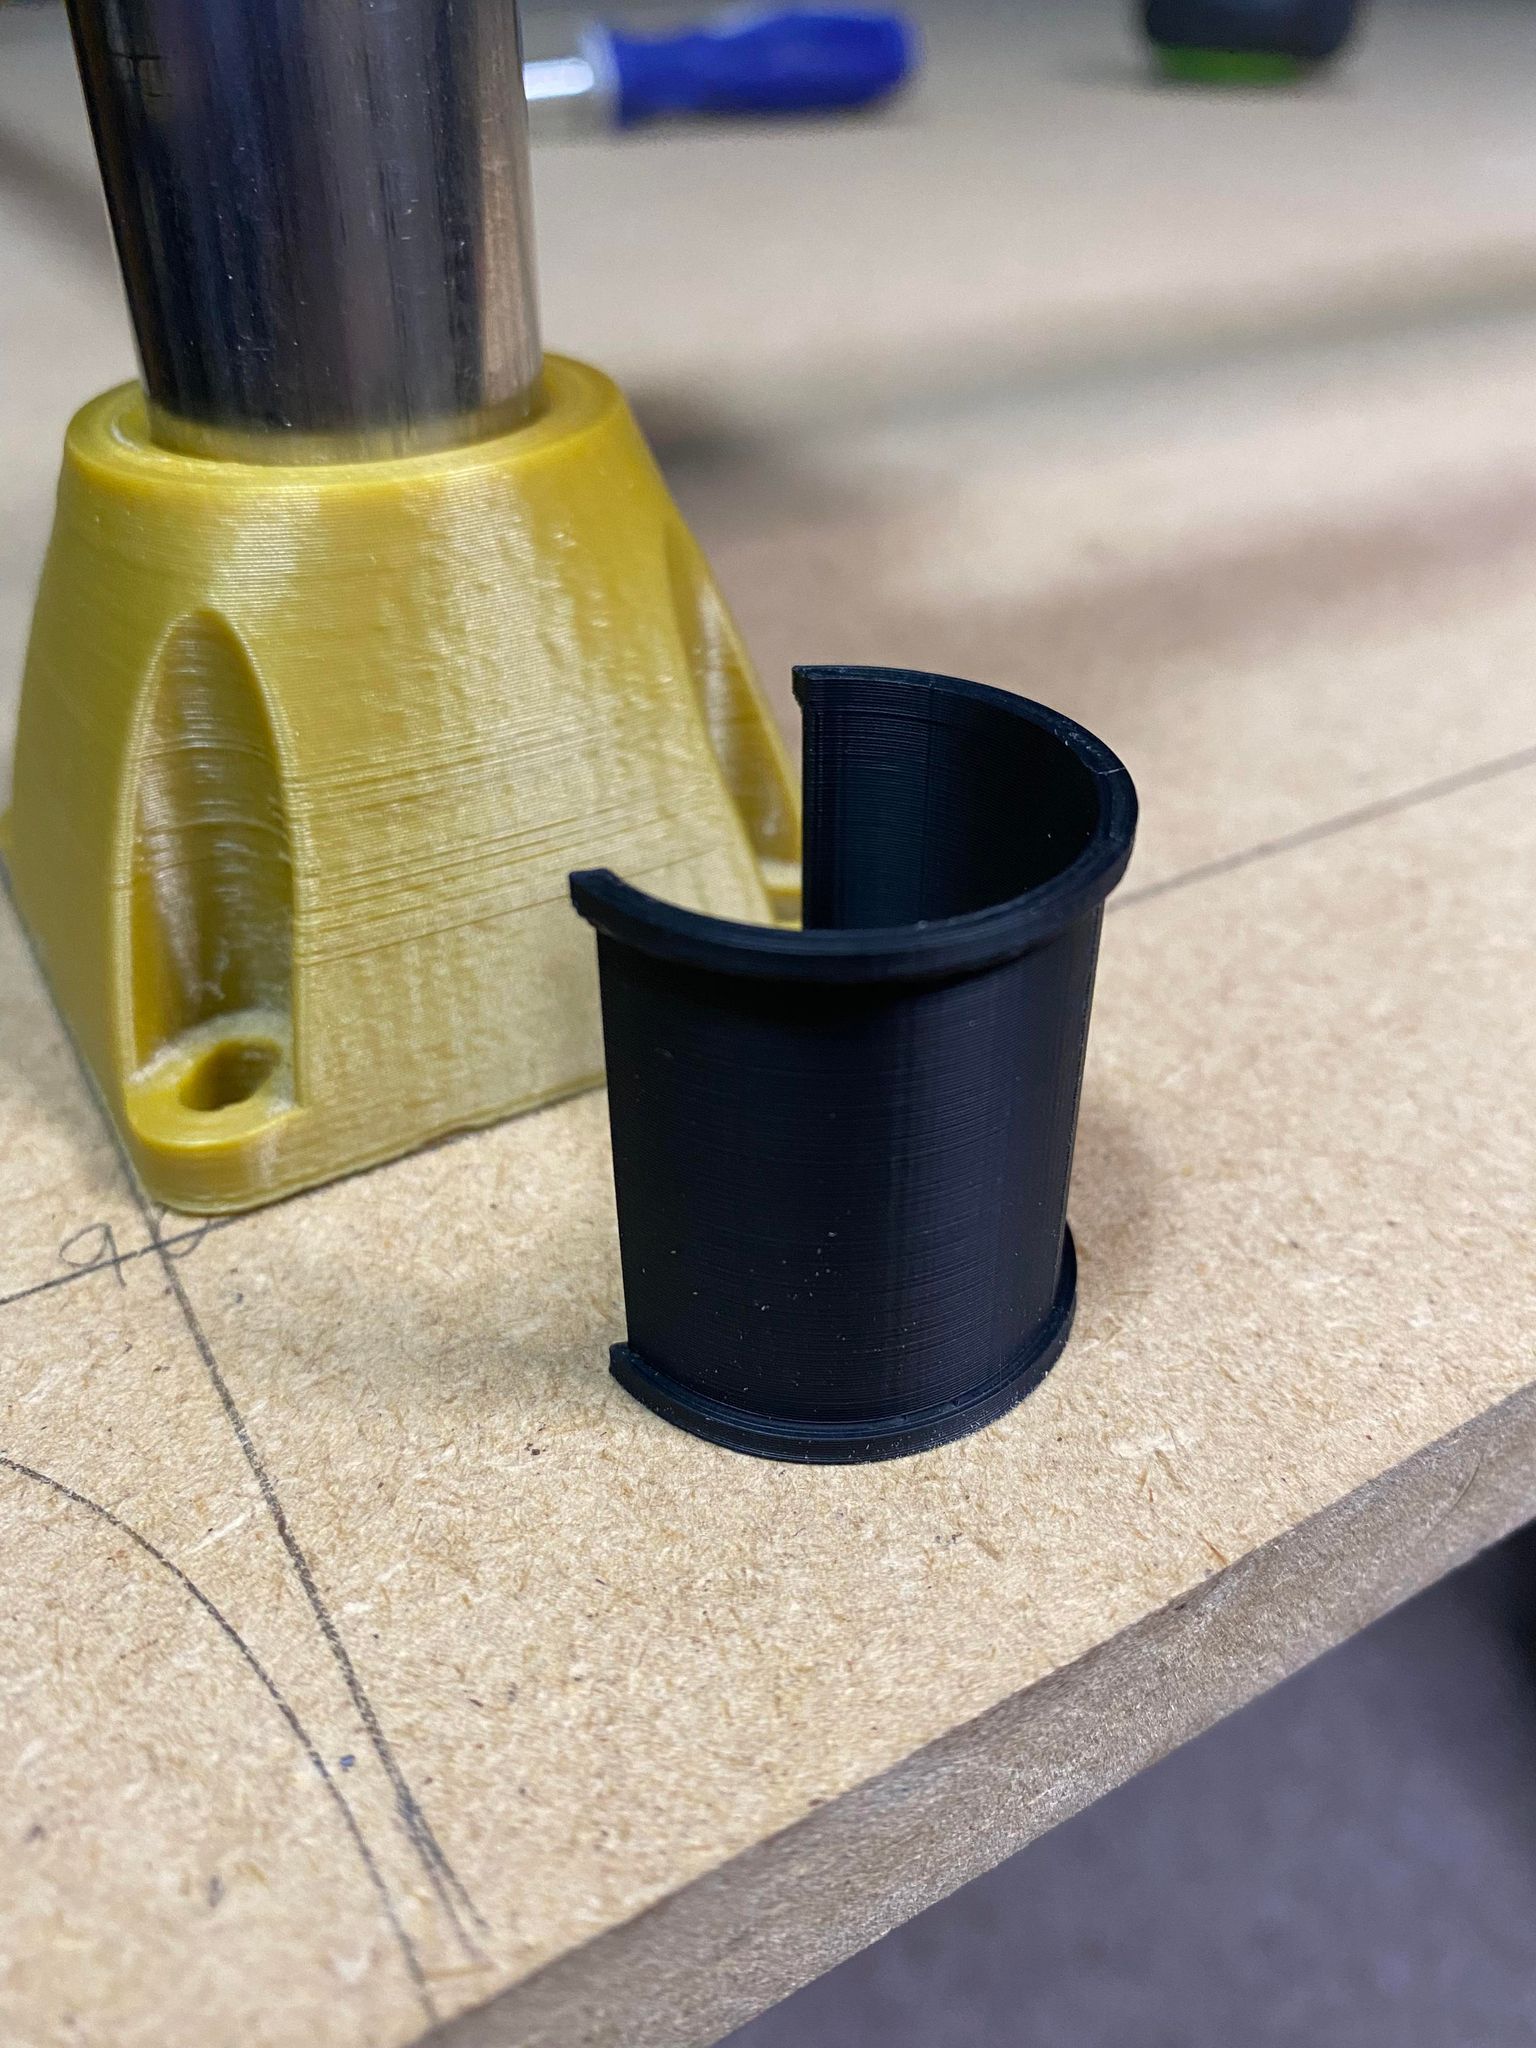
Slowly making progress. I got it together over carpet and ran the crown gcode just to make sure it worked so far. I now have a table built for it so I can set it up there. Then I can square and calibrate it. I should have done more thinking in regards to leg height. I used the cut calculator but think I’ll need to chop my screw rod on the z and will still have clearance issues when a wasteboard, wood, and windmill are in place. What’s the height most people go with? I was trying to keep it short to minimize deflection.
You may be able to cut your lead screw in half, either to keep as a spare or to make a swappable Z-assembly to switch between (for example) a router and laser.
I agree that a minimum height build doesn’t leave much space if you want to fit a spoil board above the table. I went with 3" legs and it gives me room for spoil board, a 1" work piece and the cutting bit.
Hey, it hasn’t quite been 2 years but I’m back! I made a mistake last may. I put the tool in my garage unfinished. Then when it was out of site (with stuff piled all over it because it was unfinished) it was never touched again… Little road bumps. Because I had to borrow the saw to cut the pipe I didn’t want to have to make new legs, and didn’t want to square it if I was going to have to change out parts blah blah blah
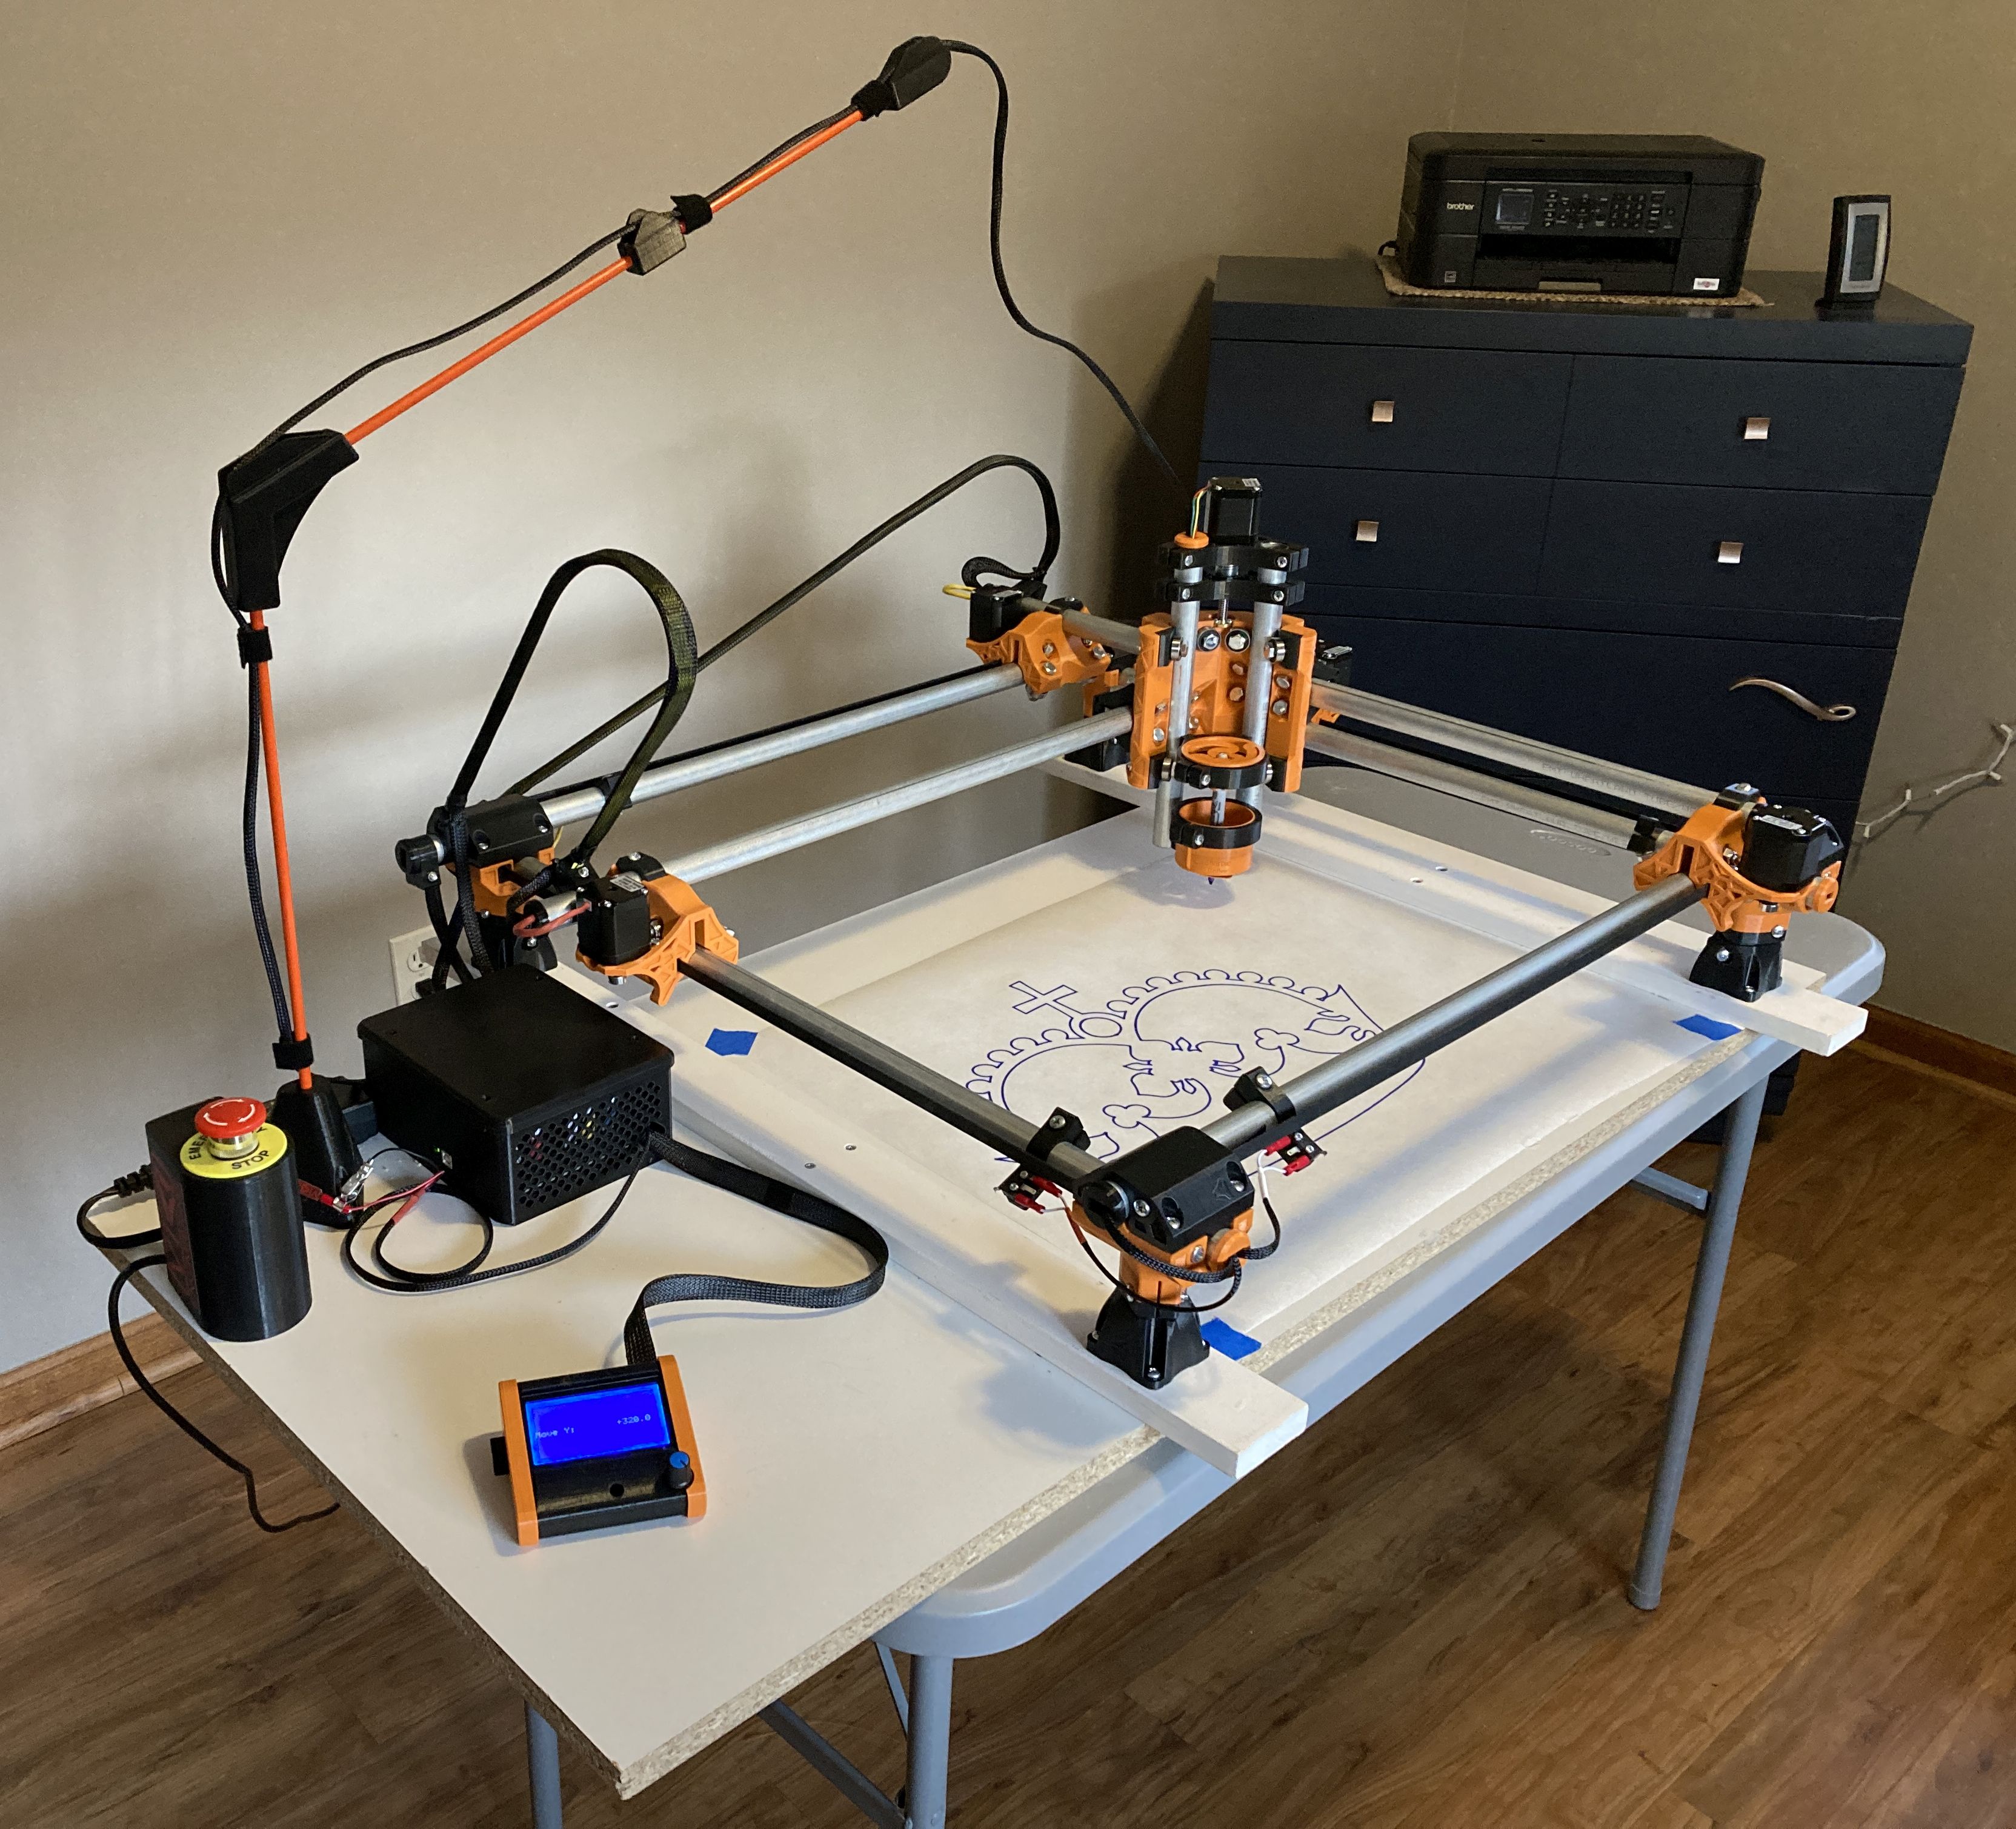
I grabbed a spare bit of MDF and brought that into my office/craft room so I can have easy access to it (since it doesn’t fit on my spare table) I need to trim it down, and then would like to trim down the CNC table in the garage because its unnecessarily large. I’ve decided to do all of the setup in this room. I’ll mount it to this board, square everything up, do all the cable management, and get used to running the machine. once that’s done and its a usable tool I can move it back out to the garage and will be much more likely to use it. This does have me thinking I need a small, enclosed desktop cnc to put next to my vinyl cutter and 3d printer… regardless…
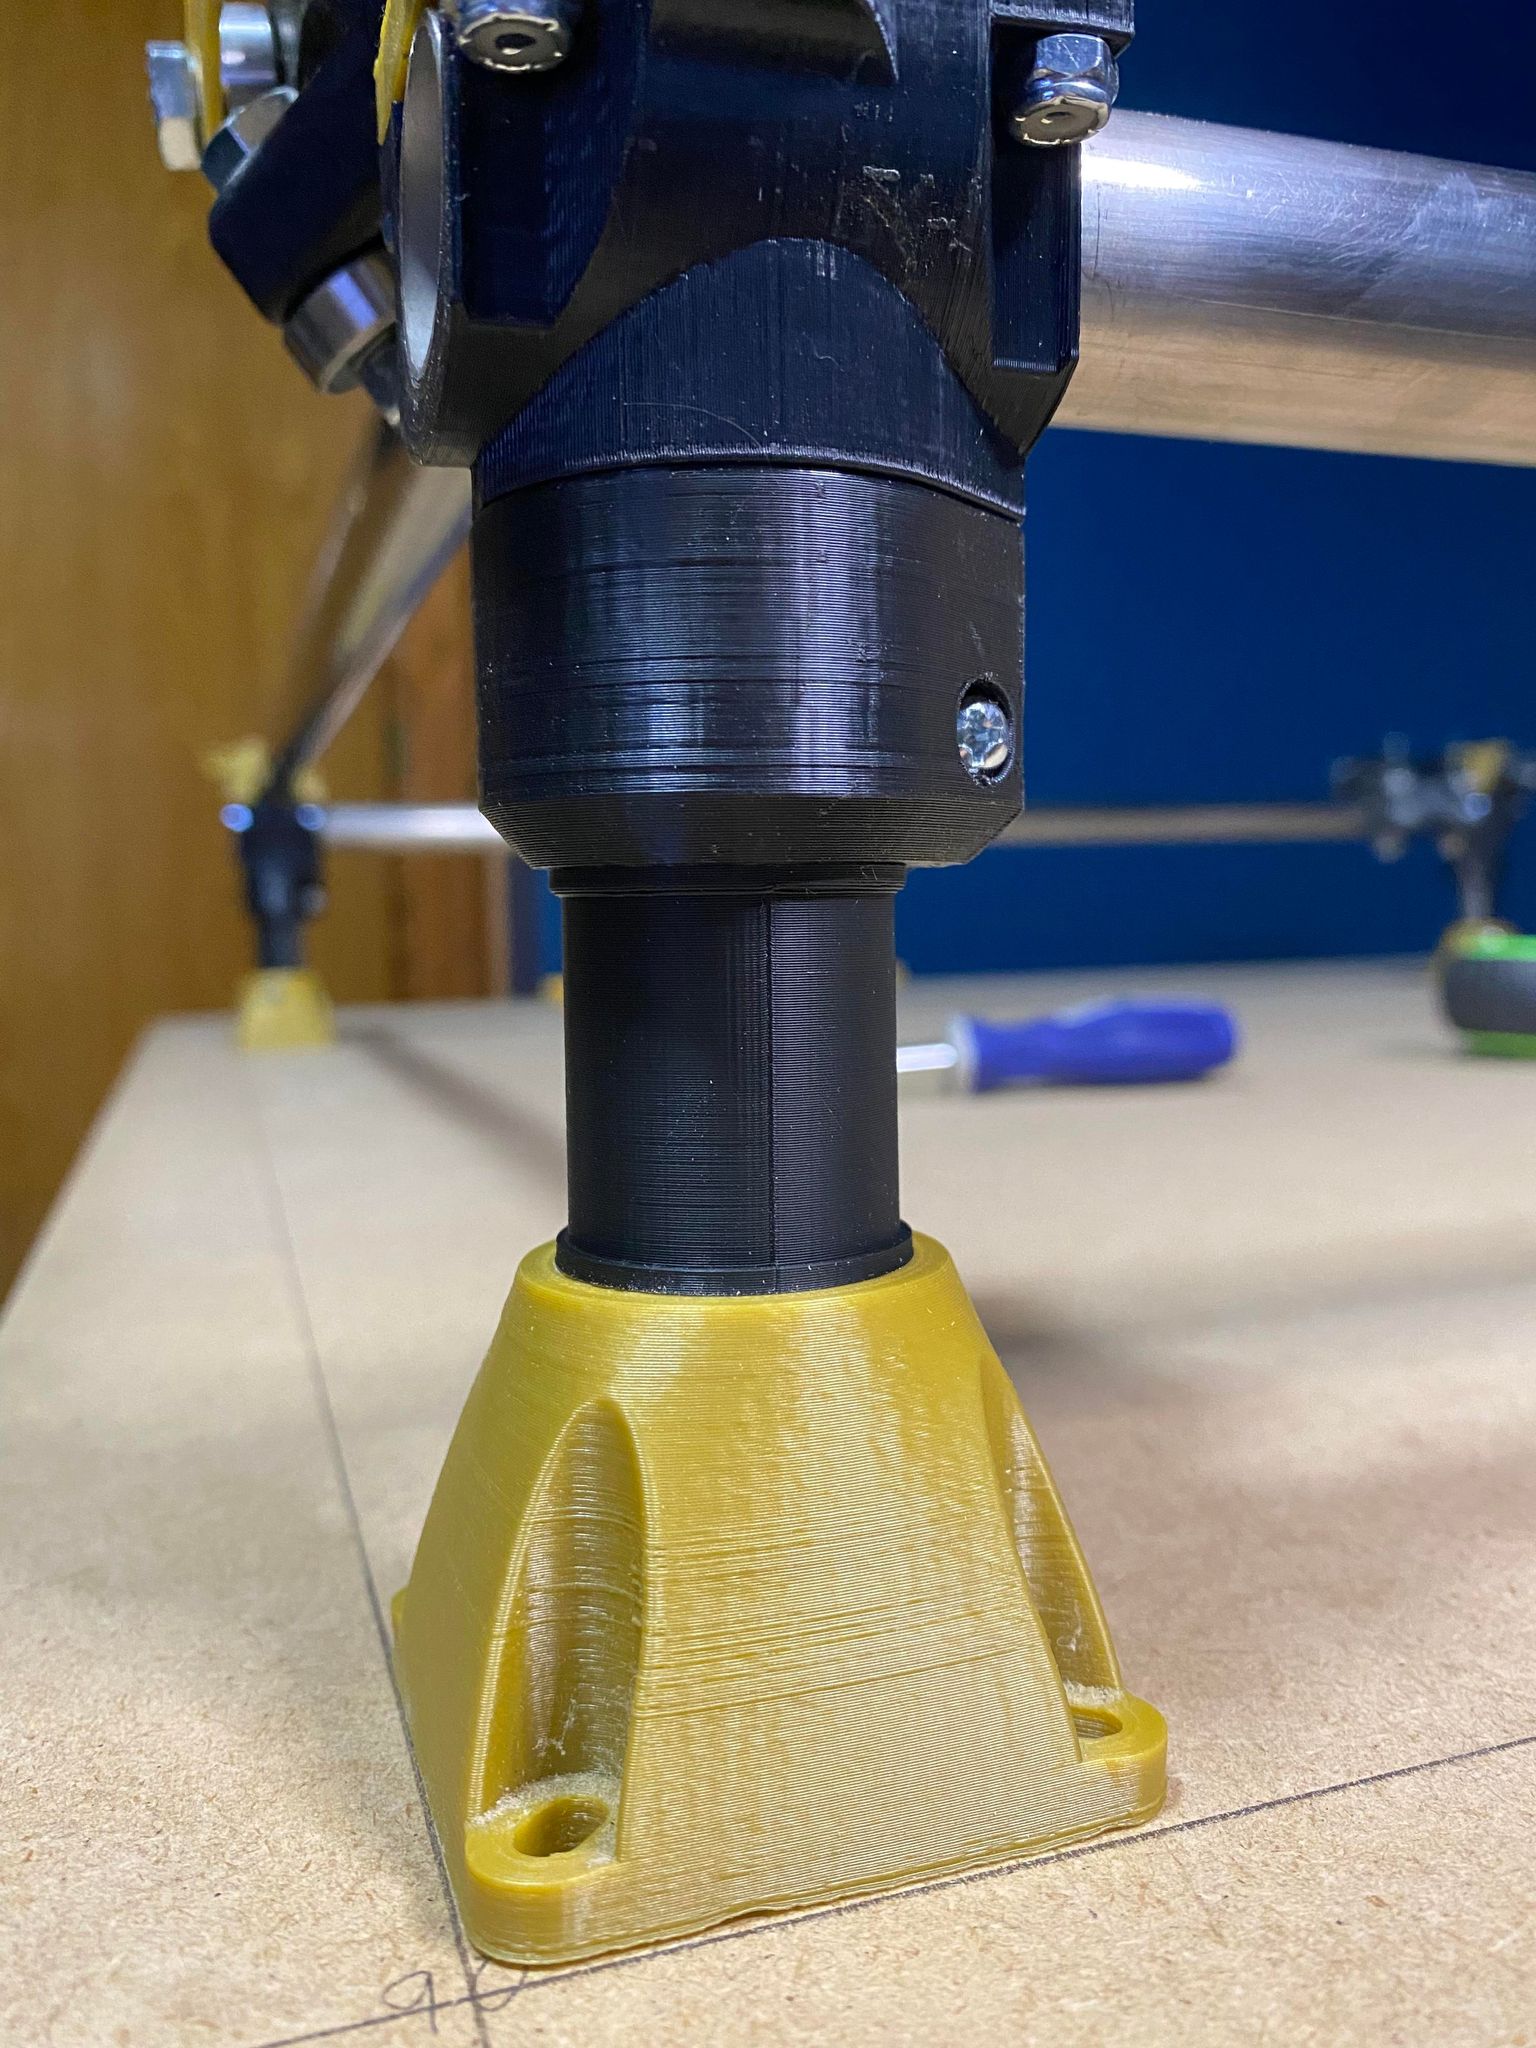
Anyway, I just bought a pipe cutter. It wont be as nice as using the steel blade on my buddies saw because with that I could set jigs for length and end up with perfectly equivalent tubes with 90° cuts. Thankfully that’s not as important with the legs as I can print a height spacer and not need the tube itself to be the reference. I cut out some new legs, about an inch taller than the previous ones, and they came out pretty good. Then I quickly sketched up a height guide/space just a few thou taller than the tallest gap. This way all of the legs will exactly the same height, as the ones that were a couple thou shorter get expanded to the same height. I snapped that into each corner and tightened the legs down (and the corner pieces since I had the legs squared up)
(You can see how much nicer my Ender prints now compared when I printed my Burly)
I also pulled apart the other pipes and hit them with a scour pad to take off the printing and light scratches. I’ve decided to print some belt tensioners. I know they are sufficient but I didn’t like the aesthetics and limited adjustment. I went with this design because they just snap onto the OEM corner pieces. For some reason the nub that holds the belt seemed small (didn’t fit tight and didn’t line up with the belt teeth) so I printed it at 104% X and Y which was perfect.
Does anyone have recommendations on mounting drag chain to the X and Y axis? Something that won’t inhibit dual endstops. I’m tempted to throw one on for the Z axis that rests on the X axis but I’ve seen so many posts where Ryan said that’s a no-no. I just can’t image it causing that much more drag than the tape measure trick but he’s literally the authority on it.
For my portable build I used the method shown. I drew up and printed the parts to suit and the rod is a $2.50 fiberglass driveway marker rod from a big home store. It looks what it is, simple and cheap. I’ve since reduced the height about 3inches. After a few weeks the look doesn’t bother me and it’s very effective with zero drag. I’m now using a Dremel for indoor practice and it manages the power cord well.They have yellow to somewhat blend with your colors. EDIT. Not enough coffee early, this if for Z axis.