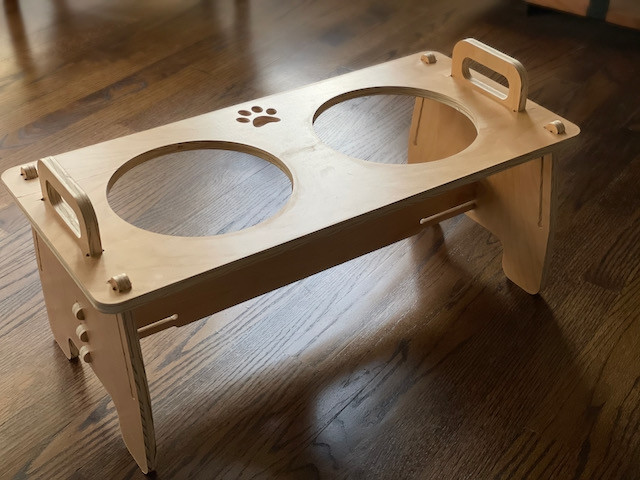
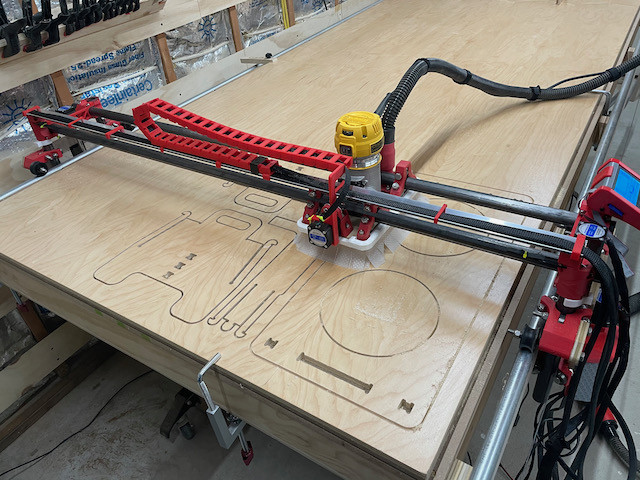
Still testing my Lowrider2 out, and tried making a flat-pack dog bowl holder for our puppy. No screws or glue, uses CNC joints to snap together. Pre-finished plywood and waxed edges.
Still testing my Lowrider2 out, and tried making a flat-pack dog bowl holder for our puppy. No screws or glue, uses CNC joints to snap together. Pre-finished plywood and waxed edges.
That looks cool! For the edges you just use paste wax? I am about to slap together a little plant stand and might need to try that out since there will be water around it.
Where did you get the plans? that is kool I will have to try the wax also. Is that just a finish pass or a lot of sanding? What plywood did you use
Yeah just paste wax. First time I’m trying it for this, so I don’t know yet if it’s a good idea or not  . I was using prefinished plywood and I didn’t want to use another finish for the edges that couldn’t easily be wiped off of the prefinished surfaces. It seemed like something to try in this case because it’s non-toxic for the dog and it helped the pieces slide together for assembly. It should get plenty of water exposure, so I’ll see how it goes.
Where did you get the plans? that is kool I will have to try the wax also. Is that just a finish pass or a lot of sanding? What plywood did you use
I modified this stool on thingiverse to be the right size, height, and to fit my particular bowls. I used a 1/8" compression bit on pre-finished 1/2" ply, which was nearly perfect right off the table. I had a light finish pass in the gcode but I don’t think it was absolutely necessary. I just did a very light sand after with 220 and removed the holding tabs, waxed the edges and that was it. Again, just trying the wax - can’t say if it’s a good idea or not yet.
Where did you get that plywood? My local home depot had some prefinished 2’x4’ sheets that I really liked using, but nothing bigger.
Yes modifications would be necessary from looking at the picture on thingaverse. Maybe very small stepstool or a single step. His size just struck me as funny but great adaptation
Where did you get that plywood? My local home depot had some prefinished 2’x4’ sheets that I really liked using, but nothing bigger.
Yeah I’ve never been able to find it in sheets at the box stores… I had ordered a bunch from a specialty store for a pegboard wall system I did last year and had some extra. Finishing the edges of pre-finished things was a pain so I took a shortcut this time.
I think we need to see it in testing with the end user. ![]()
A little off topic maybe a little inappropriate… But I feel like this is something every woman has said to one of her friends at one point or another. ![]()

@jeffb - My hometown in Salem, Oregon had a shop with discounted building supplies. But what I really liked about it was they would bring in some units of plywood to sell - they would stock typical styles that seemed to fit their customers’ needs. One of which was a pre-finished 1/2" birch or maple - it would vary - I think they rotated that unit specifically. But they would bring in lots of different types - they also stocked 60x60 Baltic Birch sheets from 1/4" up to 3/4" - made for a fun stop on the way home for woodworking projects!
All that to say - have a look in your area - there may be a locally owned shop that carries a range of plywood. Start at the local hardwoods shops, move to the doors and millworks shops, then after that - move up the supply chain and see if there is a wood/hardwood warehouse that depots woods from their location and learn if they supply someone near you. You could probably buy direct from these guys - but you will probably need to buy a whole unit at one time.
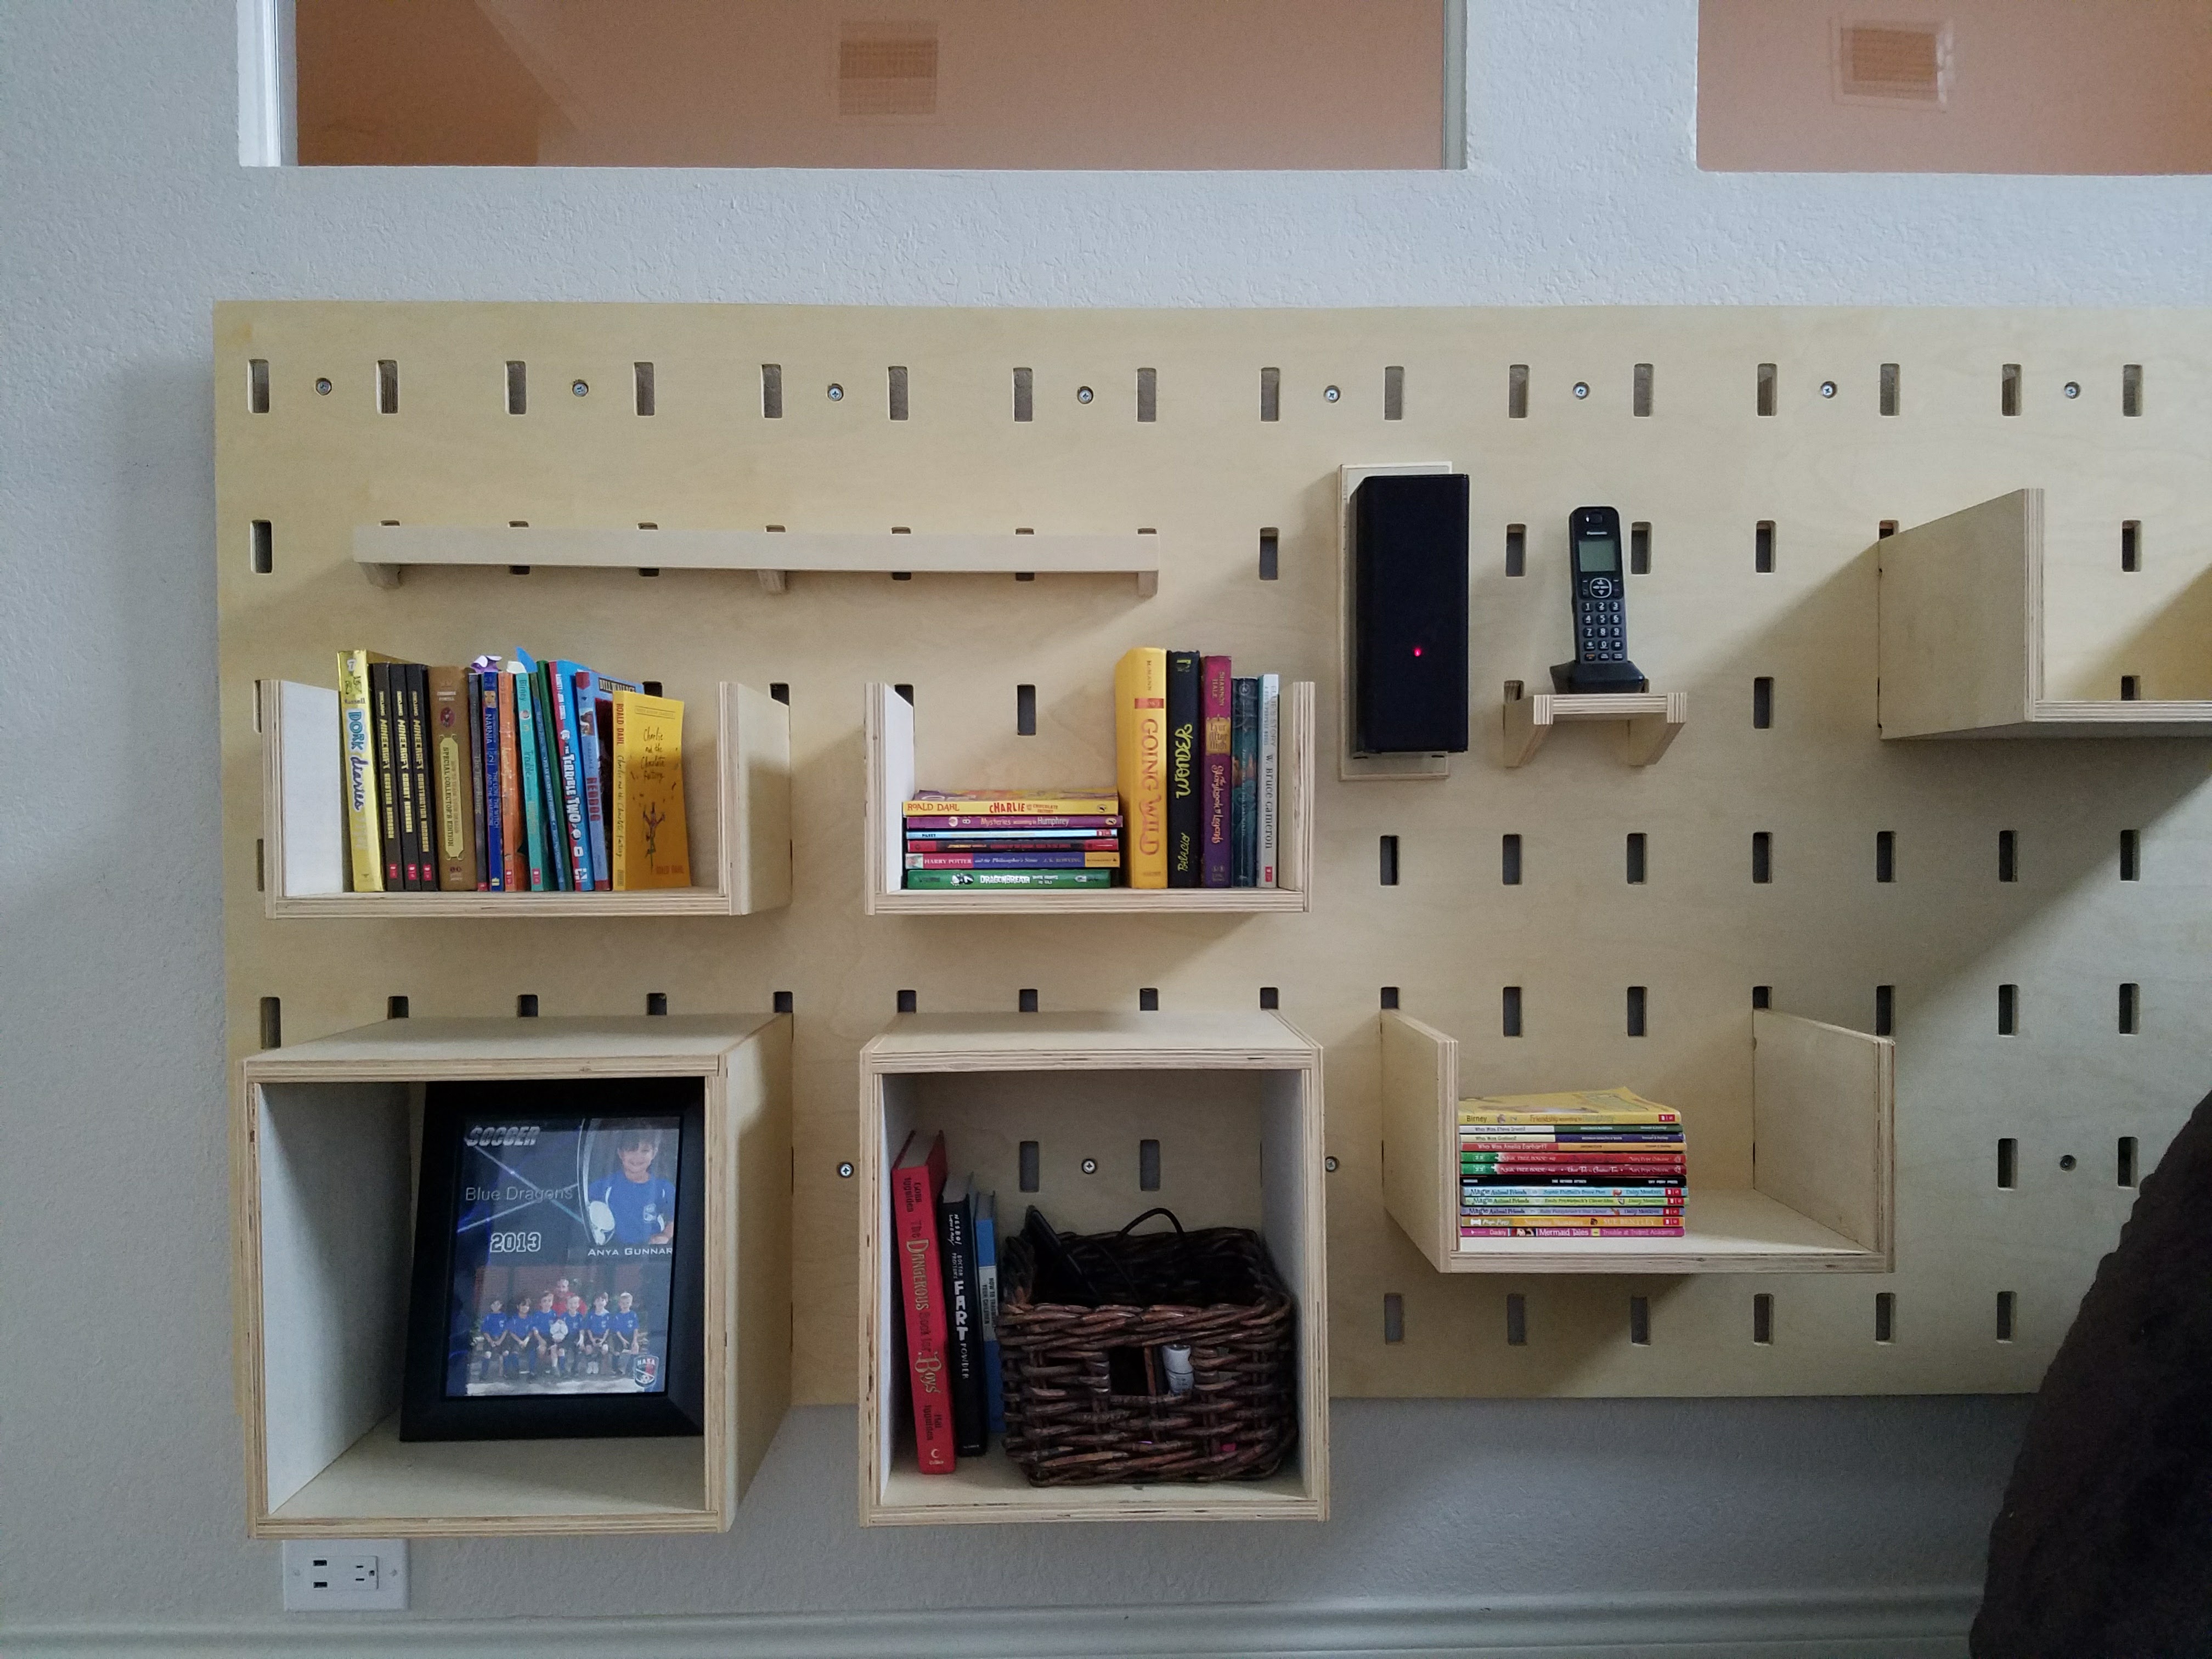
OK, this is a real awesome project. I wish I could have had this for my son’s room - he loves to tinker with his displays and it makes for one tired Dad in hanging stuff up - plus it makes for lots of holes in the drywall - yes, he now learns to deal with this himself, making his own holes and filling the old ones. In fact - in our last move, he was in charge of filling ALL holes in the walls from hanging pictures and such. Kind of a nice way to discipline a kid away from making random/impetuous movements.
Back to the wall system - You used 1/2" ply for the board, looks like 3/4" pegs - but is there any depth for the pegs to use other than the 1/2" holes to be stiff enough to hang those trays/bins/boxes? I mean it seems that 1/2" is too thin? Maybe not? - Bottom line, that’s great use of space!
Thanks! It was a fun one. I’ve experimented with several kinds of shelving systems and this one is one of the better looking ones.
So yeah, the trick with 1/2" (or any thickness for that matter), is getting a very tight tolerance between the holes and the pegs. I experminented on my cnc until I got a pattern that would transfer with a pattern bit that was very tight: you have to kind of twist the pegs back and forth while pushing to get them to slide in. Those have held up very well.
So then I made a grid of those holes and used pins to index from previous ones over and over to cut the panels. Really could have used my lowrider then but only finished it after! I debated adding a slight angle to the holes: like 1 or 2 degrees to compensate for any downward ‘droop’ from pegs under weight, but experimentally it proved unnecessary.
This wall is mostly decorative, so pegs aren’t going in and out very often which helps too. I bet that with heavy use they would loosen somewhat. Long time ago I made a ‘kerf wall’ system for another house, and that would stand up to more repeated changes as everything ‘slots in’ and hooks there - but of course then every accessory has to have those hooks:
That is really neat.
What shop in Salem? That’s where I live. Small world!
It’s called Building Materials Bargain Center: 775 Front St NE, Salem, OR 97301
It’s in the old Kieth Brown indoor lumber yard building. The Kieth Brown complex now houses four separate businesses. A doors and millwork shop, a church, the bargain center, and a Salvation Army or UGM distribution/donation center.
I read an article about sealing with Shellac seal first then final with a paste wax. Zinzer has a couple products out there. One has a shade of amber in it. There IS a Shellac based “Seal Coat” but it adds in the alcohol thinner as part of the recipe. Most still think this is too thick, so they thin it out more. But if you just get the full Shellac in a quart - take a glass jar and thin out your own portion, you can wipe on several coats to seal the edges then apply your wax. The alcohol evaporates quickly leaving the shellac there. It also makes it dry quicker. If you thin it out a lot, you can pretty much work one coat on several pieces, then pick up from the first piece and start a second right away.
Thanks! I know exactly where that is. We bought our decking there when we redid our deck as our first Covid project. They had great prices.
They do!
Did you get my message in your inbox@