Am I the only one who has problems with the y axis tensioning mechanism? I am finding the nuts spin in place and mash the plastic a little bit. I tried re-printing the blocks and I’m seeing the same issue. The nylock on these 5mm nuts seems a bit stiffer than I might prefer, so even with no axial tension it takes a lot of torque to put the nut onto the bolt, and I’m thinking maybe that’s a contributor.
In another context I heard that jamming a screwdriver adjacent to the nut can help, but I don’t want to resort to that because I’m hoping to add/remove this part frequently. Adding some epoxy is not out of the question.
I’m about to modify the design a bit to help retain the nuts a little better but I thought I would ask if I’m the only one seeing this issue? I also can’t rule out a print issue.
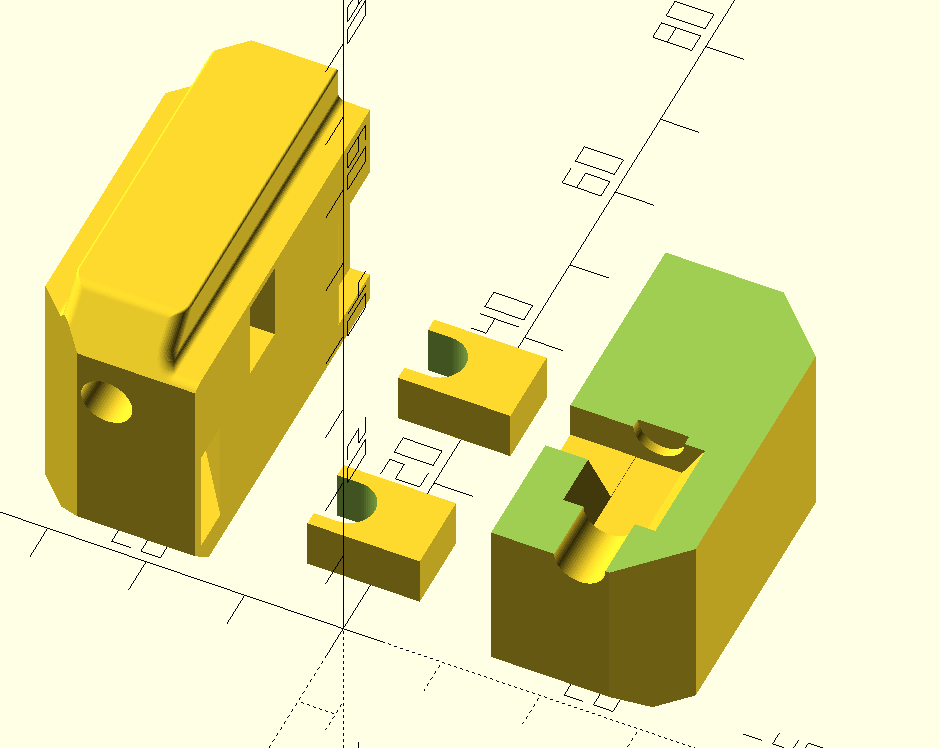
Absolutely, I had the same issue with nuts spinning in the trap and the screwdriver technique did not work: Here is an alternative design for the y-tensioner blocks:
The same issue occurs with the x tensioner blocks - the solution is to use square nuts instead of hex:
make sure you prethread the lock nuts. That loosens them up a lot. I used a cordless drill and did all the nuts in the same sitting.
I don’t actually undo that screw. I have enough flex to pull and release it. But maybe mine isn’t tight enough? Or maybe my table length is longer, it is over 60".
I didn’t encounter nut spin, if anything, found nuts were harder than expected to squeeze into place, ended up using self adjusting pliers 16:52 in my build assembly video.
Built using Bolts+Nuts from V1E LR3 Kit. Used Hatchbox PLA, 0.6 nozzle, 0.32mm layer height, 3 walls (so 1.8mm thick), 3 top/bottom layers, recommended infill + additional 10%. Cura slicer, Ender 3 Max. Tuned using Cura test calibration cubes before printing all parts.
Hope this helps, look forward to seeing updates on your table. Am looking for inspiration, am wanting to build a less janky setup for my LR3.
Thanks guys for the feedback. I had forgotten about running the nuts ahead of time to loosen them.
I decided to try a modification where they shift axially to fit into a pocket, similar to the X tensioner and the Primo belt tensioners.
Since the table will stay outdoors in the heat, I want the absolute minimum of plastic to be permanently attached to the table. The stock LR3 design for Y belts is very good in this respect, so I am trying for a small modification relative to the baseline.
I also decided to try a couple plugs that I can put in behind the nuts so they don’t get pushed back axially. Maybe not an issue for this case where the bolts will stay in the nuts but for Primo I recall a mild annoyance with the nuts getting pushed out of place if I was not super gentle with the first few threads.
I’ve only removed the machine a couple of times, seems to be fine with my prints.
I often do use epoxy with captive nuts. I did for my Primo for the tool mounts. Just have to keep the threads clear of the epoxy, or you get all kinss of issues.