Attempting to do the Crown Test, after making sure the steppers go in the correct direction.
I’m not using Repetier Host, since my computer is in another building. I’m using the touchscreen.
I plug in the USB that my gcode is on, power on the machine, move Z “up” until i can fit the pen in place, jam the pen in there, move Z “down” until it is just above the paper, then click “print” on the touchscreen, select my gcode, click go, and it starts moving.
Problem is, it doesn’t draw anything, the pen is lifted about 5 mm above the paper. its making the correct movements otherwise.
So of course, i power off, and flip the z steppers. now when i power on, i cannot jog the z axis in either direction, up twists the couplers since it is trying to go down from the bottom, and down is not allowed since it is zeroed at it’s starting position.
I’m at a loss as to what to do next.
Lowrider 2, all parts bought from the shop.
SKR Pro with TFT screen
gcode generated with Estlcam 11
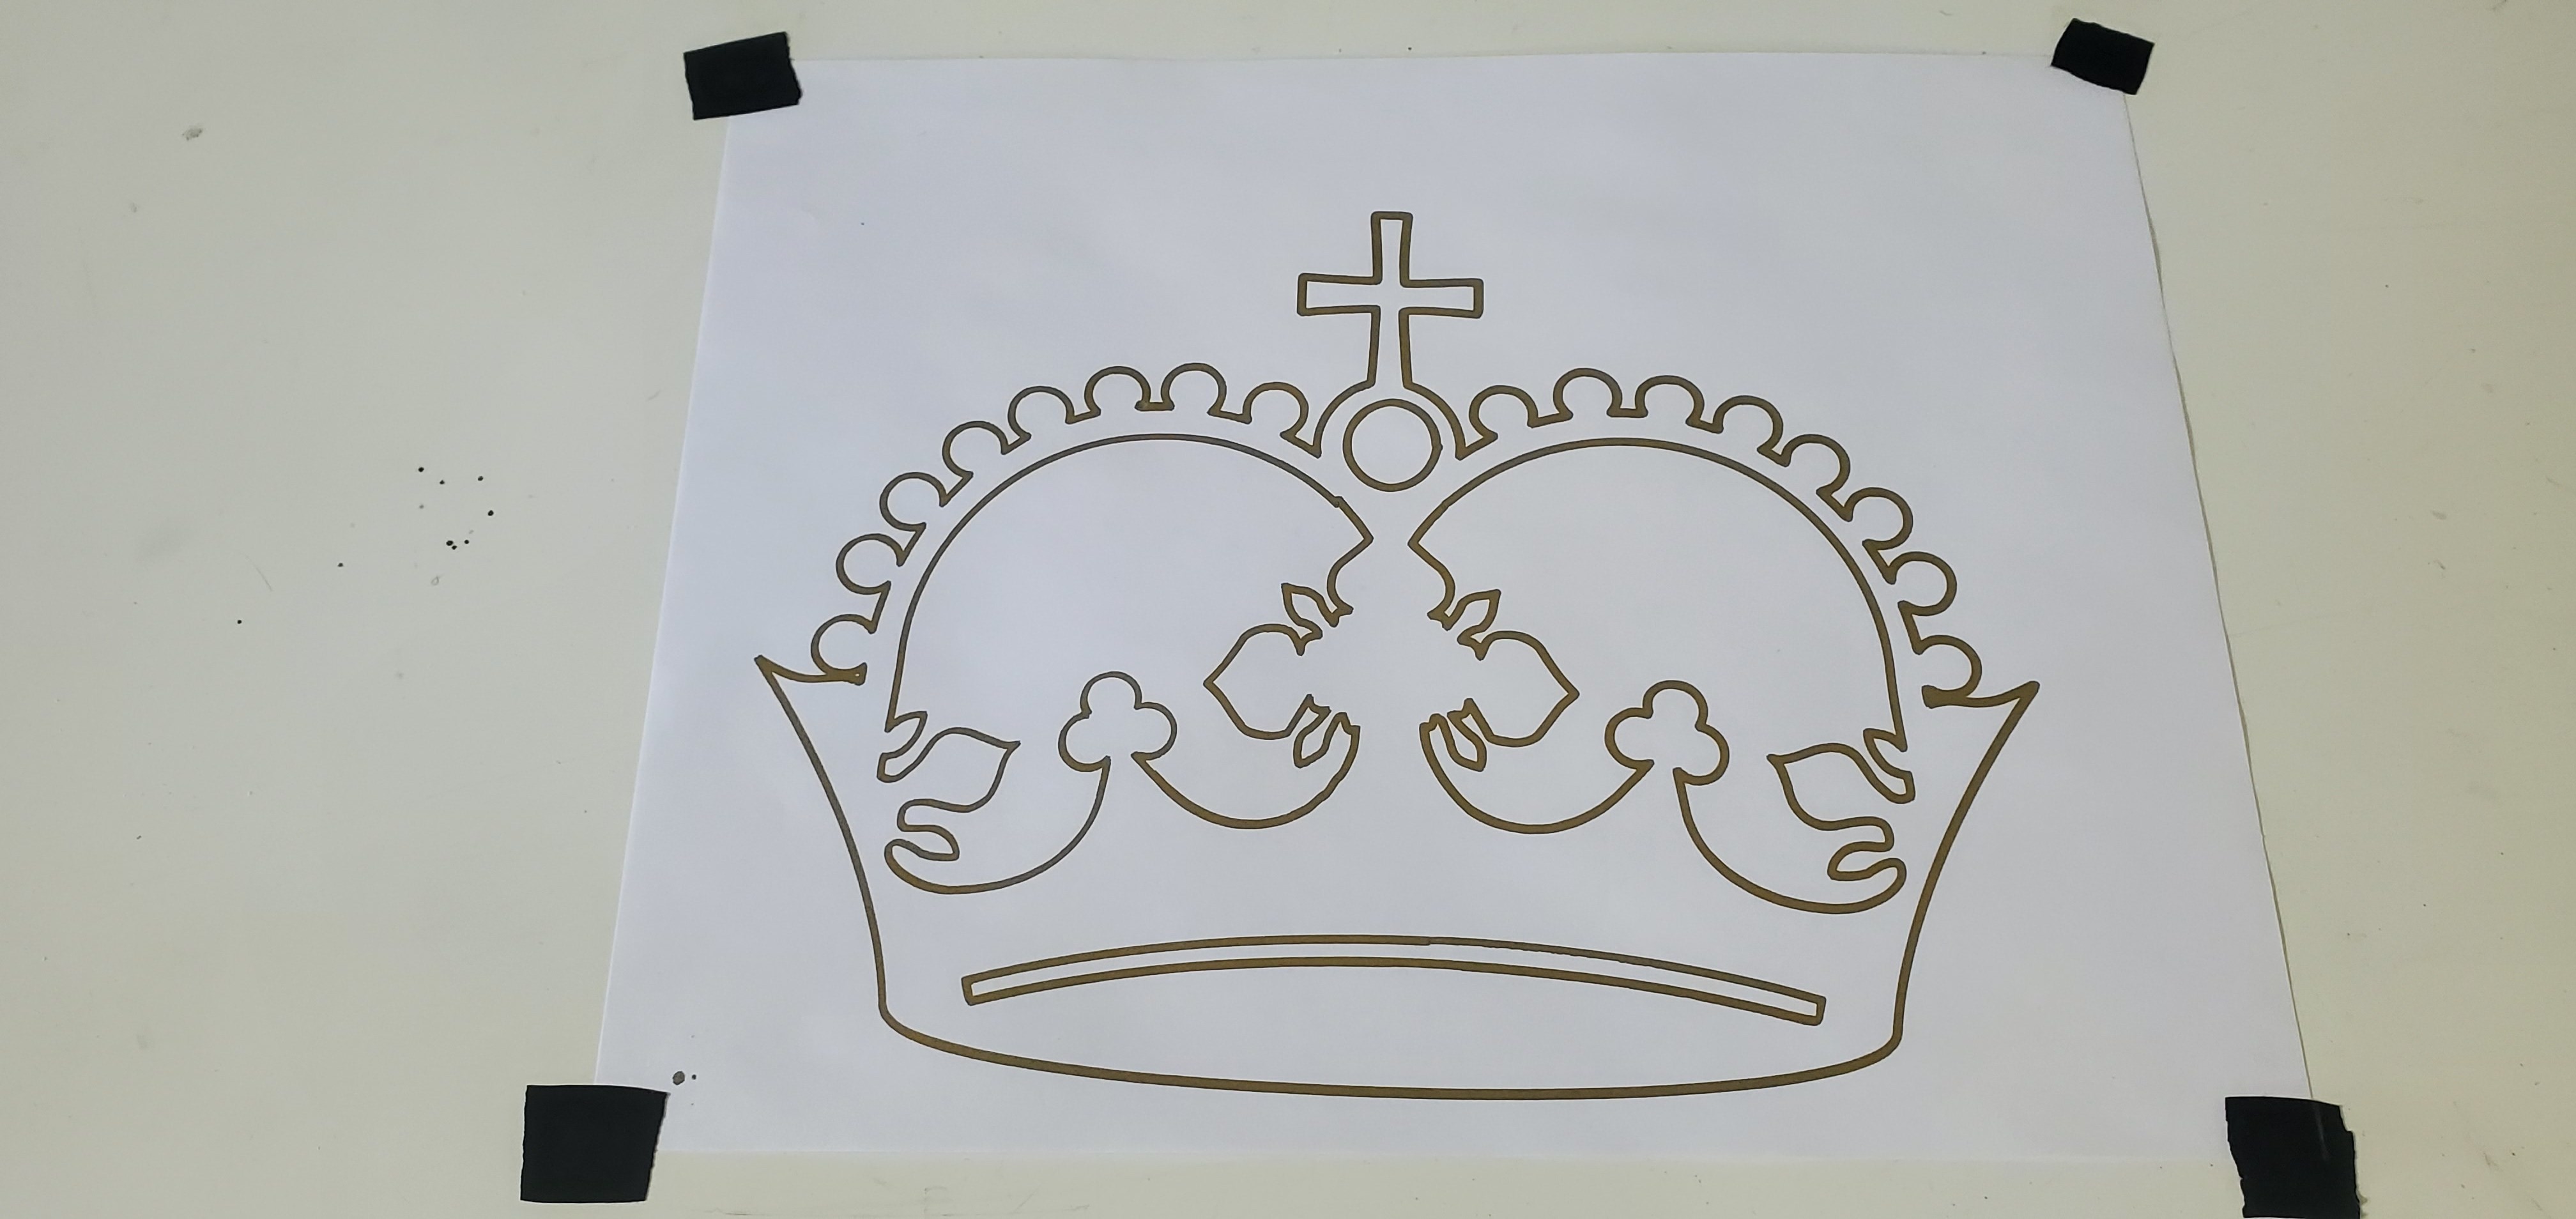
Test Crown 12mm/s– If you are having problems try this one (If you are having download issues -Right click- Save as.).
Just put it on an SD card and run it from the TFT . Do not use EstlCAM.
If that doesn’t work then your setup process is probably off. This is what I do:
with the power off, place the two axis in the home (squared) position. It doesn’t really need to be up against the mechanical stops, but that’s not a bad idea if you have them in place. When you turn the power on, the “current” location is home.
Using the TFT, move the X and Y axis the same number of steps away from the home position and then set the “origin” with the LCD “V1 menu” (don’t home ANY of the axis).
Move the Z axis as high as you need to get the pen installed, then move it down until it just touches the surface, maybe one mm more. Set the Z “origin” with the LCD V1 menu, but DON’T do the Z homing.
You should then run the gcode from the SD card.
If your resulting drawing is not correct (skewed, or otherwise), take a picture and post it here.
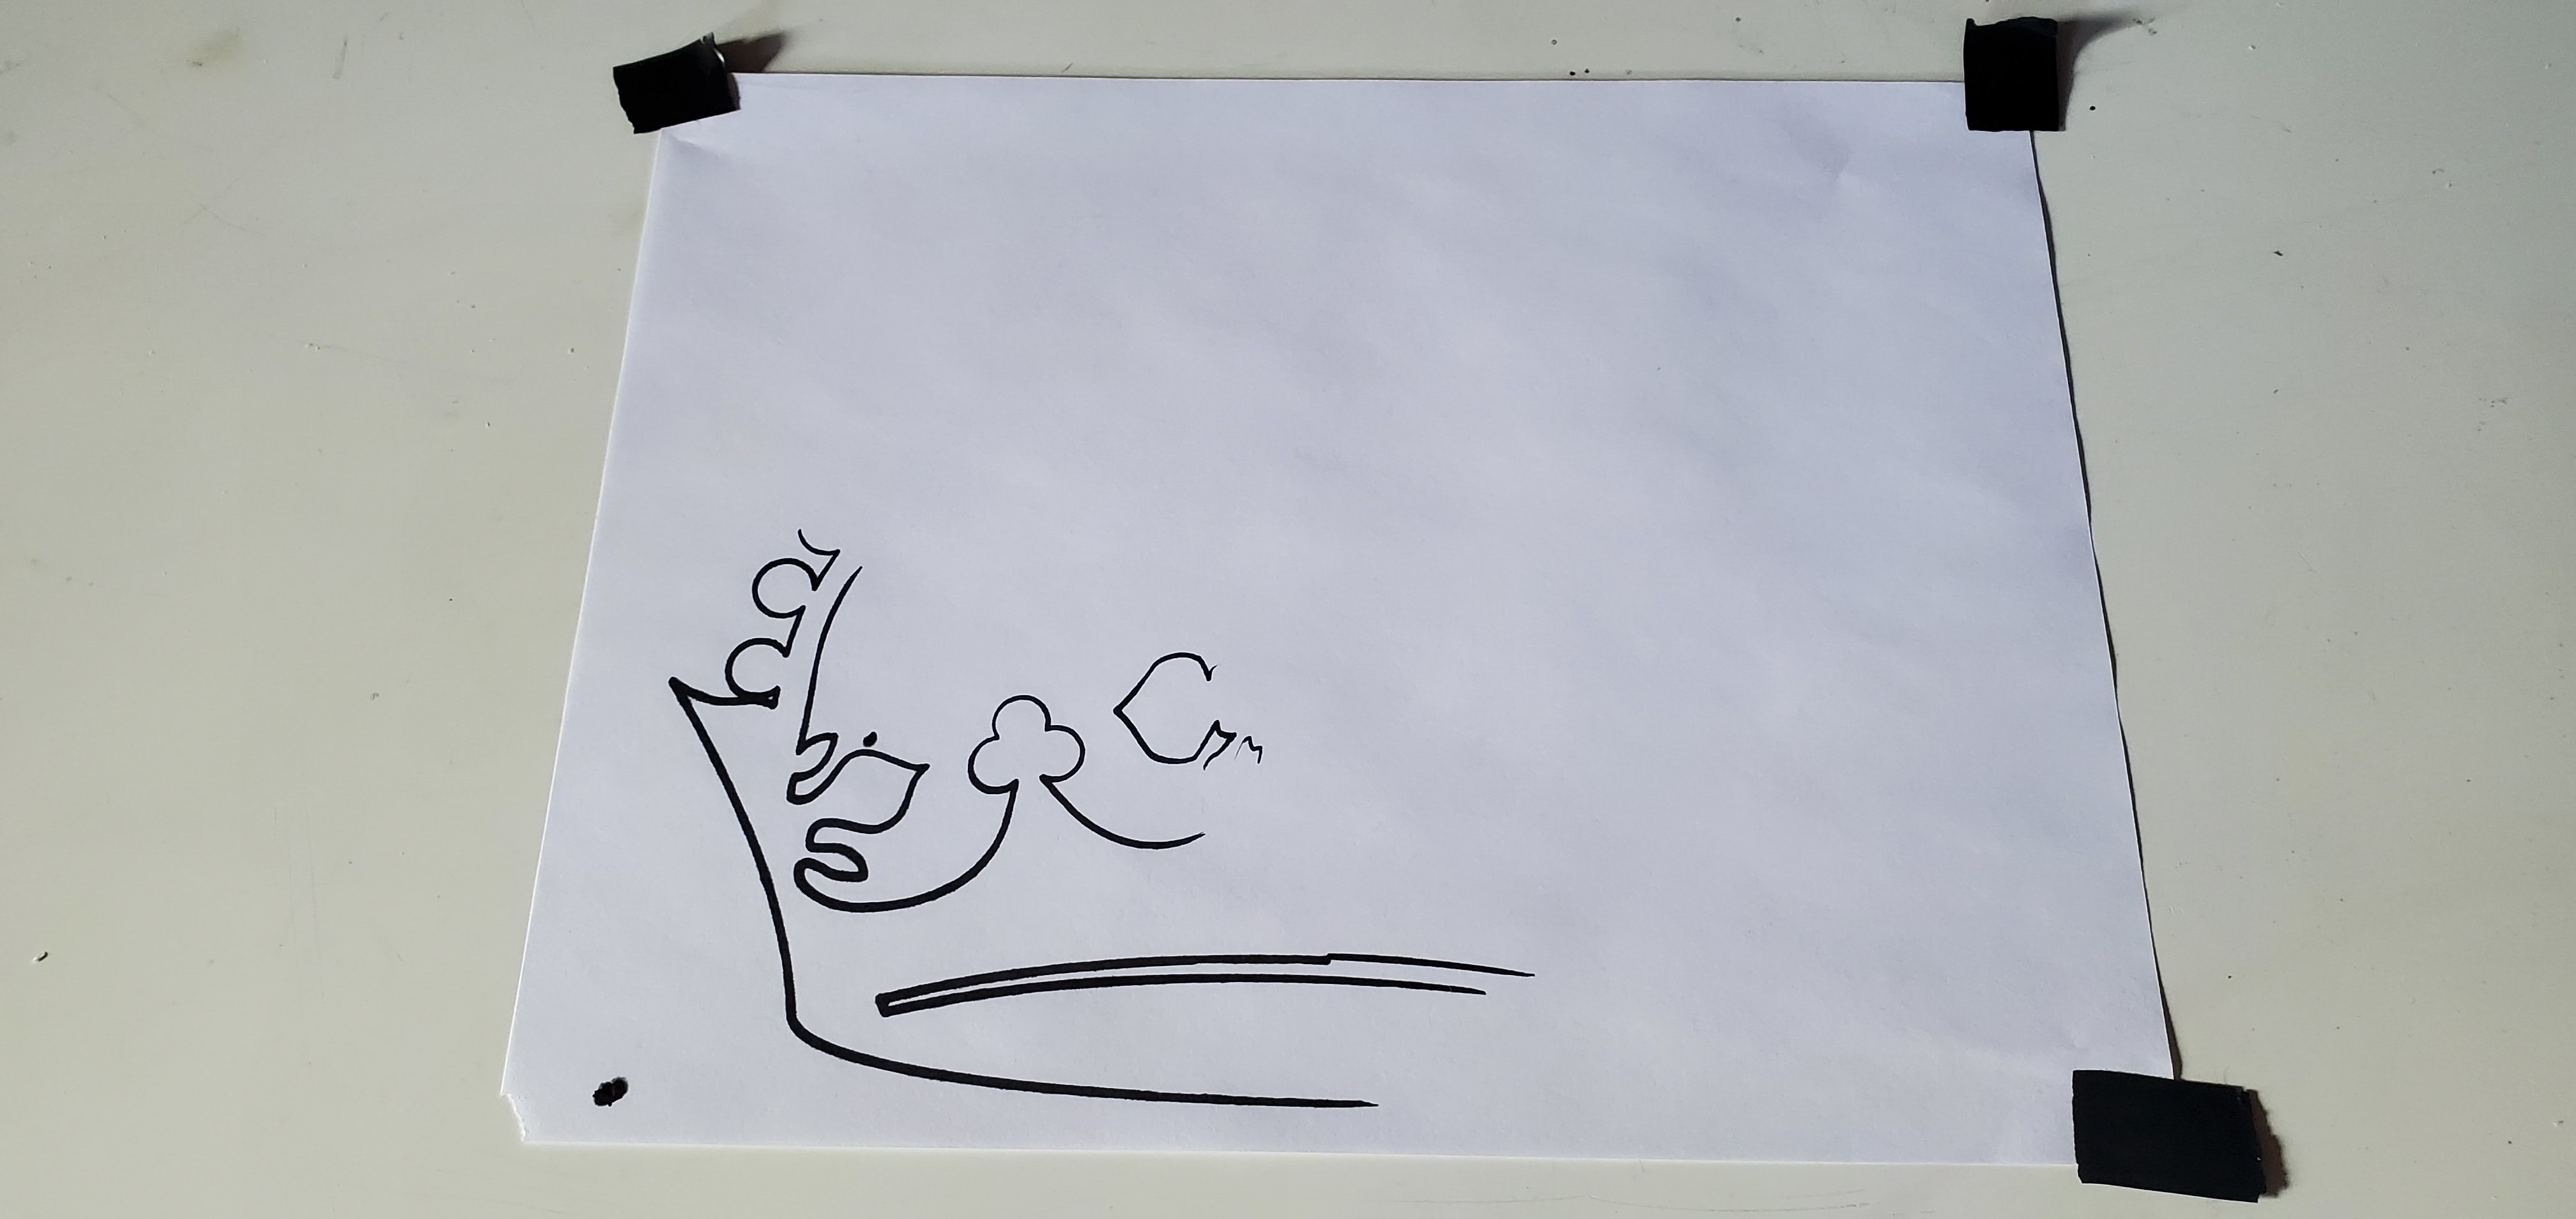
Ok, I got a result. My Z direction was correct the first time, but I noticed that the left Z motor makes a grinding noise when I accidently tap the jog button twice, the right one does not. Wired in series. I think the X axis has become unlevel and resulted in the following, despite my re-leveling the machine
I lubricated both leadscrews the same, only the Left one falls all the way down when I power off, the right one has to be gently pressed back to square. so if anything it seems like maybe the right one should be skipping not the left one, not sure if I should try to loosen the tension on the right side before its presenting an actual problem.
It doesn’t have to fall on its own. But if it is, then that seems like it should be not causing enough friction to skip steps. The default firmware has a max speed of 10mm/s. So extra clicks shouldn’t cause problems with it going too fast. We could try increasing the current on the drivers. But that should be plenty strong. A loose sure may cause something like this.
That sounds perfectly normal to me. Mine does the same, usually because my 611 plate is off to the left and provides a little more weight on the left side to cause it to drop when powered off. The right side needs a little push to settle it down on the mechanical stop.
Are you using a pen holder that has a little spring or give to it to apply slight pressure on the paper as it moves?
Make sure your X axis tubes are parallel to the wasteboard with both left and right Z steppers down on their mechanical stops before powering on the machine. If it’s not parallel then shim one side as needed (or, if you like dust, skim cut the face of the wasteboard. Then you know it’s both parallel and flat)
I did solve the grinding it would seem, I switched which end of the wiring harness each Z Motor was connected to. Now it doesn’t grind when accidentally double tapping the jog button (which is far too easy to do BTW) but I’m still getting identical results on the crown test. It may be that my table is just not flat. It is not my final table so I’m going to try it again in a different part of the table.
Well, I got a bit of a grinding sound again lifting the Z up to work on the 611 plate. Also after finishing a job or sitting for a few minutes the Z motors disengage and drop the left side back to the table. Gonna have to fix that.