Yes, I tried higher numbers & they did not work either. M4 S200 is a number I also tried. What you seem to be missing from my previous messages is that it worked before & it also works now on a different controller. Look at message #172 for reference, 2nd sentence is where I reference it working on a different controller.
Sorry
Got a scope Dave? It is by far the best bit of kit for troubleshooting this sort of problem, even a cheap DSO Shell or a software usb based one will be fine.
Am I right in thinking you have tried a new nano in the faulty controller (Mana3?) and the PWM still doesn’t work?
There may be a pull down resistor on the PWM line on the controller to prevent the laser firing up during boot as the nano output pins float during that time.I don’t possess a Mana board so I’m not sure…if there is one it will be somewhere around 1k ~ 5k. Pull the nano and check between D11 and ground on the controller board.I really can’t see how it could happen but if there is one and it was somehow magically short circuit your laser wouldn’t fire…
I did try a new nano on it. There is a 100ohm resistor on that line that measures 99.9ohm. The interesting thing is if I connect the 12v 1st, then connect the USB to the computer, the laser flashes a few times as the nano is booting up which leads me to think that line at least sort of works. If I connect the USB first, then the 12v it does not fire which is probably because the nano has already booted & did not flash because the 12v was not on. I don’t have a scope, but guess I should order an inexpensive one next time I order from Aliexpress to add to my troubleshooting tools & also a usb endoscope for viewing & maybe soldering some of the circuit boards. Anyone have recommendations for these 2? Will see if I can check that D11 to ground later today.
The 100 ohm resistor will probably be in line ie in series and is just a current limiter to protect the pwm output pin. With the laser flashing during the nano boot there probably isn’t a pull down resistor that I was postulating may be causing your problem…so…I can’t think of anything else offhand…how many spare nanos do you have? Remove the Nano and use a jumper lead to flash +5v onto the D11 pin socket…the laser should fire…if it does the problem is the pwm signal from the Nano and the board is ok.
For a cheap scope I use one of these. you can either buy it as a kit (just make sure the surface mount components have been mounted) or you can get them ready made, some even come in a case!!! I fitted a minute 2S lipo in mine with the balance lead hanging out the bottom.
There are also software based scopes that will do a good enough job for this type of application, This Espotek offering is a good example…one of our co-forumists has received one and done some experimenting with it here
I have no experience with endoscopes other than there used to be a problem with MediaTek chipset mobile phones not working with usb endoscopes, but that was some time ago and may well have been sorted out.
Dave,
I second Mike’s recommendation of the little DSO scopes for this kind of work. If you want to see it in action and “compared” to a nice Rigol scope check out this post (and the one after). This is actually looking at the +5V PWM signal (in this case, remapped pin 44 on RAMPS) in response to M106 Sxxx commands…
–David
Here is probably the least expensive one I could find. This one is powered by USB or battery. Some others are cheaper, but have a high shipping charge. https://www.aliexpress.com/item/32957706370.html
I found one similar to what @dkj4linux is using, but it has a european plug. https://www.aliexpress.com/item/32878694776.html
Here is what seems like the best deal on an endoscope.
https://www.aliexpress.com/item/4000851475647.html
I got my laser wire made up for connecting to the keyestudio board. I had to make 2 solder joints per wire since each end connector wire was quite short so had to add a wire between them. I have to make a new 3d printed mounting bracket for that board now since I am mounting it on the side of the 2020.
I’d go for the second one…it comes with a case. Either a kit or ready assembled…down to your desire on soldering vs. cost!
Your third link is to a microscope…not endoscope. I have one of those microscopes too!..excellent for reading ident numbers off pcb surface mount components…not much use for peeking into deep dark holes.
Problem with that scope is it has a european plug on it. Not sure that would work for me. I would also prefer a usb or battery powered.
Some of those microscope ads were calling them endoscopes. They confused me.
Dave, I’m not sure what “european plug” you’re talking about here… but if you are talking about that little DSO scope in your second link or the Banggood unit I referenced in my post above, it simply has a +9V power jack in the bottom edge. It doesn’t come with a power brick that I can tell but a common +9V power brick, similar to what is often used in the Arduino world, should be easy to find to power it… that’s what I use. – David
EDIT: Never mind… I see that AliExpress site link does offer a power brick… and European plug (probably because its a French website?). It still has a +9V power jack however that would allow you to substitute a common US plug +9V power brick. The Banggood unit I bought doesn’t appear to include the power brick…
EDIT (again): This unit from AliExpress offers the fully assembled unit with choice of power plug for $28… still not a $$$ back-breaker IMO if you want to skip the soldering and assembly…
Cool. I am still not sure a scope is worth it for me, but would give me a new experience. Whether I would be capable of fixing this board is probably unlikely. Since you have one of these boards, do you have a guess as to what component might be bad on it?
On a side note, the other day I checked the amps used by this machine by plugging it into my Kill A Watt plug & it used .2amps at the max. With that in mind when I need to make this more portable, I will borrow https://www.thingiverse.com/thing:4226726 design from my rolling plotter. I just need to get one of these 4.0 Banana Plug Balance Charge Cable 20cm Silicone Wire for RC Helicopter QuadcopterXT60 JST Lipo Battery Plug Charger|Parts & Accessories| - AliExpress . I have a 1.5ah & 4.0ah ryobi battery to use with it. Seems like I should be able to get at least 5 hours of burn time from the 1.5ah since it only consumes .2amps. Am I looking at that sound reasonable? I am figuring there is going to be some loss & would not get the full 7.5 hours if this the correct way to calculate that.
I was also looking on aliexpress for a way to make light weight Z-axis & came across this item. https://www.aliexpress.com/item/1005001323339344.html There are some other similar parts when you click on this page. Not sure how I would connect the laser to it, but for $3.37 might be worth getting one. This motor takes 3v-5v so would that work? Does this sound like something worth pursuing?
Since my post was mentioned, I thought I’d give a little more info on what I have:
I have the EspoTek board. For $30, you can’t go wrong. Scope, Signal Generator, Variable Power Supply, Logic Analyzer all in one. All functions can be used simultaneously. The software is a little basic, but it gets the job done. Has some nice functions like if you put in a sense resistor (low resistance), it will calculated the current based on the voltage drop. I might might make a little case and a breakout board for use on my bench. Super handy.
I also have a DAQC2Plate. https://pi-plates.com/daqc2r1/
This also functions as a scope but has very robust IO and a python API. The scope software is very simple, but it works fine. This is another swiss army knife I’d recommend for any maker. I’ve made a few temporary projects out of it when I just want something quick. I also have a permanent installation that runs my pool. This one is a little more at $50, but it’s also very handy to have around. The Pi-Plates in general are really slick.
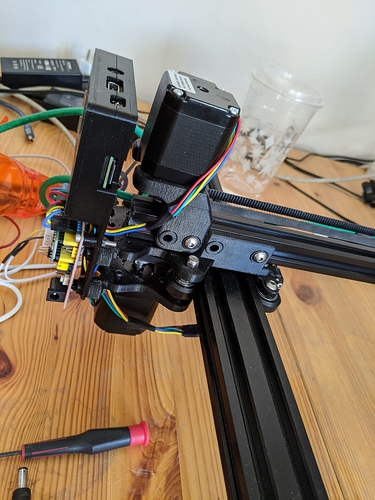
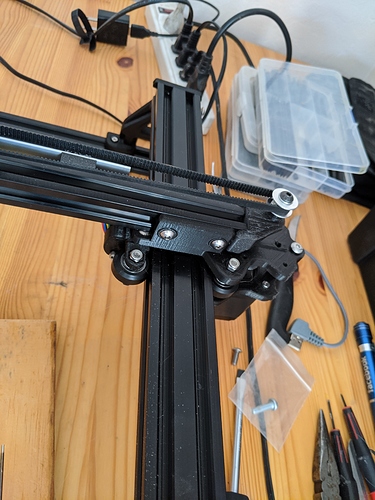
Not a huge fan of the cantilevered system. However this design is easily re-mixed to a traditional machine with dual motors on the y axis.
Just got this working tonight currently running of computer have not yet integrated pi.
here is a link to first run
https://photos.google.com/photo/AF1QipOIFokpxMKeRUcjVtsRh0d60QRpkIksuvyn0Oat
That sounds cool. I get a Error 404 (Not Found) when clicking on that.
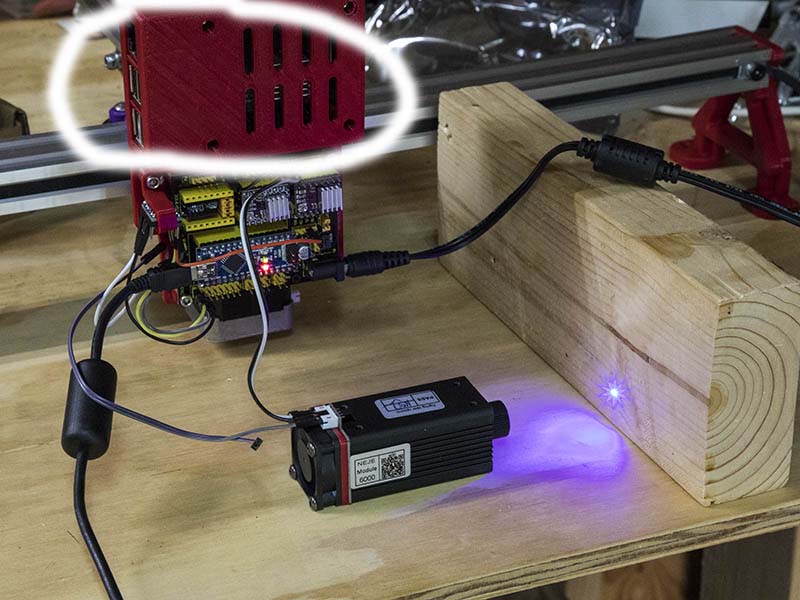
What is board I like to know and How it works? See white circle.
I have Arduino Nano. I am building it and will learn to use.
I already got the parts I ordered.
That is a Raspberry Pi 3B+. It is not really needed & I am not currently using it. @dkj4linux uses a pi to control his laser using @jeffeb3 V1pi software with cnc.js running on it. This can be more convenient as it allows you to access the engraver using a web interface over a wifi connection.
Ok, Thank you
Cantilevered Remix to traditional 2 Axis machine
Uploading: IMG_20201129_085042.jpg…
Someone said they were having problems with the video I posted earlier
here is the youtube link
reposed below with youtube link and photos
That is a cool and simple remix. Thanks for sharing.


