Lowrider 2 journey

Small update,
my project is paused as I am looking for some replacement spacers to fit the wheels.
It seems that my wheels need 6mm long M8 spacers that I can´t find locally.

For the moment I can only find some 3mm nylon spacers that might do the job. But the cost is as much as ordering another set of wheels. So I am on the edge of buying other wheels instead.

I also wanted to start the construction of my table, but came to 2 conclusions:

  • The initial plan was to make a torsion box. But looking at some other users their pictures, I stumbled on the fact that I wanted to make the upstanding sidewalls 14 cm heigh, that will cause issues as there´s only about 10cm space on the Y plates.
    So would need to redesign…

  • My workspace just got smaller again due to storage for renovation. So instead of a “solid” workbench I think it might be best to make something I can easily move or stow away.

And it must be coincidence, but I stumbled on a promotion in my local DIY shop. For these sawhorses:


I think that this would be an interesting alternative for my table, as it is quick to dis-/assemble and easy to stow it away. And I can easily add a full sheet onto it if needed!
Only need to think on how I can mount the belts easily…

Last night I quickly mounted the 3D parts on the Z plate. Hope the screws on the bottom will not be in the way when operating.

1 Like

The screw heads should be ok.

Can you print the spacers?

1 Like

Hmm, that´s an interesting idea.
But wouldn´t they wear out quickly due to friction?
I imagine that the weight of the Z would cause friction, thus slowly grinding the PLA spacer?

It looks from an earlier photo that metal spacers came with the wheels. Can you cut/grind down those to the right length?

1 Like

The spacers should not touch the moving parts. That’s the bearing’s job. The spacers should fit over the axle tightly, and touch only the axle and the center part of the bearing that moves with the axle. It should not touch the moving part of the bearing, nor the outside edge of the wheel, so there should be zero friction in regular operation.

2 Likes

To be honest, that was my initial idea too. However I do not own a belt sander for such metal work, so would need to use the angle grinder.
But this scare´s the **** out of me, I could loose a finger :smiley: So for me that´s a no-go :blush:

Thanks for the insights Dan. I appreciate you guys for thinking with me.

I imagined that when there would be a slight misalignment the spacers could be turning around too. But you´re right, if it is clamped tight enough it should work.
I might give it a go.

Some good news is that I managed to get a set of sawhorses for the easy removable table.

I went with another brand instead of toughbuilt simply because the other brand is wider and longer. Now I got to make the decision if I would make a full sheet table immediately, or just start small like I initially planned.

It seems that Michael had the same idea in the past so I can get some ideas from his project :smiley:

Love this forum!

1 Like

The yellow and brushed metal feel is super nice. Looks very professional.

1 Like

Thanks, it looks indeed very Pro :smiley:

While I can think of a couple of ways to arrange work holding so my fingers weren’t at risk, angle grinder would probably not be my first choice either, although maybe with a coarse flap sanding wheel…

Ultimately your safety is your responsibility since you’re the one who lives with the consequences of any mishaps. Congratulations on holding to your preference to do what feels safe for your situation.

So, my project came to a full stop because they claimed my workspace for storage while they are renovating the house.

I did not want to mess around with my spacers, or loose a finger. I decided to order a new set. They are a bit larger, but according to the FAQ within tolerances.
I expect them to run out quickly because of 82A hardness, but it´s not like it will do that many miles soon.

When I tested them, they fit perfectly with my spacers and bearings. Now I need to find a purpose for the spare wheels :slight_smile:

I also started to see for a router. And I am doubting between either an original Makita or the Katsu clone. That´s like 60€ versus 230€.

The Soft start and Load based RPM will probably make a huge difference for a beginner like me, but on the other hand I can buy a lot of gear with the savings. Ahhh decisions… :smiley:

Wow! The Makita RT0701C here retails at Home Depot for $129CAD.(About 87€)

I’ve got the $60 clone from Harbor Freight in December and it’s worked fine for me but it sees fairly light use. I bought the $10 warranty and assume the brushes will burn out at some point but they haven’t yet.

Wow, 87 that´s cheap. But I expect it will be without Tax?

And to be correct; I need to tell details😊

(prices excl shipping, including tax, updated day prices)

  • Makita 117€

  • Katsu 50€

Set: Router, plunge base, tilting base, plus 2 or 3 bits

  • Makita 209€

  • Katsu 80€

Set: Router, plunge base, tilting base, of center base, no bits

  • Makita 235€

  • Katsu 103€ (plus 2 bits)

If I would buy a new router, I would let go of my older one, so the plunge base would be a requirement to have. I´ve been reading that most people seem to be happy with a Katsu router (some exceptions aside), however the additional parts seem to be of lesser quality.

So it´s becoming either a gamble with Katsu and hope I have a decent base, or just play safe and buy a Makita. And when I take the Makita, there´s the question of taking the of center base, I have never used yet.:slight_smile:

Aside from the brushes, do you think you´re missing out on the soft start or load corrected RPM?

Soft start doesn’t really matter as you are starting cutting air unless you are turning on the vac with the same switch and are worried about tripping breakers. I’ve never had a router with RPM correction so I don’t know what I’m missing there. I suspect that my lowrider would start skipping steps before I bogged down the endmill but I could be wrong on that.

I’m sure the Makita is a better router, I just found the clone to be good enough for my needs. Alsoyou are in Europe so I know that in many counties easy returns are not the norm. Here in the US you can buy a cheap angle grinder at HF for $10 with a $5 warranty run it non stop for a week cutting concrete and rebar and bring back the melted, concrete encrusted carcass for a full exchange. If I couldn’t do that I could do that I would go with the better built Makita.

Good point on the skipping steps idea. Something to take into consideration when making my decision.

I think the Soft-start and RPM correction would be mostly “important” when not using it in the LR2. For my case I plan on using it often with a tilted base.

We do have some good return policies in Europe, but not the way you describe it:-)
In my case I will not be buying it in the local shop as there´s a steep difference in pricing. Last time I checked it would cost me about 100 euros more compared to an online shop.

But that means warranty will be dodgy as it depends on the online seller. Most of them point directly to Makita, but I am sure Makita will point to the reseller…

Oh well… I´ll take some time to think about it before making a decision in Katsu vs Makita.

Today I wanted to order a router, but then I suddenly realized it would need some bits too.
However without any CNC experience this seems to be not so easy (to select a bit…).

So I came across a very interesting website: What the flute? And a nice youtube video: CNC Bits For Beginners

Thanks to this, I think I got the basic insights, and wanted to order some bits at the V1 shop, but then I got my calculator running…

And concluded I would be better to buy on a localized Amazon shop to begin with. So I can mess around before buying better tools :blush:

I would be milling the following

  • Acrylic
  • Poplar wood
  • Paulownia wood
  • Layered Maple veneer
  • Engraving text and logos on Acrylic

I think I understood that Acrylic would benefit from 1 or 2 flute bits. But I am still not sure if I would need a V bit for engraving logos instead of a “normal” bit with small diameter like 1.8mm :blush:

So I wonder if anyone has some experience on buying bits from Amazon?

I came across this kit, and for a newbie, it looks interesting as it is a mix of bits: Genmitsu End mill set with a total of 40 CNC router bits but it lacks some details like if they are up or down cut bits.

Obviously I have no idea if it would be a good starter kit, nor what a blue or titanium coat would do :smiley: Some advice would be appreciated​:blush:

Start with a good set of uncut carbide bits 1/8 or 1/4 with 1-2 flutes.

There are enough things that could go wrong with a new build so take the bits out of the equation. Upcuts aren’t as clean cutting as Down cuts or combo bits but they dont jam up either when doing deep cuts.

If you aren’t buying from the V1 store I’ve had some good luck with the speed tiger bits on Amazon. I think Ryan sells Kyocera bits which are also good.

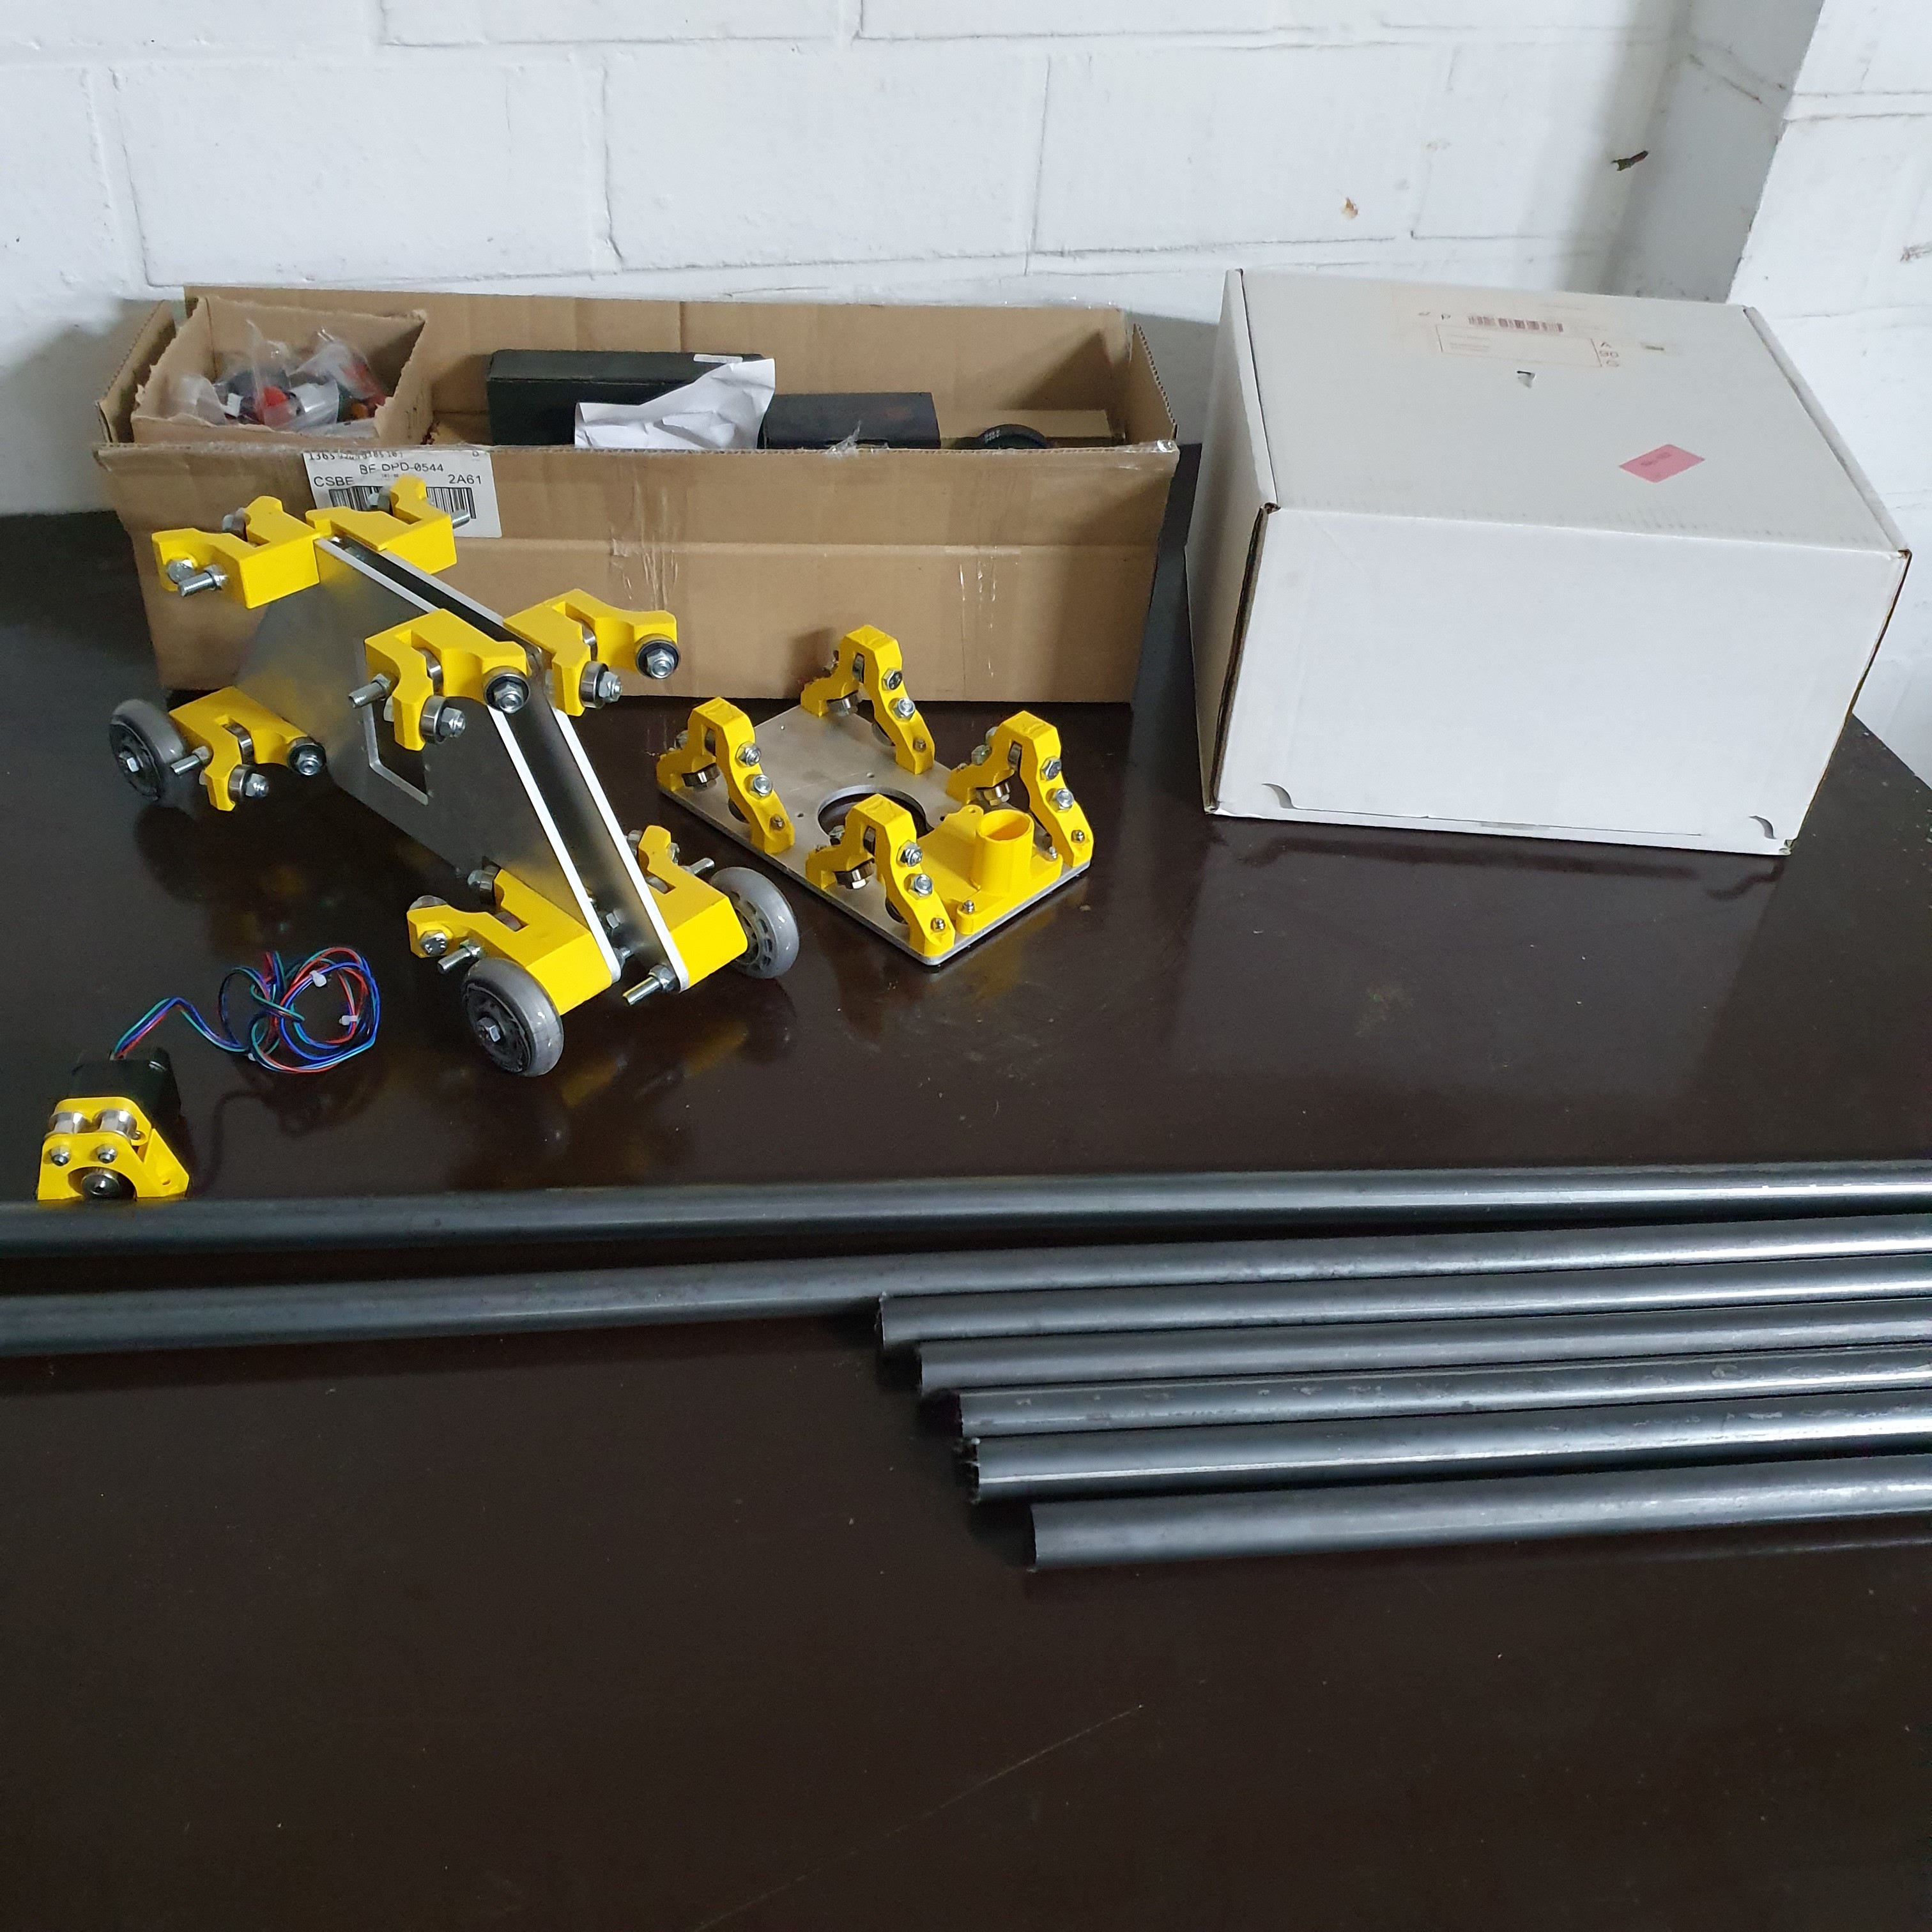
So, last week I received some goodies :slight_smile:

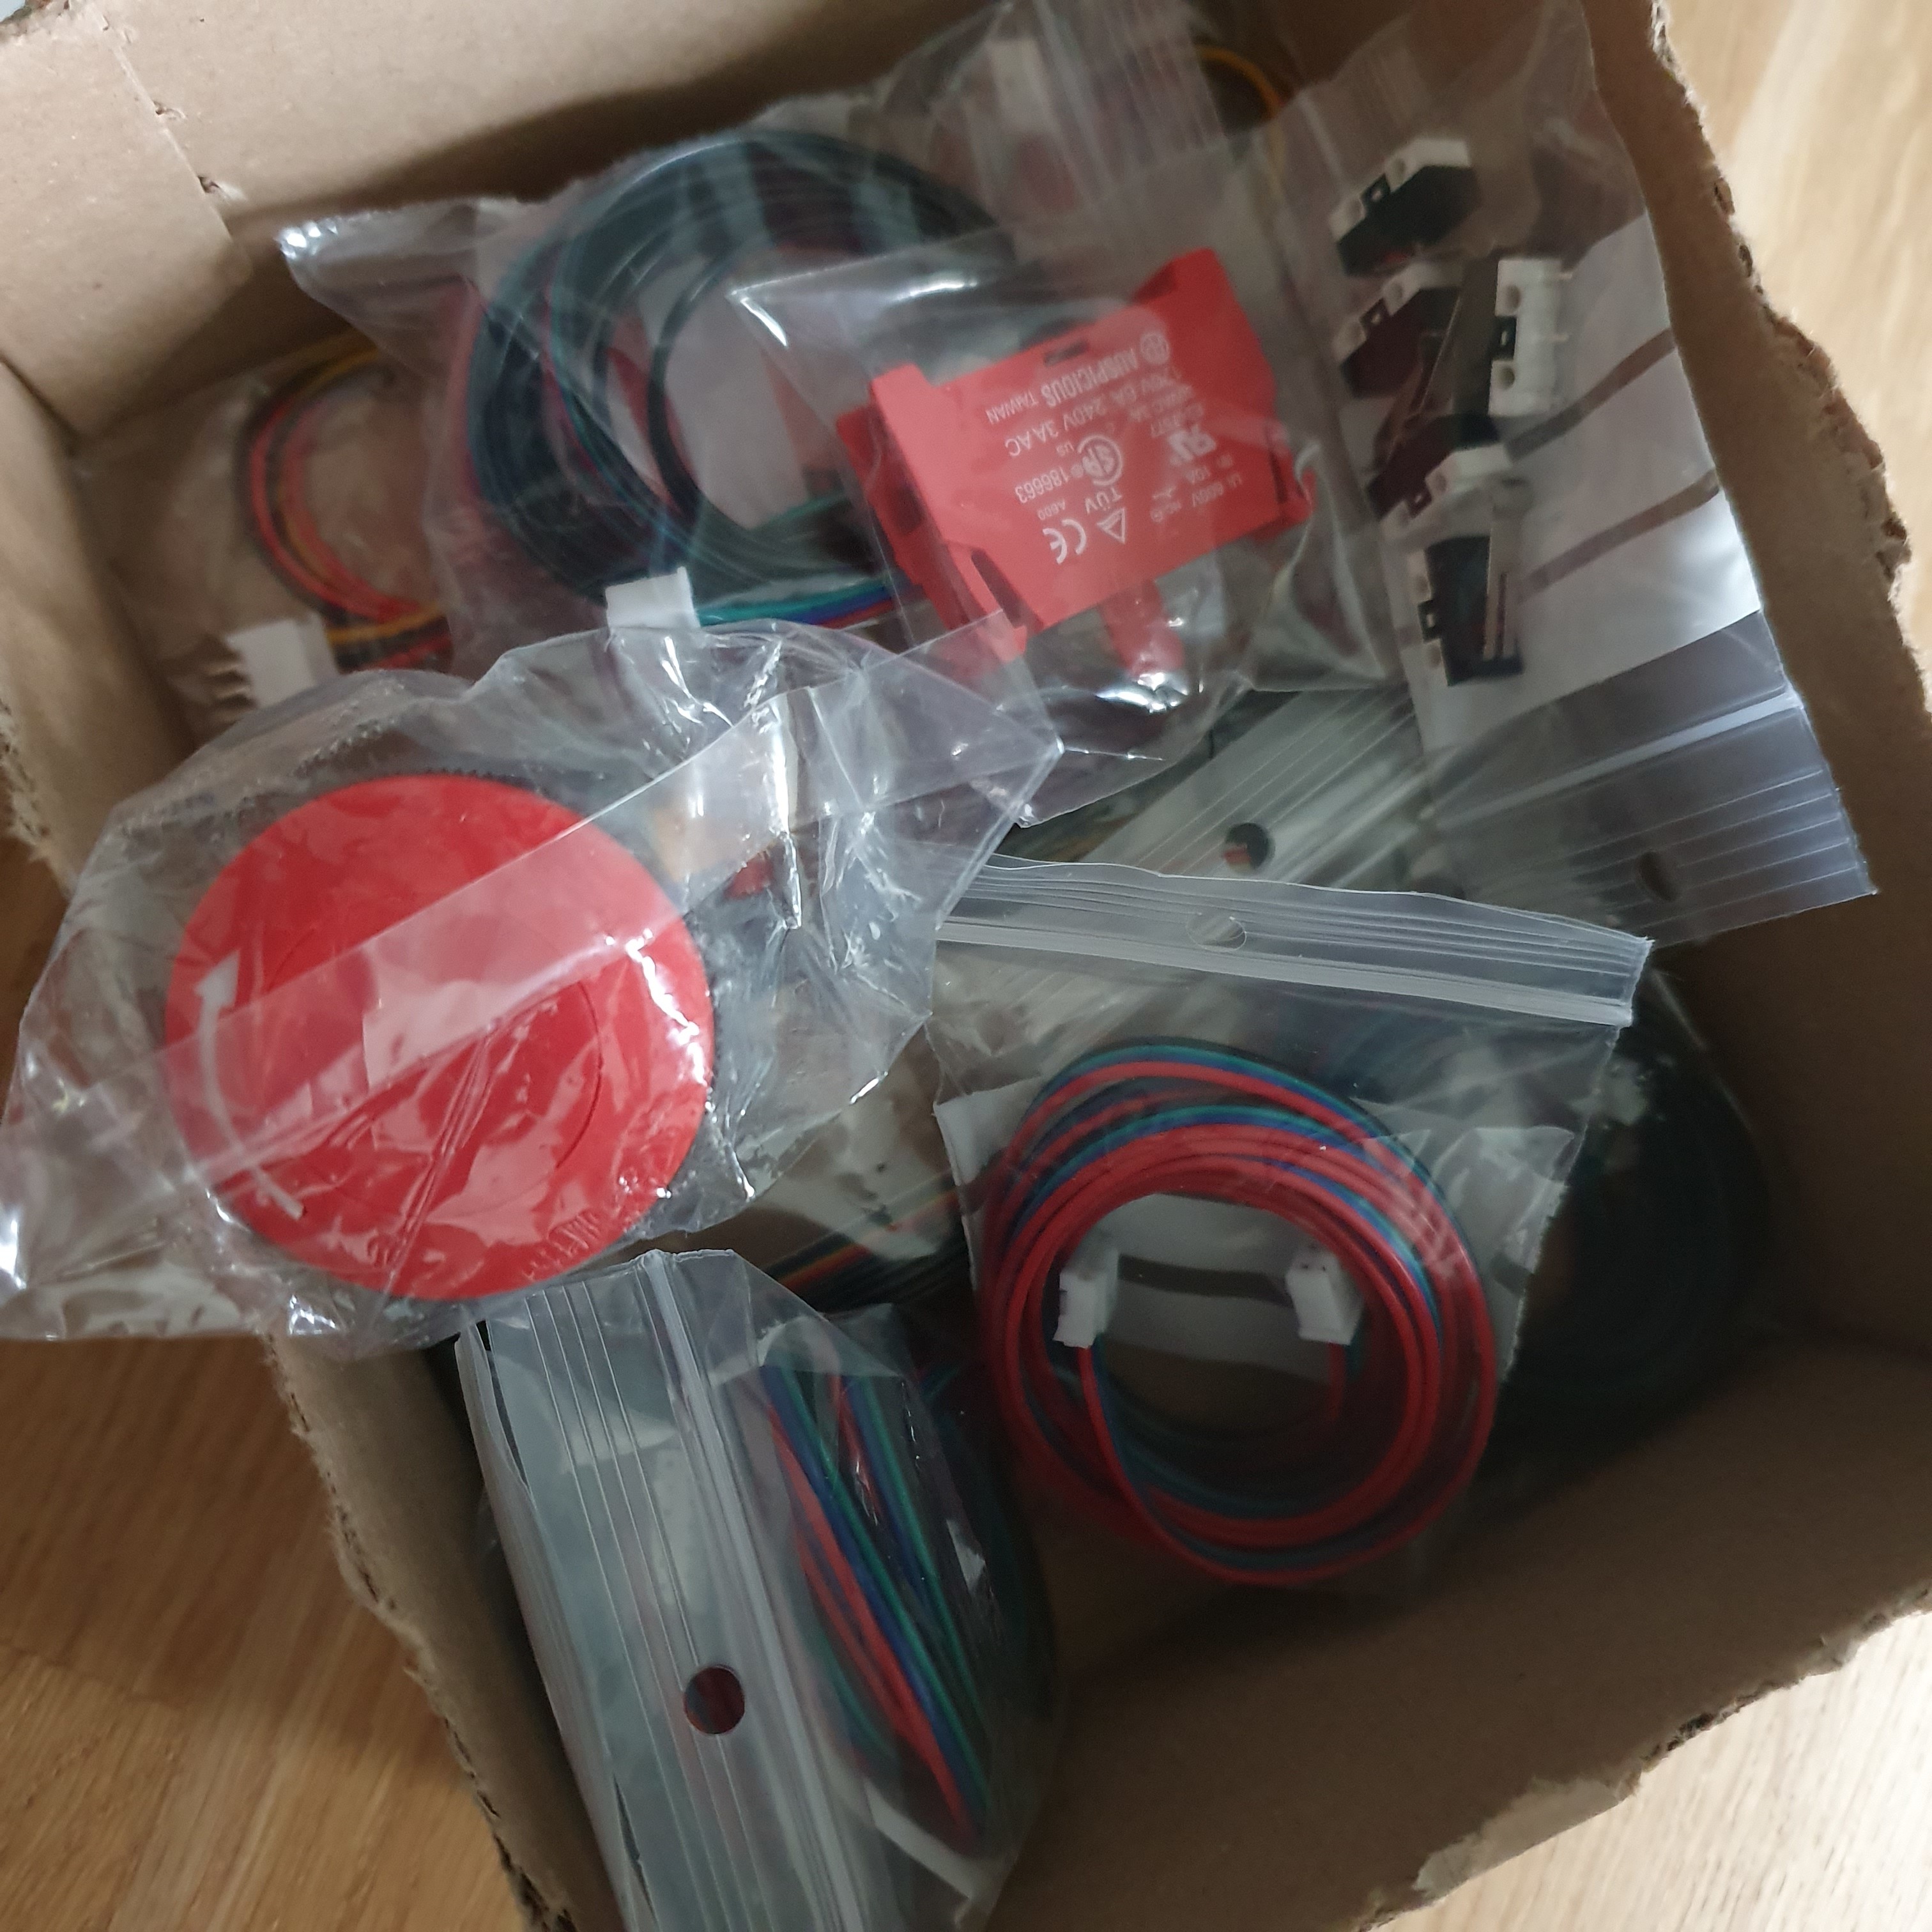
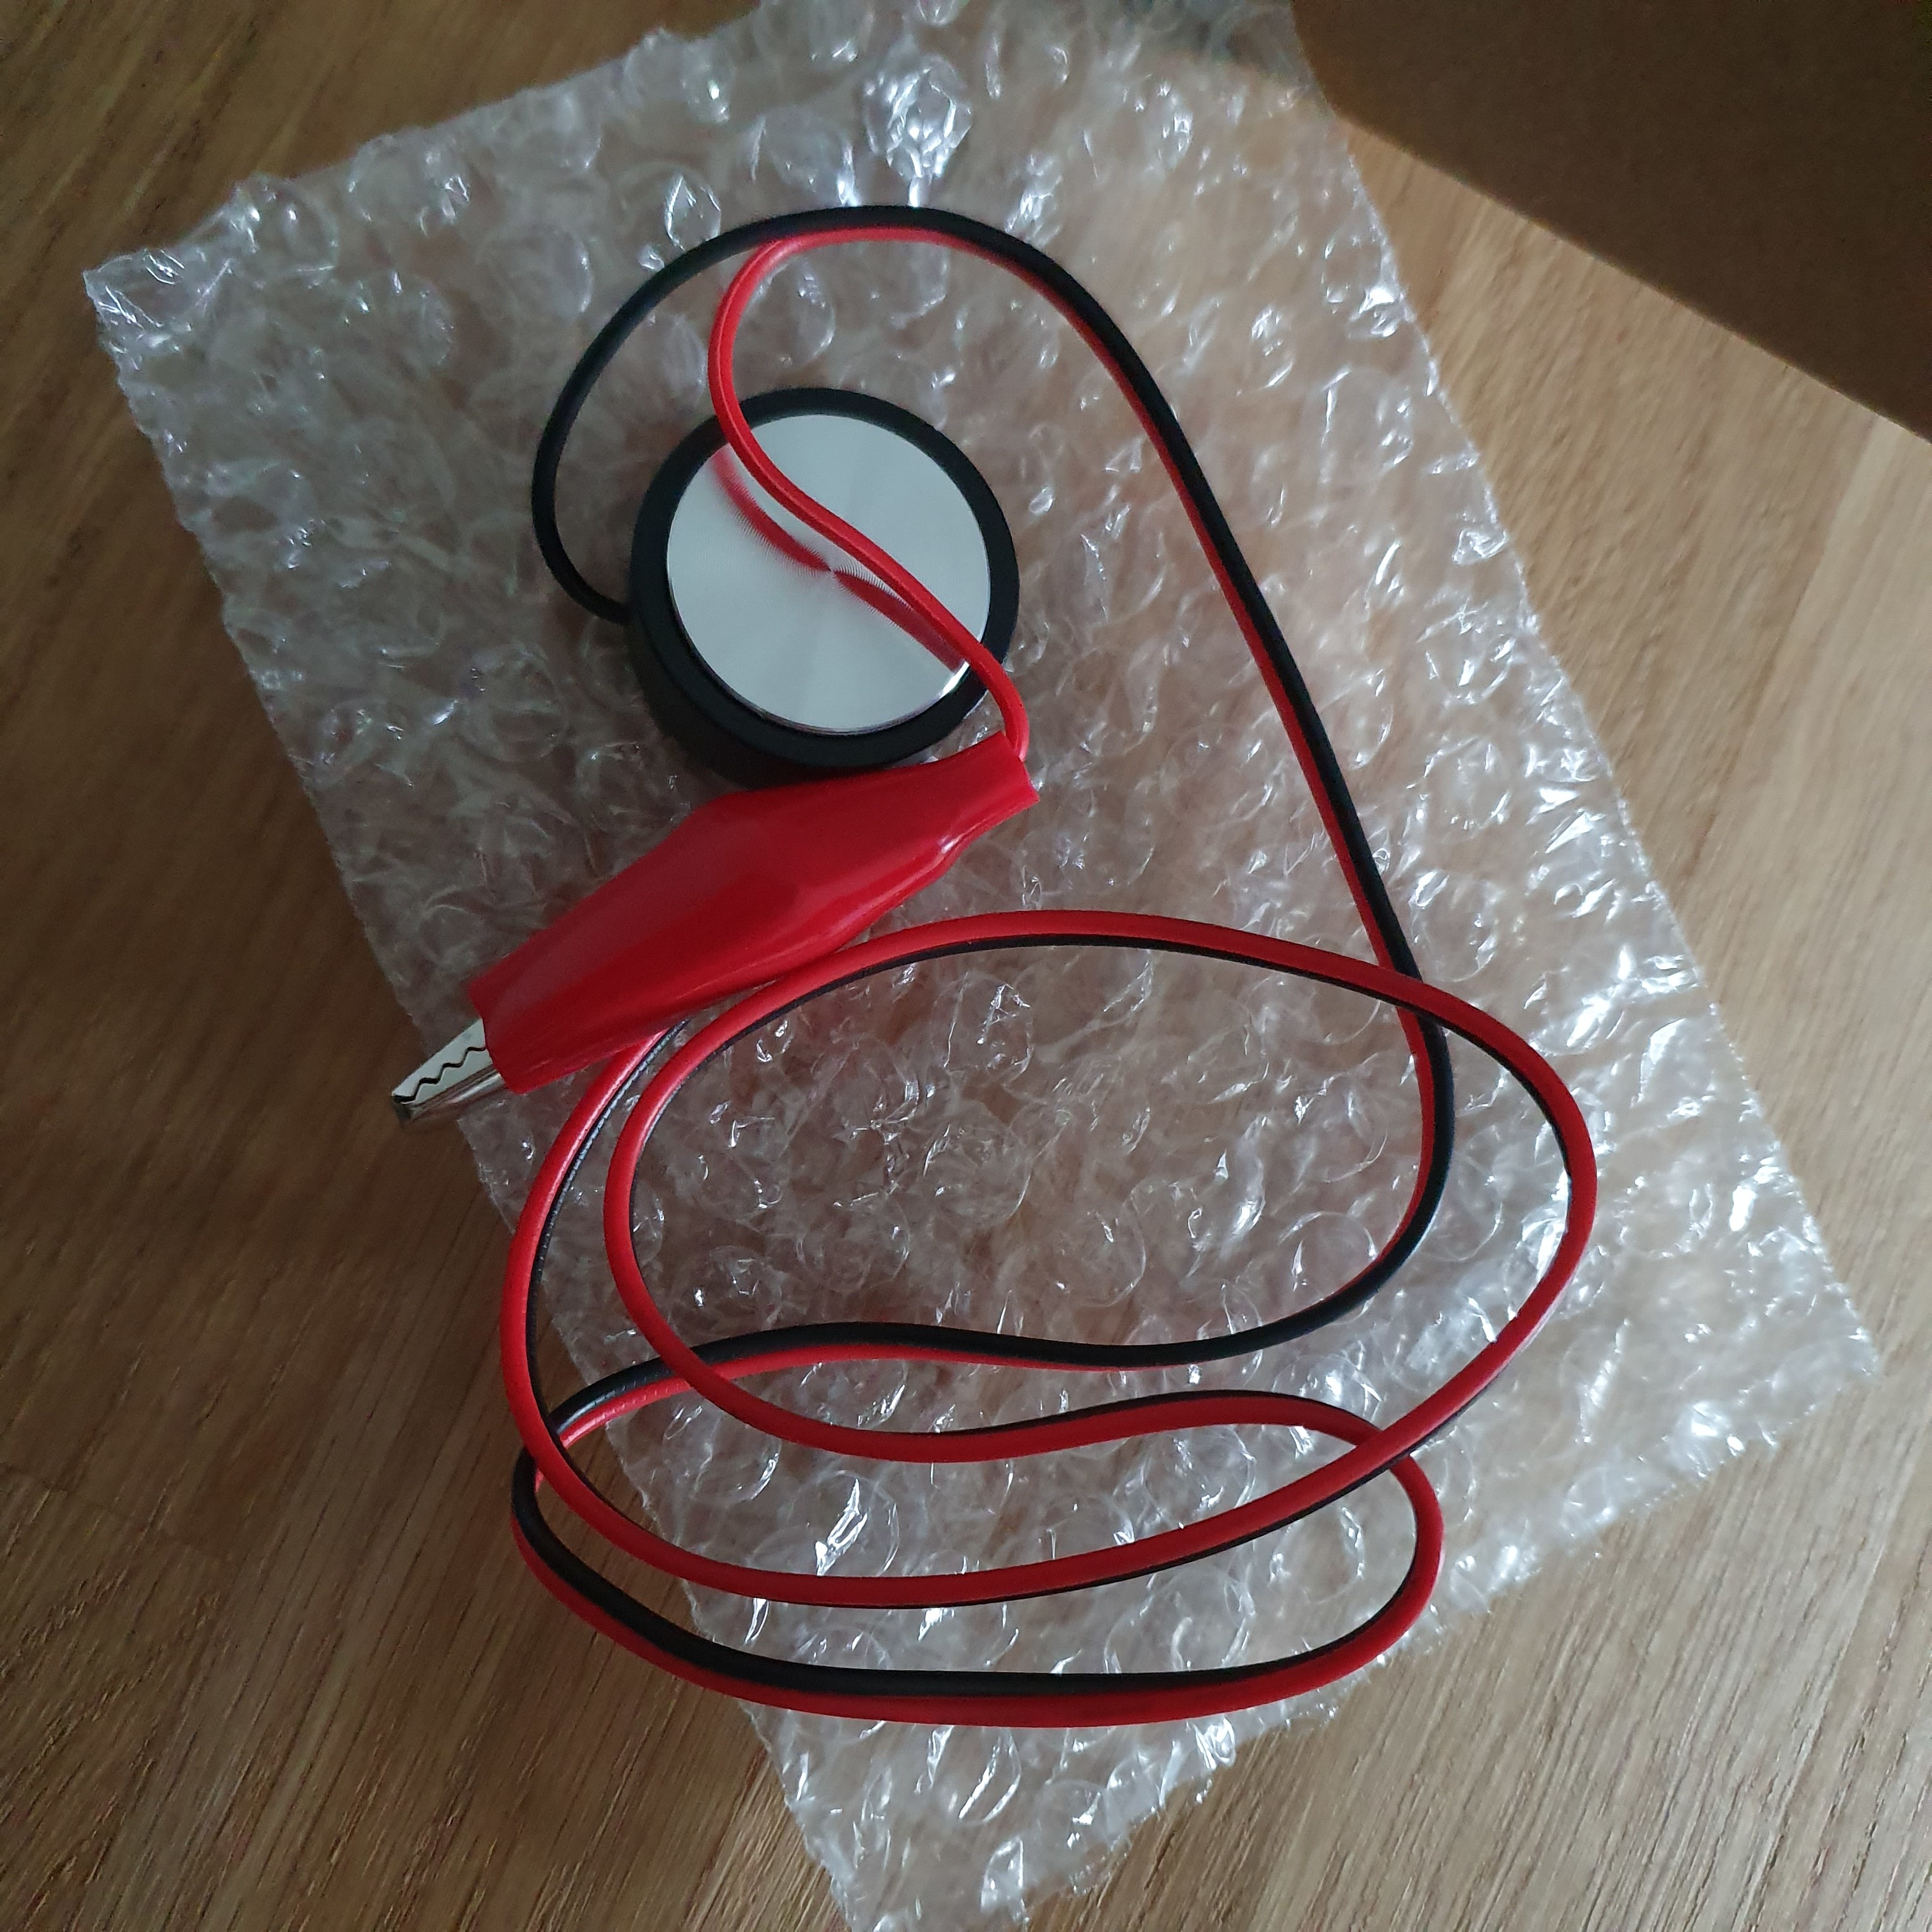
I ordered some wiring, end stop sensors, etc. The basic stuff to make my build complete.

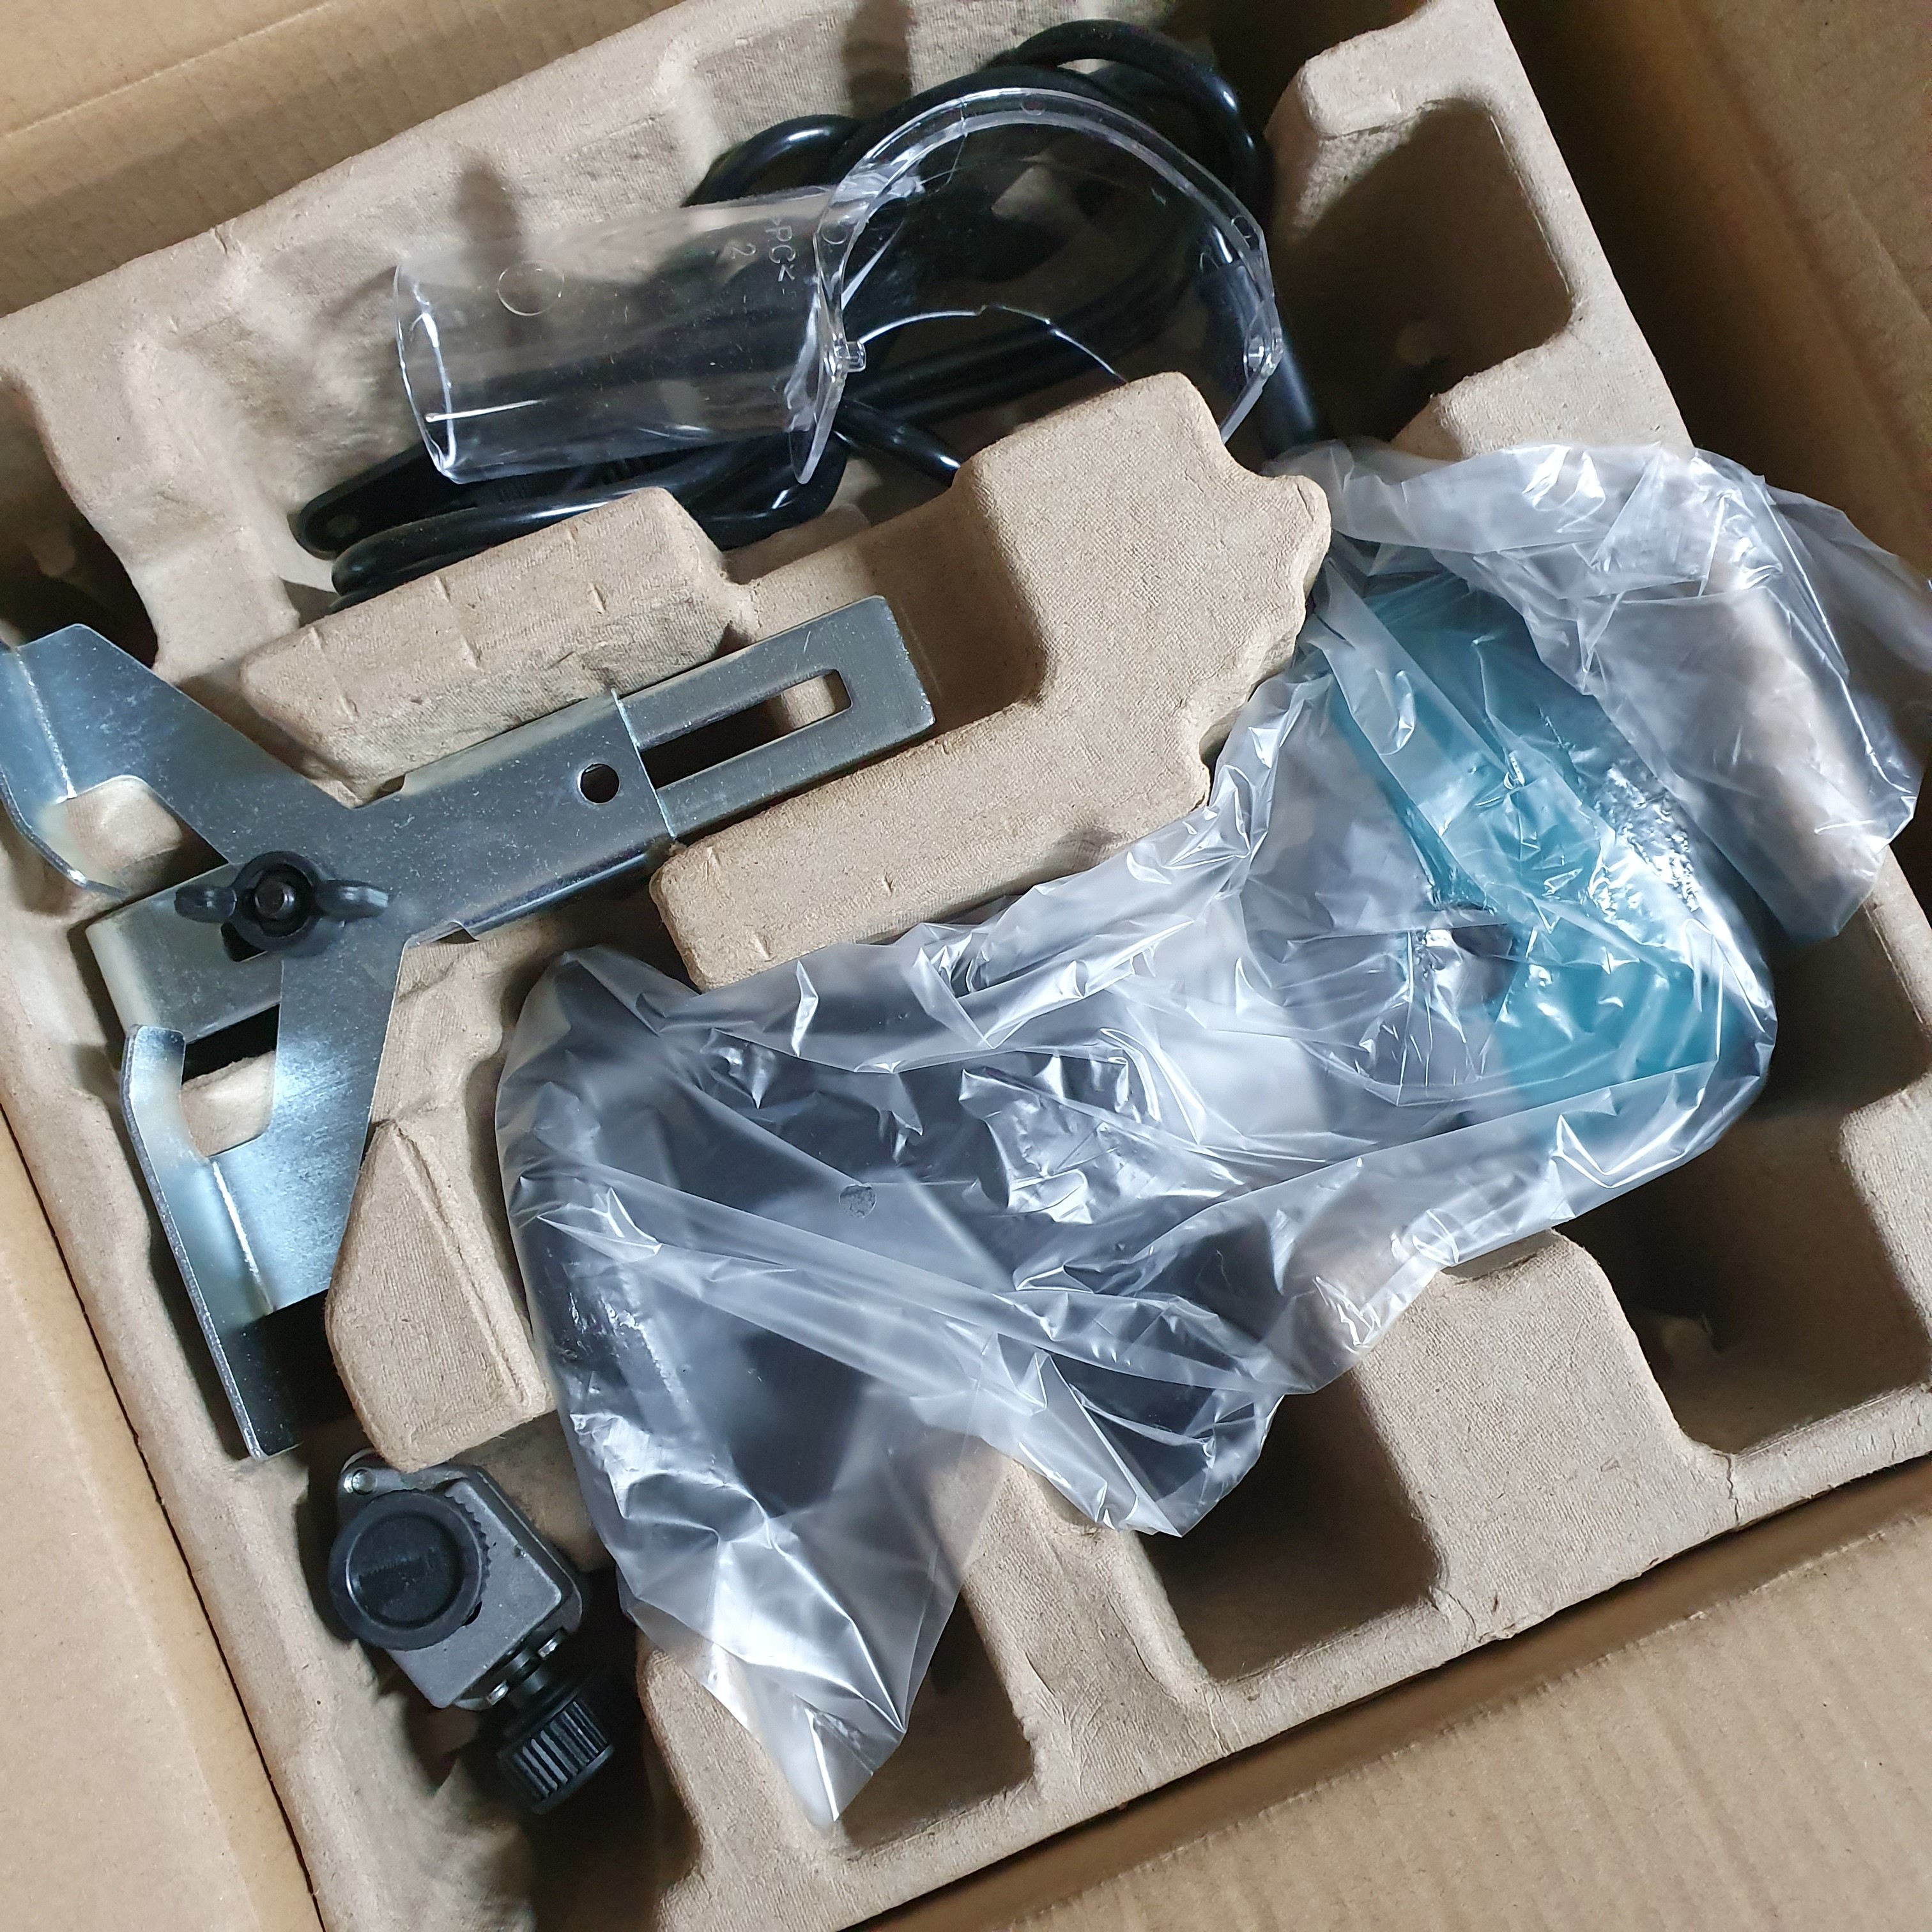
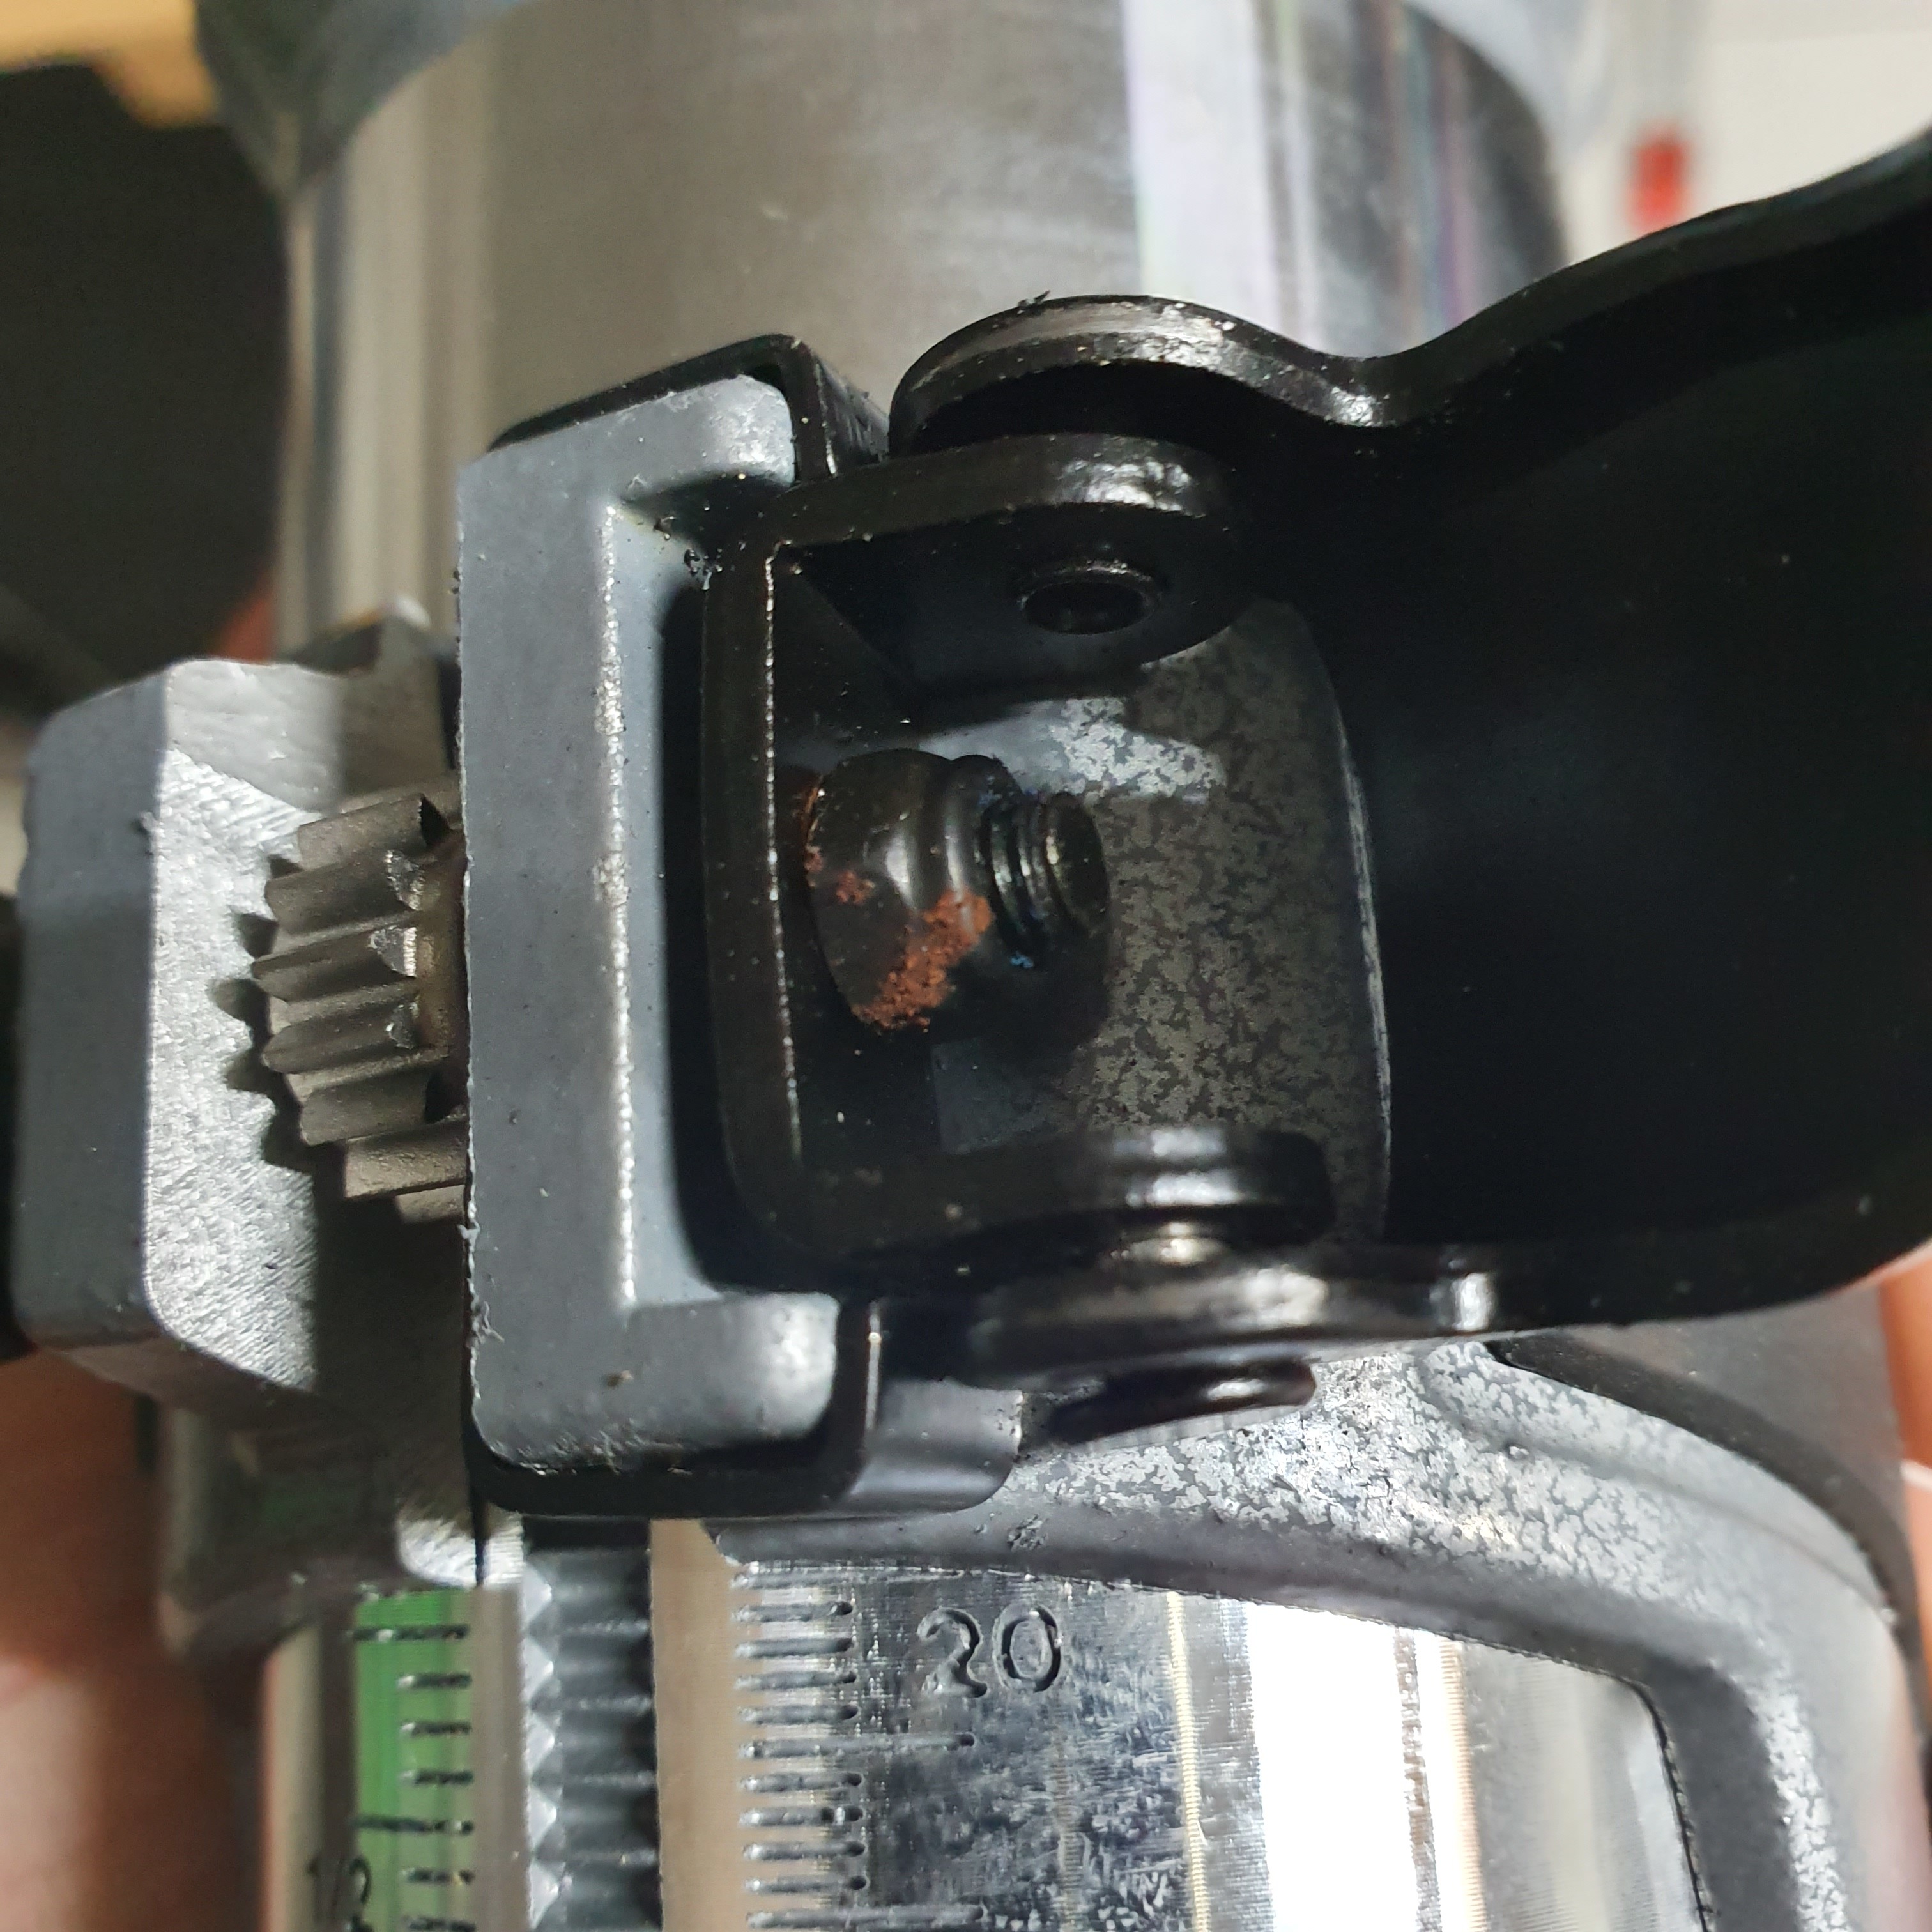
I also received the router, I decided to go with Katsu as it will probably be attached permanently. So it wouldn´t have made sense to order all the additional parts. It was a pleasant unpacking up until the moment I noticed the rust on one of the screws.
Let´s hope that´s the only thing wrong with it:)

This damn thing makes a lot of noise, so it will be replaced in the future for sure.
Otherwise my wife will kick me out the house :smiley:

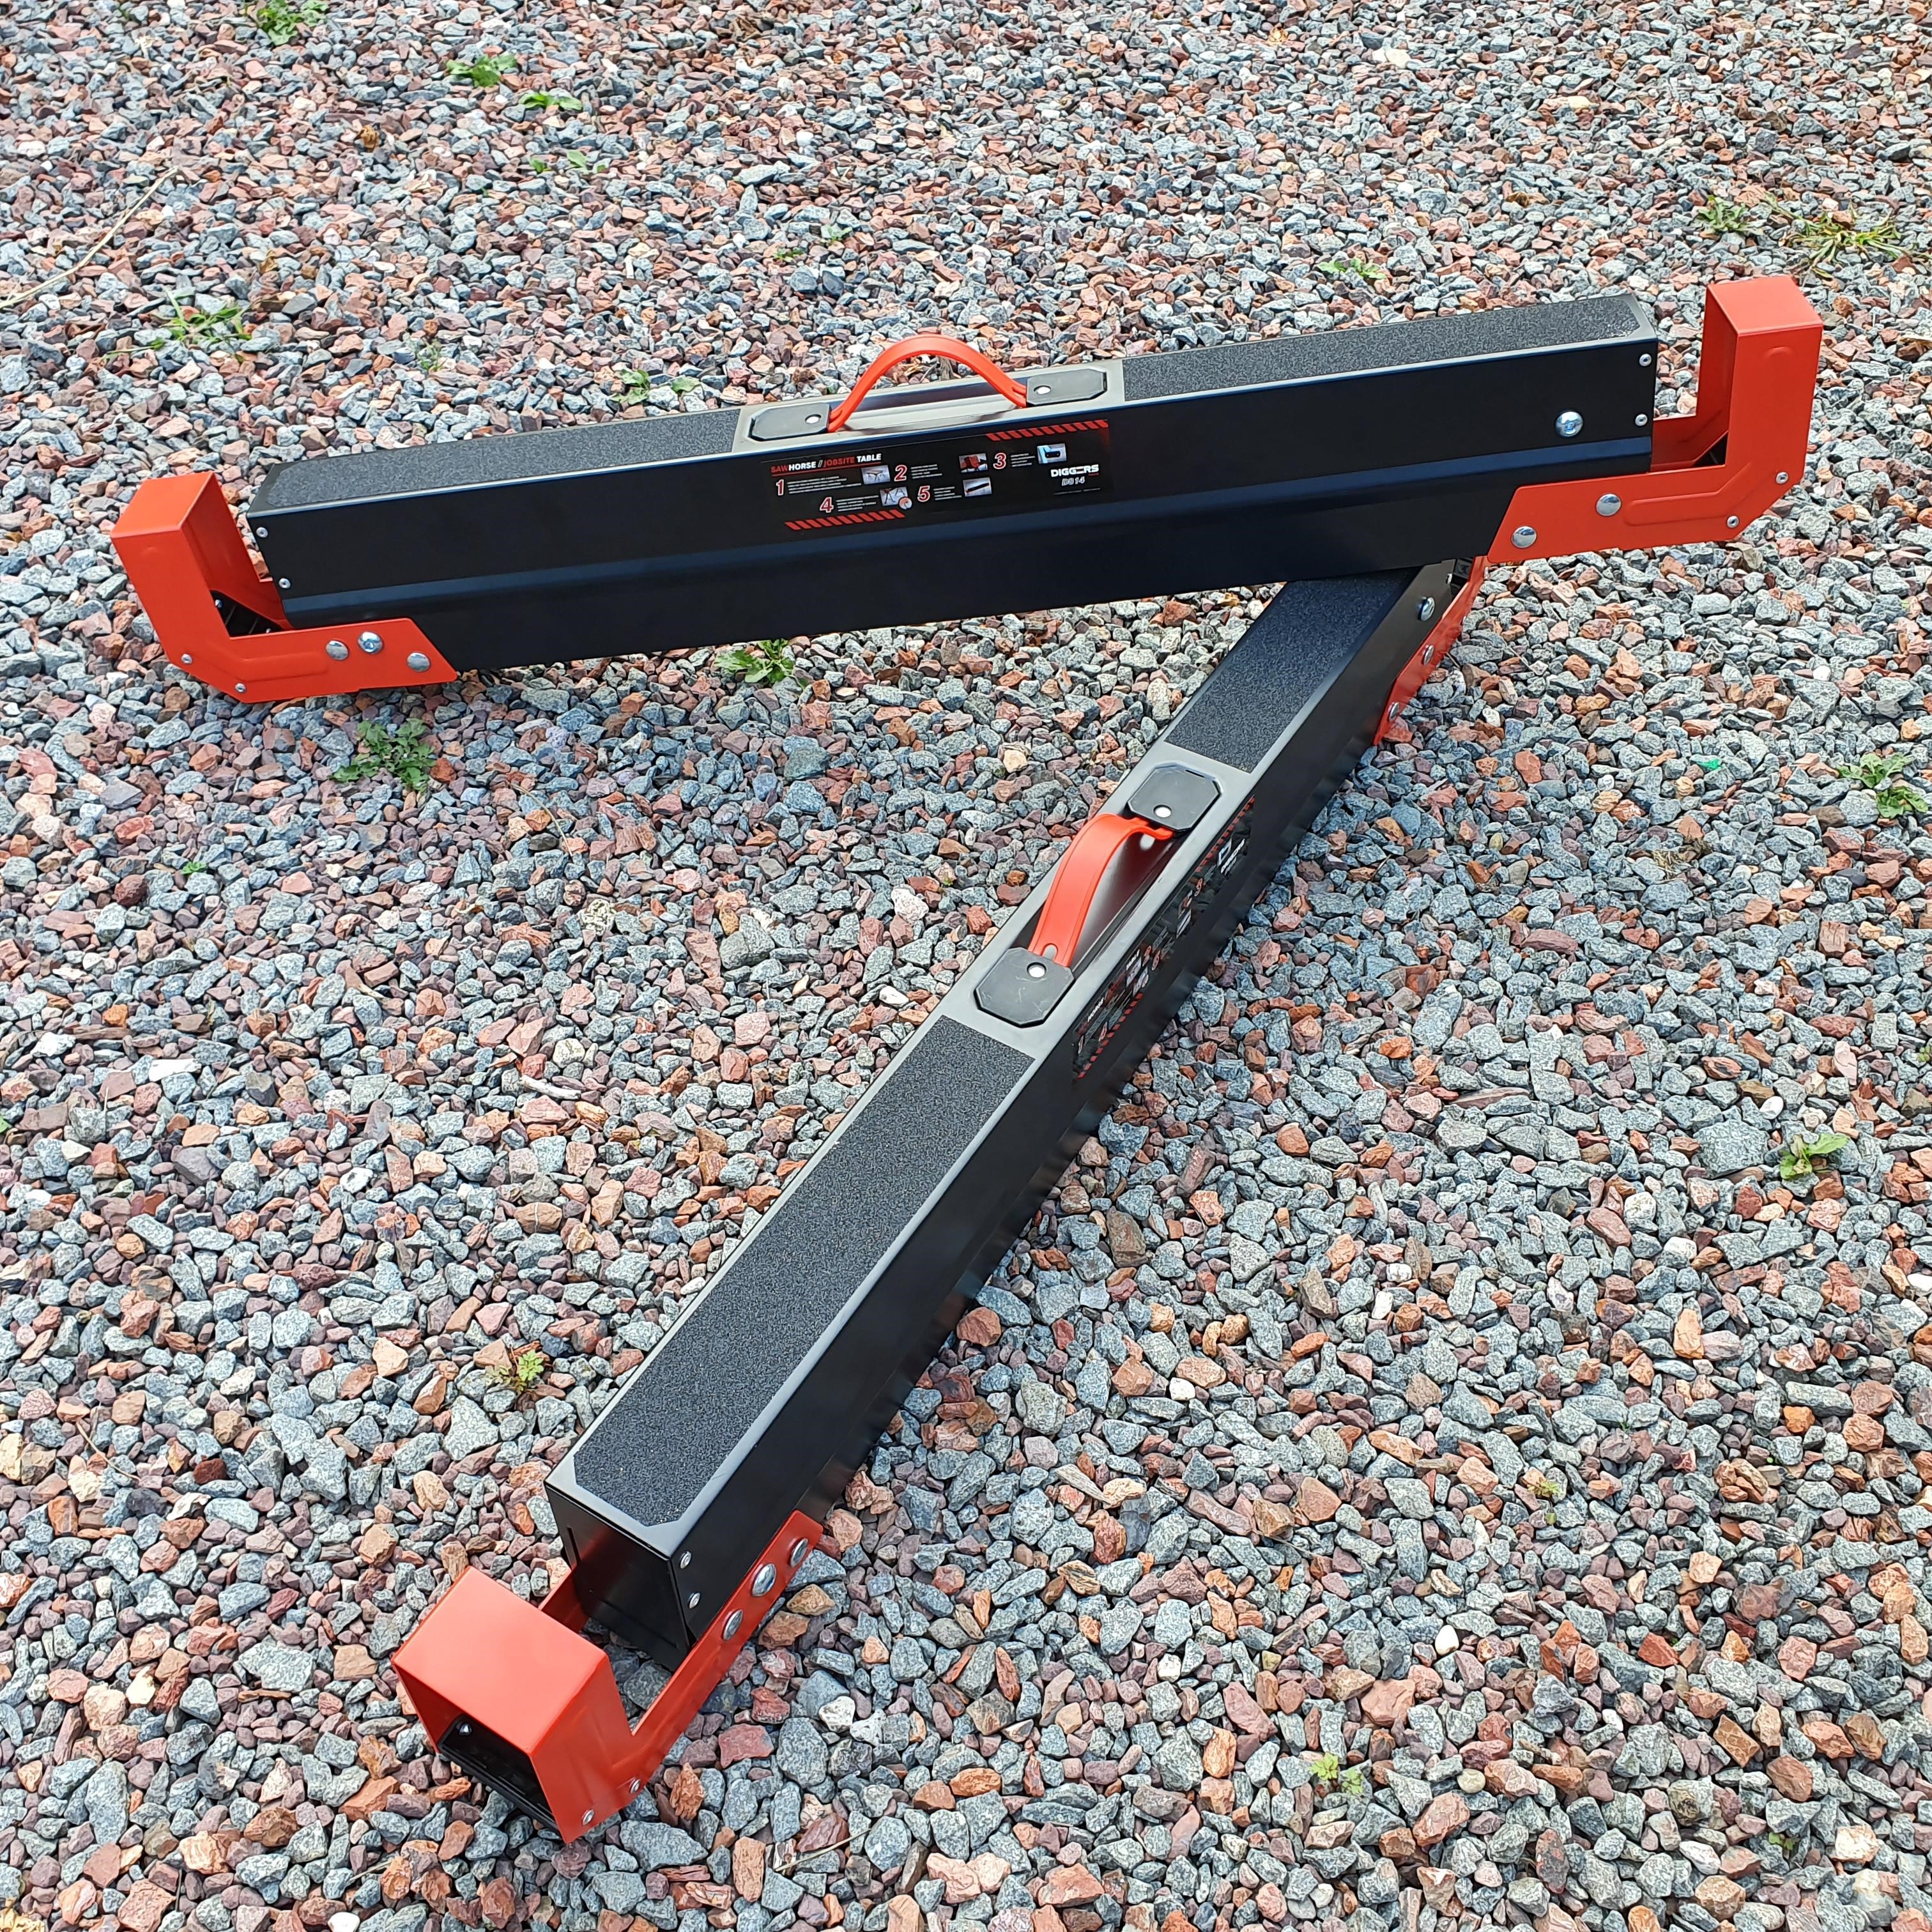
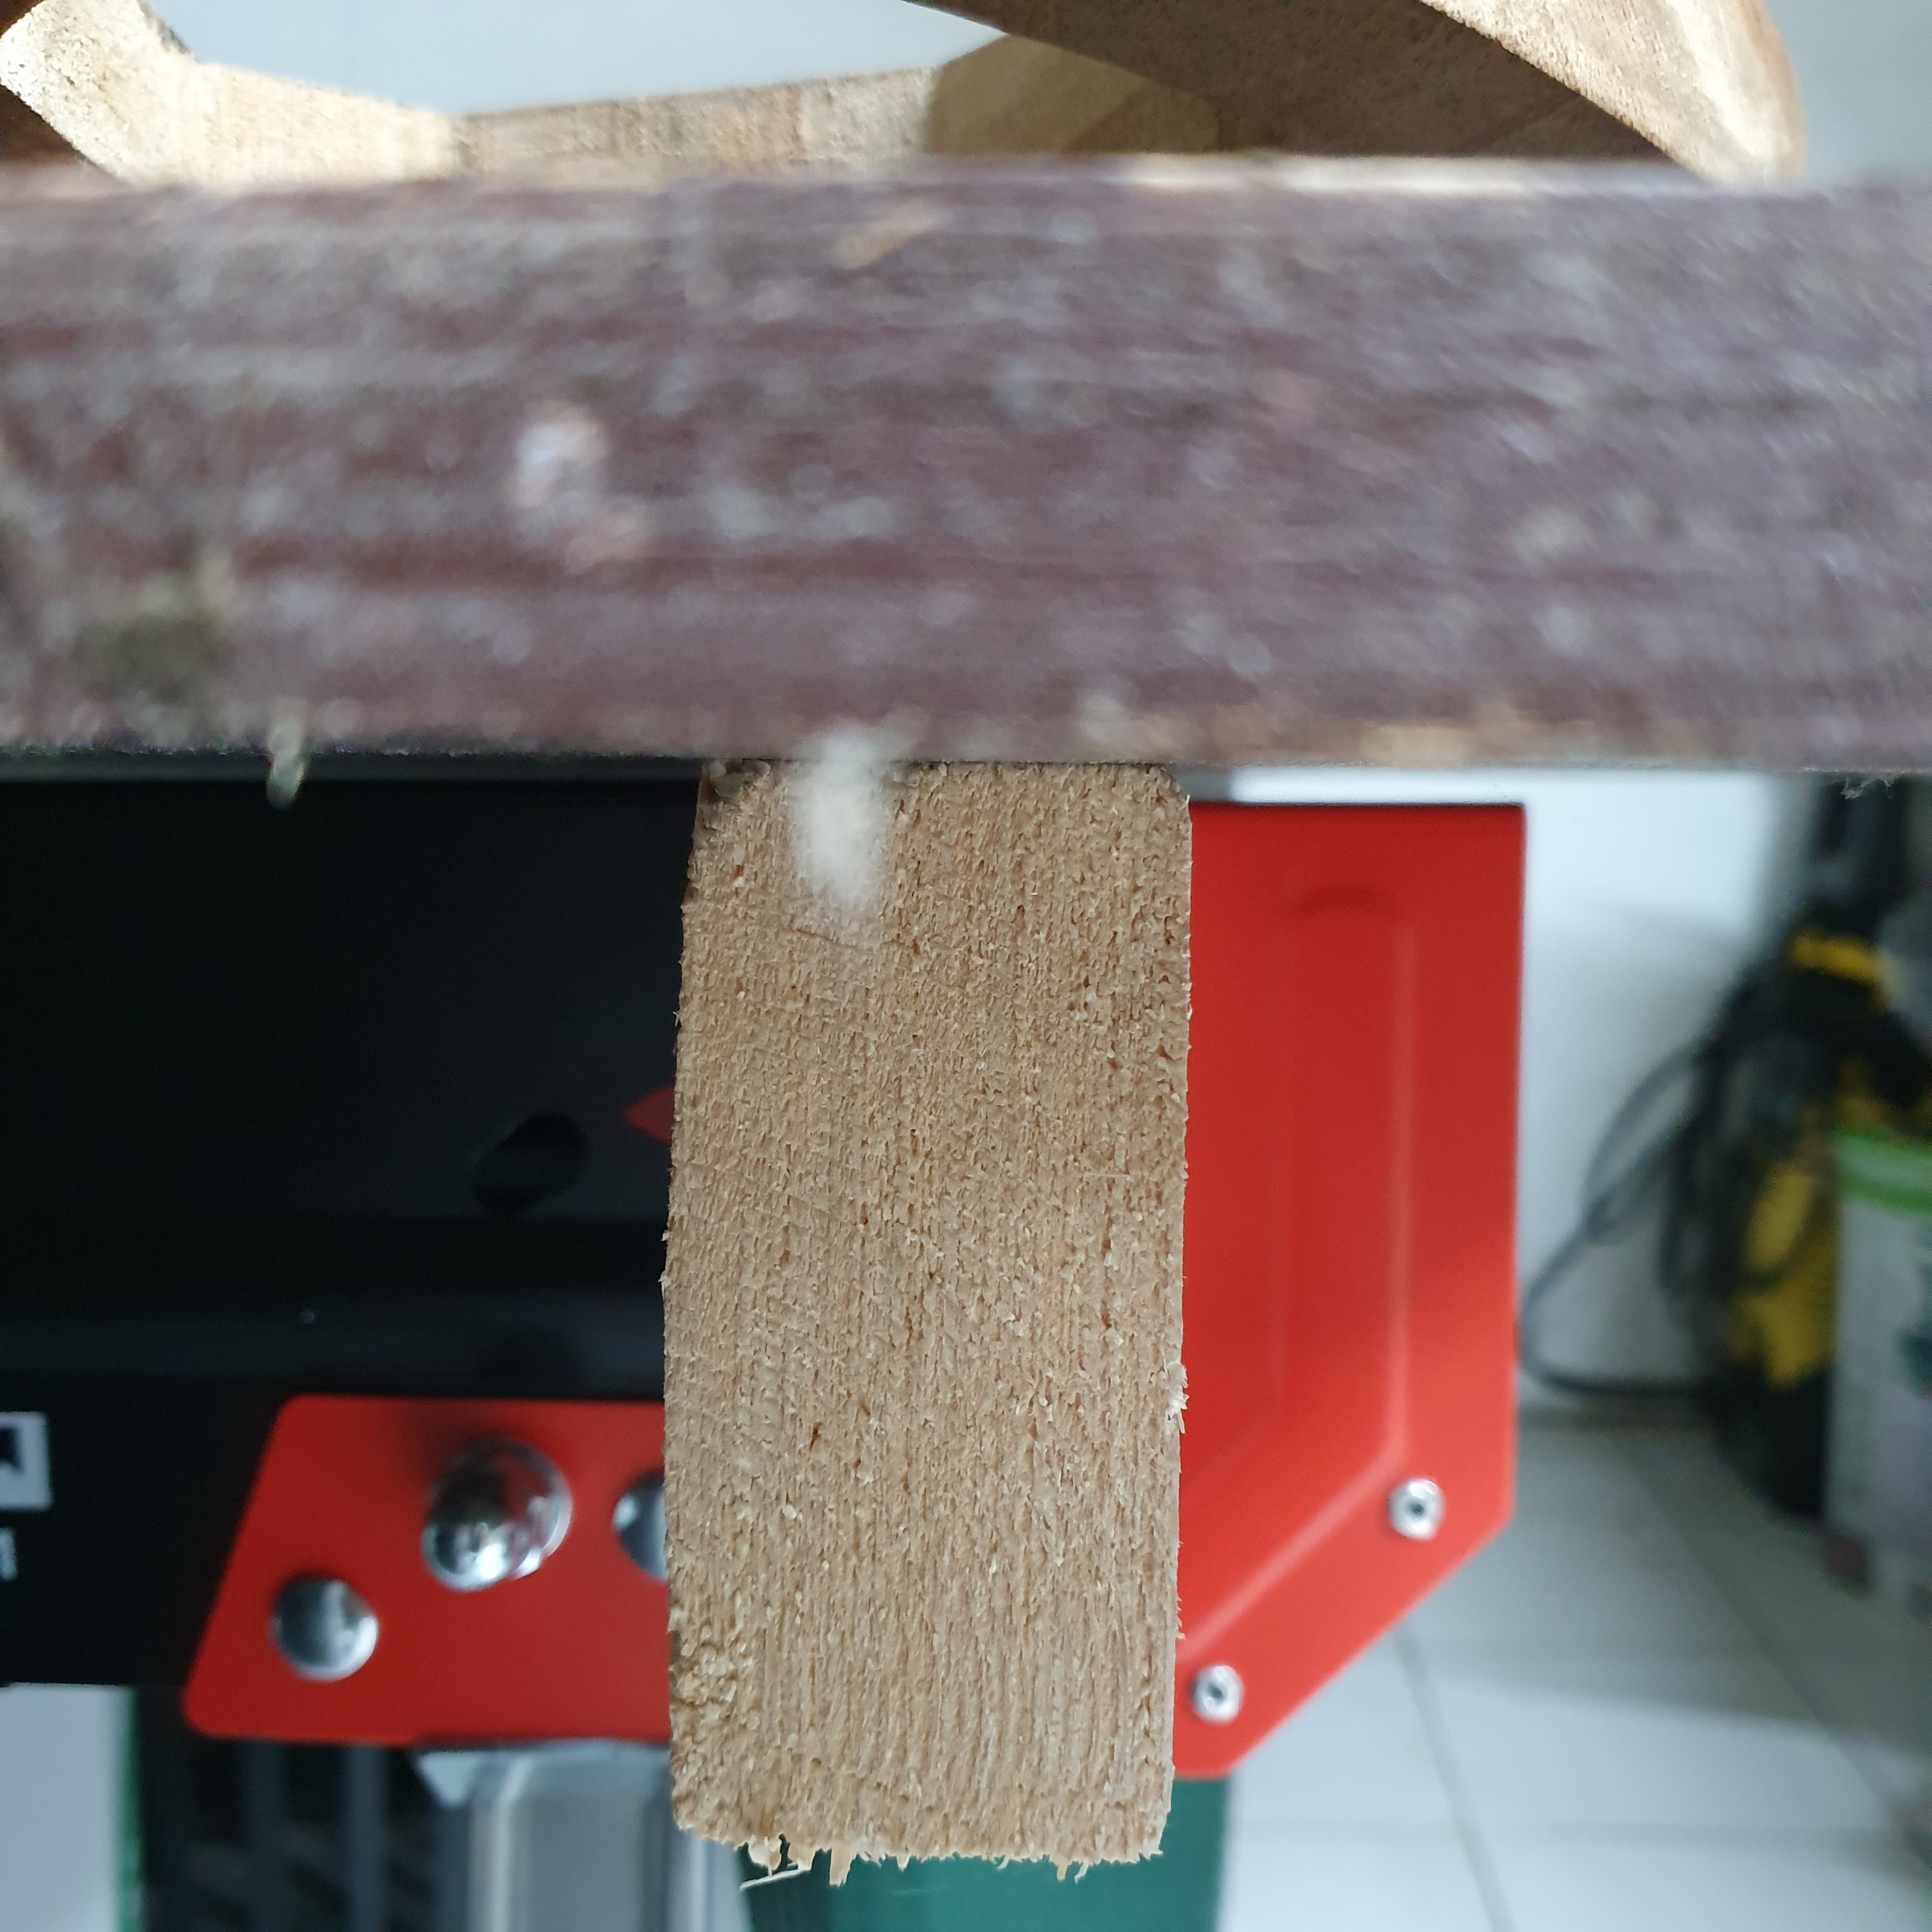
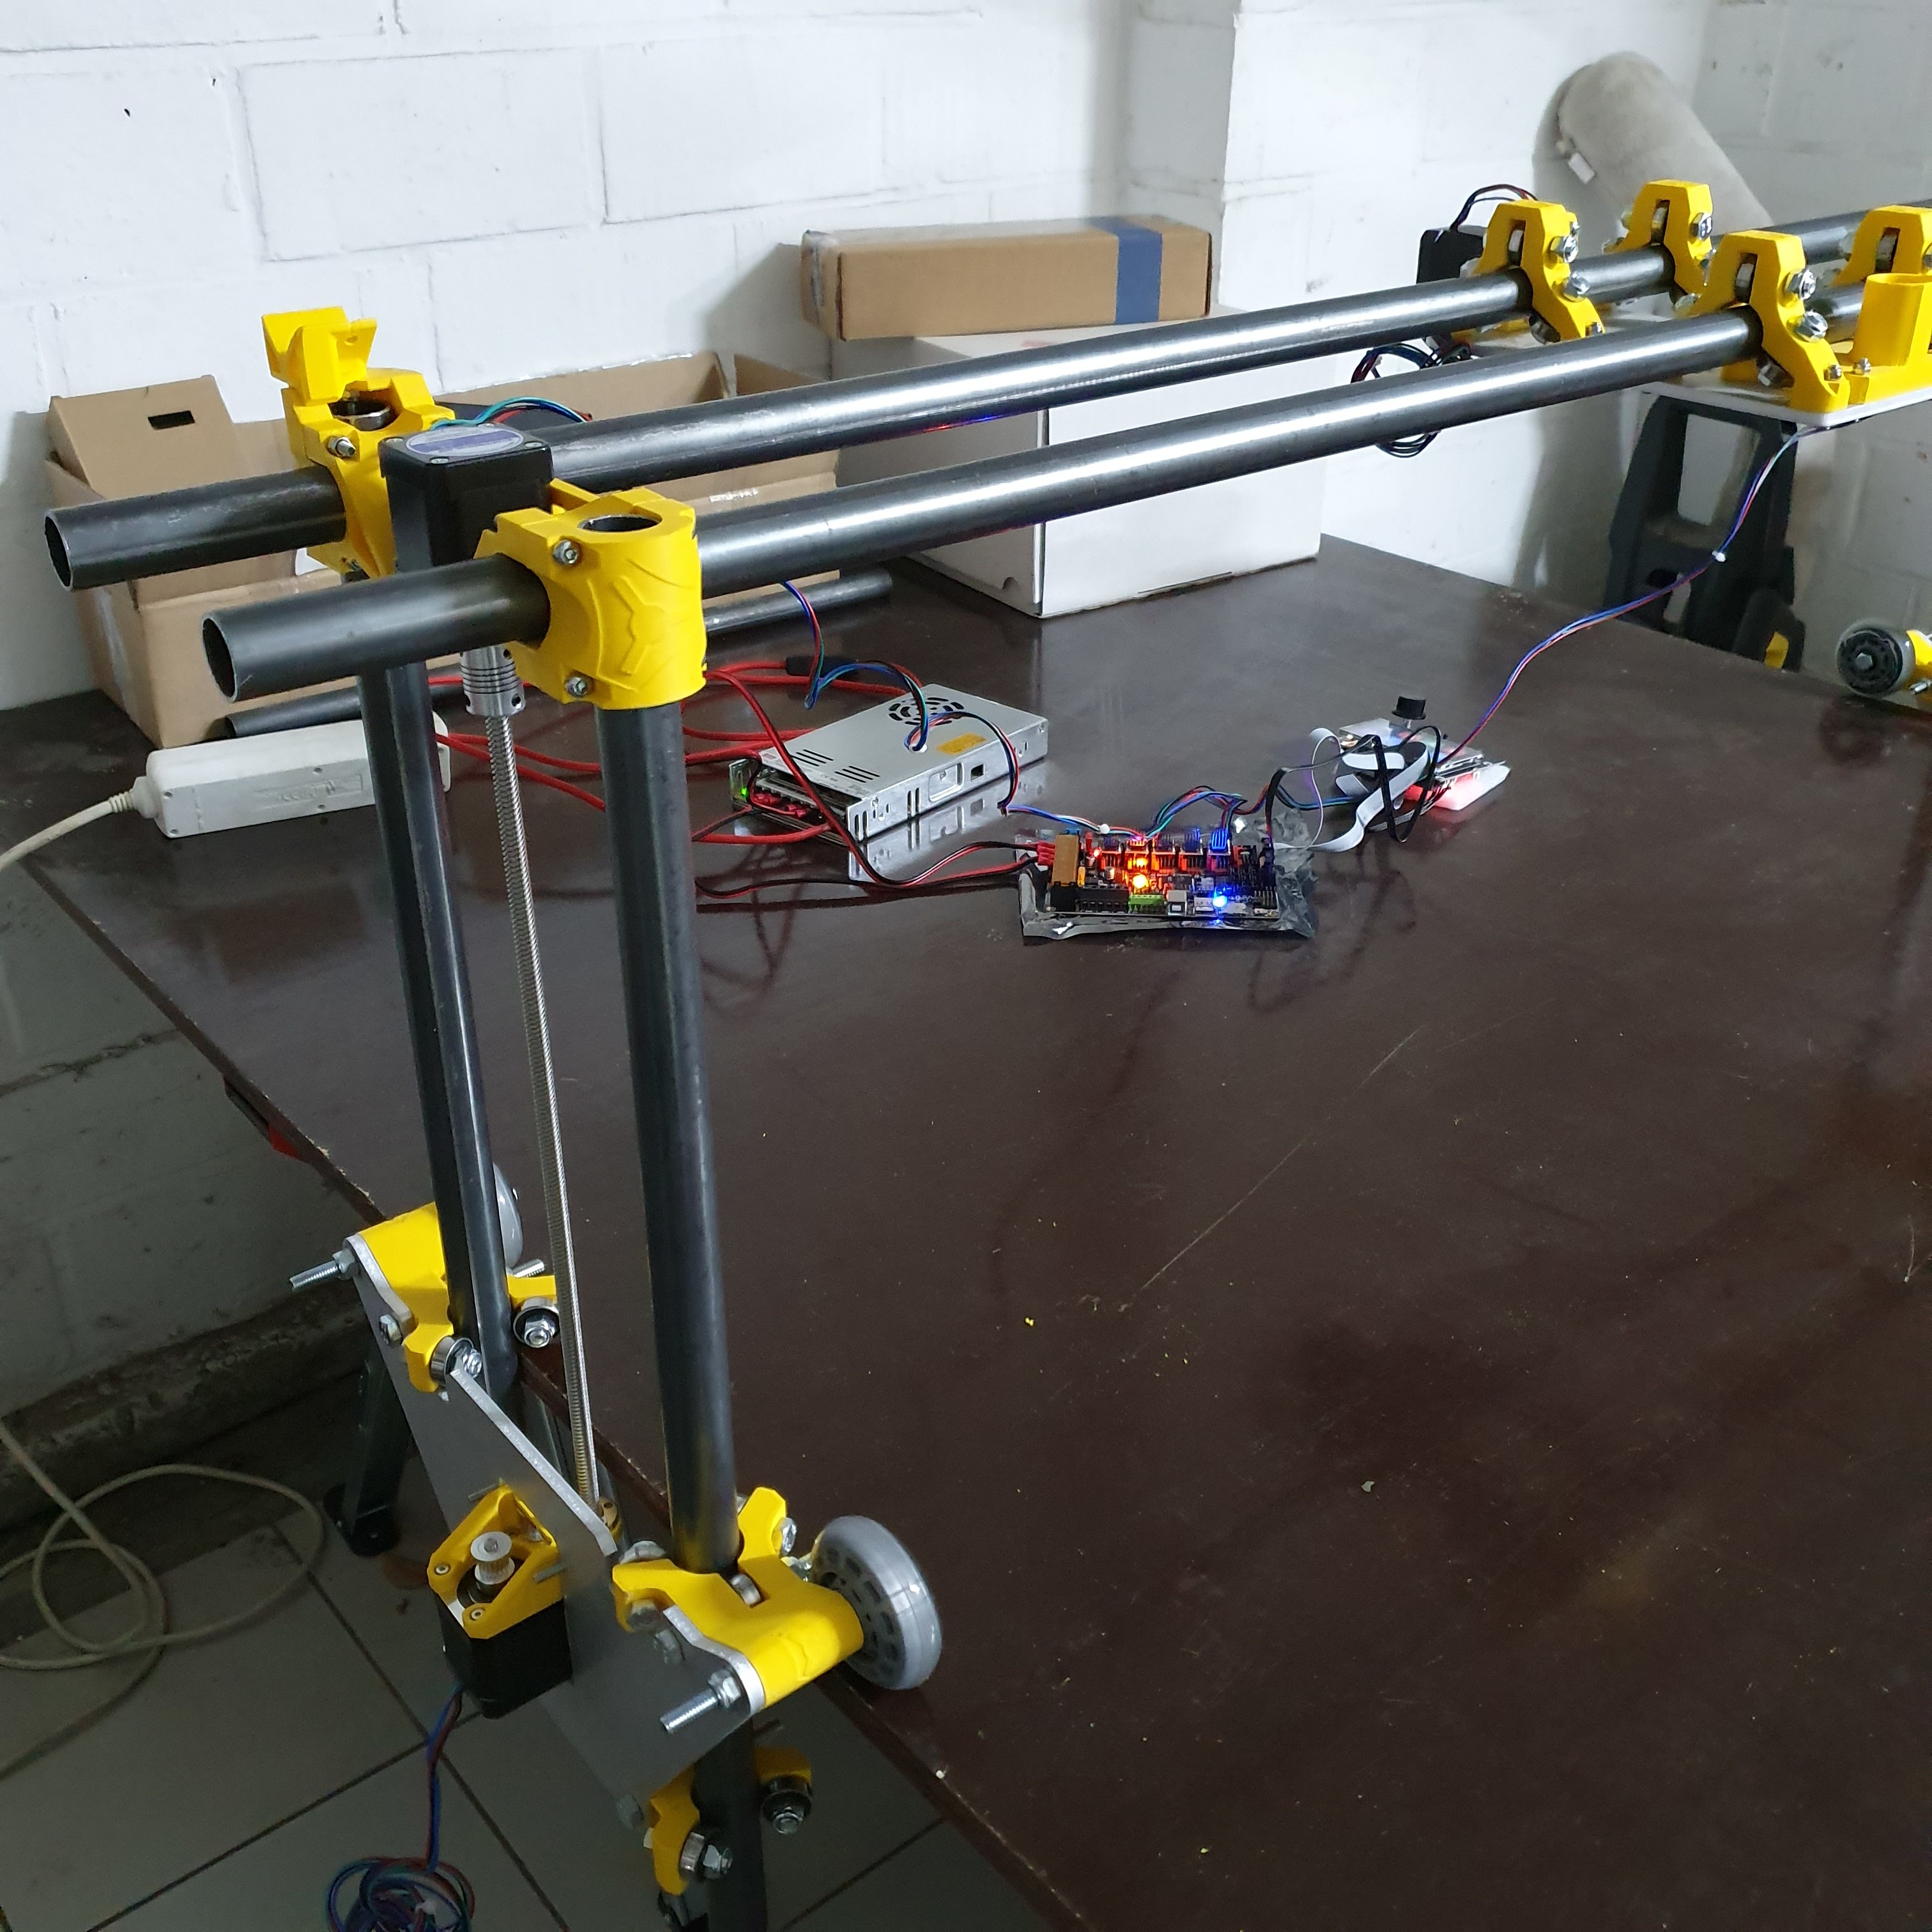
After reclaiming my workspace I set up the sawhorses, but I´ll need to make an adjustment later as there´s a gap between the beams and the spoilboard. That makes the workspace uneven for now. But it´s a start :wink:

I went to the metal shop this week too, but I was unable to get RVS steel in 25mm. They only stock it in Alu but read in the forum somewhere that would be a bad idea. So I took the welded steel tubes instead. The downside is that they already show some minor corrosion after cleaning the lubes from them. Let`s see how this continues.

During assembling I noticed that something big is missing in the instructions. It did not tell about the many swearing involved. :slight_smile:
I accidentally dropped one of the heavy steel tubes directly on my weak ankly. Not fun!
That was caused because I needed to use pliers instead of the right tools. It felt like mission impossible.

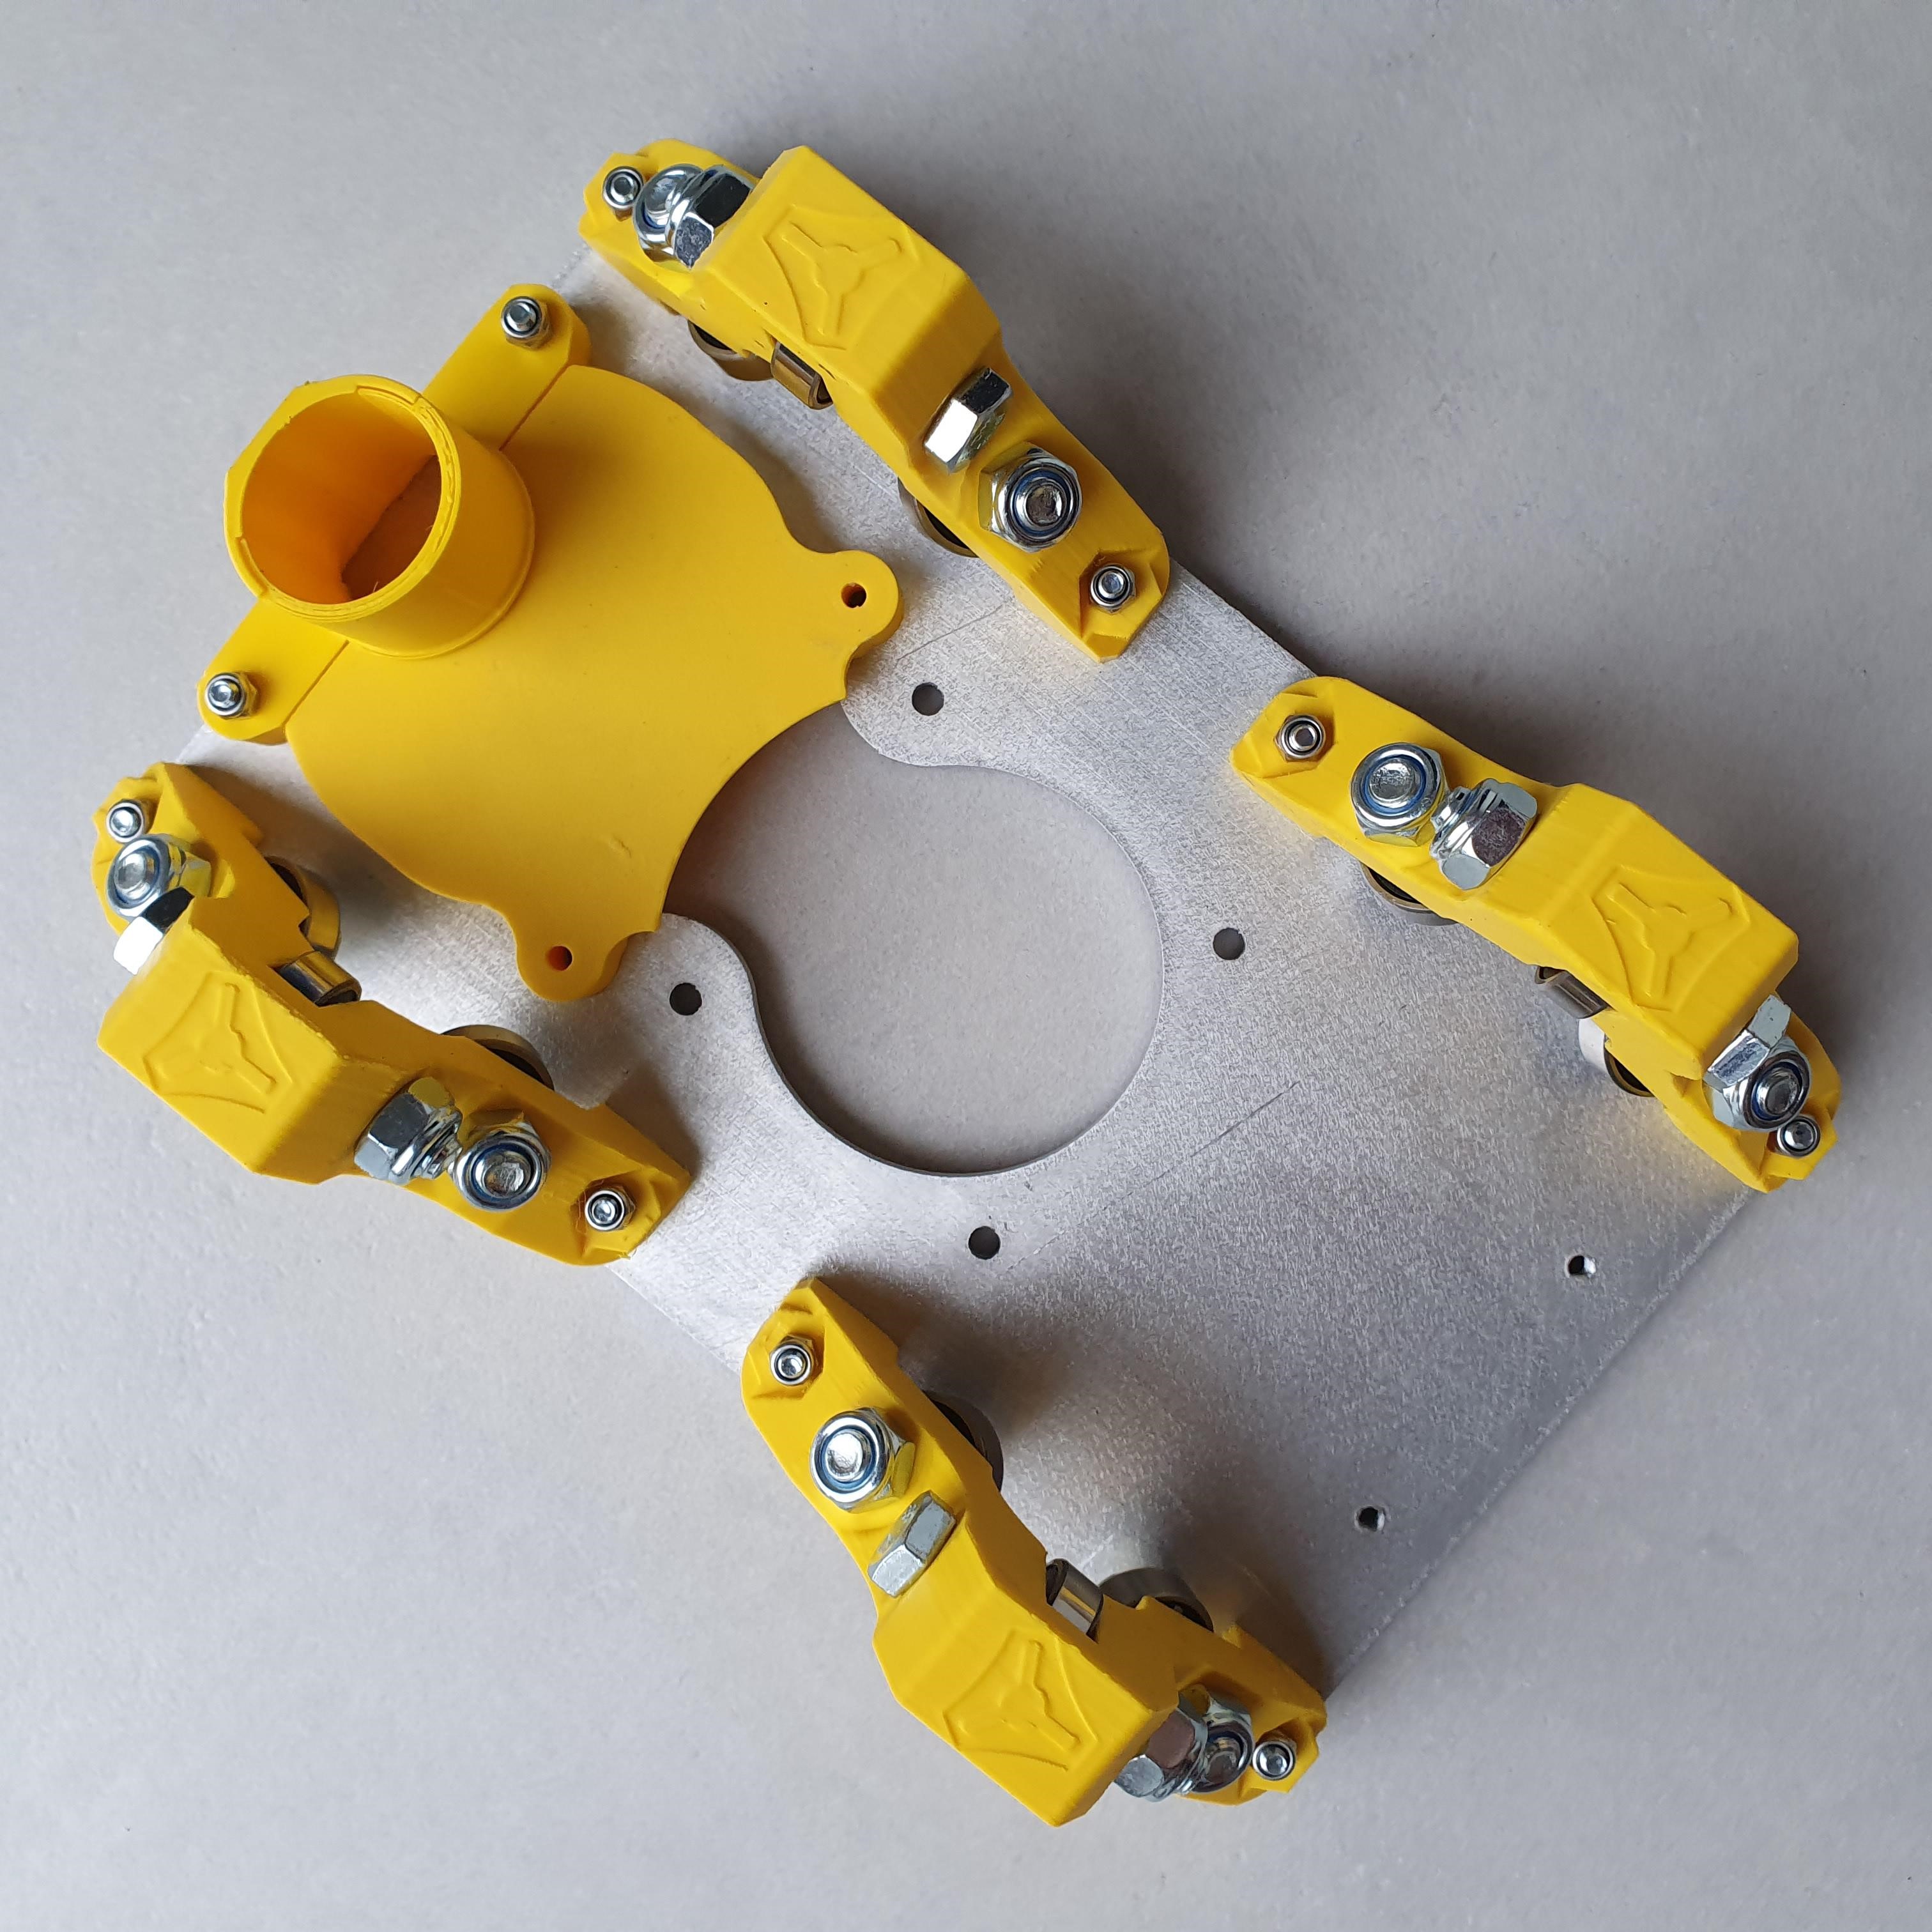
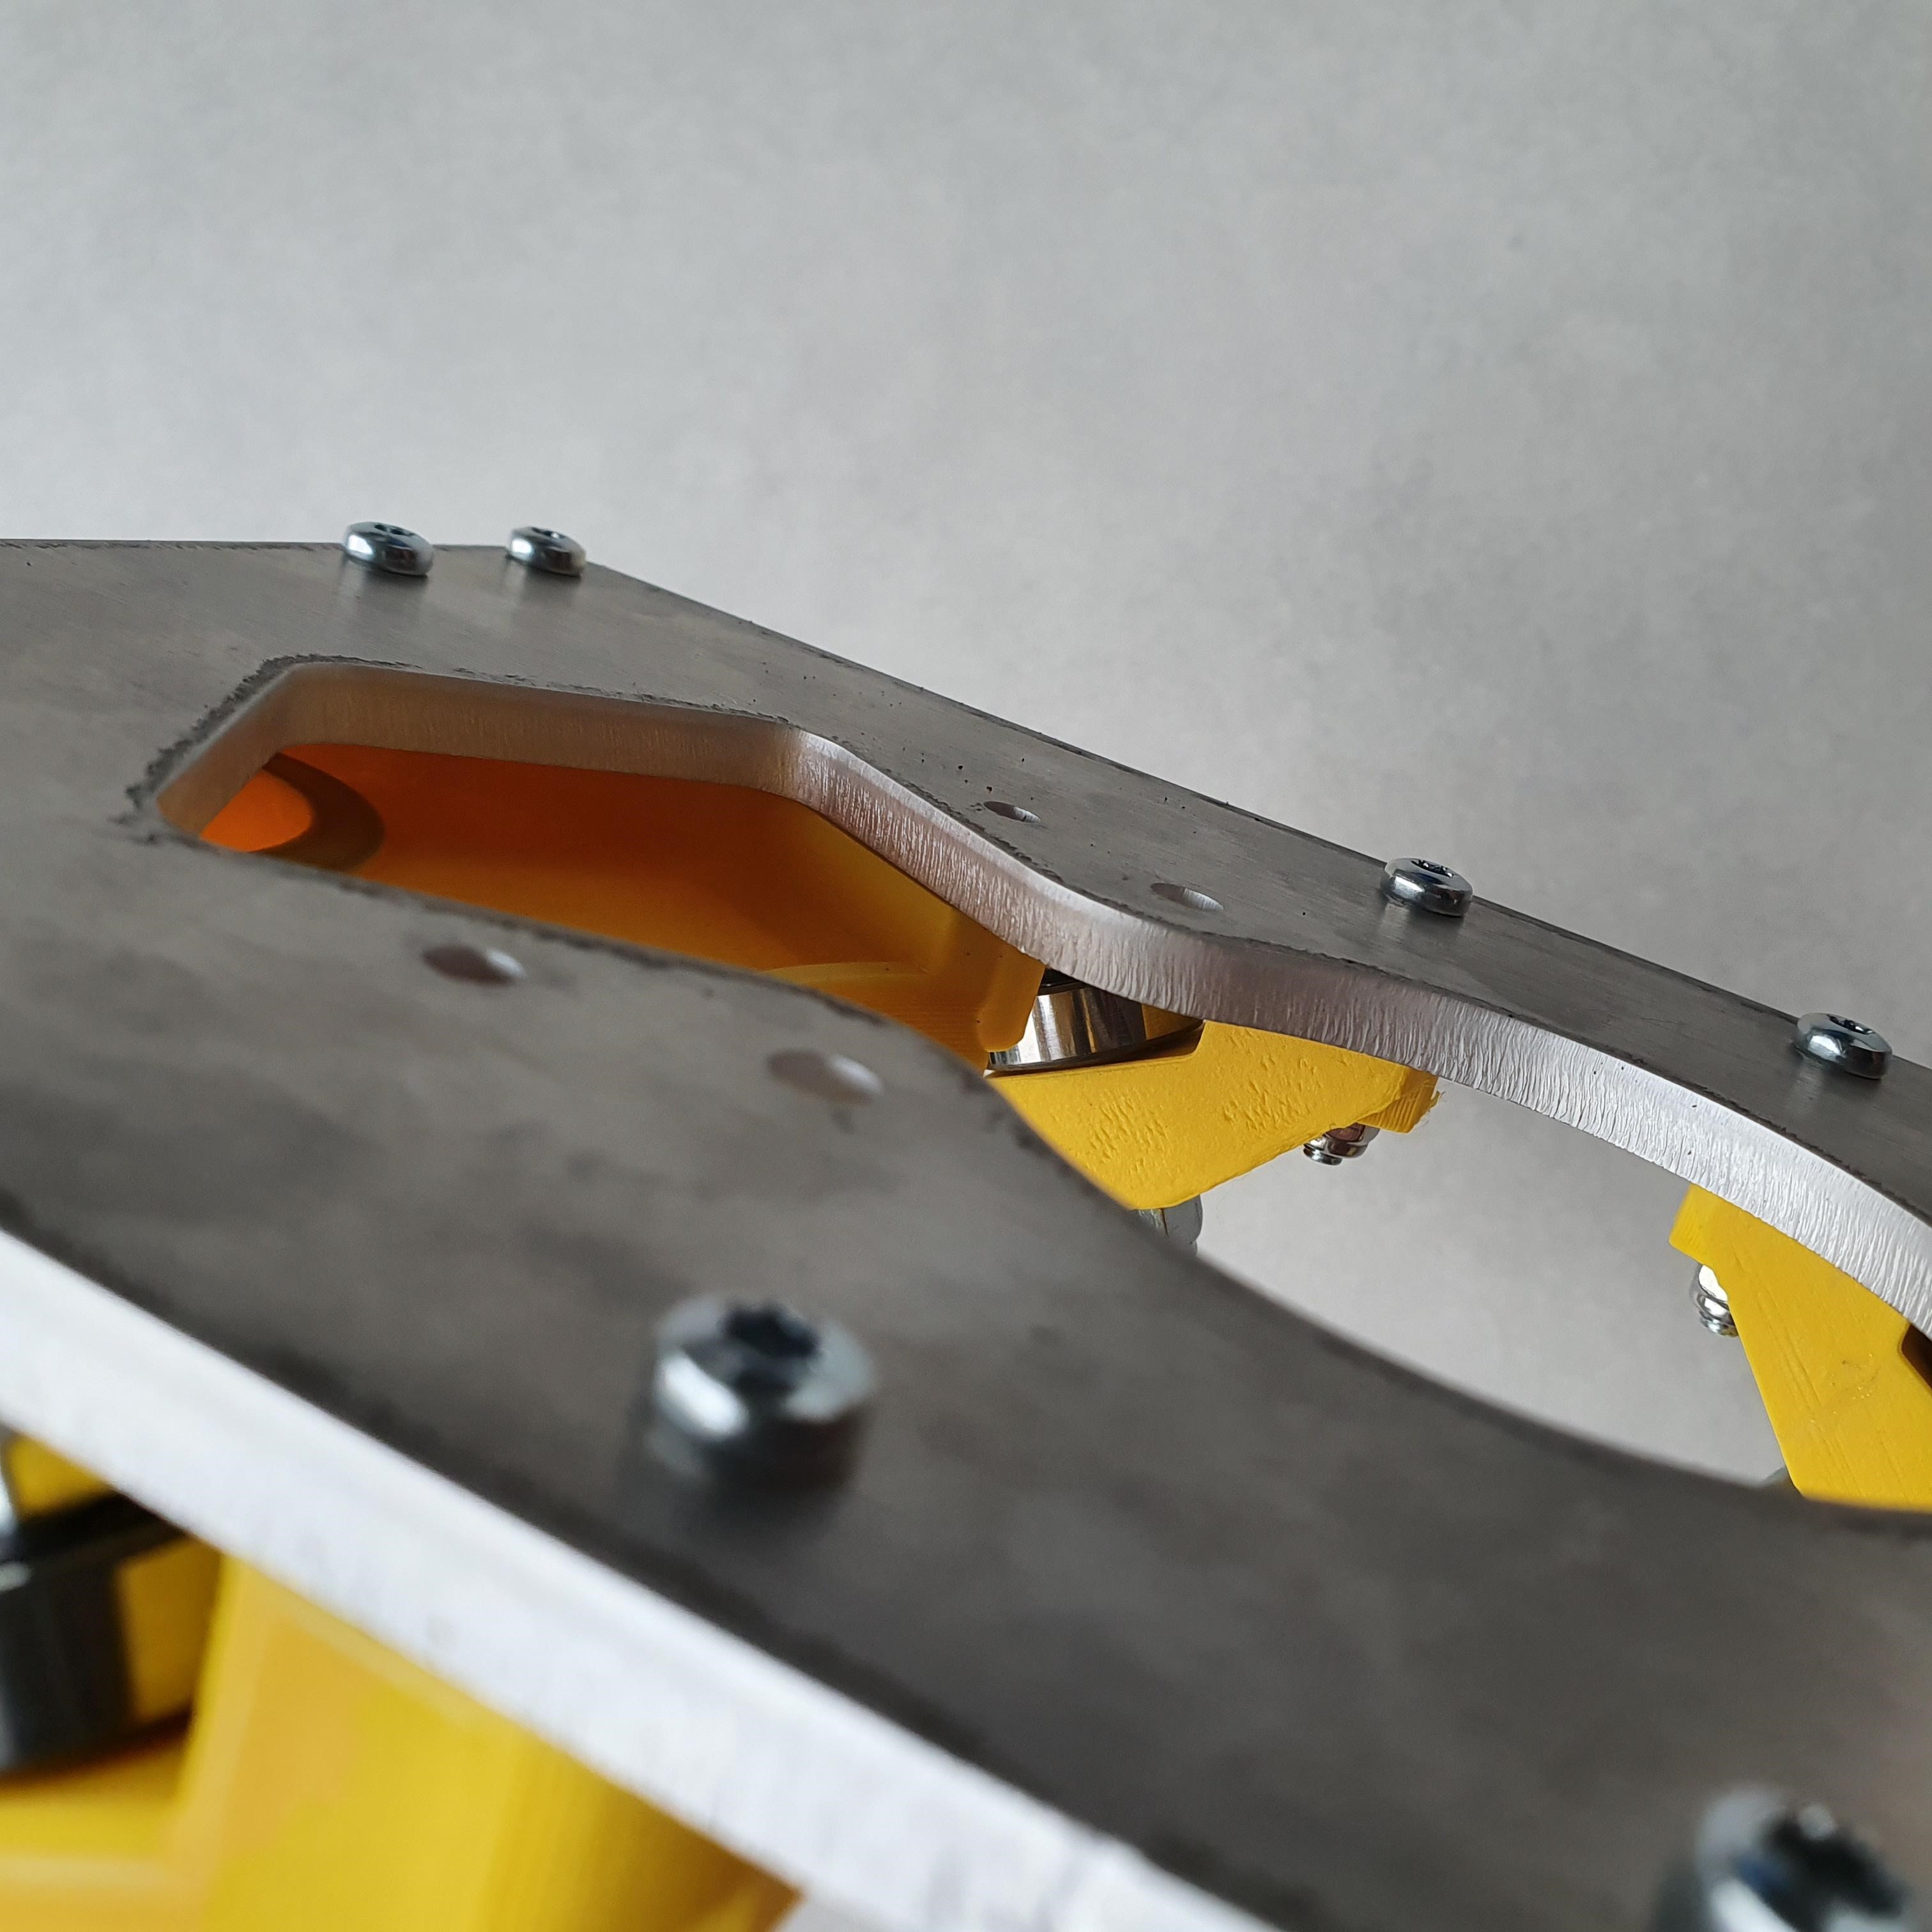
In the end I managed to get them installed but one side of the XZ main doesn´t sit completely flat on the YZ rollers. Because of the little accident I dediced to ignore it for now.

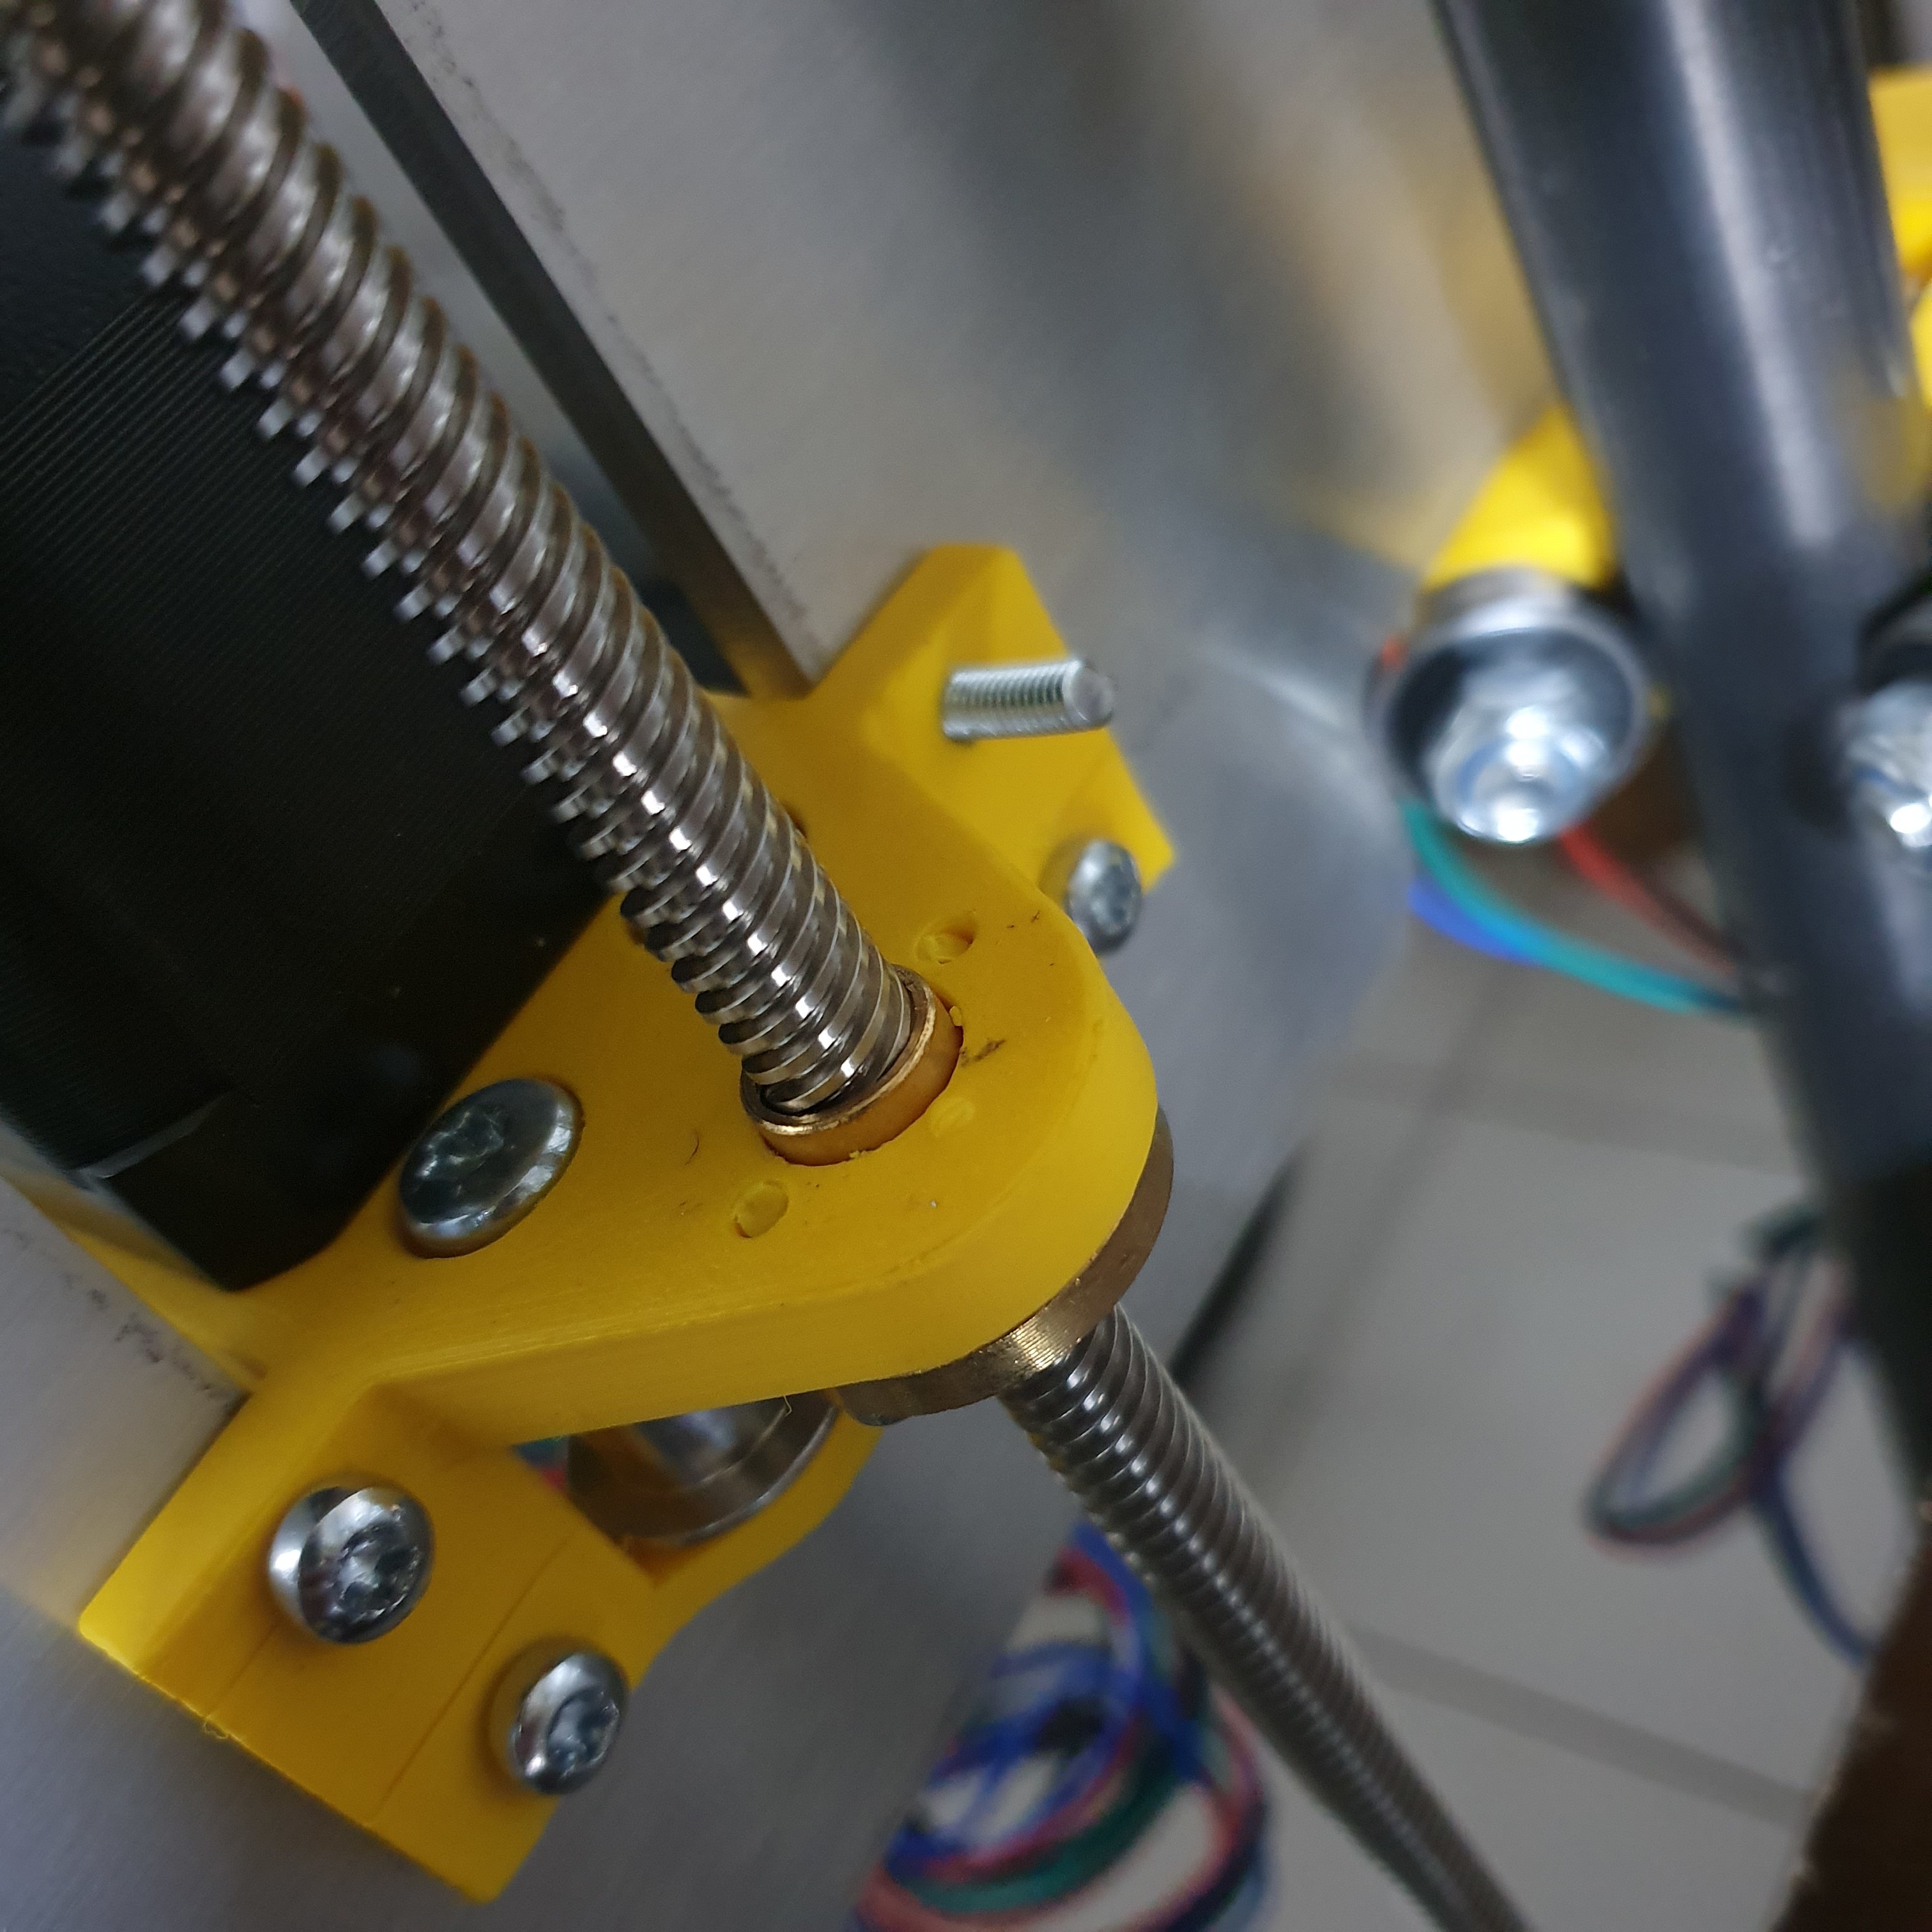
When installing one of the steppers, a screw broke because it didn´t allign perfectly. I was lucky it already fitted in far enough so it´s more like an optical issue. I should have threated it before installing, but was in a hurry.

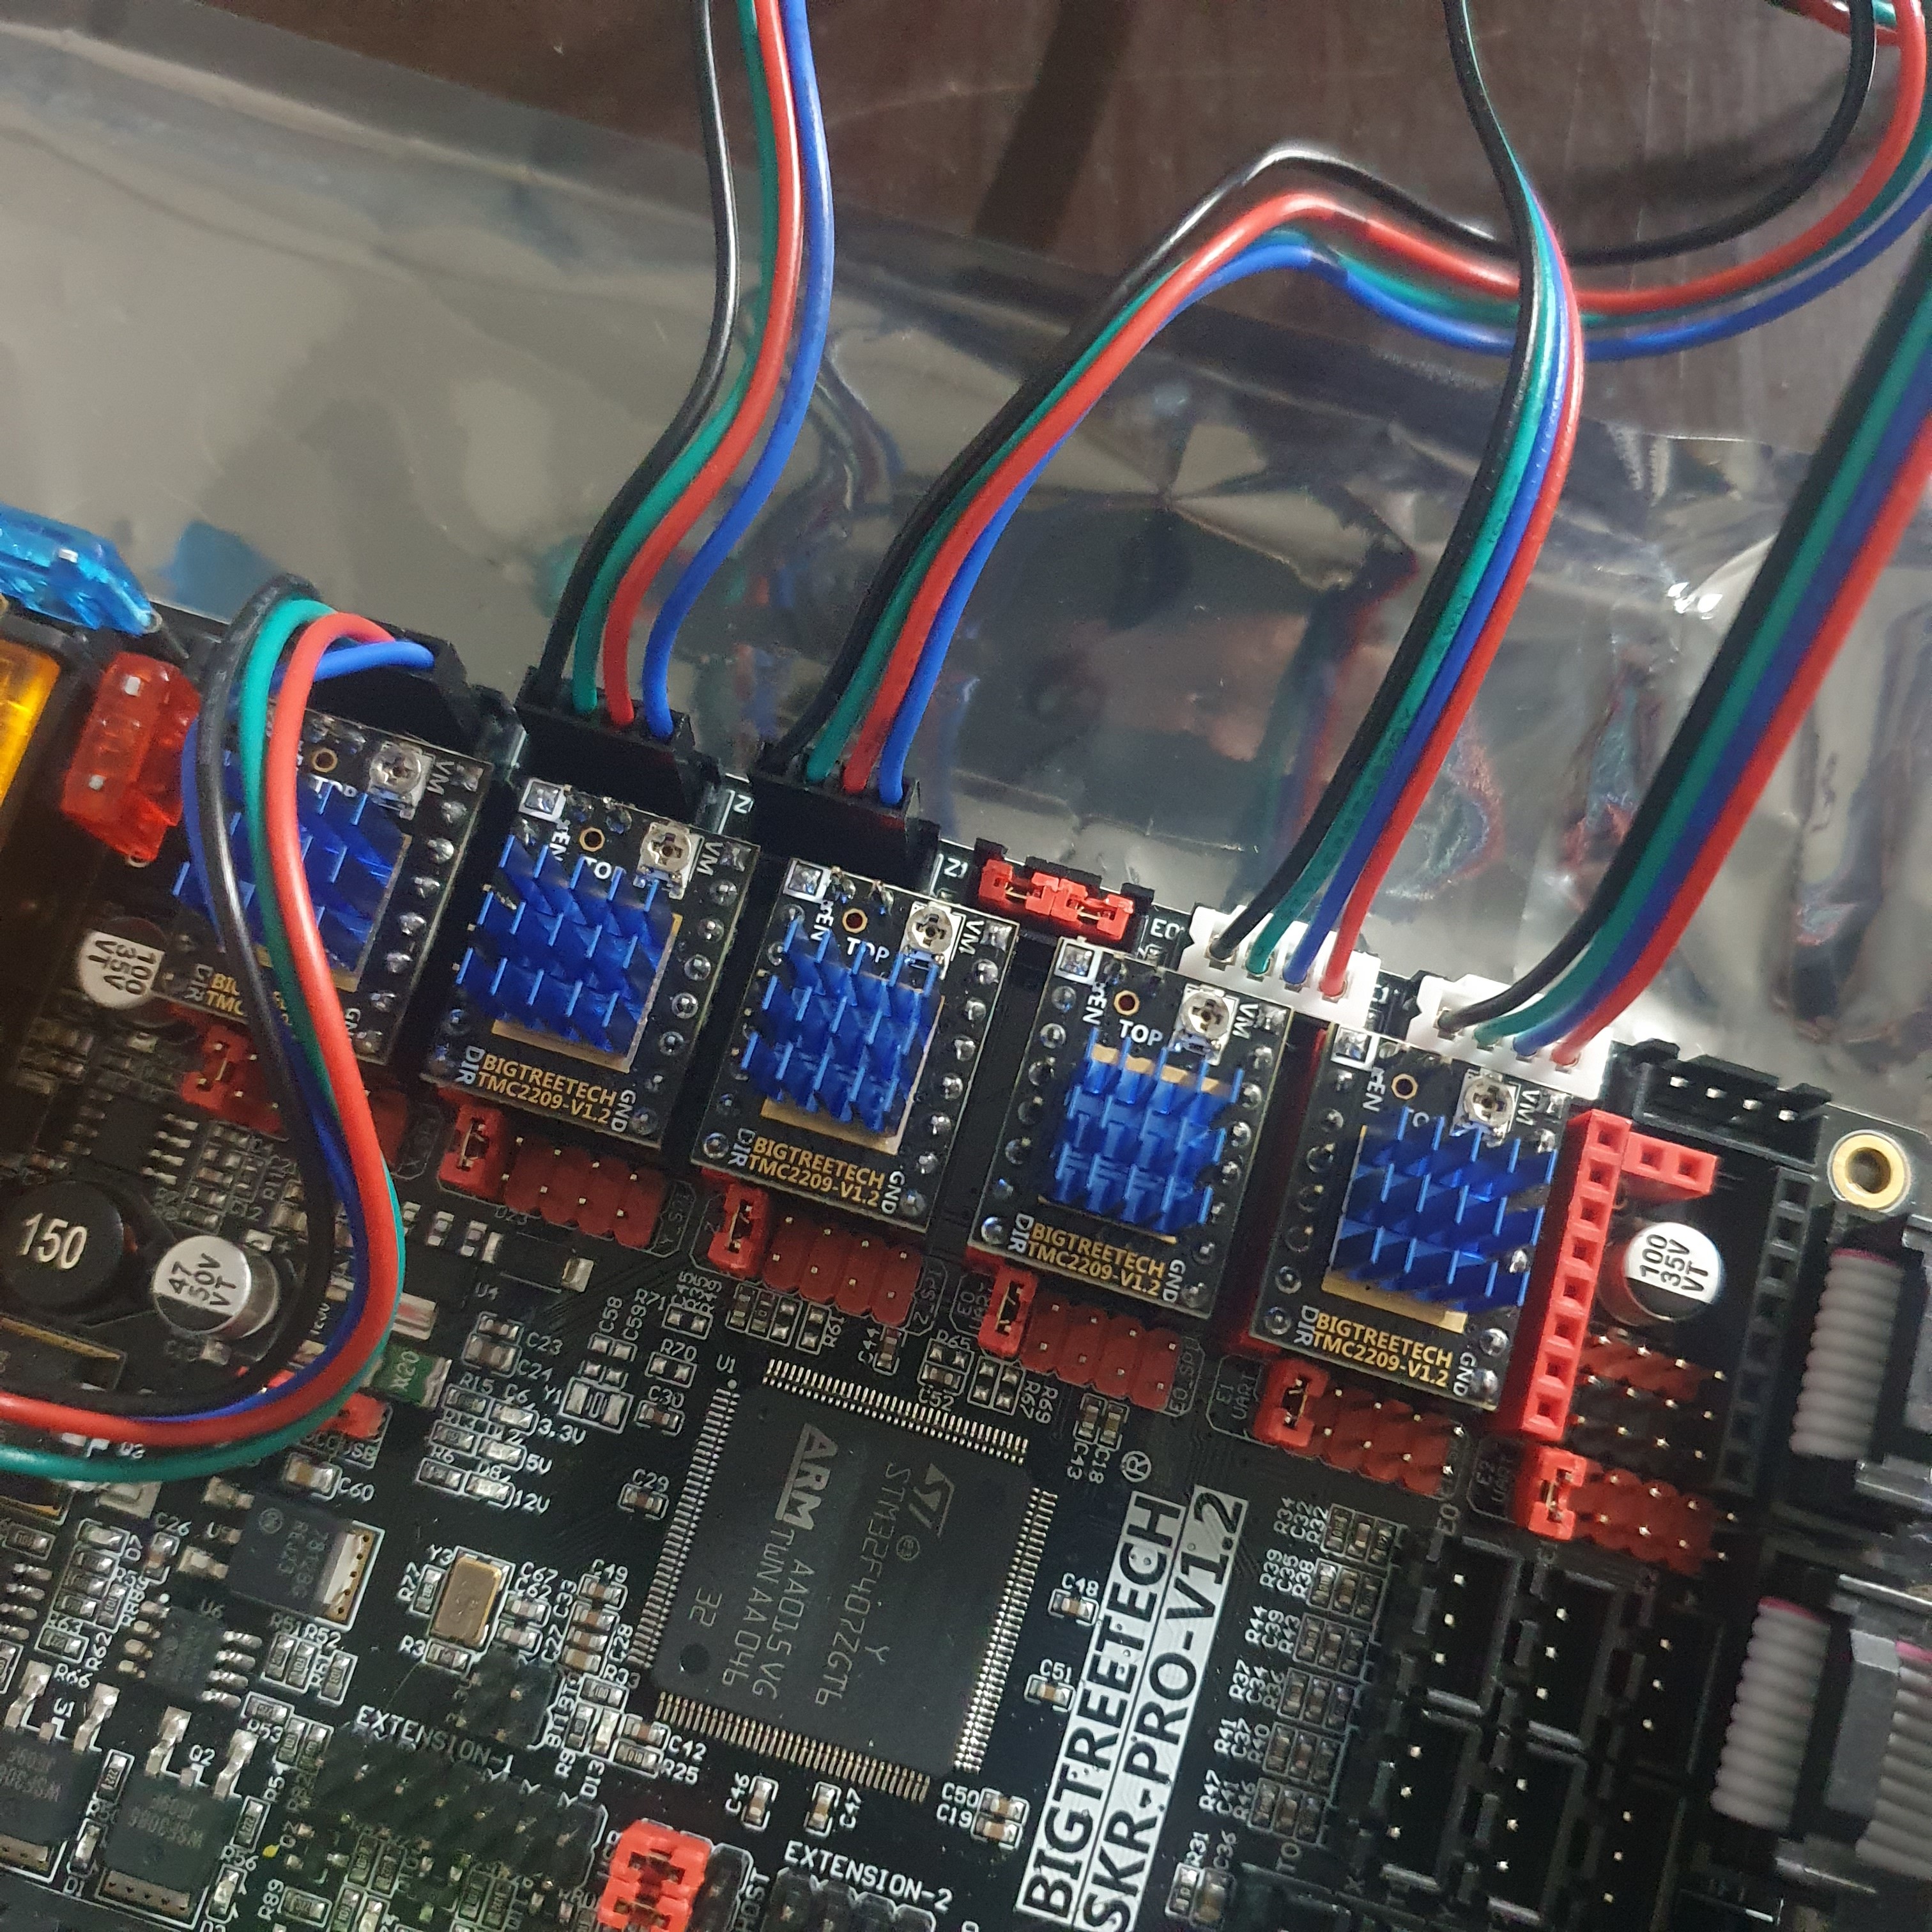
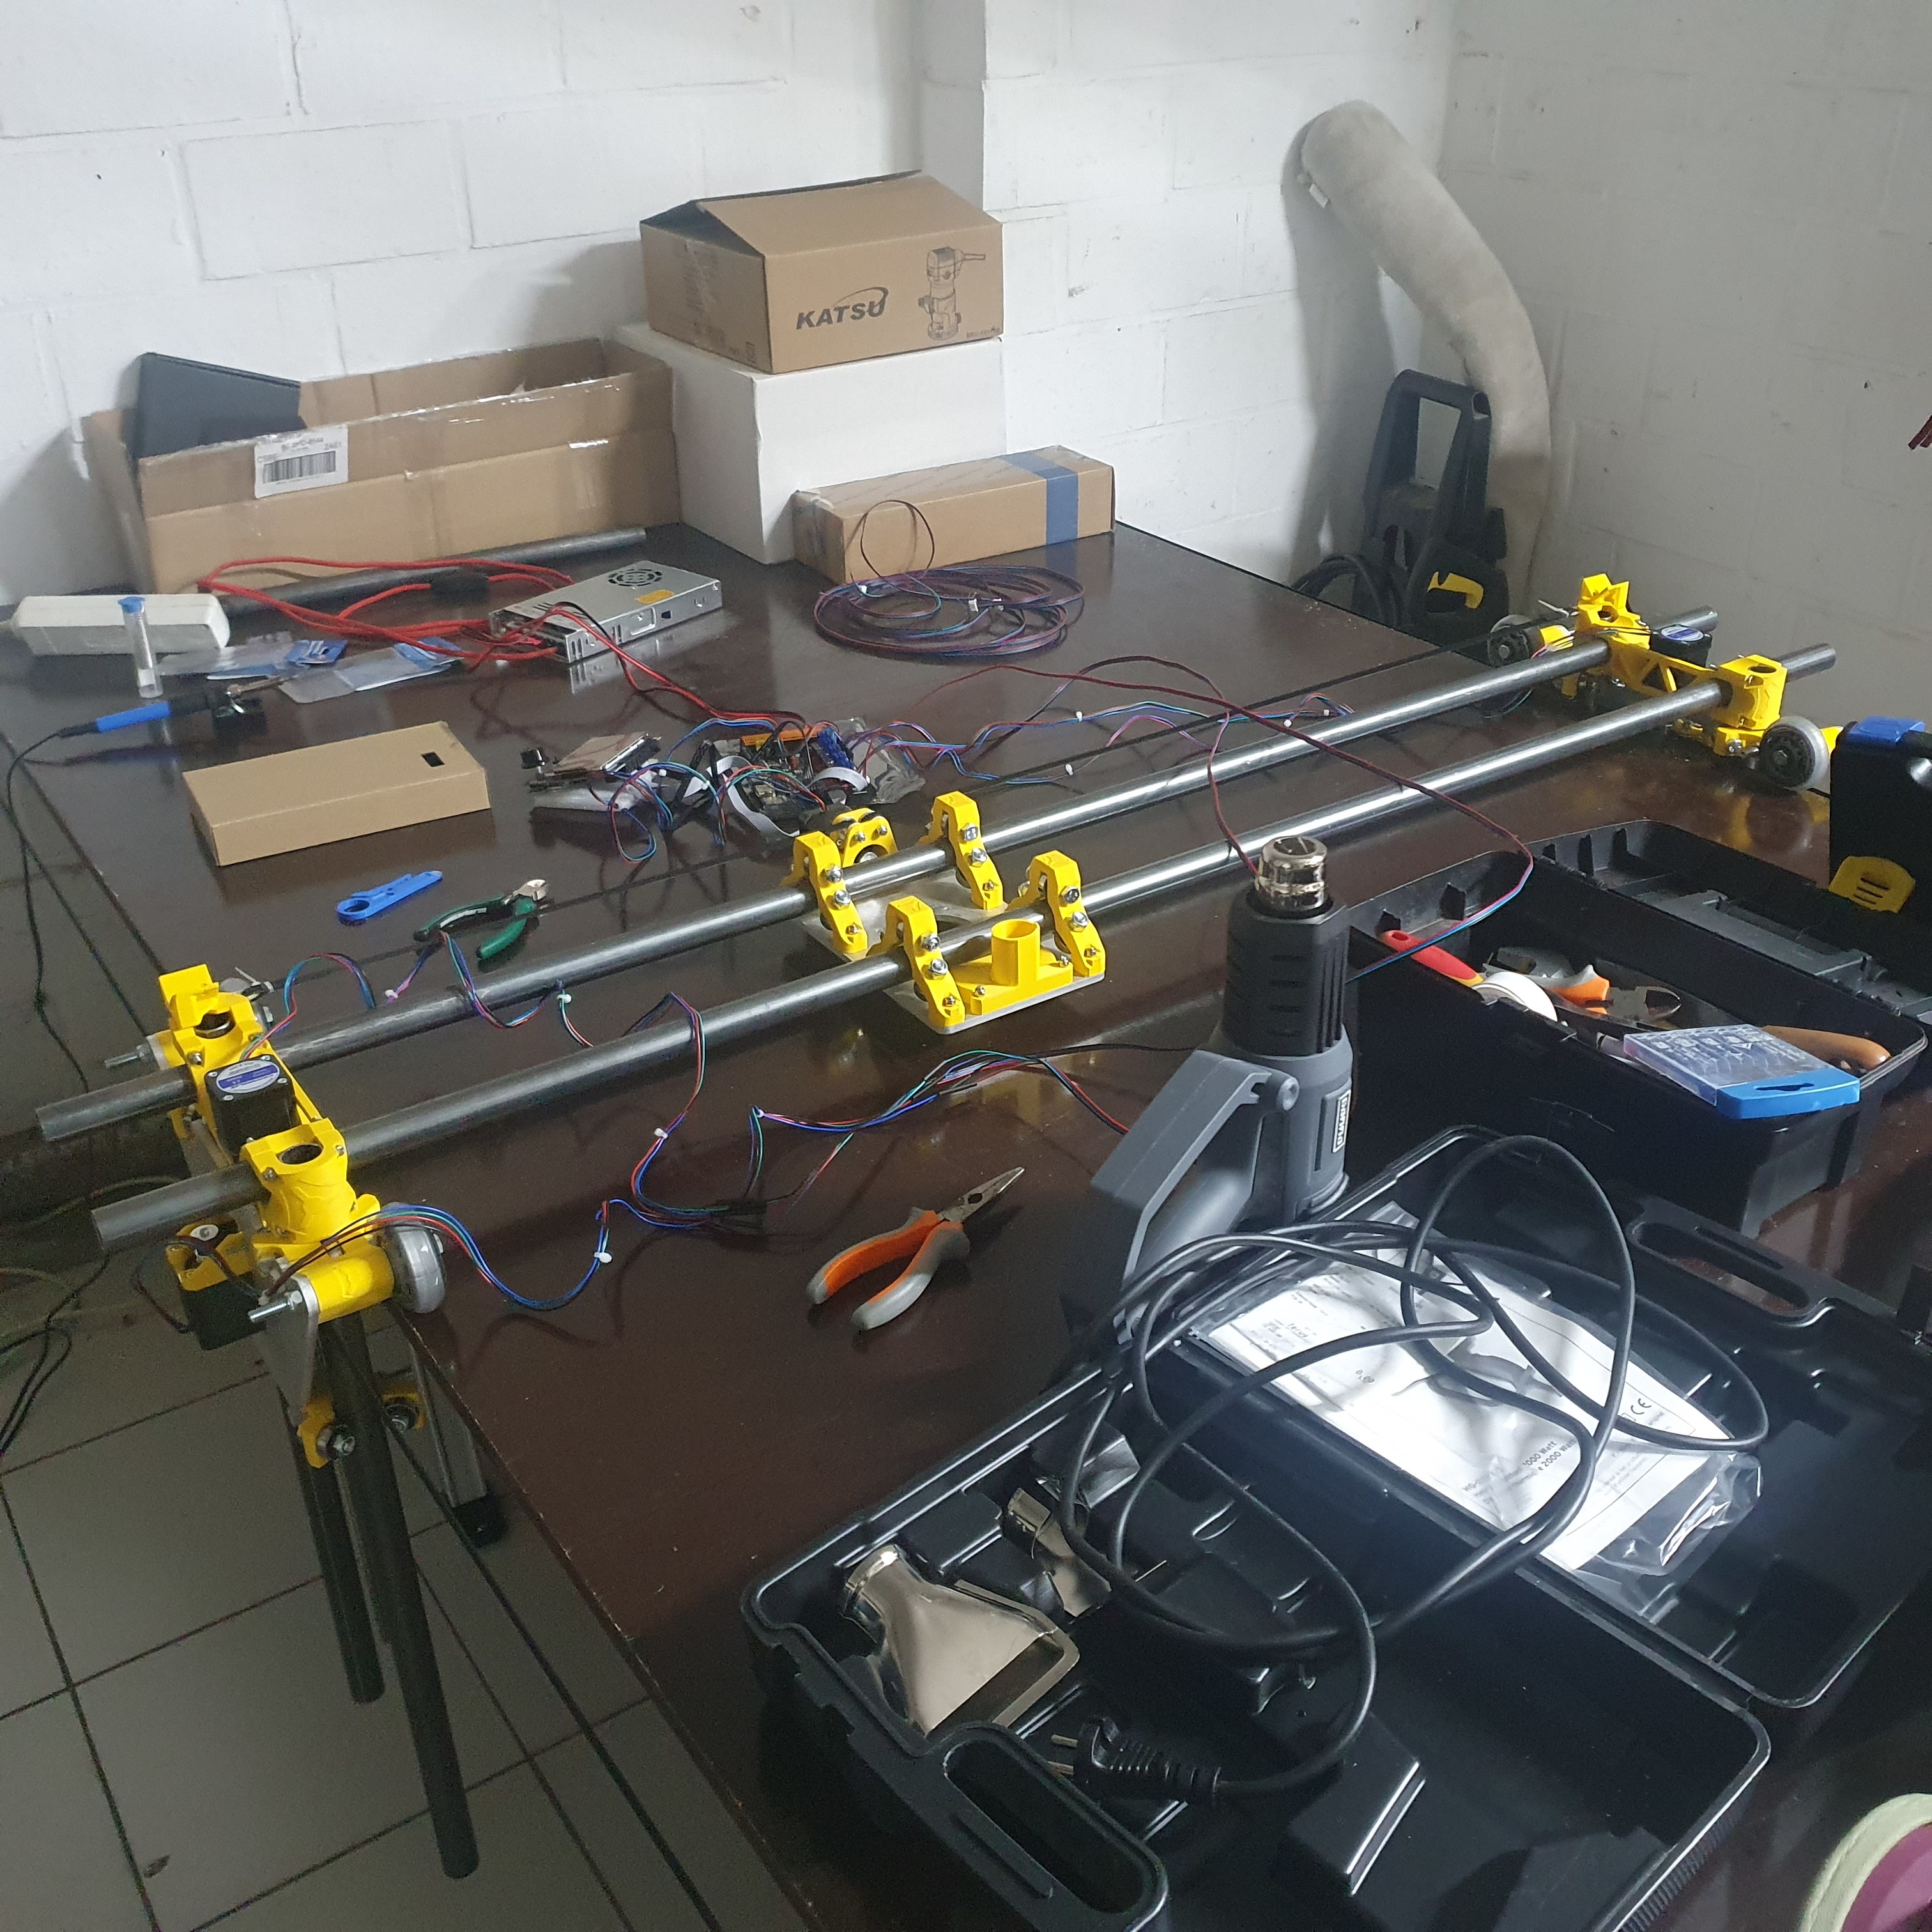
Next stop was extending the stepper wiring, and installing the correct connectors.
It was a bit confusing because 2 wires had to be swapped (red is blue, blue is red).

I could´t wait any longer to power the device, so I lifted the Z axis. Yes, I am sure it is way to long (40cm) but that´s something you conclude after assembling, specifically if you have zero CNC and lowrider experience :slight_smile: So next time I would use shorter tubes.

For me it was funny to see that, without lubrication, the Z remained its position once unpowered. The moment I added a lubricant, the Z dropped down immediately after powering down. The momentum creates enough power to repower the CNC based on current the steppers generate. So I might experiment with a solution to avoid power to flow back in the system. It could damage things.

So I kept building,…

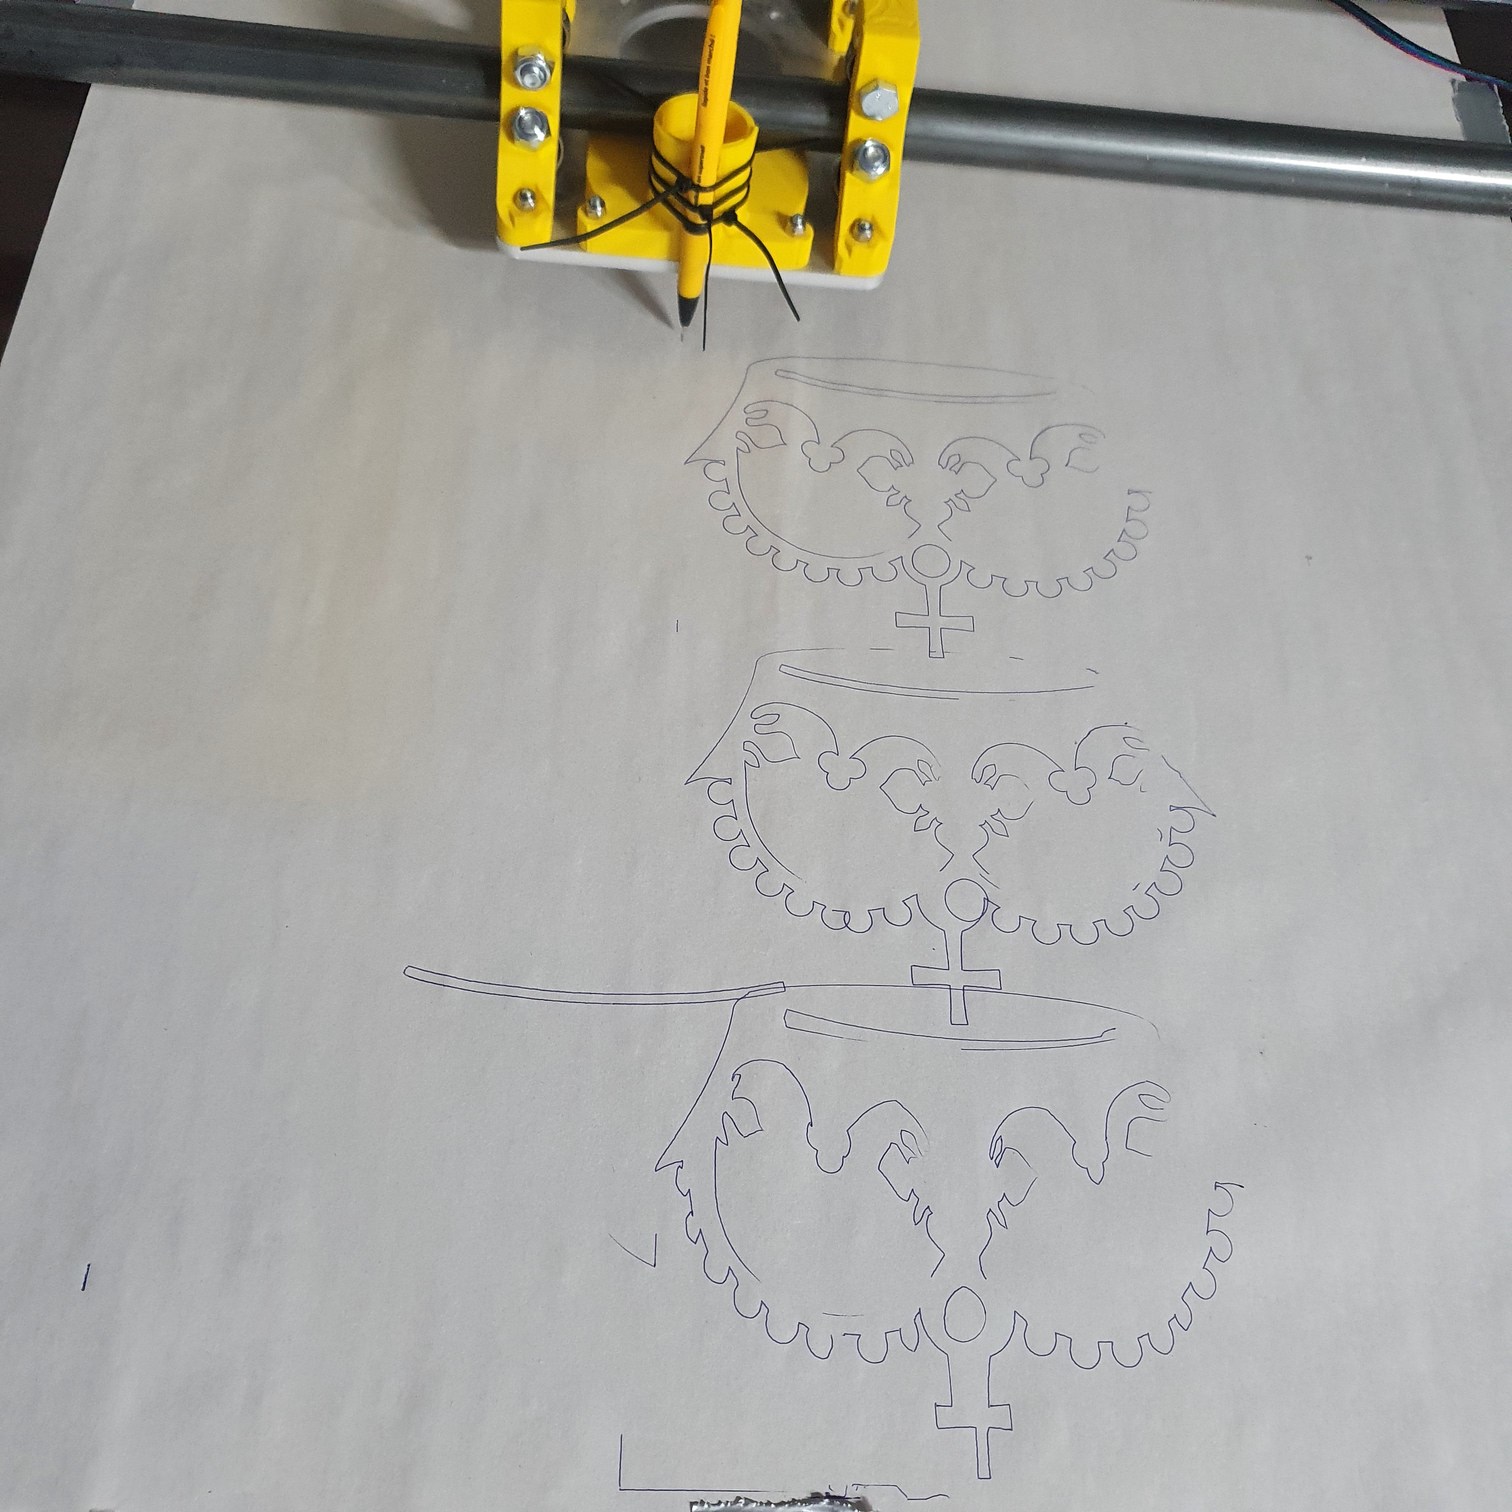
And finally I downloaded the test crown, installed a pen, and watched the magic happen…

During the first run, the pen pivoted all directions, so I made a sturdier connection, but when the pen did not touch the paper, i pushed it a bit to hard so it misalligned.
Third run was great, as it´s a perfect drawing, except for the place where my spoilboard isnt´level…

Now I need to figure out what would be the best endstop solution. If anyone has an opinion about this, please share! I found some info on the forum but it´s hard to compare the solutions and figure out the best way. Some people seem to add a stop on the upper part of the Z, other on the bottom side.

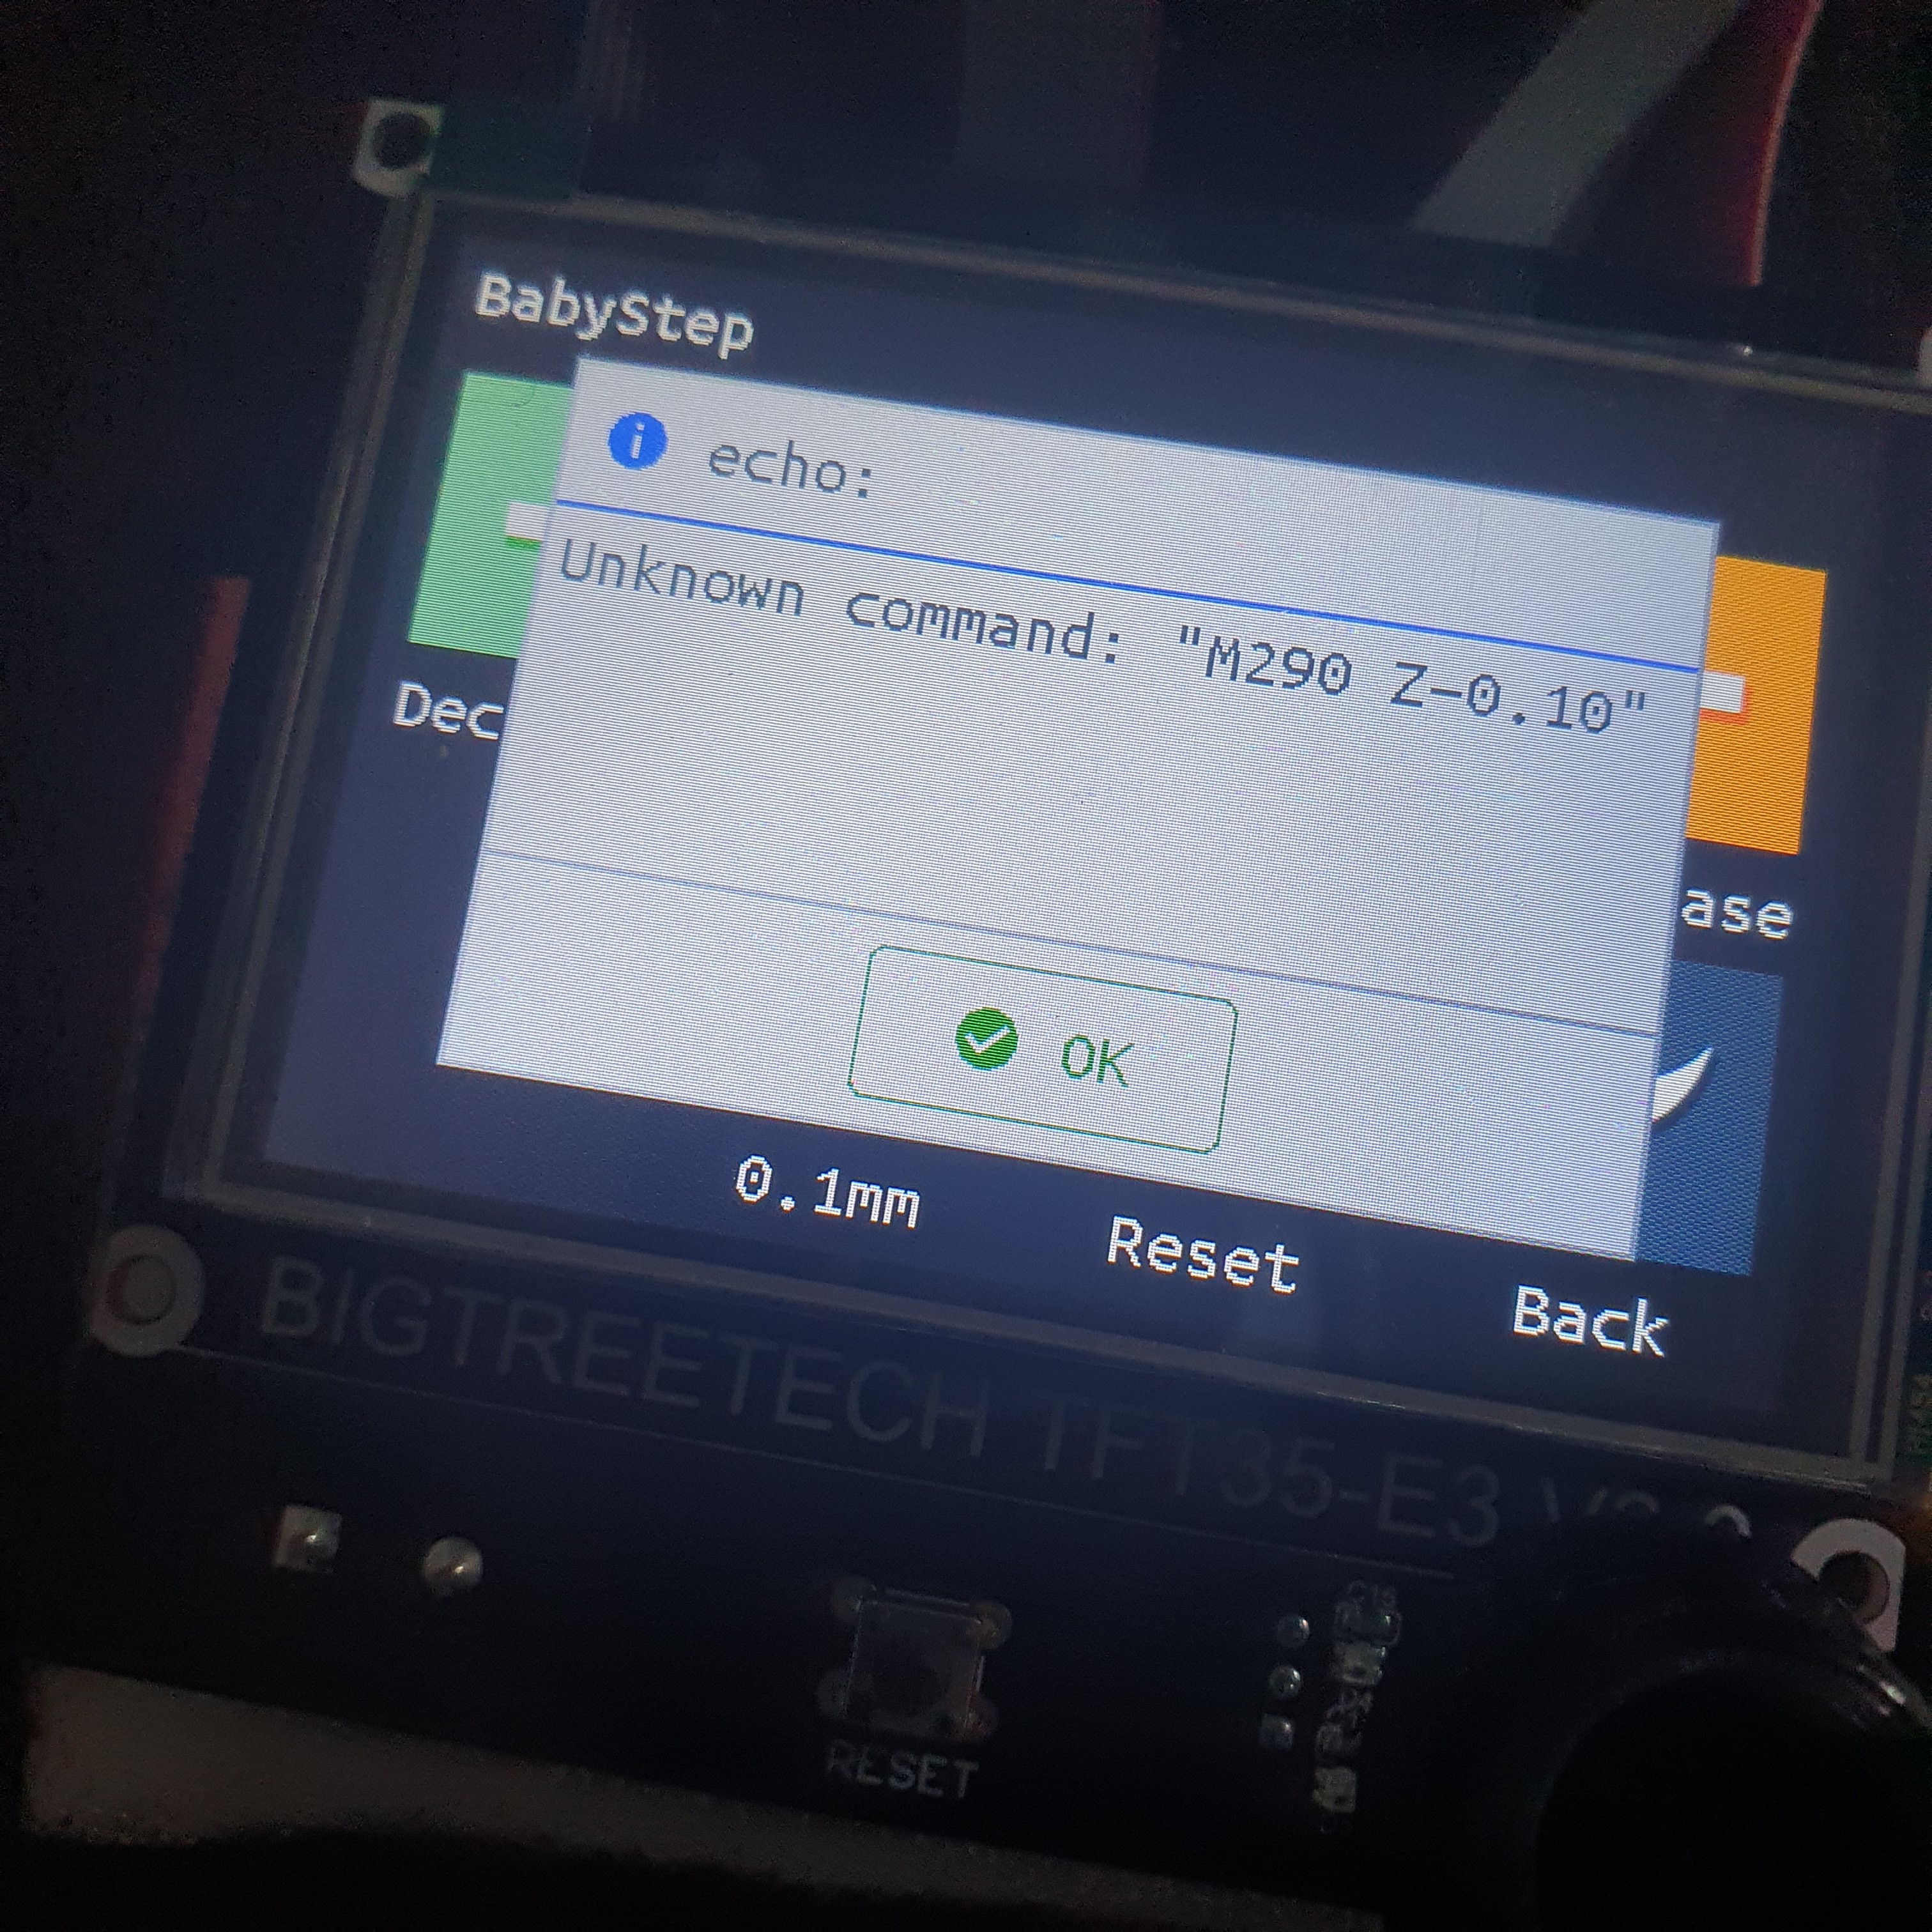
I also wonder if it is normal that I cant use the “baby step” during runtime. When using the menu it throws an error. That´s to bad because it would have been a good solution to fix my pen height.

Anyways, next on the list is printing the TFT housing, install the endstops, mounting the SKR and power supply (I´ll be using Dan´s solution probably). And when that´s done it will be time to install the Katsu router too.

3 Likes

Wipe the tubes down with some paste wax.

1 Like

That’s a good idea, will see if I can find it in a local shop.

1 Like