Congrats. I forgot about popeye!
It’s advised to cut off the barrel plug and hardwire the power supply. I see why, I’m using it for testing and it is unreliable. My question is can I cut off the ferrite choke to shorten the line? Making the wiring neat is the most difficult part of any project for me. I want to do this one right.
1 Like
All in time, all in time!! Though now that you have it working as a plotter, you may start getting asked to do some large scale drawings and artwork! That Popeye looks pretty good to me!
Yes, that ferrite is fake.
Thank you. I’m not good at bundling wiring neatly. I’d rather cut it off.
1 Like
Thanks but it will get better. That pen mount had lots of flex so corners didn’t match up and my novice programming produced some less than desirable toolpaths. Besides I produced the .dfx from a cartoon and Estlcam wanted to produce duplicate toolpaths from my file. I’ll figure it out.
1 Like
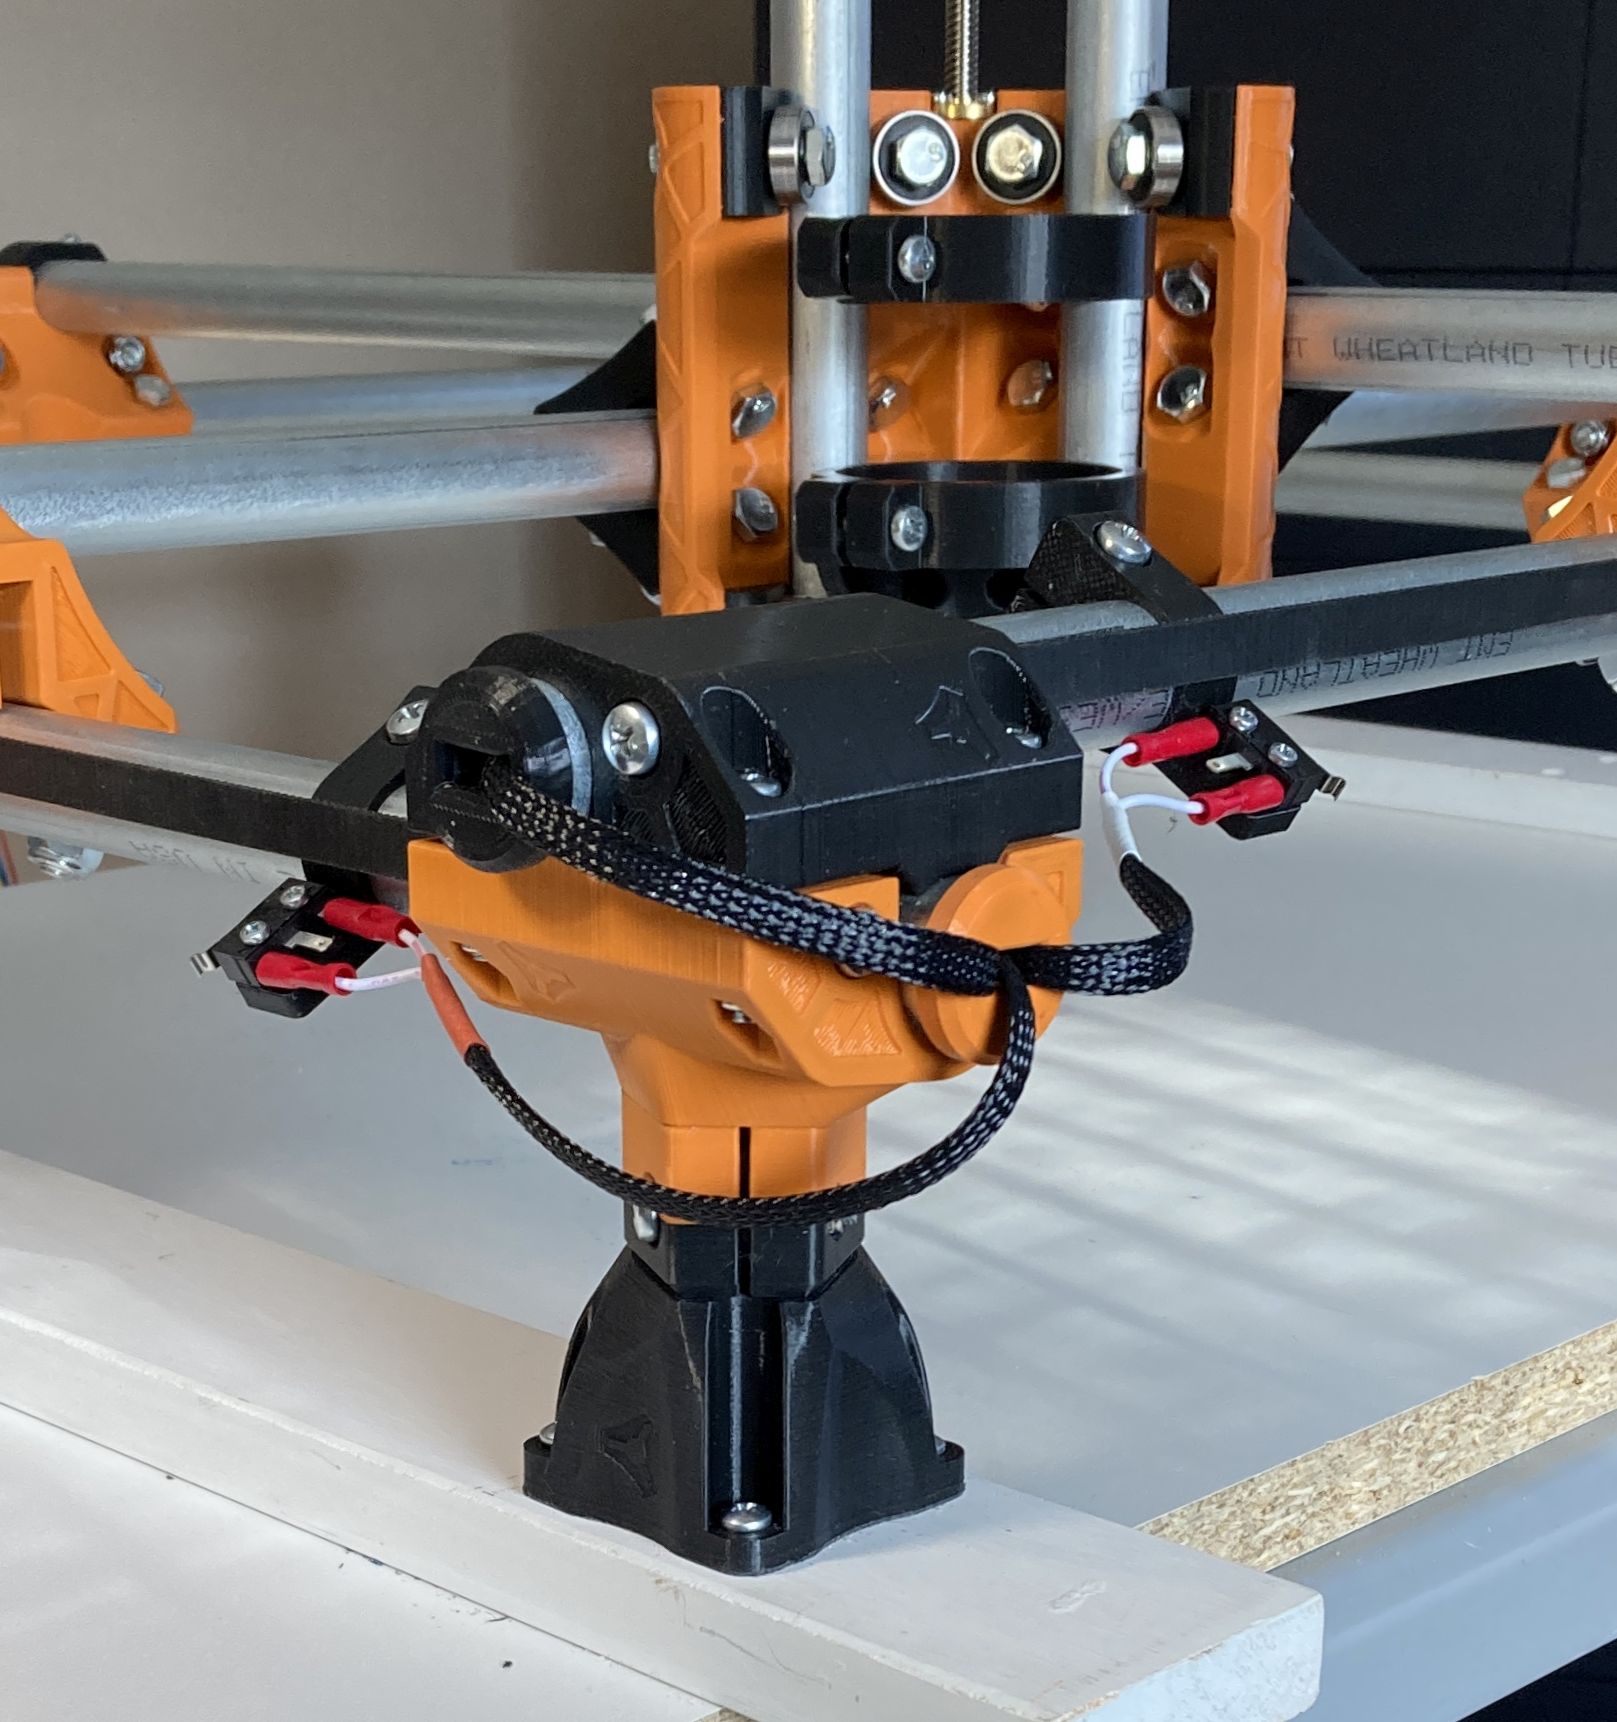
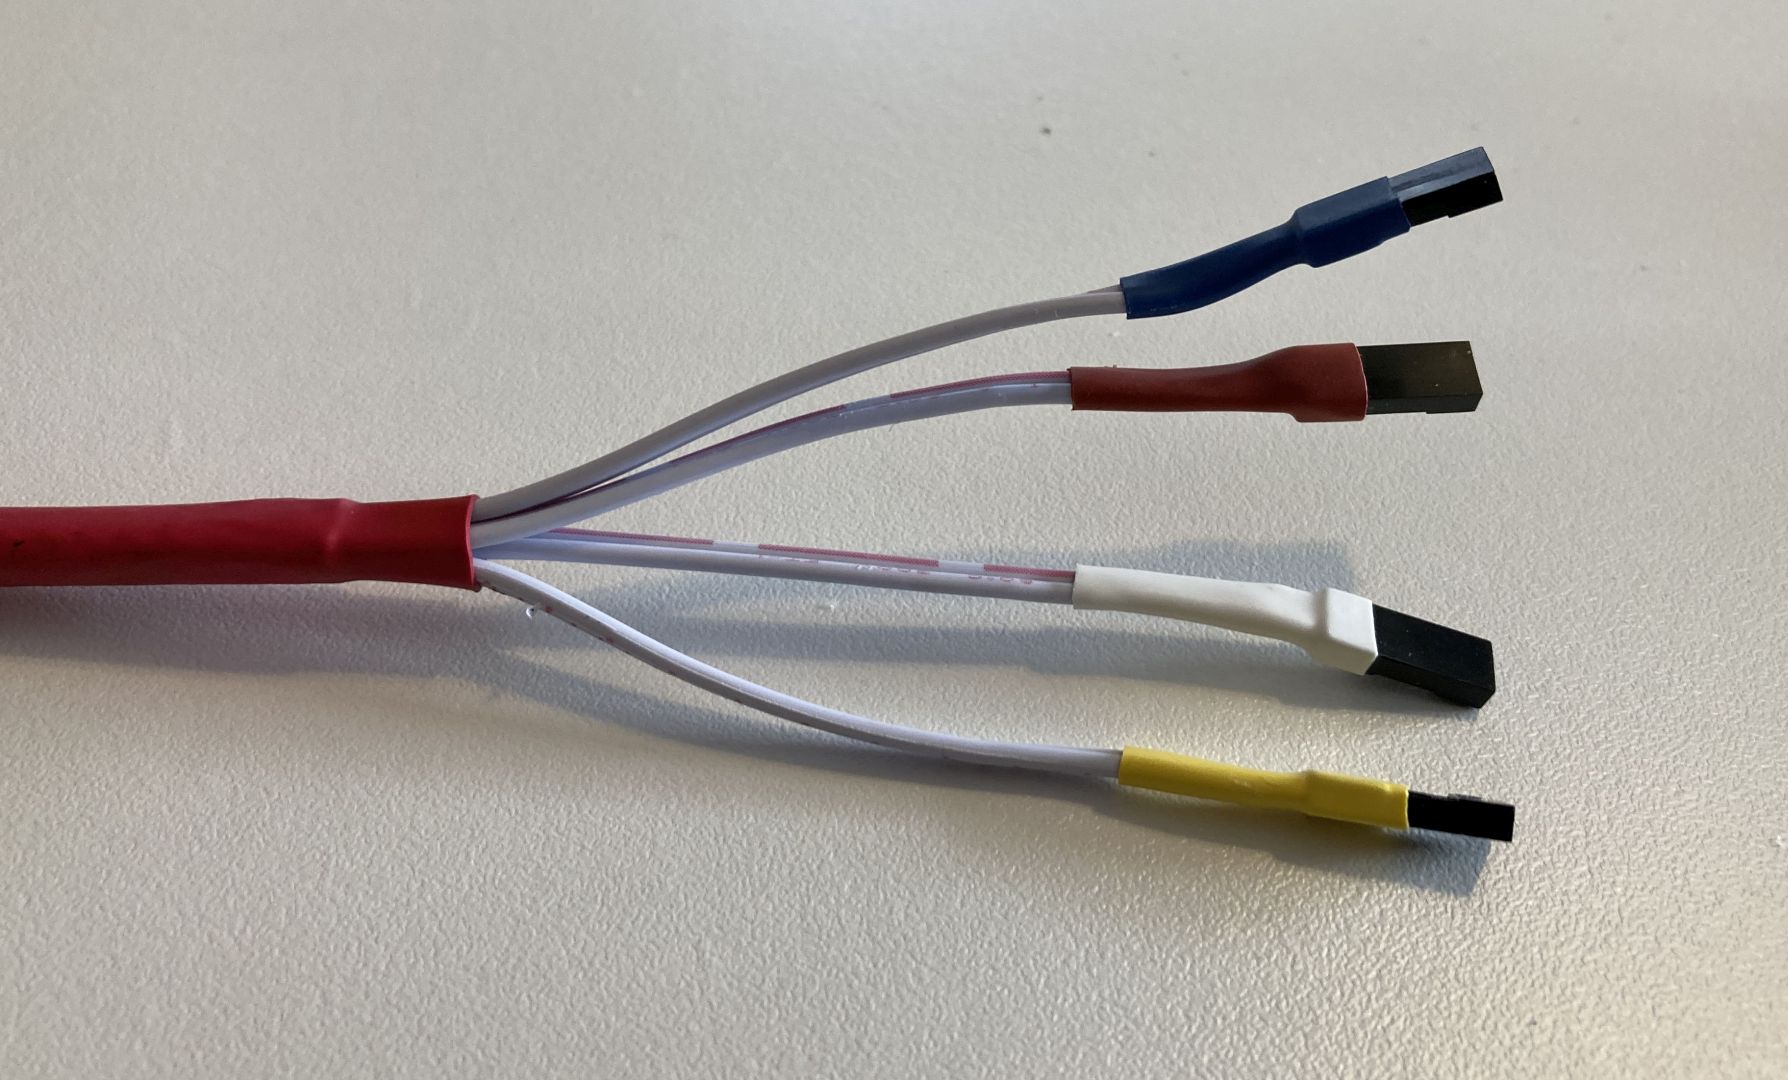
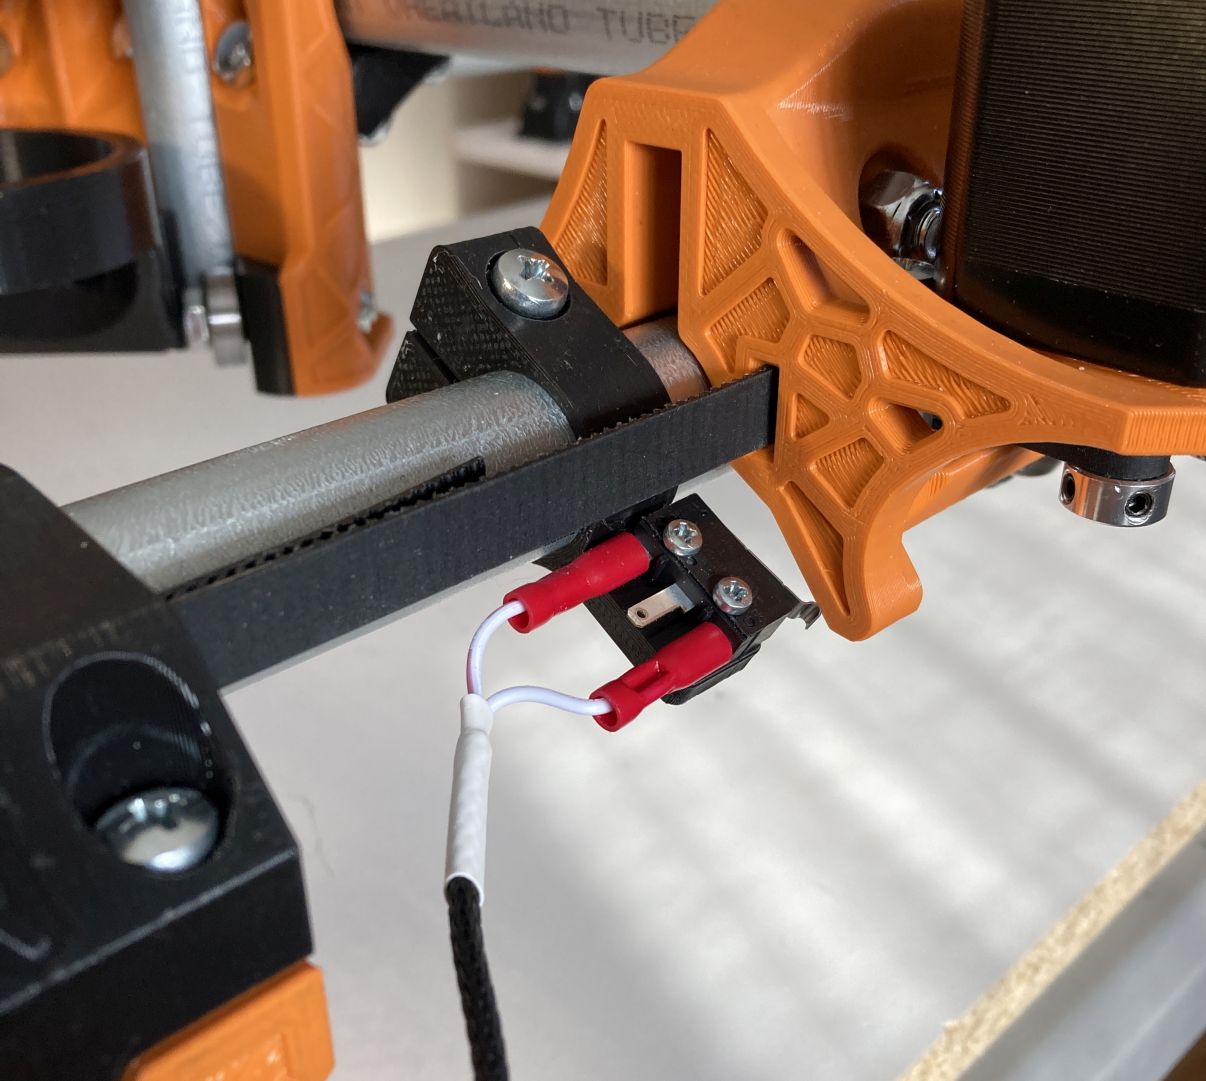
Sorry Ryan, I’m not a good bundler. I started routing the wiring as intended and didn’t like my outcome without shortening lots of wires. I decided to route the limit switch lines separate and fixed. I stripped off the limit lines from the ribbon cables and removed the cables that came with the limit switches. I routed the wires through the tubing that’s not used for the stepper cables. I cut each to the proper length, added new spade connectors and nylon sleeve with color coded shrink wrap. I only had to extend the ribbon cable for Ymin. The limits are mounted on a remix of V1 Stop Blocks. It’s neat enough for me and less moving wires. Now to the dollar store to find a cheap tape measure. I’ll probably do that different than normal too. I should change thread name to “Can’t help myself”
2 Likes
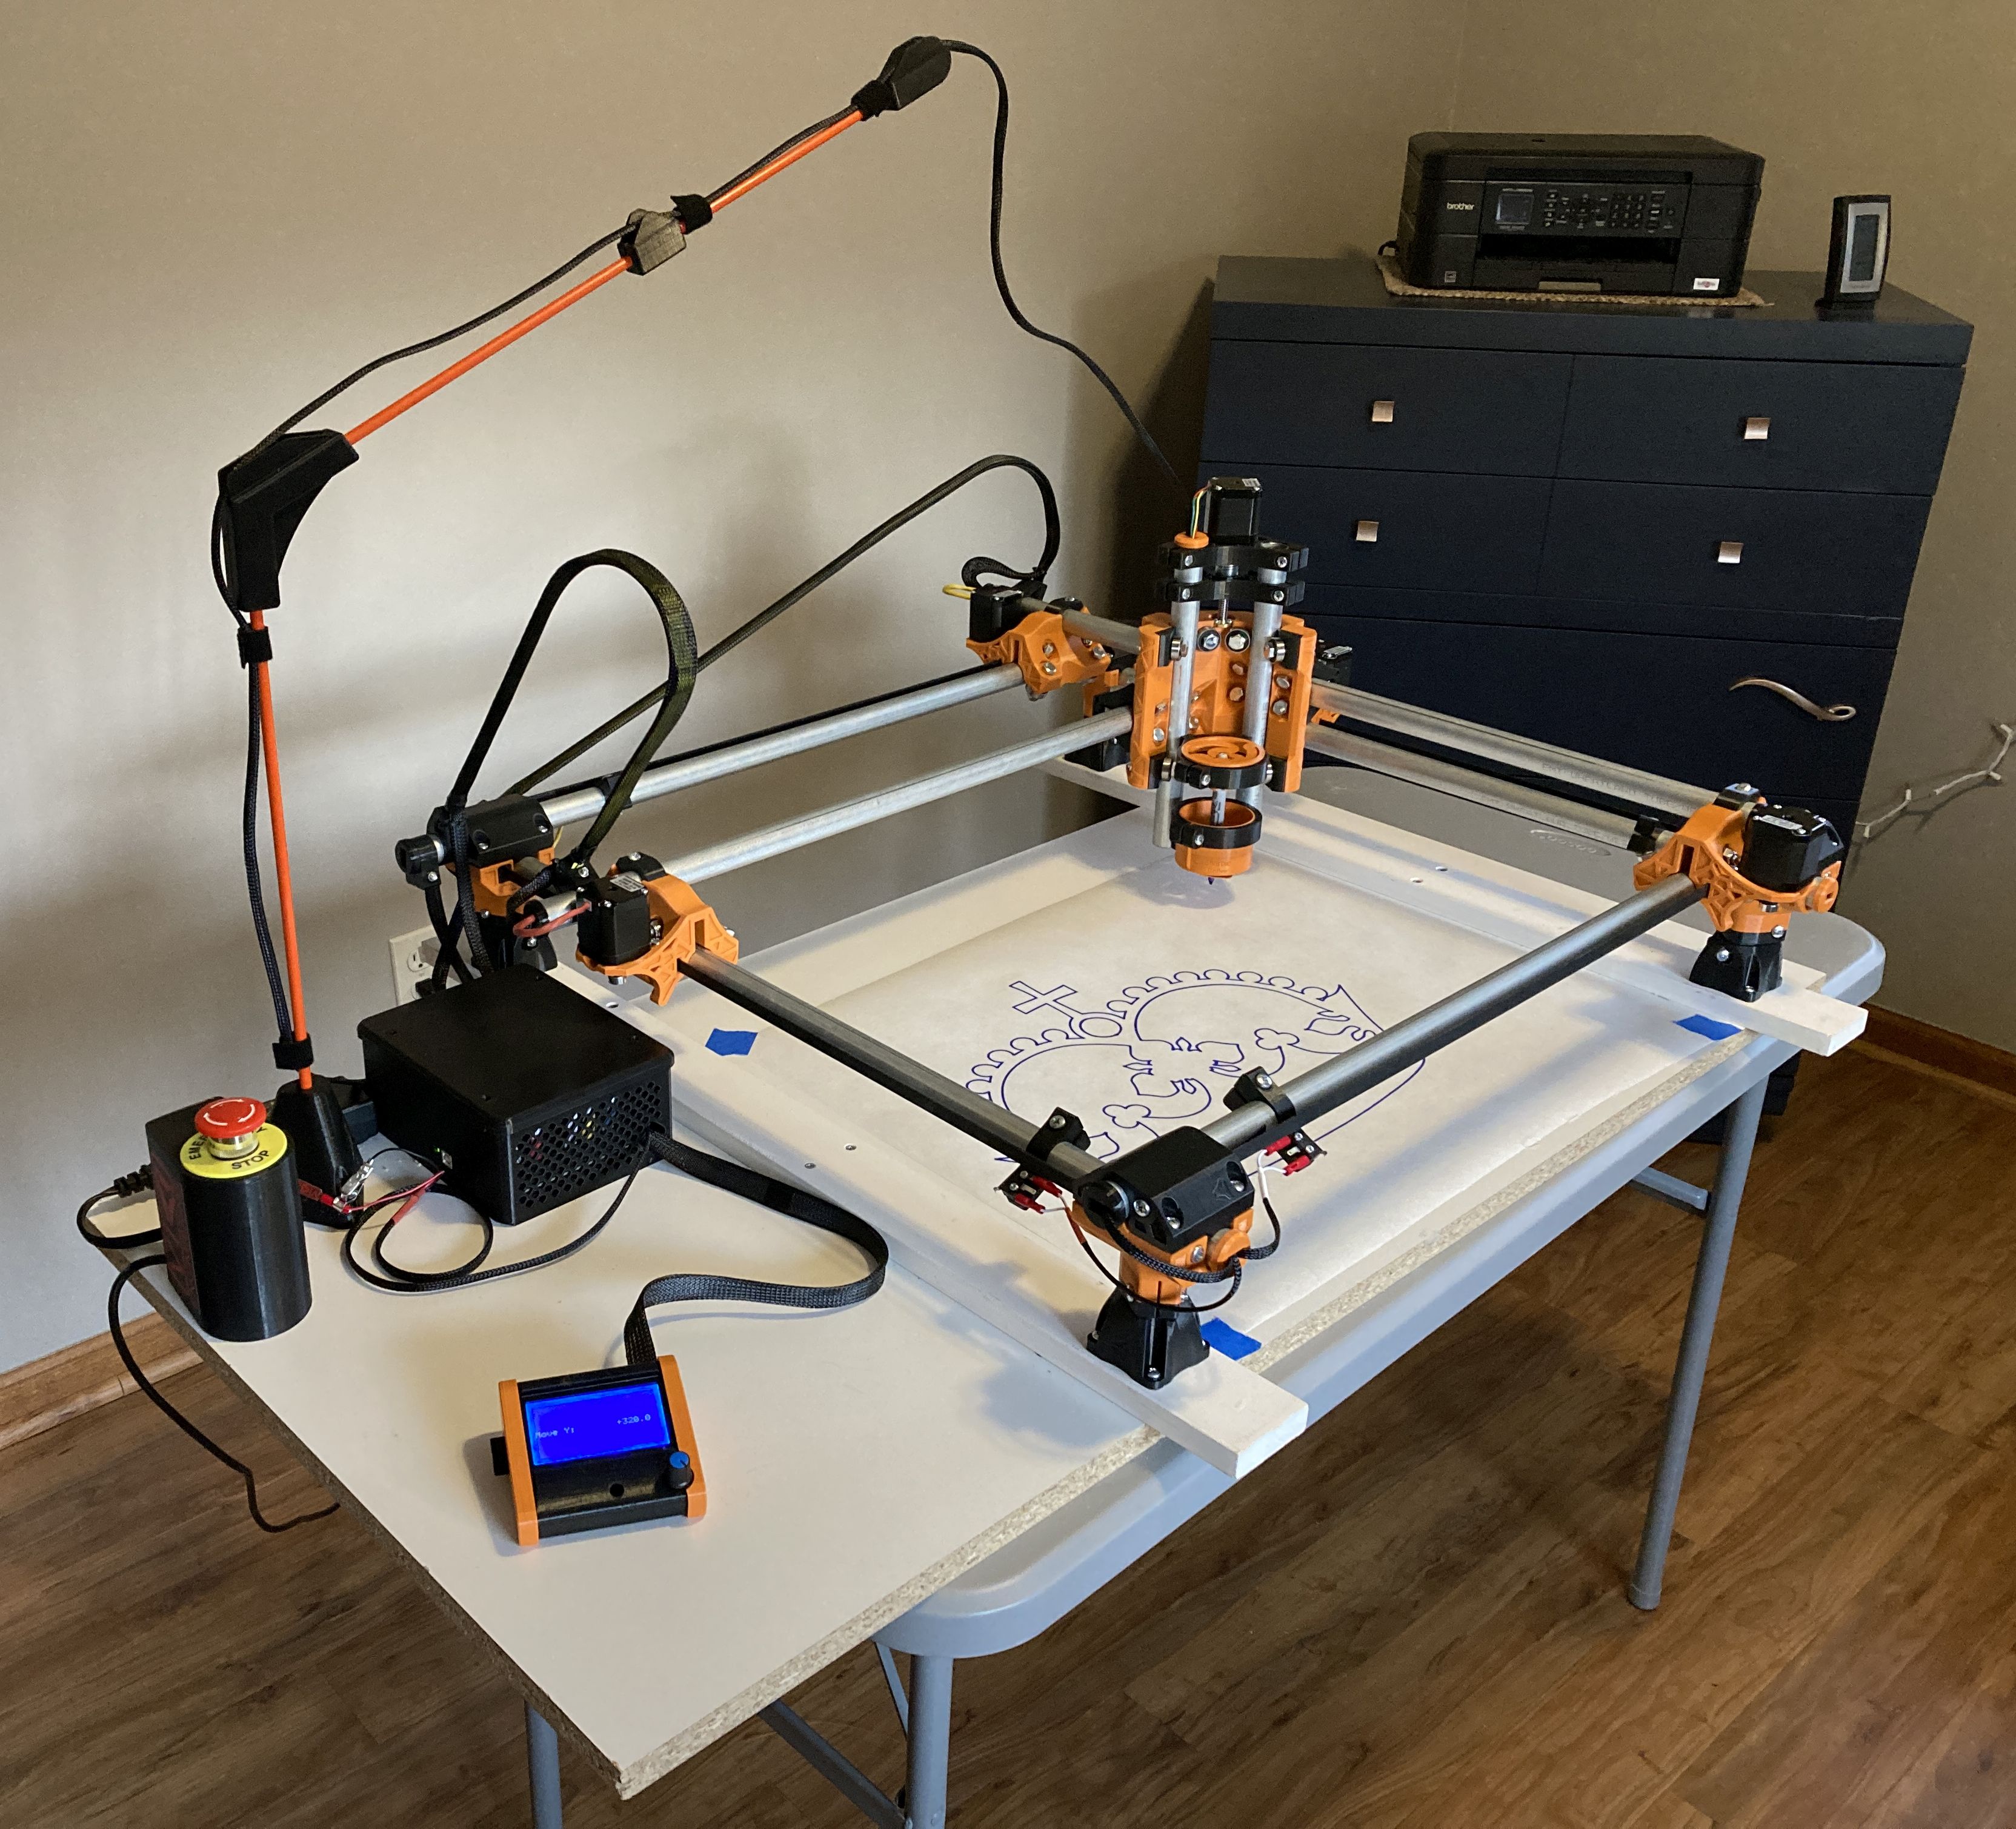
It’s done. I wanted the project to last all winter but it’s so well designed that it finished quickly. Even with all the over thinking I do and parts I designed. Thanks for the great experience. Everything is mounted to the platform except the LCD. I’ll make the clip for that. The Z axis gantry is just a slip fit in the base. Easy to store and strong enough to handle the Makita power cord. The crown in the picture is with a marker but I’ve been doing some with fine tipped pens and mechanical pencils. Amazed with the detail and quality. I did a rough 400x400 rectangle and it was less than 2 mm out of square. An easy tweak. In two months when we get a warm day I’ll get it dirty. I might try some foam with a Dremmel in the house and see how bad the dust is.
8 Likes
If you want to keep making drawings:
2 Likes
Those are quite intricate. I’ll try a few, thanks.
1 Like
There are a few by myself that are only one pen up/down.
They may be easier to recreate in sandify and then export the gcode.
I was looking for one line drawings online this morning. Picasso did a few, horses, women and penguins. Quite different than your own. I’ll have to look into sandify, new at all this. What have you found to be the best pen for this? I bought gel and roller ball Sharpies. The water based ink left a glob each time the pen hit the paper. So far a cheap stick Papermate in a x,y sturdy yet z springy mount is working best.
Ok where did you get that cord holder at?
Looks like a few 3d printed parts and a couple fiberglass reflector holder sticks.
That’s key. Ryan’s mount does a great job at that while not including new hardware.
There are a lot of people who pay very close attention to plotter pens. I just went into an office max and tried to get ones with the finest tips. Gel rollers, I think. I have used felt tips before and they work ok. But I am not an expert. You can put a sacrificial paper down to set the Z height, then make your gcode drop to Z=0 at the start. That should reduce the starting blob.
I sometimes feel like Picasso, but we have pretty different (but equal Fame) styles ![]()
Sandify was designed to make patterns for sand tables like the zenxy. You can’t lift the marble, so they have to be in one connected line. But there are some great contributions and patterns. So I would like to make it friendlier for plotters too.
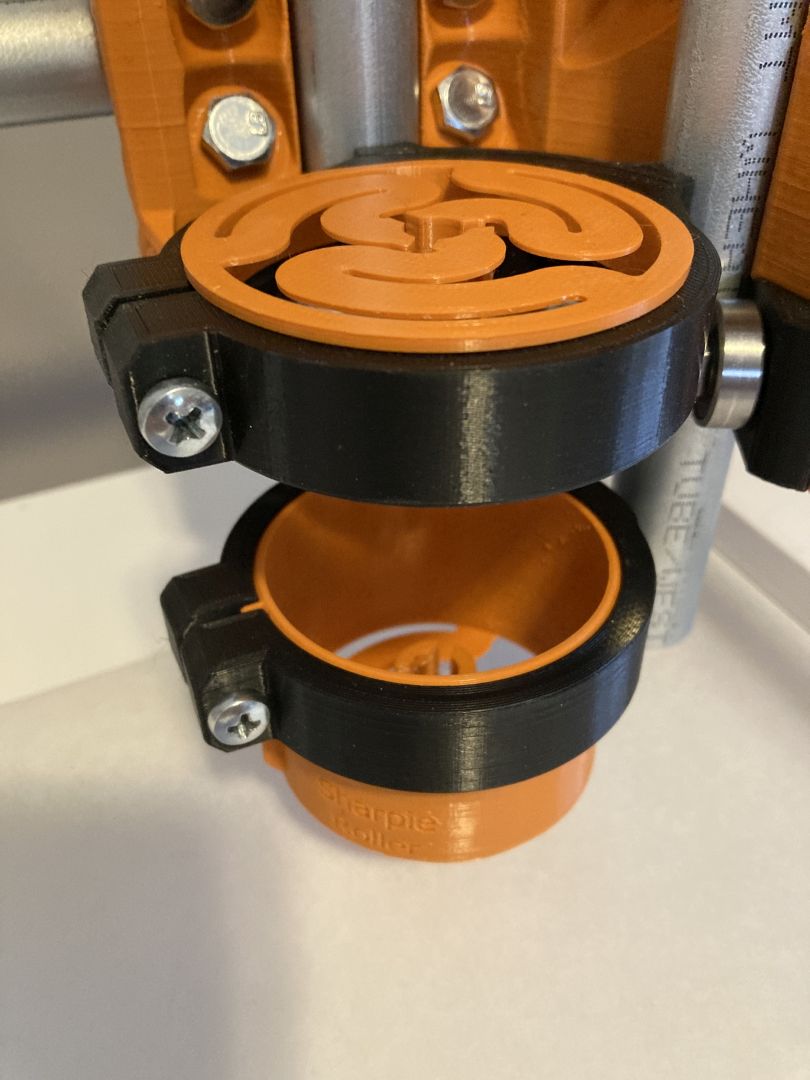
I have the Makita mount on mine so wanted something to work with that. I’ve made several remix versions of one by thingsdavemade on Thingiverse. My latest uses two of his style and the bottom clamp is dropped so it is near the lower end of the pen. both “springs” are 1mm thick and that’s close to right. 2mm was way too strong. When I held it with one only near the center I was getting a lot of vibration and deflection. That’s gone.
2 Likes
I made the black PLA parts and the Orange is fiberglass rod to mark stuff in the snow from Home Depot or Lowes. 4 or 6 feet long with reflective band around the top. Base is screwed down, slip fit to vertical rod . Press fit on other connectors. Velcro strap for cables. A few seconds to install or store
Oh yeah, it’s way overdone, I’ll scale the fittings down some and reprint.
Looks great. I may use that but with dowels.
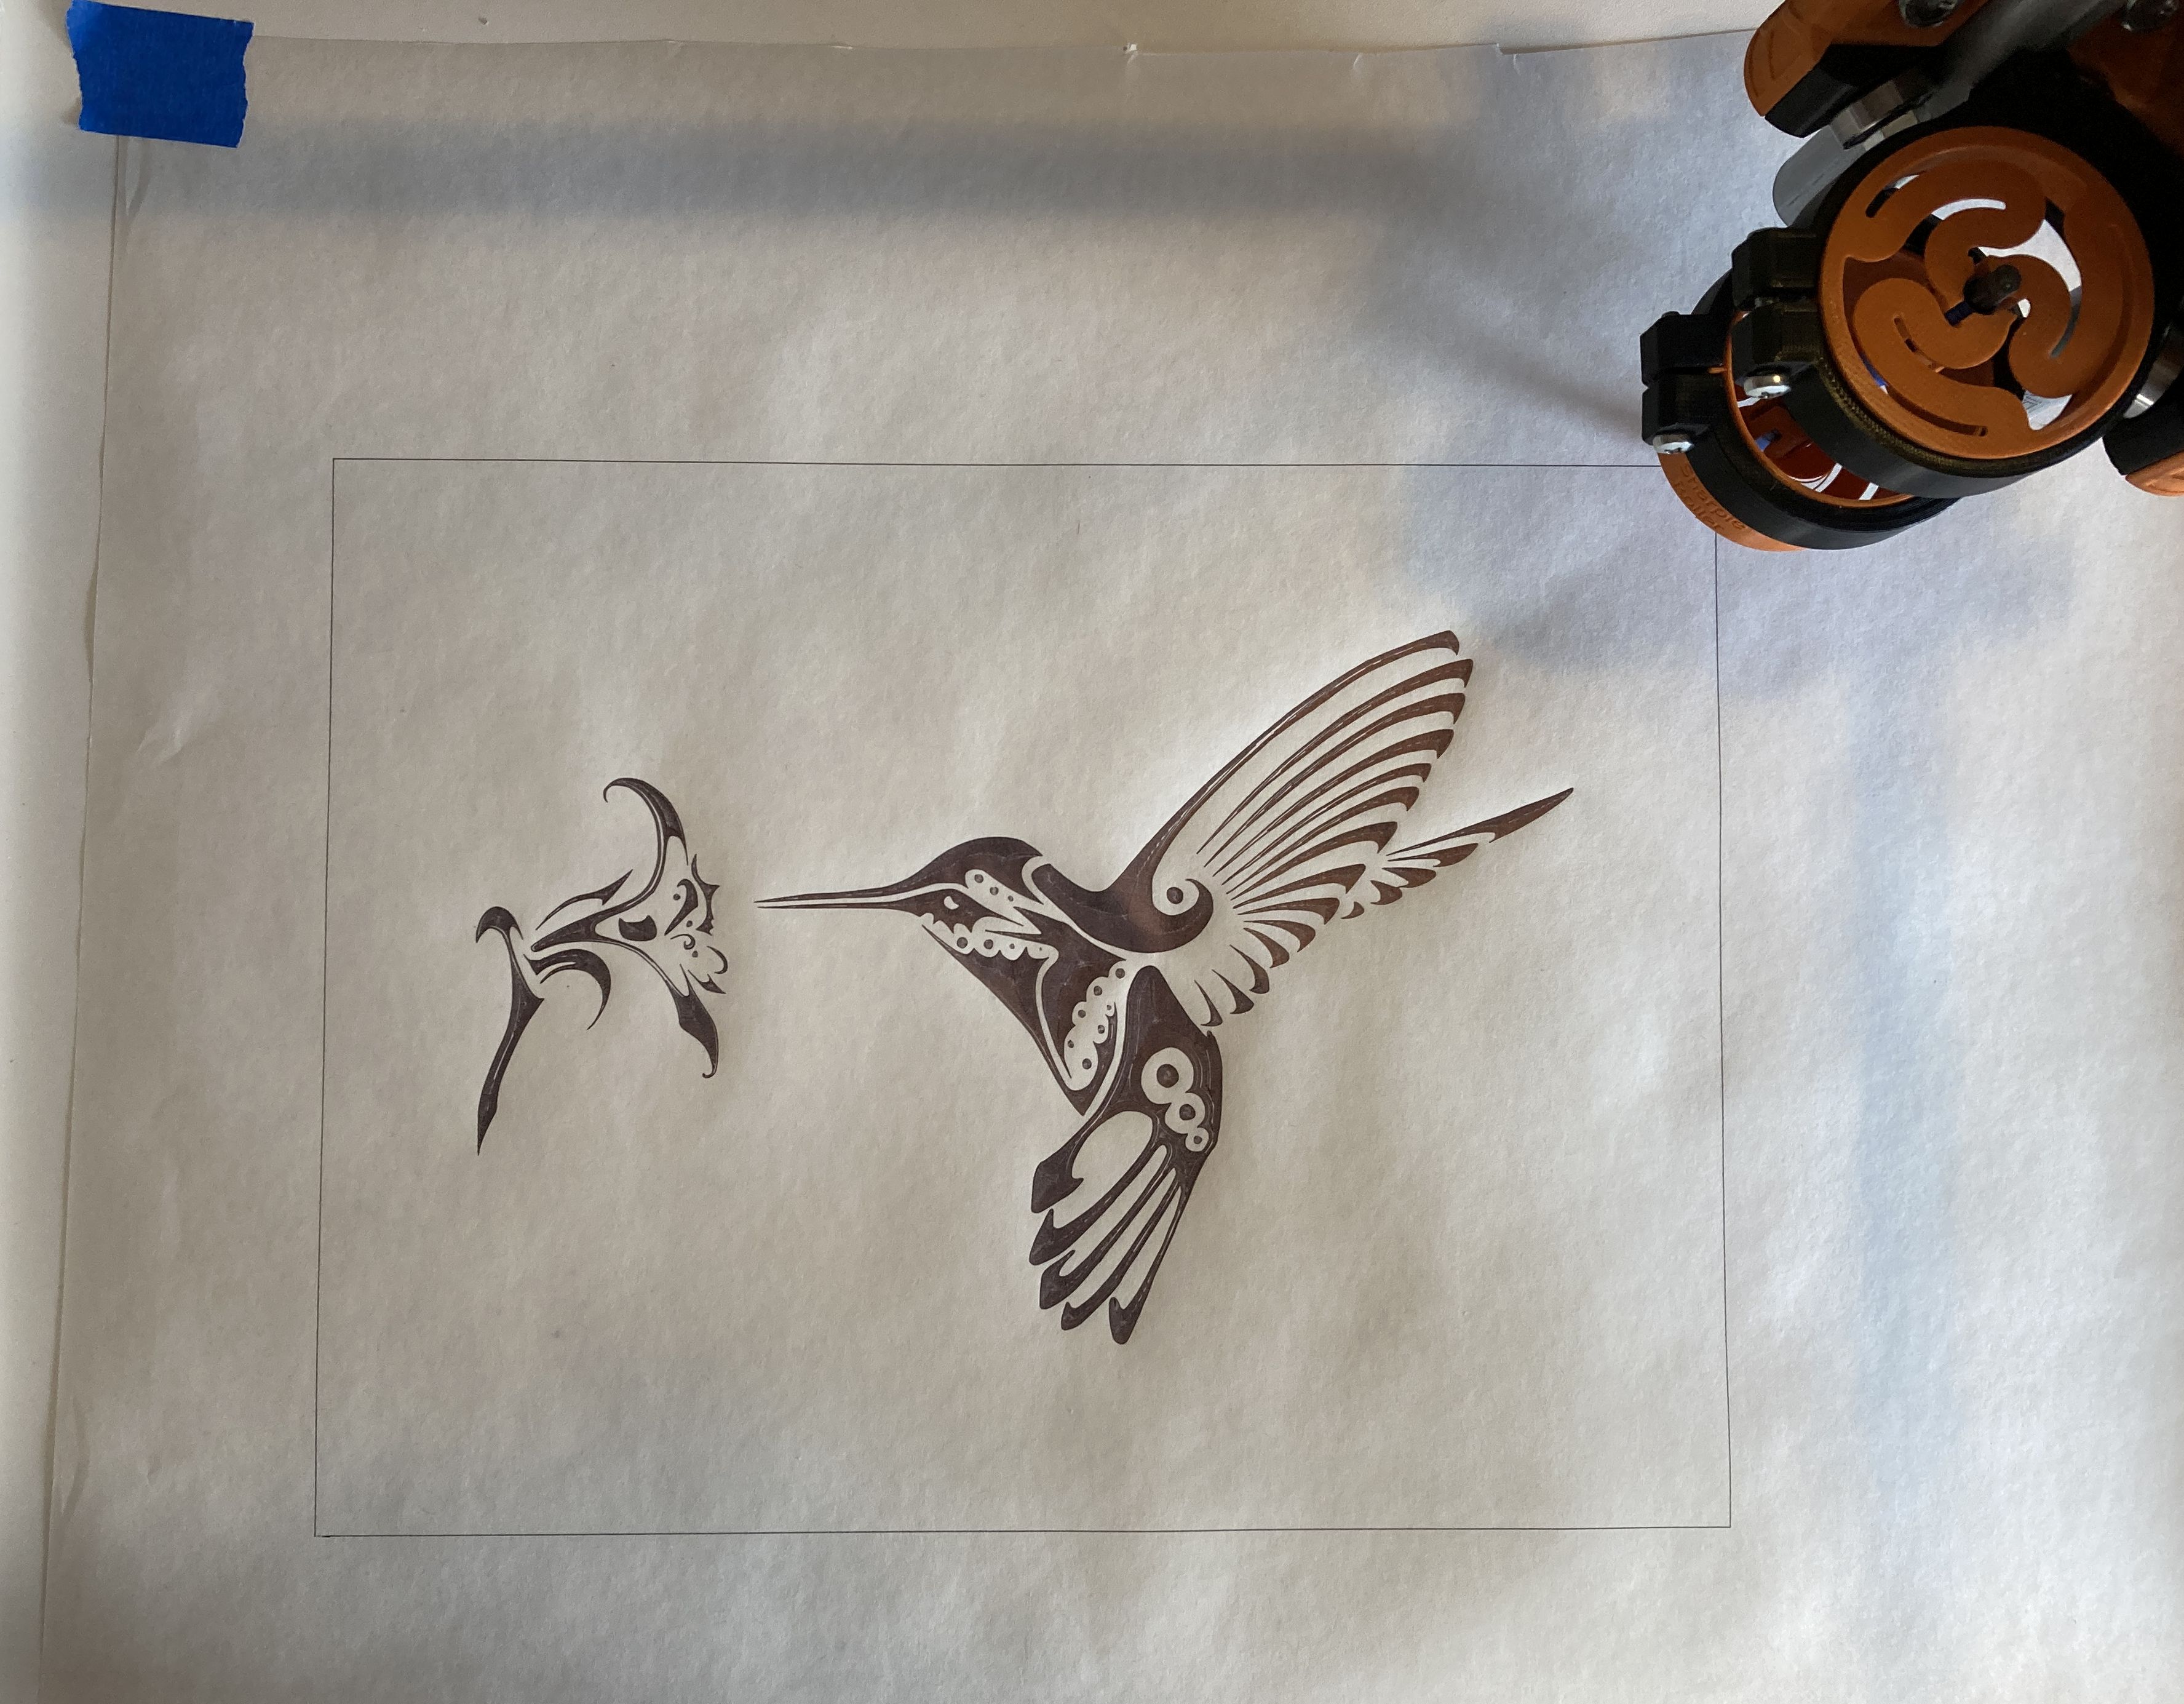
Ryan suggests Baby Steps when learning. I’m taking his advise. I’ve plotted about 20 line drawings with engrave in Estlcam. Now I’ve started learning about pocketing but still with a pen. First one was linear method, one shown is parallel. I’ll try peel next. I’m amazed how sharp the details are.
12 Likes