I’ve posted here before, back when I was 3D printing. Took a bit of a hiatus from the project due to personal circumstances, but after months of staring at the parts all ready to go, I decided to finally start on the project now I’m able.
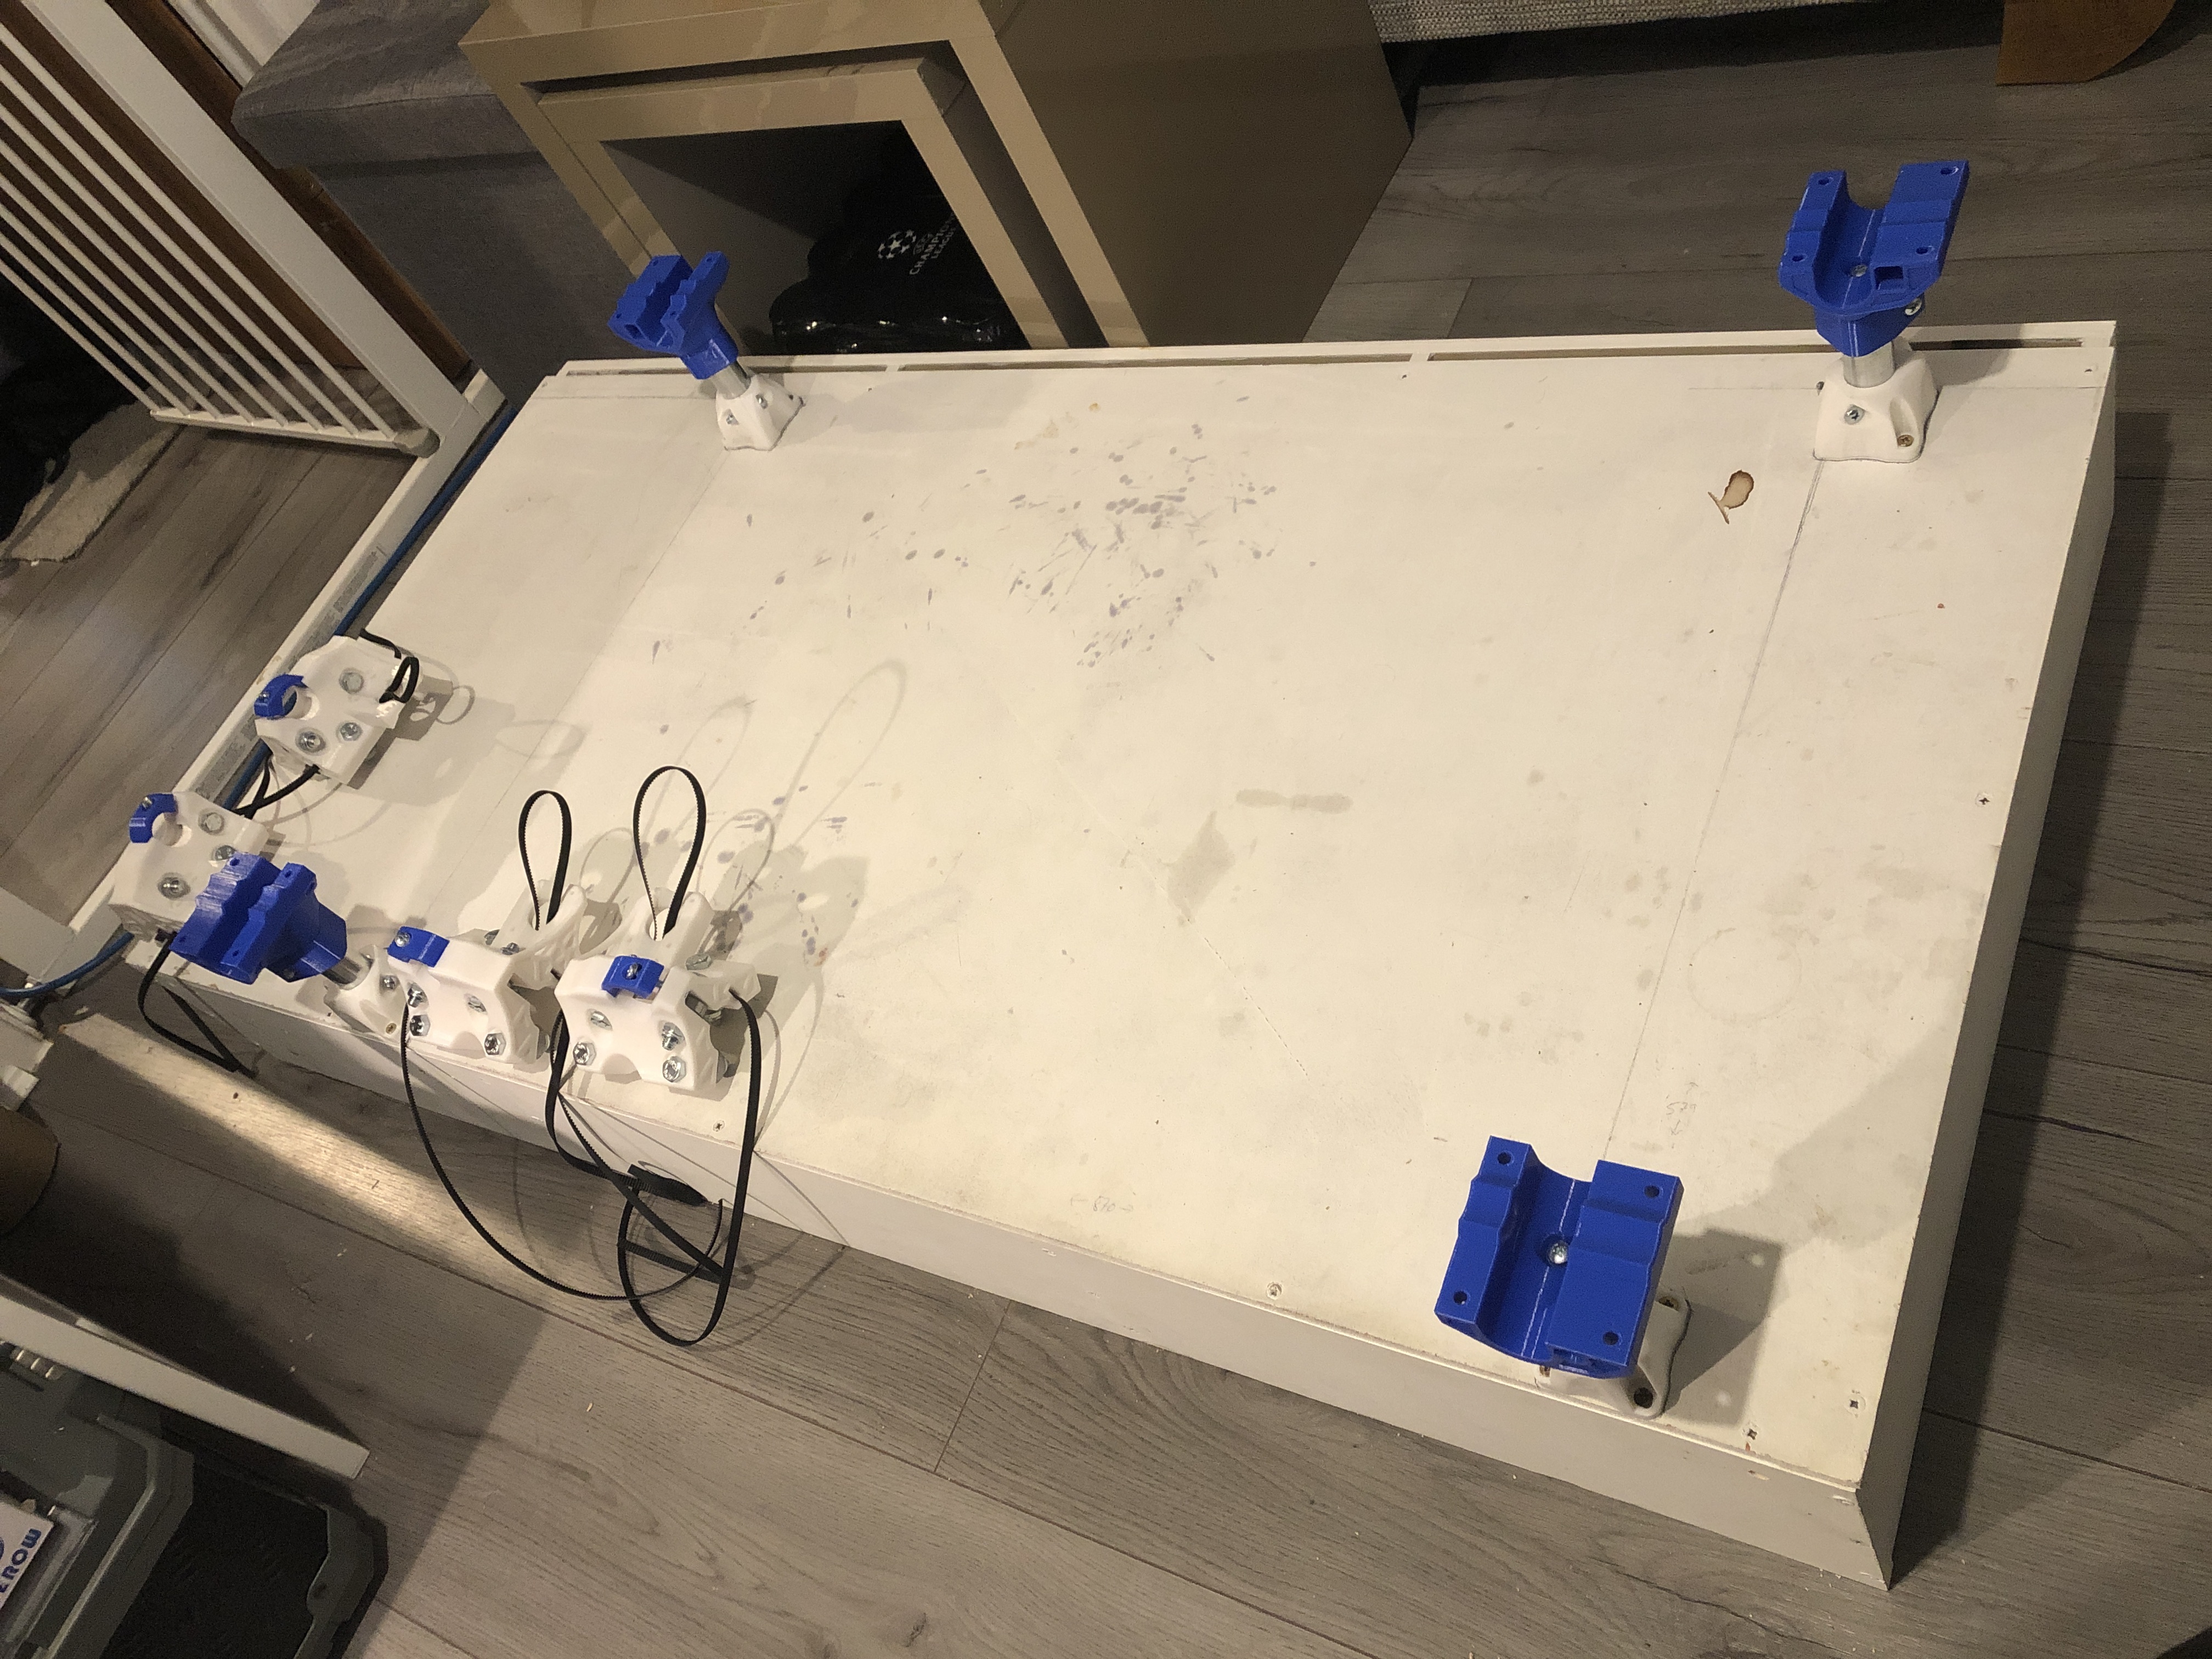
I spent all of last night squaring, checking and double checking everything.
It is such a satisfaction when everything lines up perfect. Laying the rails in and feeling absolutely no resistance when moving them was SO good haha!
I then made a start on the trucks earlier, and realised I’d ordered the pulleys, but not the idlers
So, had to call it there for now until they arrive, but I’m pretty happy with it all so far!
N.B It’s on this type of frame as it can’t live in one place all the time. Hence why I’ve spent A LOT of time making sure it’s square as I’m aware moving it will make it less square over time. But, I’ve no choice. Gotta make the best of the situation!
And the base has cosmetic marks from storage. I’ll repaint it at some point
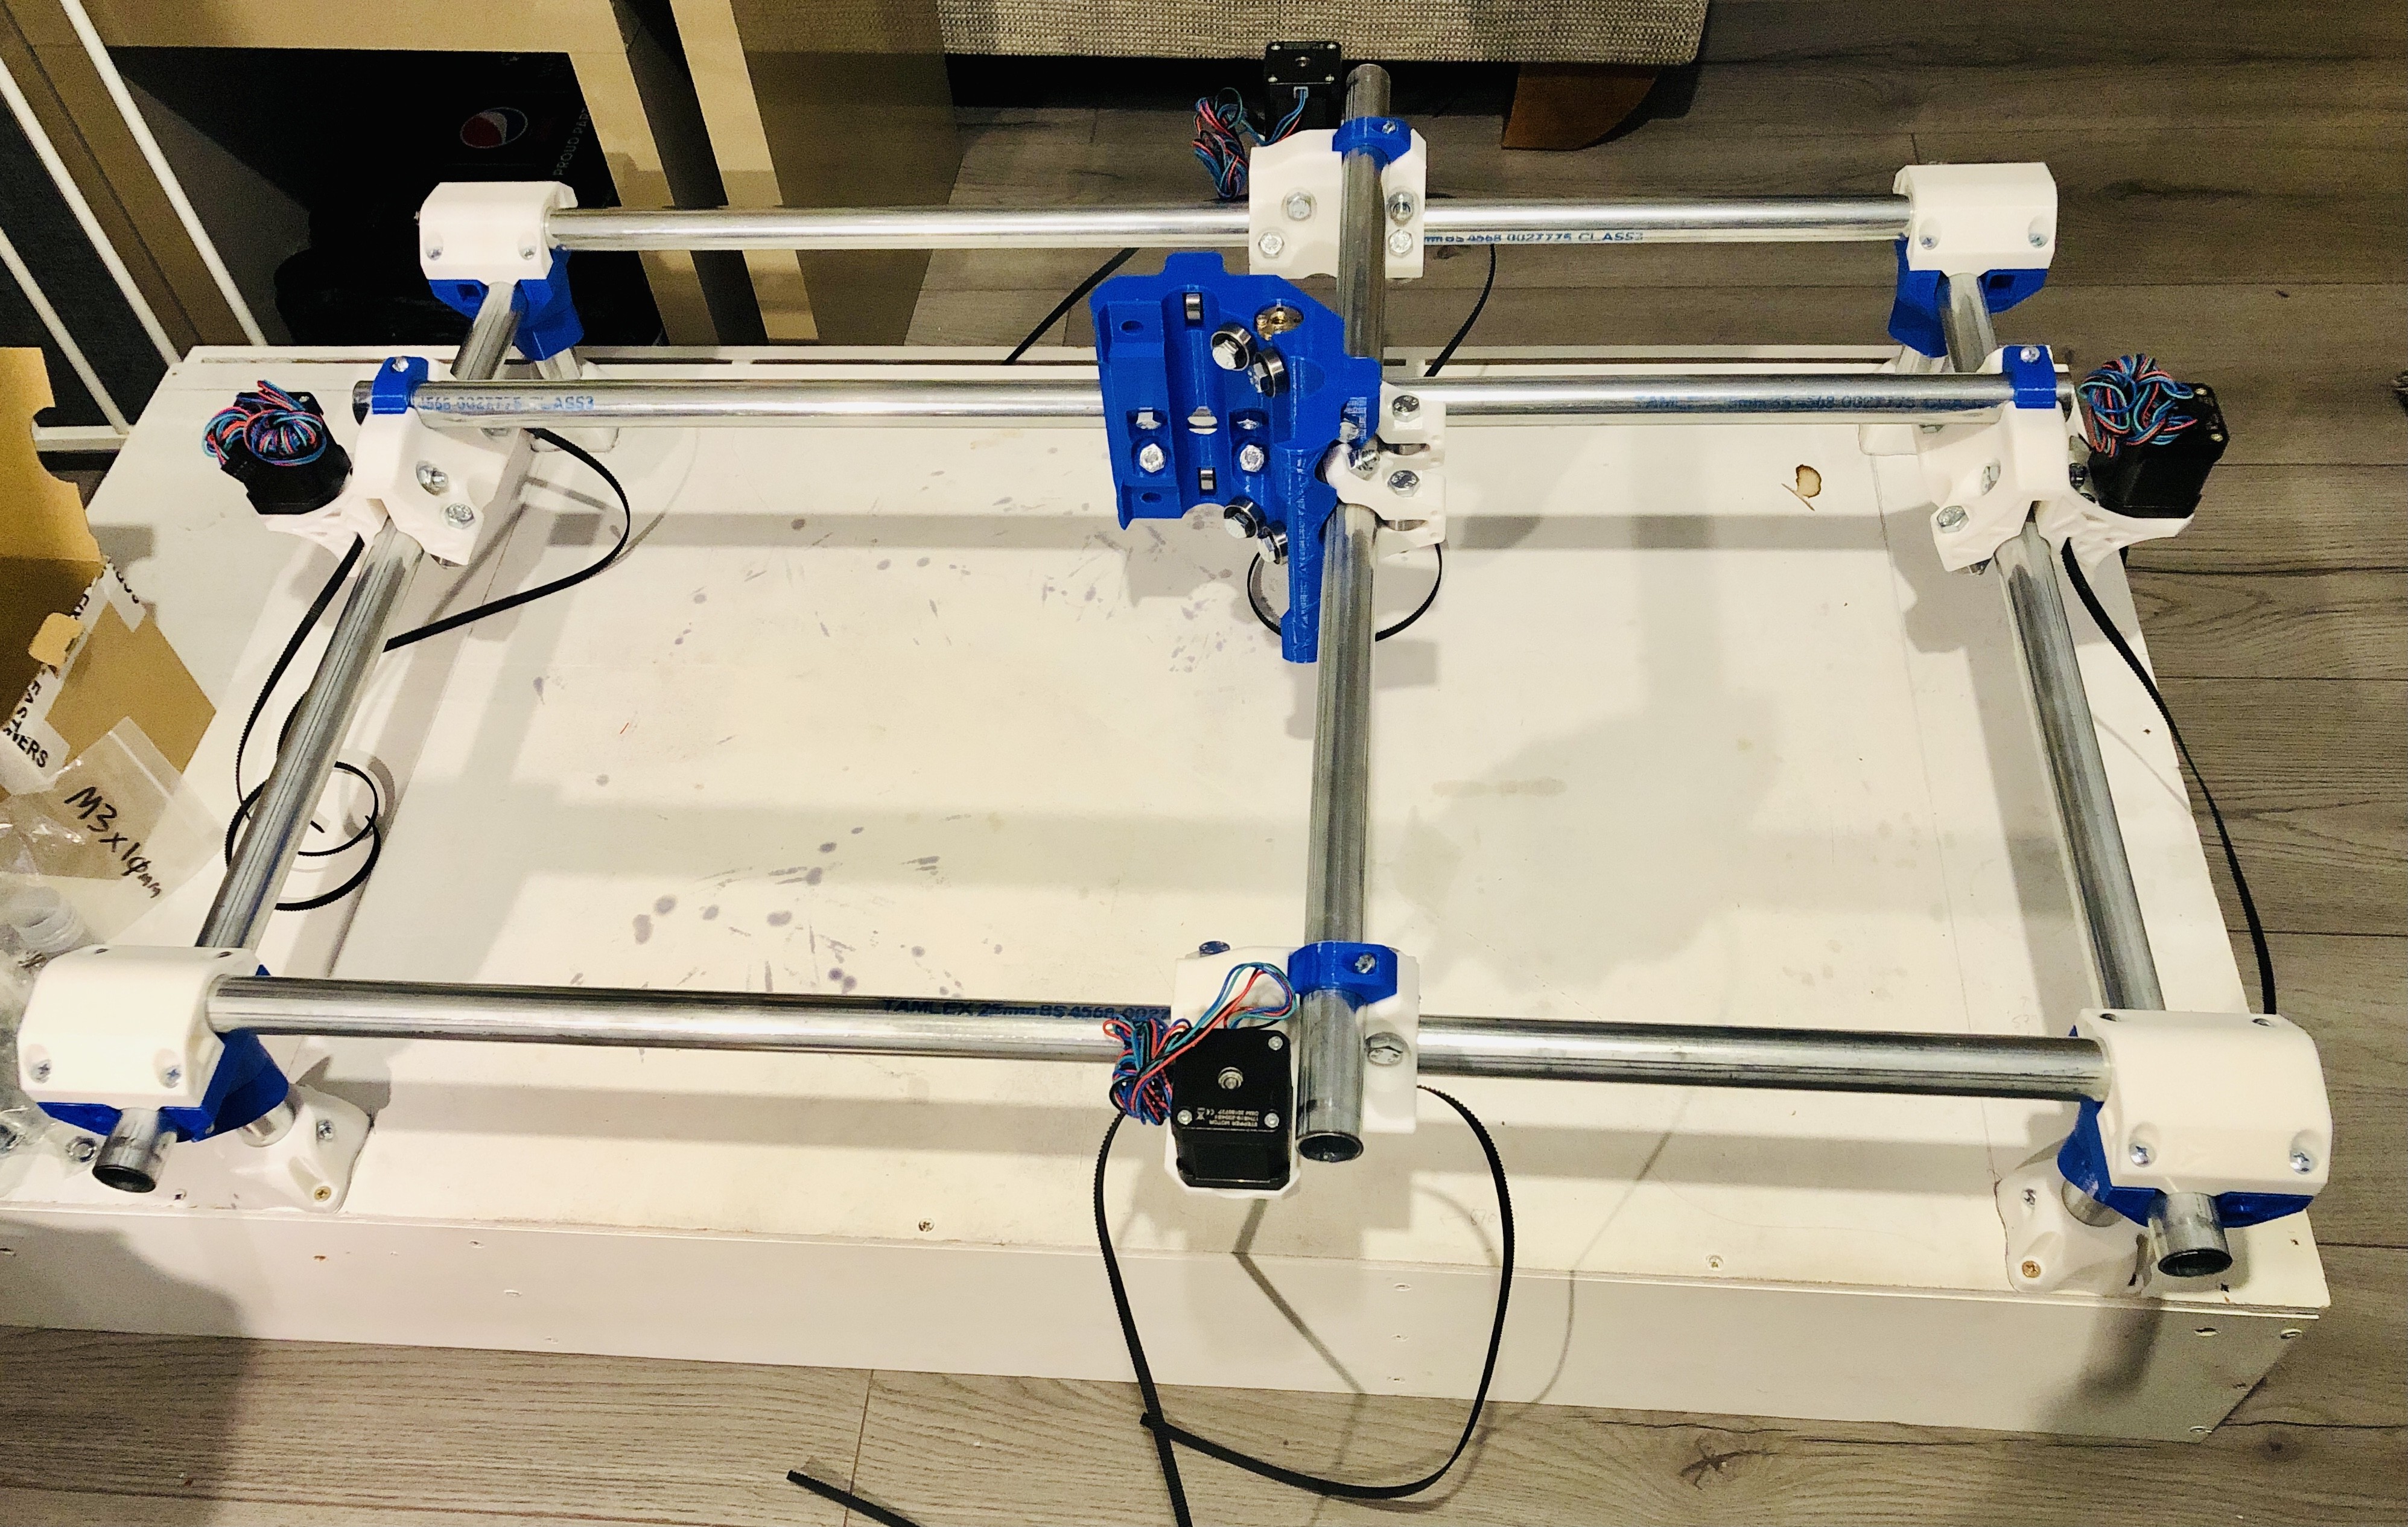
The idlers arrived earlier this afternoon (thank you Amazon prime haha! ) so I was able to push on a get a bit more completed.
I’ve finished step 5 (Core), and will make a start on step 6 (Z-Axis) tomorrow or over the weekend.
Wow, seeing it actually all together now is very satisfying. I was unsure on the colour scheme at first (thought it might be too bland), but now I really like it.
I’m happy with the progress today, and am calling it a night!
So, I’m about to purchase the last remaining items I need for the project.
Having read up on all the options as much as I can I have settled with the following items.
Would anyone mind just double checking over these items to make sure i’ve got it right please? (Being in the UK, the DW600 isn’t really an option, and any versions I could find were all 110v. So, I went with the 55mm spindle).
SKR PRO 1.2
TFT35 E3
TMC2209 V1.2 Drivers
SDHC 16Gb Class 4 Card
500w 55mm Spindle Bundle
Power lead
Stepper Wire Extensions
ER16 Collets
Router Bits
Any advice or recommendations is very much welcomed!
TIA!
Last post got hidden due to too many links I think. So, apologies, if this appears as a duplicate post at a later date. (Items listed above in original post ^ ^ ^)
I’m just about to purchase the last remaining items I need for my project, having read through all the available options. I would really appreciate if someone would double check the items I’ve chosen. Any advice or recommendations would be very much appreciated.
(P.S. I’d like to do dual end stops (maybe not immediately), but couldn’t see clearly whether the SKR PRO v1.2 is compatible with the wiring kit in the V1 store for dual end stops. So, should I consider the cheaper european RAMBo knock-offs, or will I be happier in the long run that I get the SKR PRO?)
Can probably get it a bit cheaper if you look around
I’ve got the same router bit set and they’ve been working fine for me so far
The wiring kit for dual end stops are just usual individual stepper motor wires so should work fine with the SKR Pro. It’s the series wires (non dual end stop) that are a bit different.
Hi! Thank for your reply!
I had the opportunity for next day delivery when I originally posted this, but had to order before a certain time, so i bit the bullet and went with the spindle.
I’m looking at the Katsu you mentioned and that looks pretty cool, and cheaper too. I may look into that more, and can always return the 55mm spindle. But, if the spindle is good enough, I may end up keeping it.
I’m glad to hear the router bits are good, that’s actually a relief!
And thanks for clarification on the wiring, might be worth going down that road then I think!
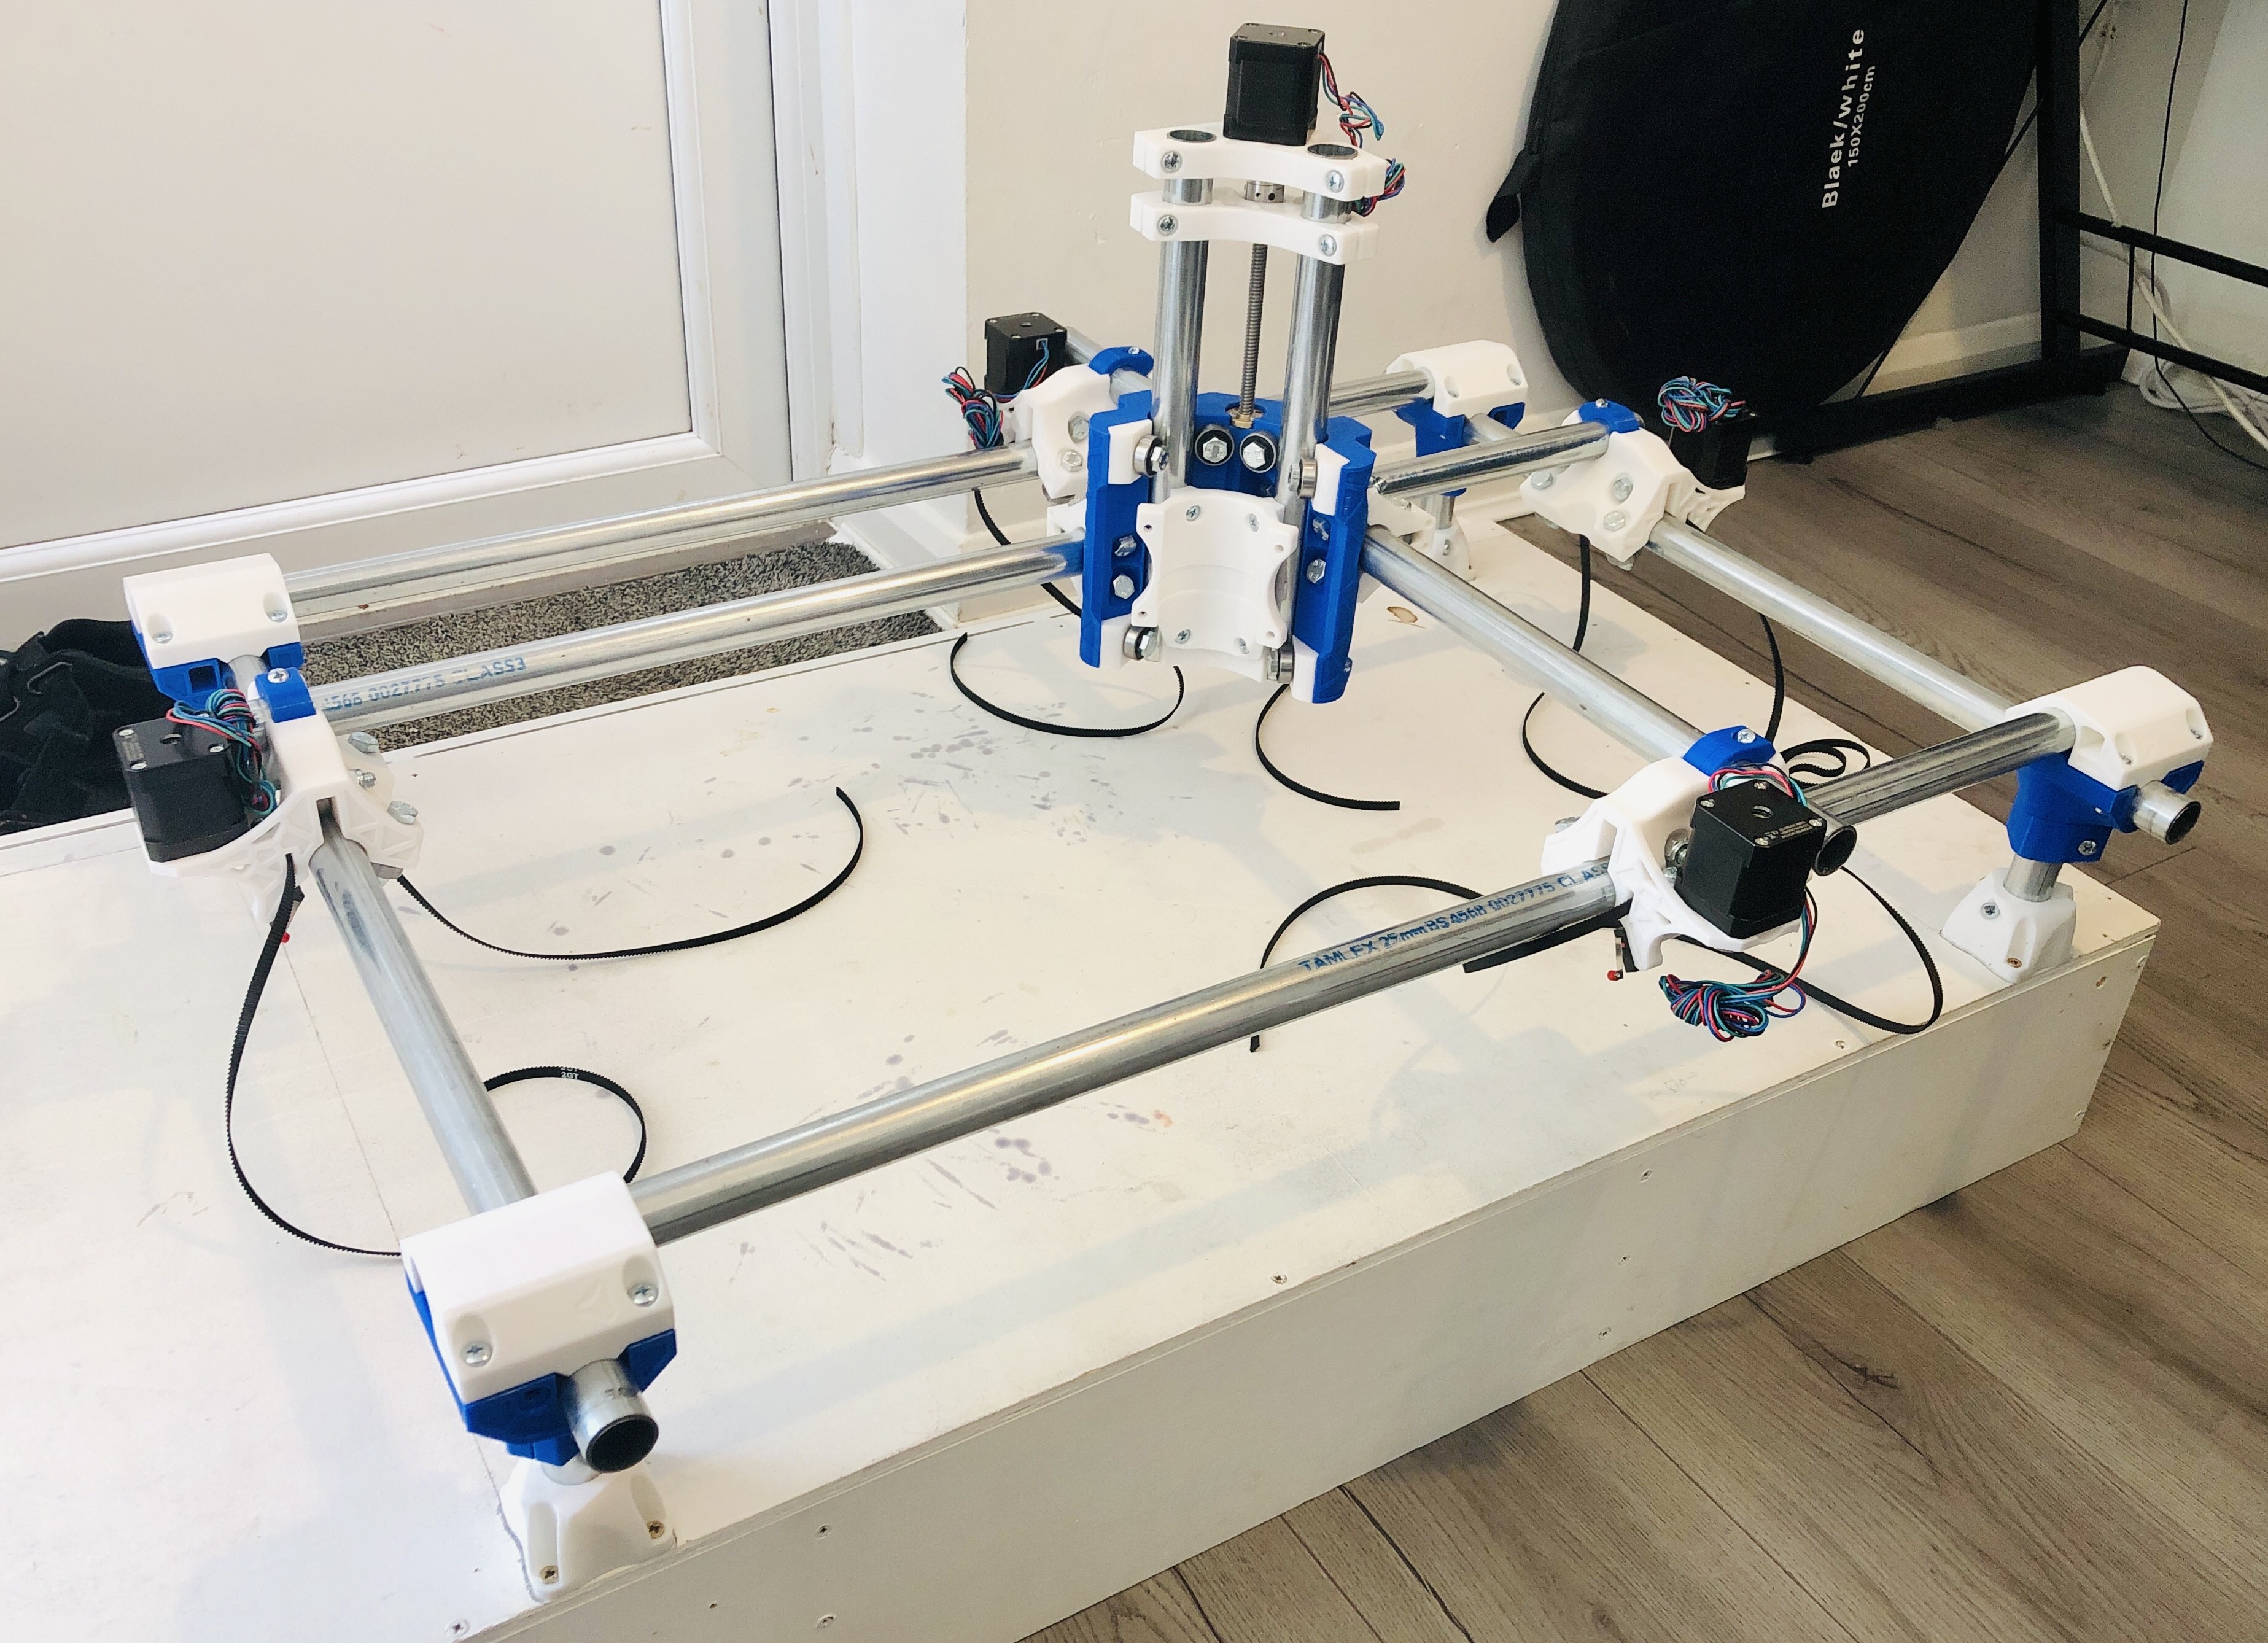
Z-Axis done!
I do have one question though, the core seems a fraction wobbly. I’ve tightened bolts to the recommended tension, and then just a 1/2 turn more to see if that stopped the ‘wobble’, but no change. It’s only small, but I fear that’ll be exponential on cuts.
Everything else seems perfectly fine, but it’s like it just needs a shim somewhere to hold it firm. I can’t quite work out where the best place would be, or whether theres a particular bolt(s) that would be better tightened. Any advice on that would be great.
Video of the ‘wobble’: (It seems exaggerated as my hand is shaky filming it, but it only wobbles in the forward/backward direction, not side to side)
Thanks for your suggestion! I’ve had a brief look at that, and it seems quite interesting.
I already have my SKR PRO board delivered now, so will be using that going forward I think.
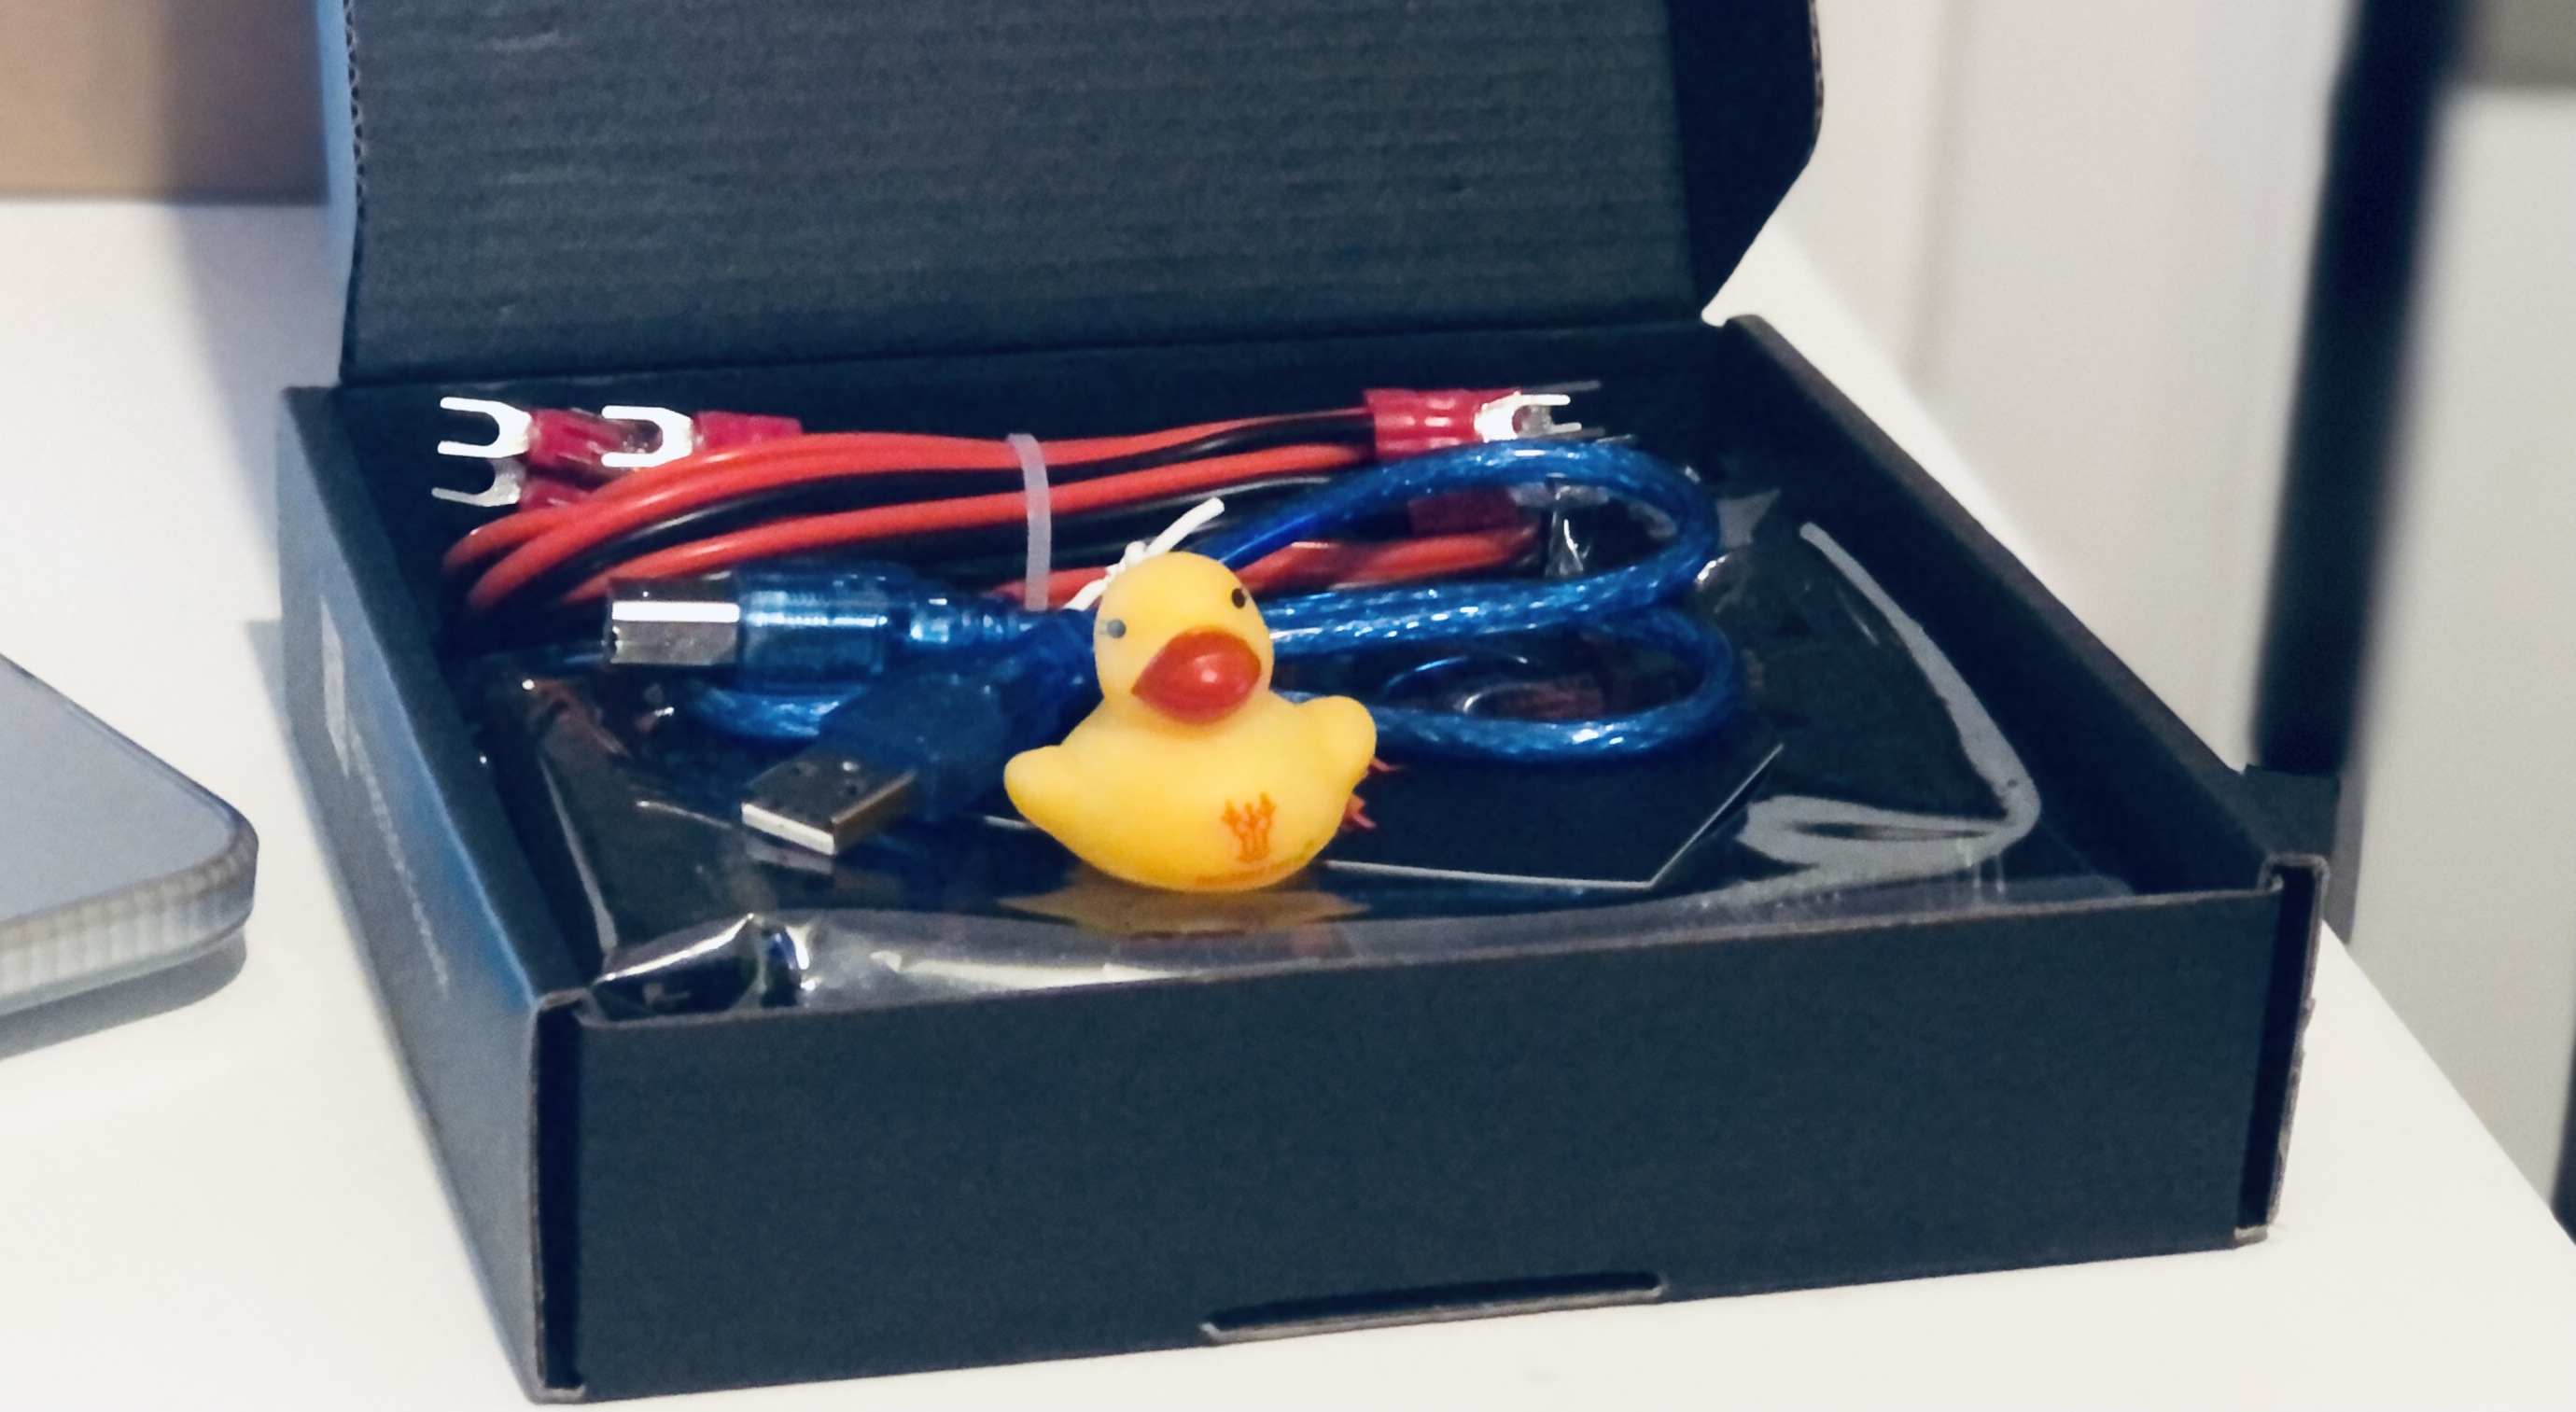
Also, I was pleasantly surprised to receive a little rubber ducky with my board haha
N.B.
If anyone does have any suggestions on what to do about that ‘wobble’ I mentioned earlier, I would really appreciate it!
And lastly, is there is a step-by-step (equivalent to the build docs) for the electronics anywhere. I’ve got the ‘Firmware’ and ‘SKR PRO’ pages, but wondered if there was anything anywhere that guides you through from the end of the ‘build’ docs, and takes you through to attempting the Crown. Everything I’ve found seems to be spread across multiple resources, and I’m a bit confused right now. TIA!
There is pretty much one way to go through the build, but the electronics have a lot of different ways to go, so we don’t have step by step instructions. You need to flash the skr (the skr has flashing instructions) then wire the motors and power. If you have the tft, you need to flash that too and check the motors move the right way. Then you can try the crown.
Great to see another UK build. I have done my first cut, but now must really tidy up. I under estimated how far sawdust can spread even with a vacuum held to the tool
Thanks, Jeff!
That makes sense. For the SKR and the TFT, it appears I simply need to add the .bin files to a card and boot.
Most of all the parts i’ve ordered are here now, just some extra wire and the emergency stop button arriving tomorrow. So, should be able to make some good progress over the next few days!
(I’m assuming the emergency stop just gets wired through the main power supply to the board)
Hi, Mick! Glad to hear you’ve got your first cut done. I’m looking forward to that step myself, but I’m really enjoying the actual build at the moment!
Yeah, that was also a bit of a concern of mine as I don’t have a specific area for the machine. I’m going to be cutting mainly acrylic though, so I’m hoping it wont be as bad as saw dust!
Since noone said anything about the wobble yet: I had the same problem and needed to tighten the core clamps more than I had anticipated before. There was a bit of chatter because of it in the direction where it lifts.
Thanks for your suggestion! I’ve tried tightening them even further as you suggested. I’ve got them as tight as they’ll go before I think it’ll start damaging the clamps, and it’s now pushed my squaring out by 1.5mm. Even still, there was still some ‘wobble’ there, so reverted back to original tightness for now.
I think I may end shimming somewhere at a later date…will see how it affects things during testing …when I finally get things together!
I have a question around wiring, if someone can advise please?
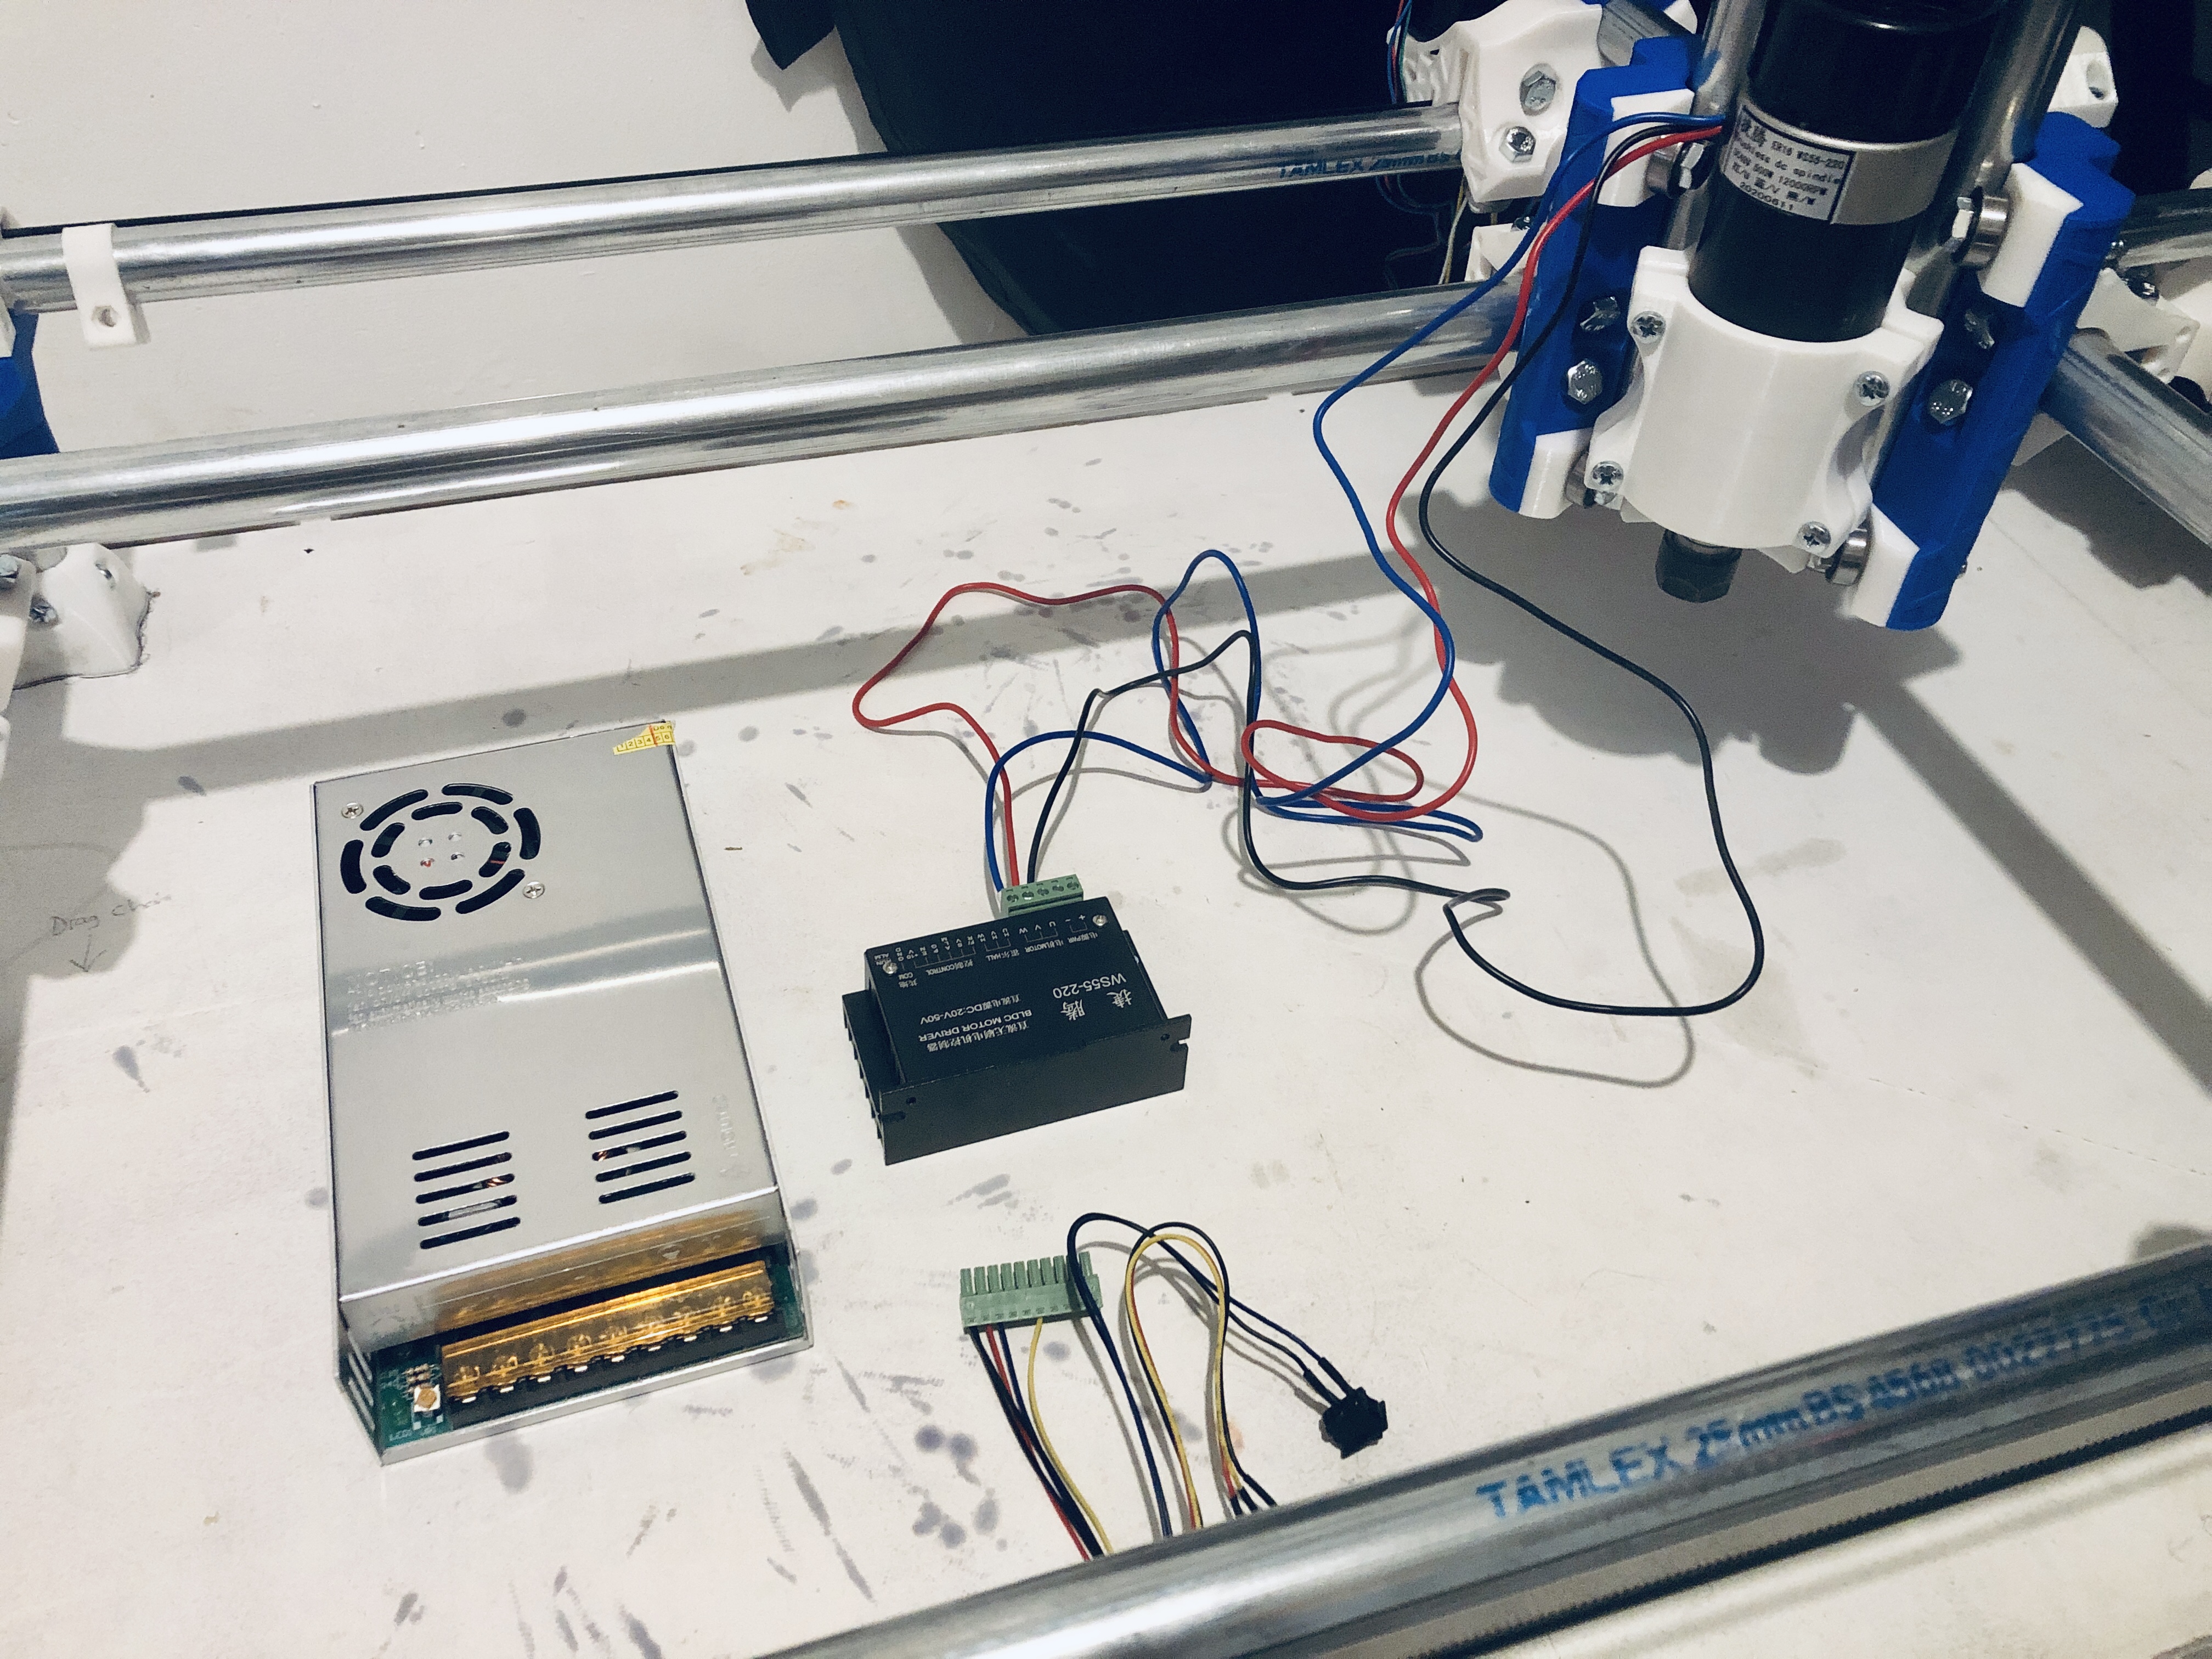
I have the 55mm spindle, and it all makes sense wiring wise I believe.
Mains -> PSU -> Driver -> Spindle
But, my question is the spindle control by the main board at all? Do I need to wire in a data/signal from the board to the driver? I’ve searched the forum, and Google, but couldn’t find a definitive answer with my board, the SKR PRO V1.2.
Lastly, I may need to extend the wires either between the PSU and the driver, or the driver and the spindle. Is one way better than the other, and if so, what type of wire would I need? I assume my supply of 22awg won’t be sufficient for this?
OK, I’ve been trying to find an answer and confused myself even more with the power and wiring side of things. I’m a bit nervous, as I don’t want to make a wrong connection and break something.
Can someone please explain a simple wiring process for this please. I’m lost and confused.
I have the 48v PSU that came with the spindle, and I assume that powers only the spindle.
I also have a 12v 6A (laptop style PSU) for the SKR PRO V1.2 (I hope that’s correct). But when I read the SKR Pro page in the docs, there is no mention of power, and I can see there are 2 feeds going into the board.
Do I have everything I need, or am I missing something.
I can’t find anything on YouTube or Google of anyone going through this. I’ve seen people showing their setup in short videos clips, but none explain the wiring, or show it for me to even see what they’ve done.
A simple diagram, explanation, anything would help me right now.
Help, please. Anyone?
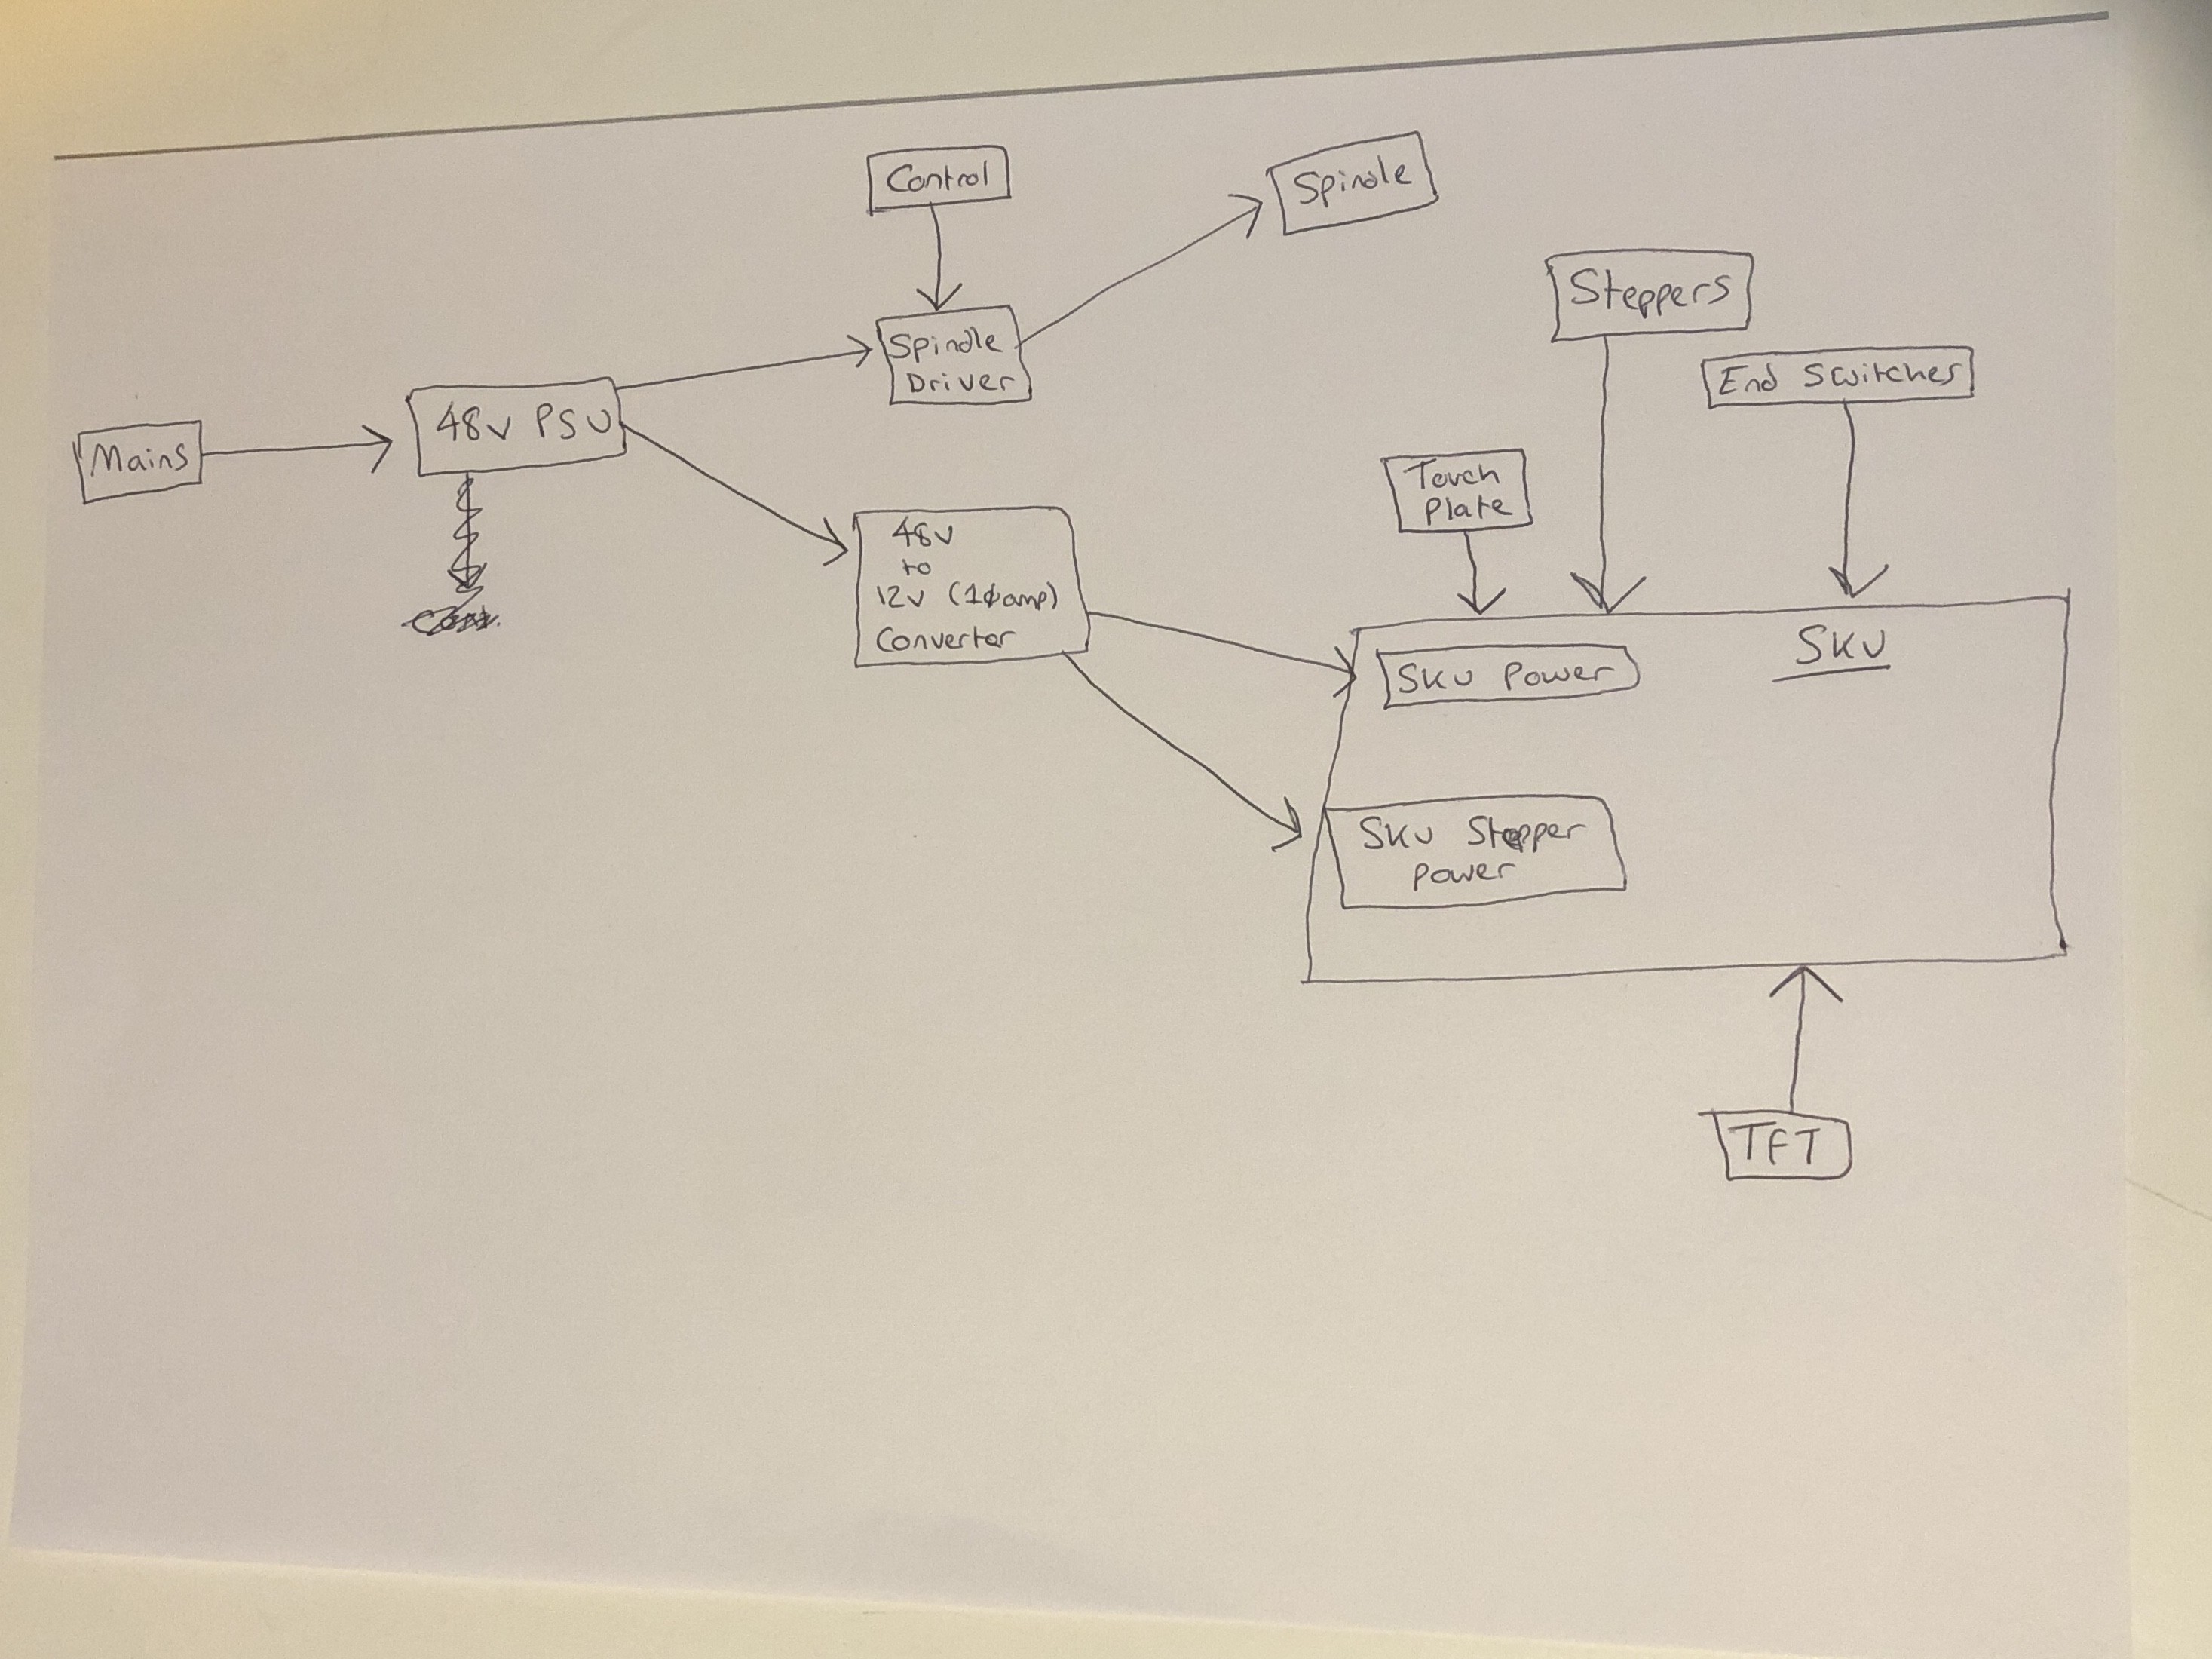
EDIT:
I’ve drawn this crude diagram of how I think I should wire it all up. Any advice on if this is correct please? TIA!