This is what our kitchen looks like right now and my wife is already giving me the looks
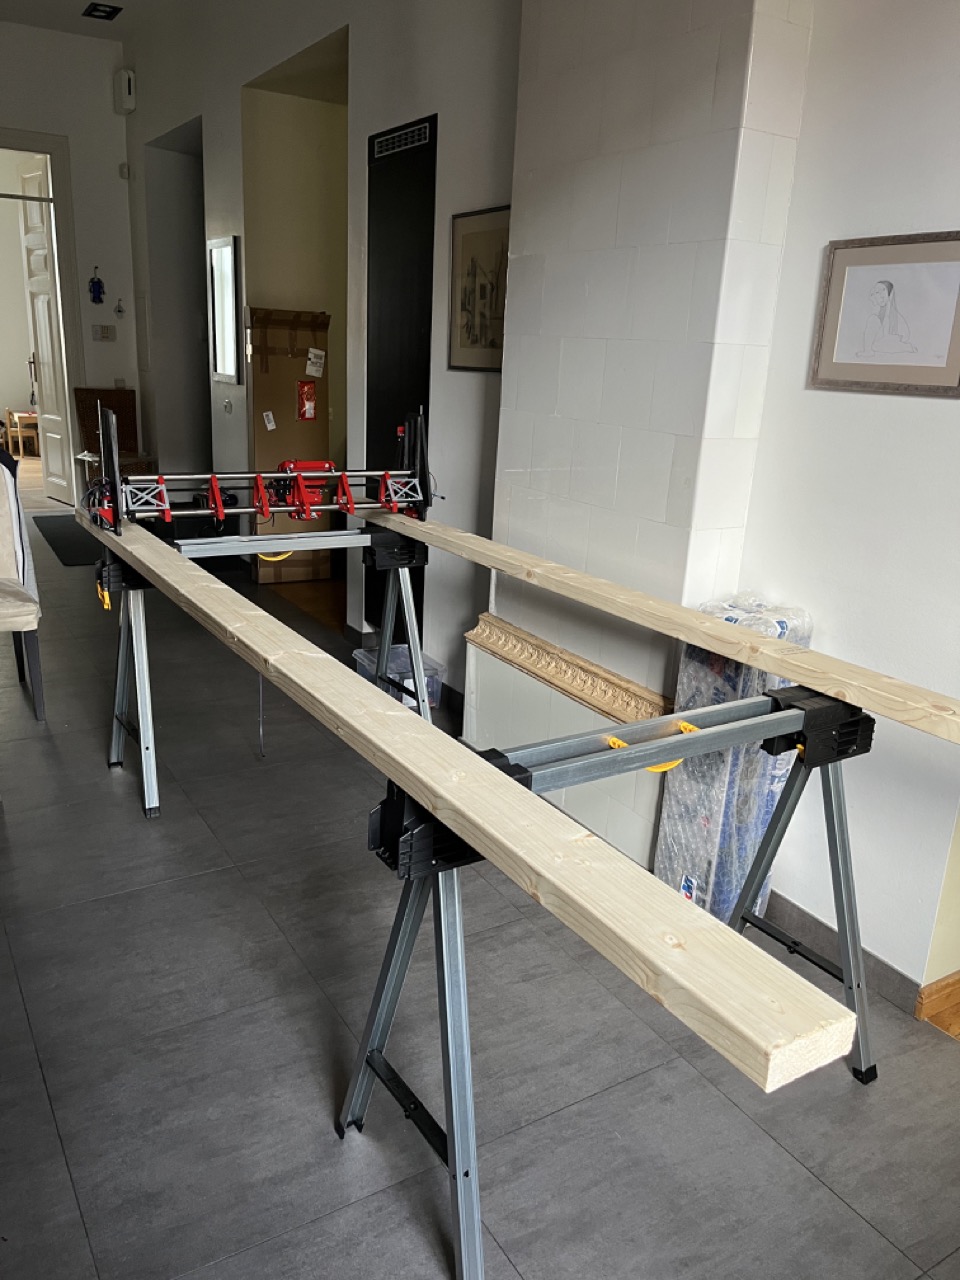
Today I bought a pair Kreg KWS500 saw horses, but they were so wobbly I returned them to the shop and replaced them with these dewalts which were more than 2 times cheaper and a million times more stable.
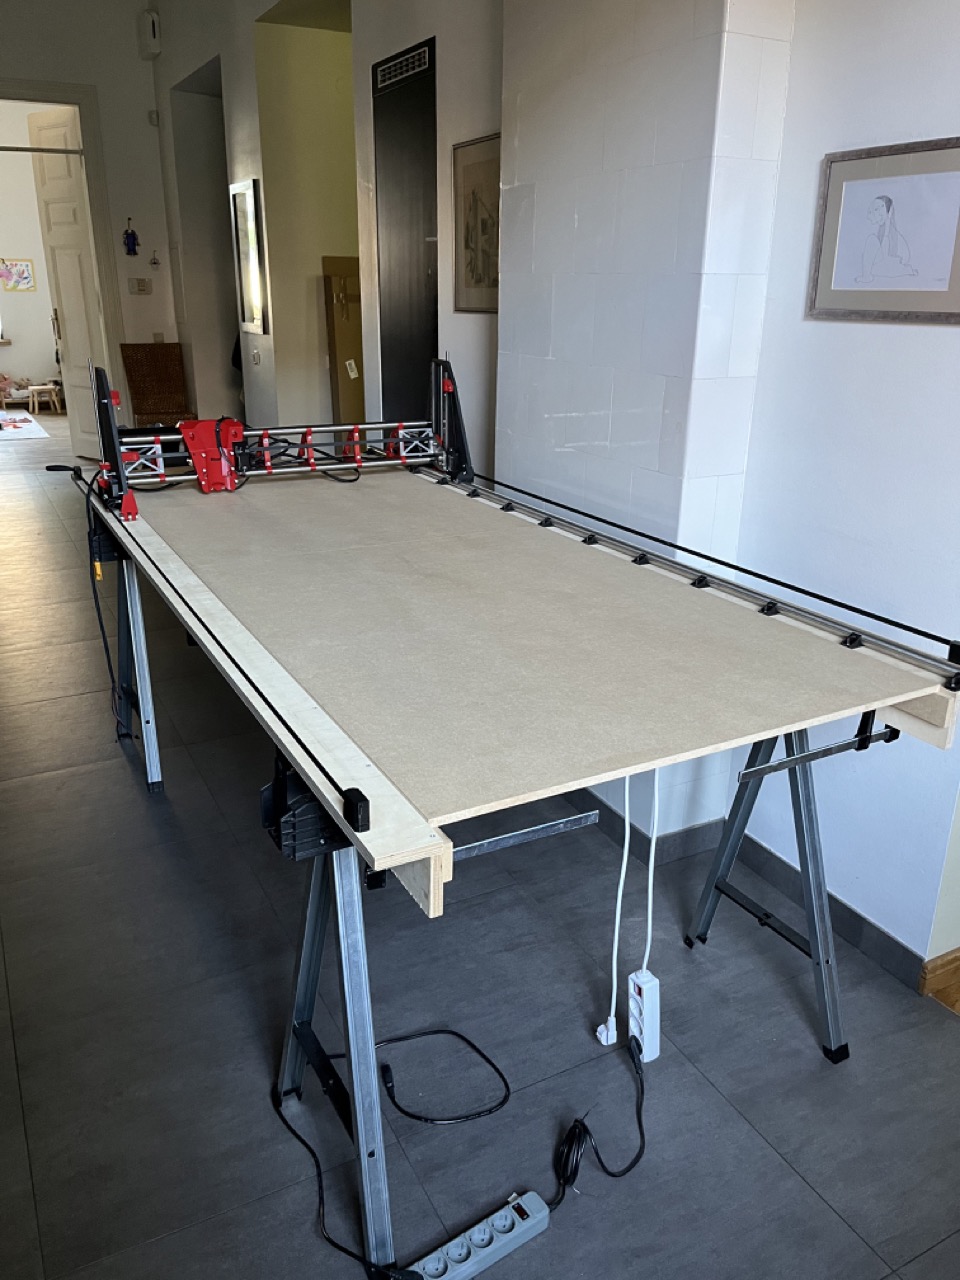
I need to build the table before finishing the router assembly. The plan is to create a pair of plywood rails and throw some replaceable MDP boards in between them. No idea how long this is going to take…
I remember when we bought our current house on 3/4 acre. Wife went to Home Depot and bought a new reel mower and said “this will help me stay in shape”.
One week later, with the yard half cut despite daily attempts at cutting, we were buying a self propelled corded electric. Now we roll with our Ryobi Battery Powered Lawn Tractor. Can’t say enough about how much we like it! Not looking forward to $800+ in battery change costs next year but no gas, no plugs, no oil, virtually no maintenance, can’t have everything!
Before we bought the Ryobi we were paying $45 a week. These days we can’t find any kids to help with weeding. Had 1 kid offer offer 3 hours for $150 or $300 for 7 hours, cash only. Maybe if I was unemployed I could afford that…
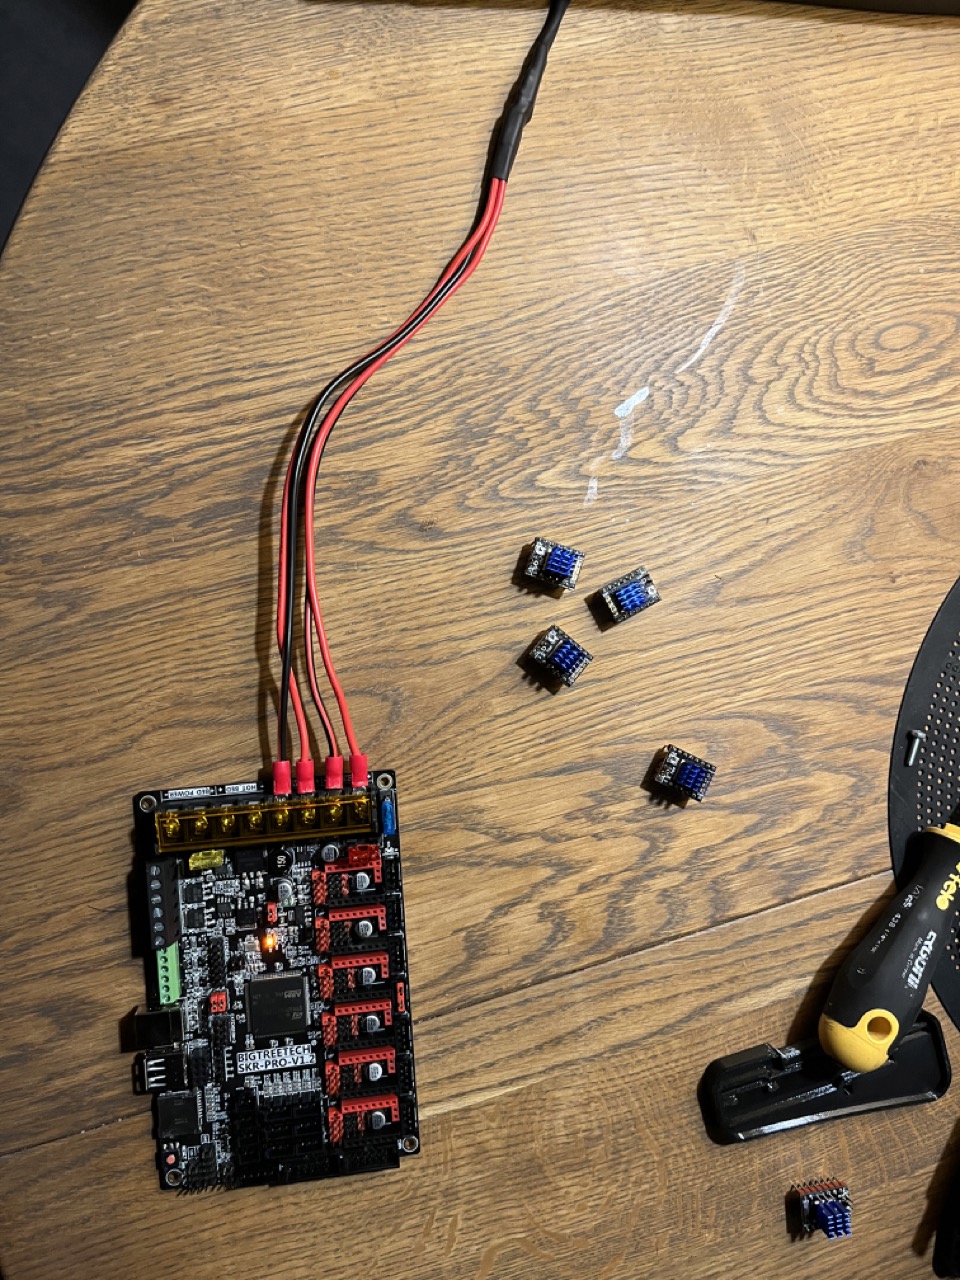
OK so I went far enough with the build that I want to connect my shiny new SKR PRO 1.2 to the machine and try to move it around and see how it works. I’ve never used neither SKR boards nor marlin firmware so it is all kinda new.
It seems that I’ve successfully flashed the firmware (found FIRMWARE.CUR on the card). The M115 command on the usb terminal shows 2209, same as the firmware filename I downloaded from v1engineering site, so I’m assuming the firmware is flashed.
Questions:
Do I need to connect the gray cables for TFT35-E3? (seems to be working without them)
As far as I understand, the TFT has it’s own firmware and communicates with the board via rs232 port, so flashing the board firmware doesn’t change anything on the TFT interface. So… I kinda see all the useless stuff like nozzle/bed temperatures, fan speeds etc on the screen. Any way to get it to show more useful info for the CNC?
At the top of the SKR board where all the motor terminals are, a red LED is on next to E0 terminal. Is this normal?
Do I need to do anything with the jumpers next to each motor driver? Can I use them to control microstepping?
I completely missed the SKR Pro page and tried to figure it out on my own, sorry.
One thing I couldn’t find in the docs: It says I won’t need to adjust motor power with the potentiometers in UART mode. This is really cool, but where do I set the power of my motors then? For example I have 2A motors, how do I tell the motherboard that I have 2A and not 1.5A or 1A etc? Is it already in the firmware?
V1 firmware has a default of 900mA The trick is to balance the available power with the need to keep the motors cool. At high current settings, the motors can and will get hot enough to soften the printed parts that they are mounted to.
I suggest that you try it at the given current, and adjust only if needed.
In the LCD menu in Marlin mode, you can adjust the motor current, sorry, I forgot where it is exactly, but I remember that you can do so. It can also be adjusted with gcode, and saved to the EEPROM with M500.
No the steppers can get hot enough to melt just about everything. At some point the steppers do not really gain any power, I do believe that is generally around the 80% rated current mark. But the heat start going up really fast.
We use 2.5A rated steppers, so the settings in the firmware are going to potentially be a bit high for you. Just keep an eye on them and see ho hot they get over time.
It says they are 59Ncm@2A while the ones sold here are 76oz/in = 53Ncm@2.5A. Starting to wonder how a motor can consume less power while delivering more torque
So… it appears my first SKR pro board is toasted! I used an adjustable “lab” power supply set to 24.0V, but apparently when I was plugging all the cables into the board, I accidently touched the voltage adjustment knob and set the PSU voltage to 34V… I waited for this board for a month…
The toasted parts are marked in red, or at least I think these are the parts. When using an external power supply, I no longer have the 3.3V and 5V leds on, only 12v. When using USB power I only have the 5V led on.
The fuses seem to be fine.
If anyone knows how these parts are called, maybe I would try to find them locally and try to replace them. Really don’t want to wait for another month…
The labels on the board next to each of the two components are F3 and F4, so I assume these are both fuses. You can find the schematic here. According to the schematic, F3 is 0.75A on a 3.3V line, and F4 is 2A on a 5V line.
Thanks. It is amazing how active and helpful this forum is.
After some further inspection, I also see some signs of smoke on the WSK220N04 mosfet. Have a feeling it would probably take as much time to have it fixed as buying a new one.
I was lucky enough to find a dealer in Germany who has the same board, so my waiting time is now down to 5-7 days. On the bright side, while waiting for the new board, I have plenty of time to clean up the cable mess. I made all the cables more or less the same length and added JST connectors everywhere, so now it is impossible to blow up the board by misplacing the cable connections.
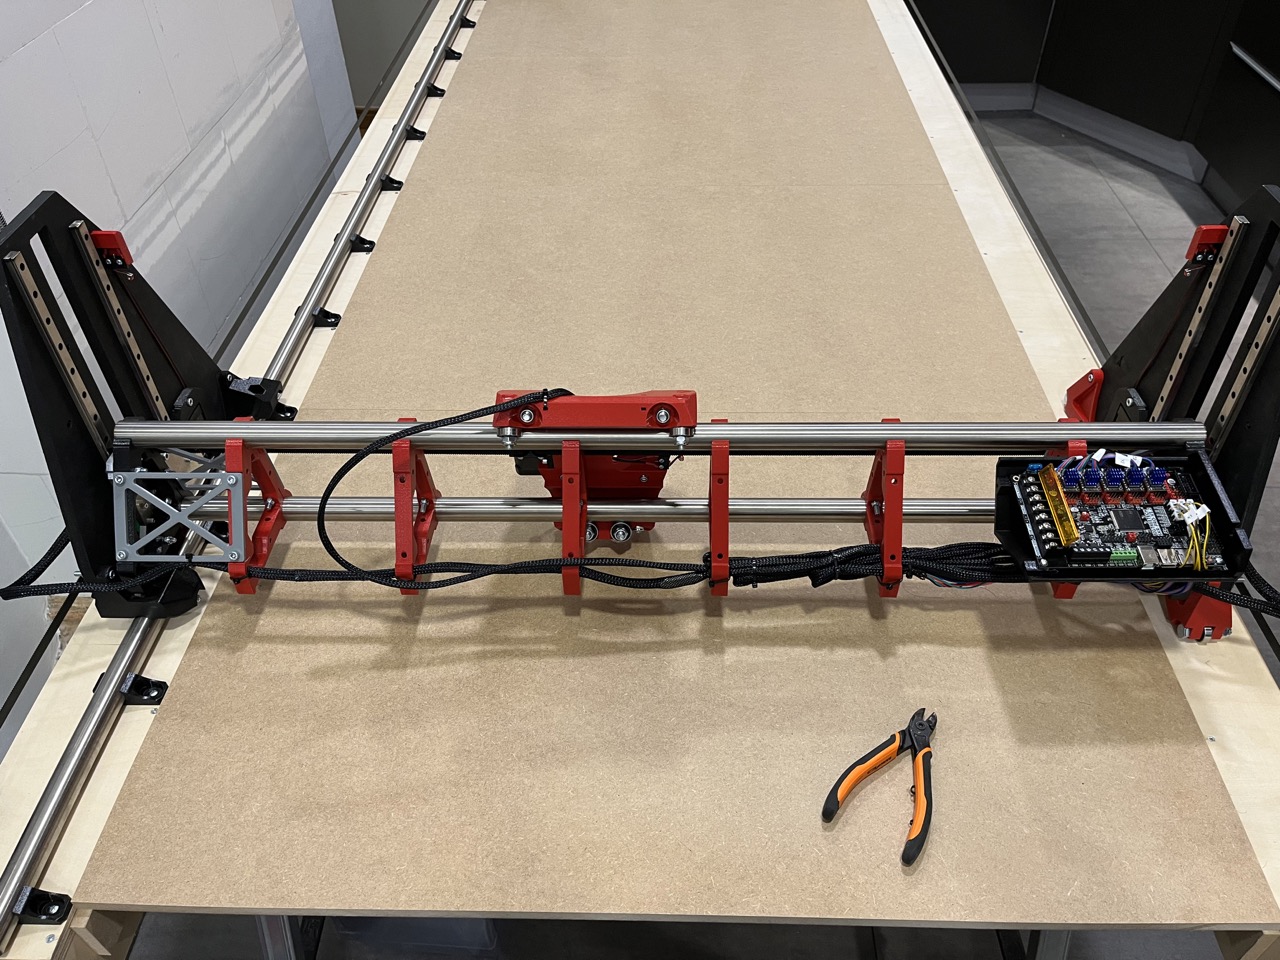
The table is not yet finished, but good enough to make some first cuts along the sides. I will need to cut the struts for the cnc and some cross rails for the table to make it more rigid. Overall I’m pretty happy with the table, as I can disassemble everything in a couple of minutes and throw it in my van and take the cnc to our country house or wherever else I please. Or just put it away in the storage when I’m not using it. The ability to lower the center part is also nice if I decide to cut very tall foam blocks.
One downside of such table is that every time I assemble it, I kinda have to check for proper squareness. To make this easier, I cut the boards between the rails in a shop with a very accurate cnc machine. There are 4 boards 90x60cm. I know each of them is exactly the same size and 100% square, so as long as there are no gaps between the boards and the side rails, my table should be square as well.
The SKR board should arrive this Friday or next Monday, I expect to make the first cuts on the same day )
OK, so the new board is here. I decided to use the 12V power supply I bought on amazon instead of the adjustable one just to be on the safe side. I cut the connector at the end of the cable and connected 2 pairs of cables that came with SKR pro board in parallel. One pair for the board, another pair for the motor power.
I tested the polarity with a multimeter 3 times. Multimeter showed +12.27V. Just to be on the safe side, I thought i would connect the new PSU to the old toasted board to check if I see the 12V led and if I don’t burn anything with the new PSU. To my surprise, as soon as I plugged in the PSU, one of the 2209 drivers smoked happily.
Okkkkkkkkk. So now I am getting a bit paranoid. Lately every time I power up the board, I see some smoke going out and it doesn’t smell nice Why did the driver burn? My ideas:
The toasted board didn’t work as expected because it was damaged previously?
The bent/disabled end stop pin could in theory be touching the capacitor under the driver? No idea of this would be an issue.
Some questions before I power up the new board…
Is it OK to power up the board with the motor drivers in place and motors disconnected?
Is it OK to connect board power and motor power in parallel from the same PSU? (see the pic)
One stepper driver is obviously out of order, the others don’t show any signs of being damaged. But I don’t know for sure. I am thinking if they are damaged and I connect them to the new board, I could damage the new board, which is something I am trying to avoid now.
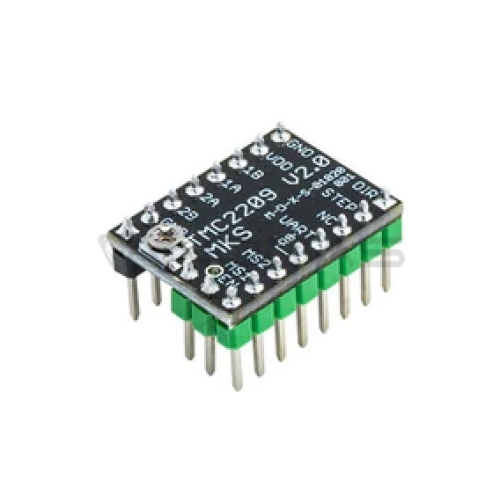
To replace the broken big tree tech TMC2209 v1.2 driver with an identical one, I would have to order it from amazon and wait until the end of next week. Local shops have TMC2209 v2 here (see the pic). These are probably manufactured in China. Is it OK to use it instead of the original one?


 Why did the driver burn? My ideas: